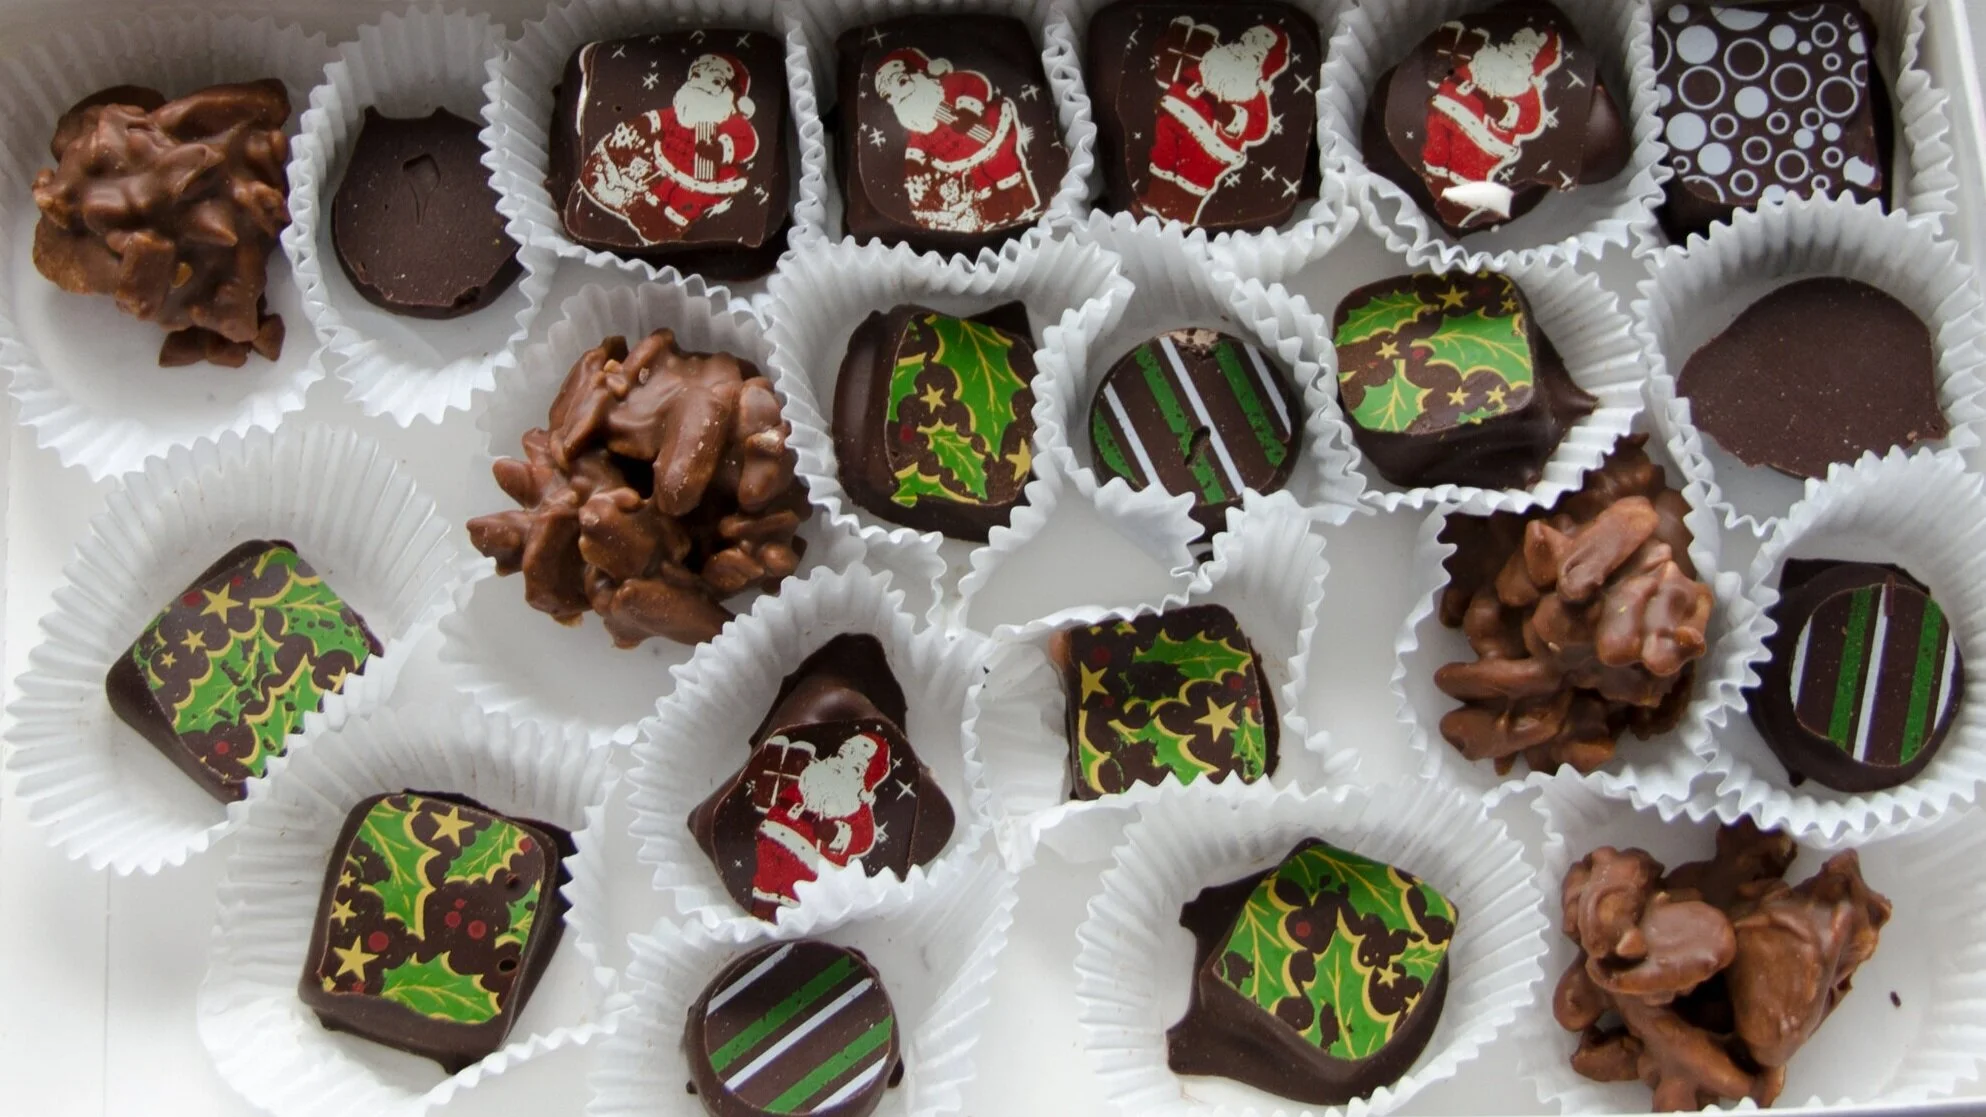
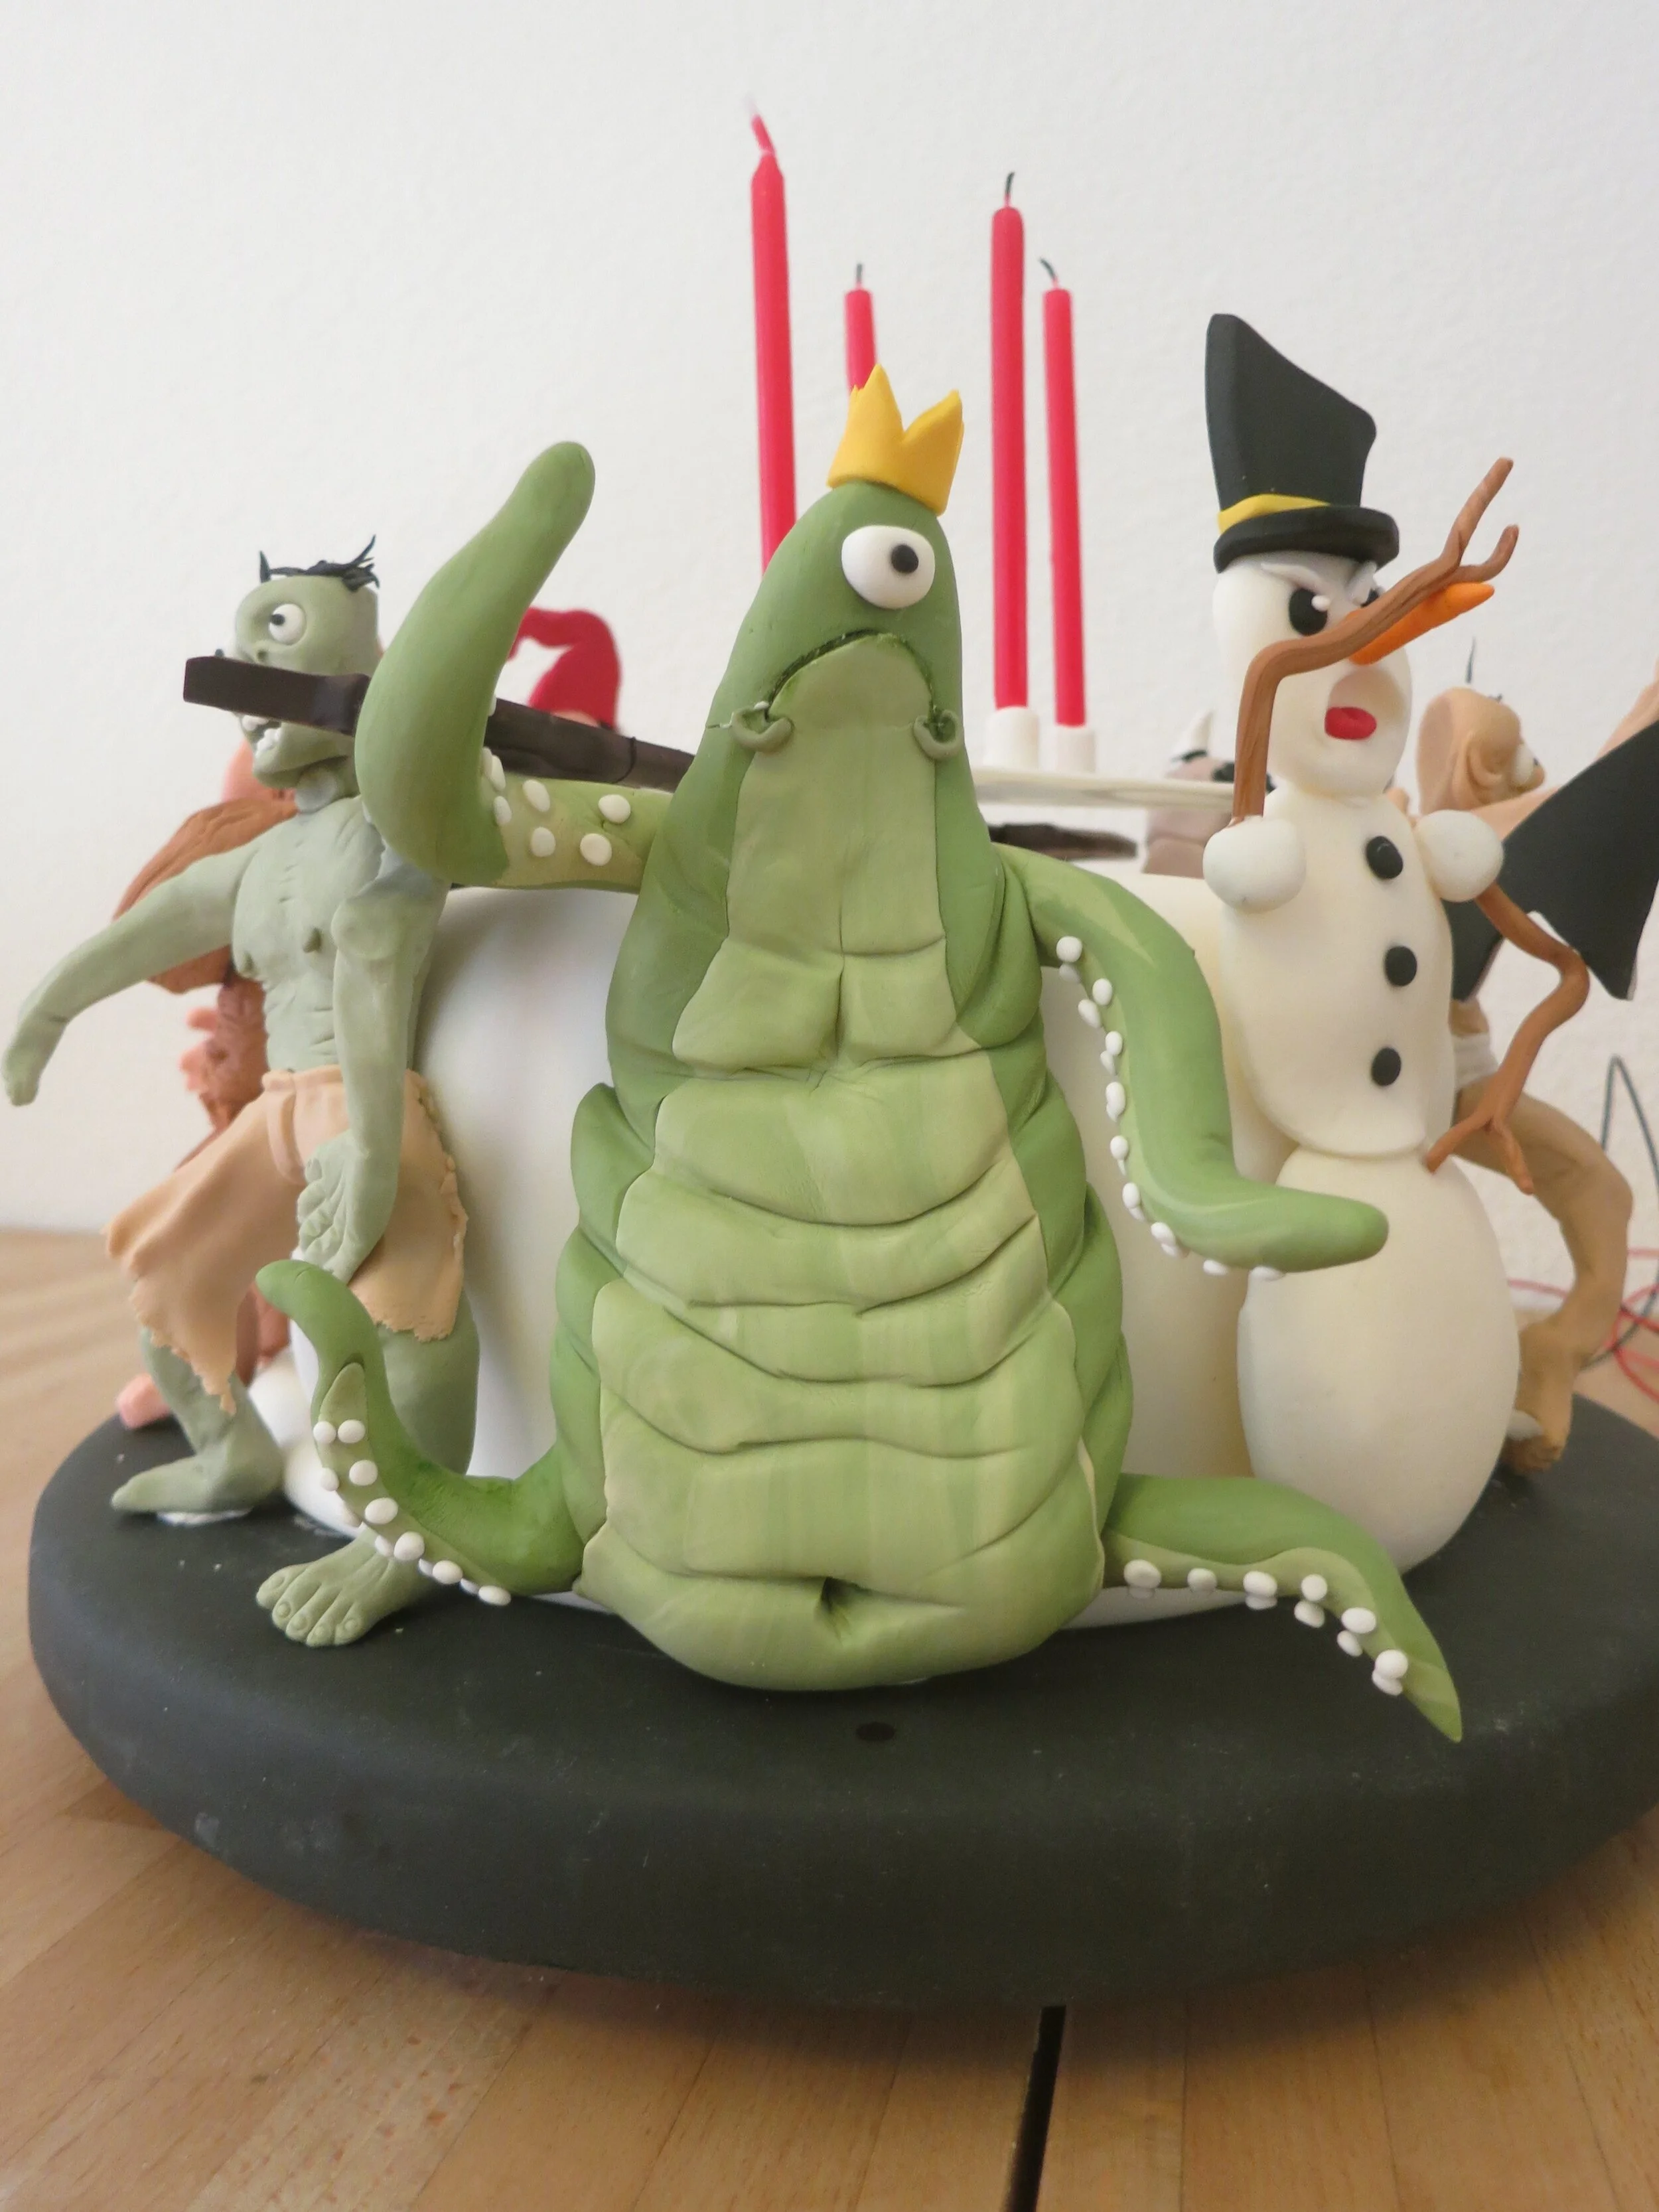
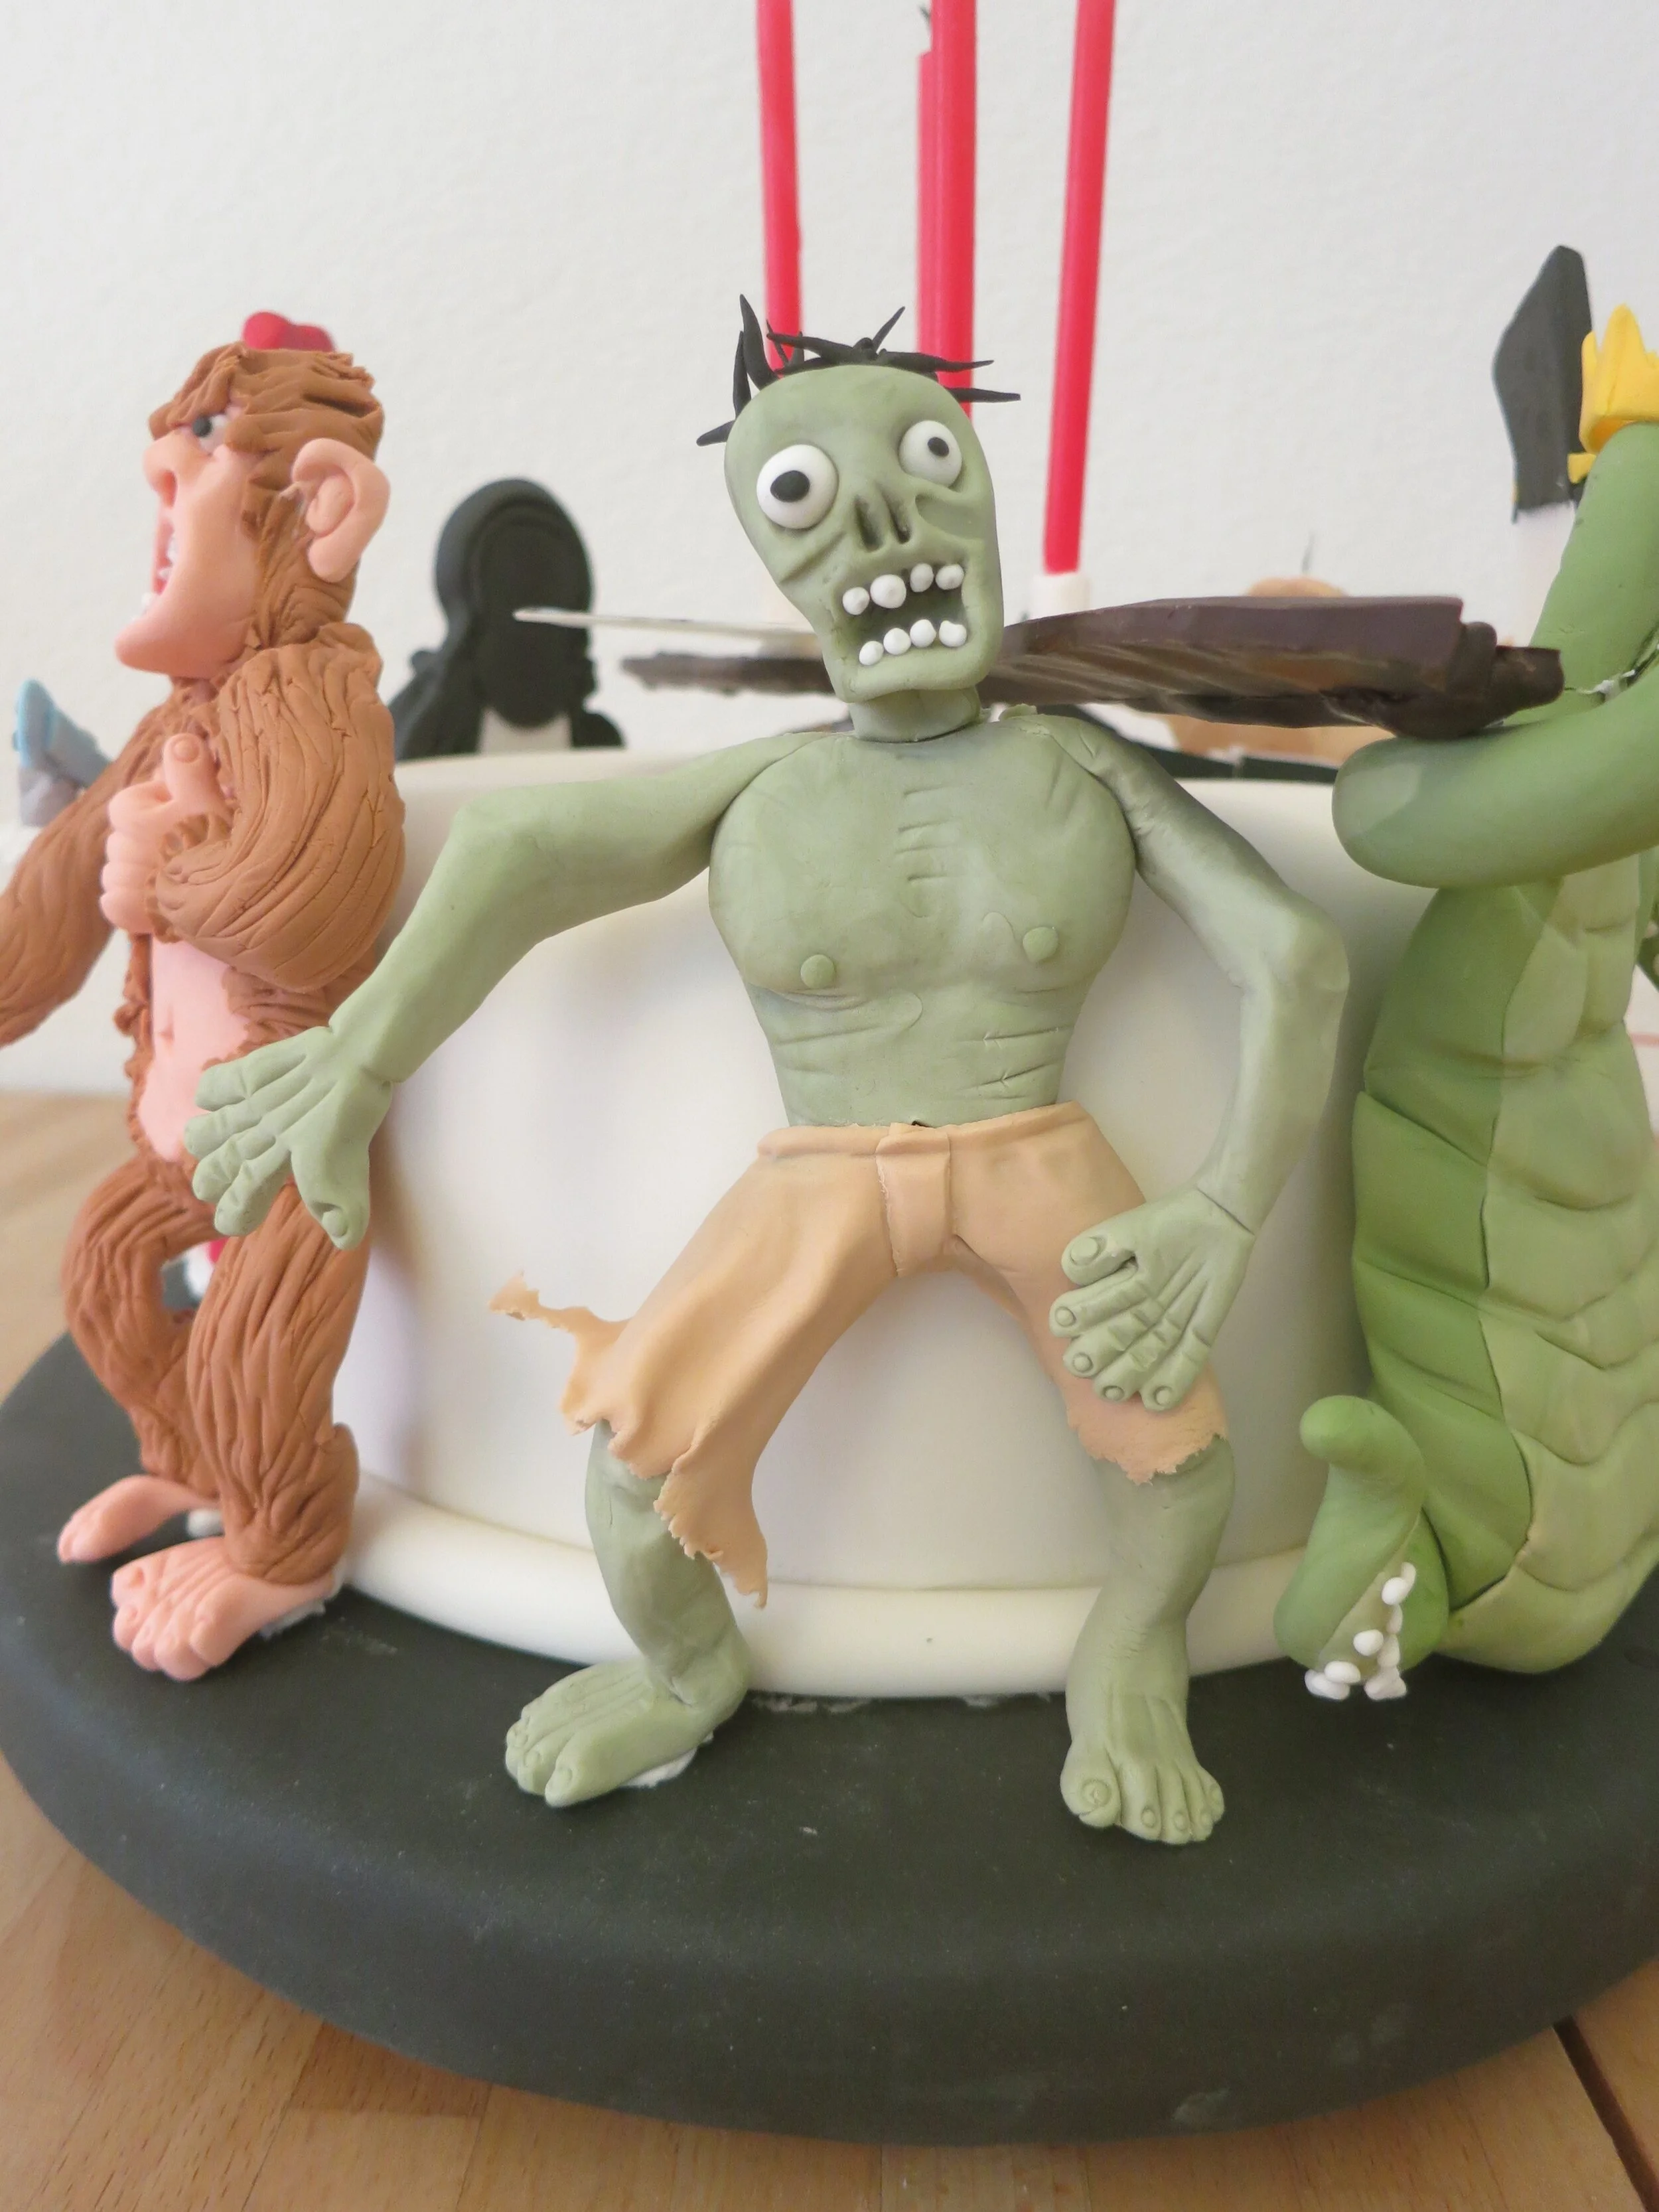
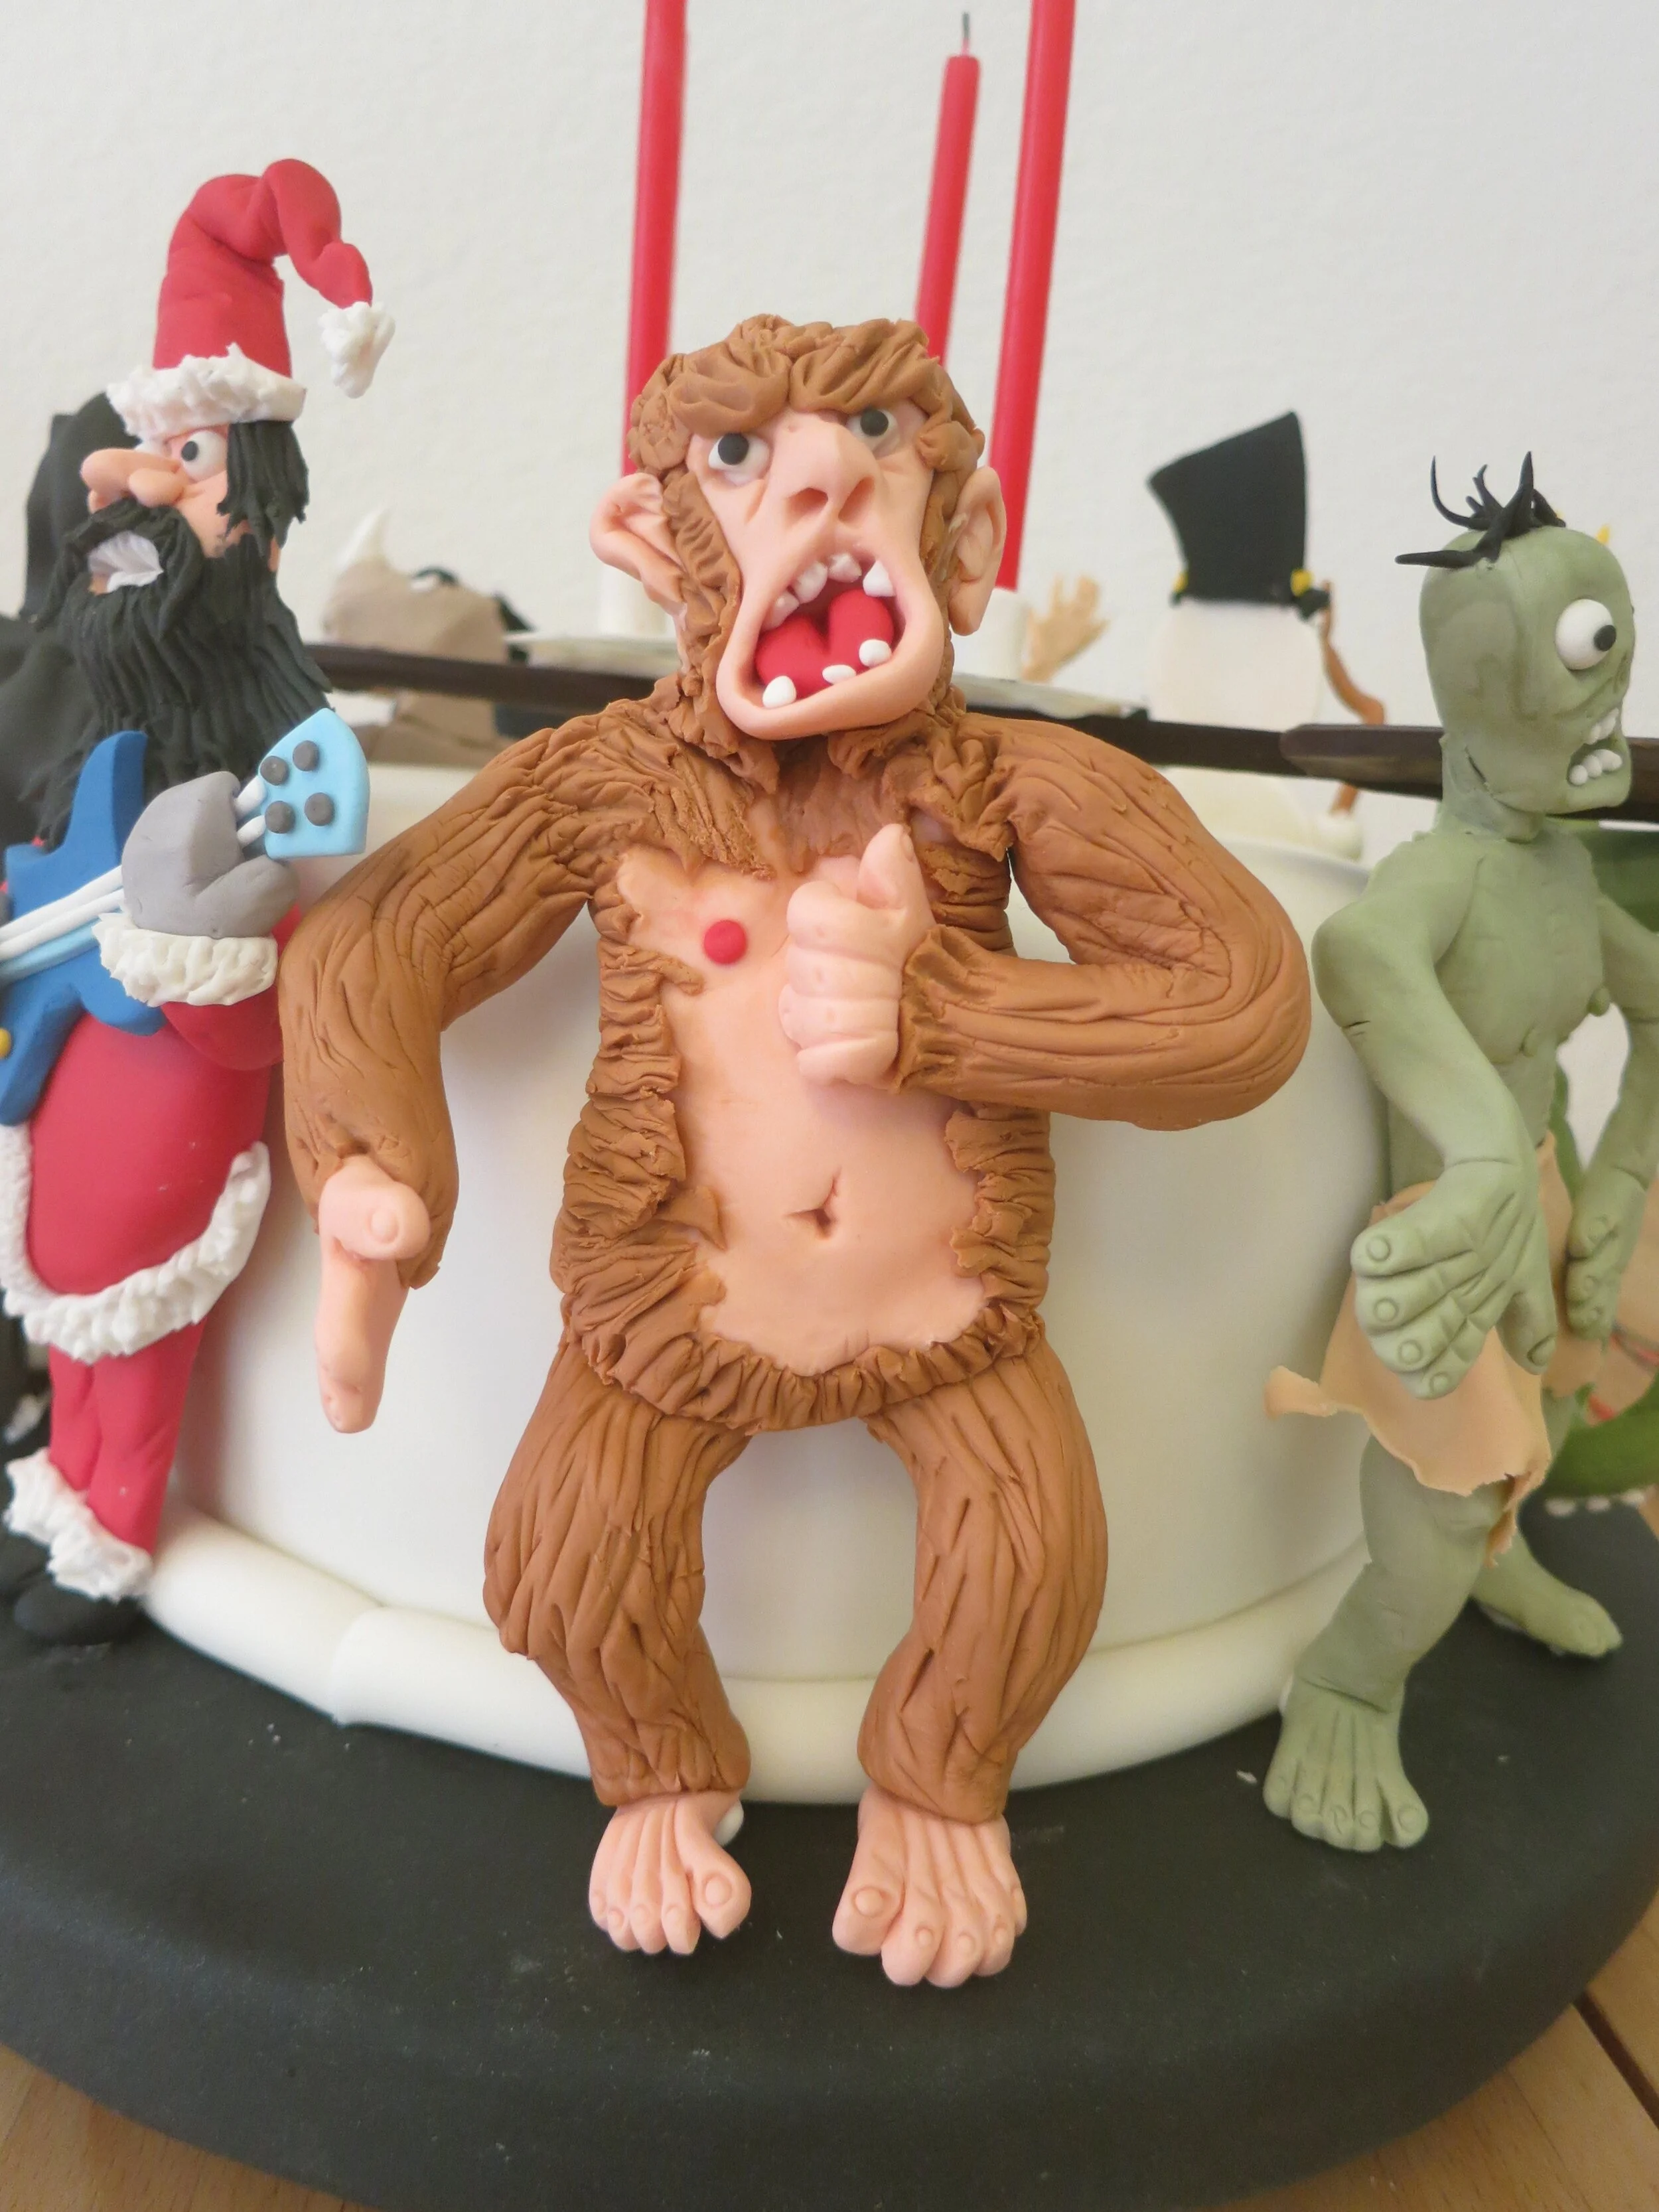
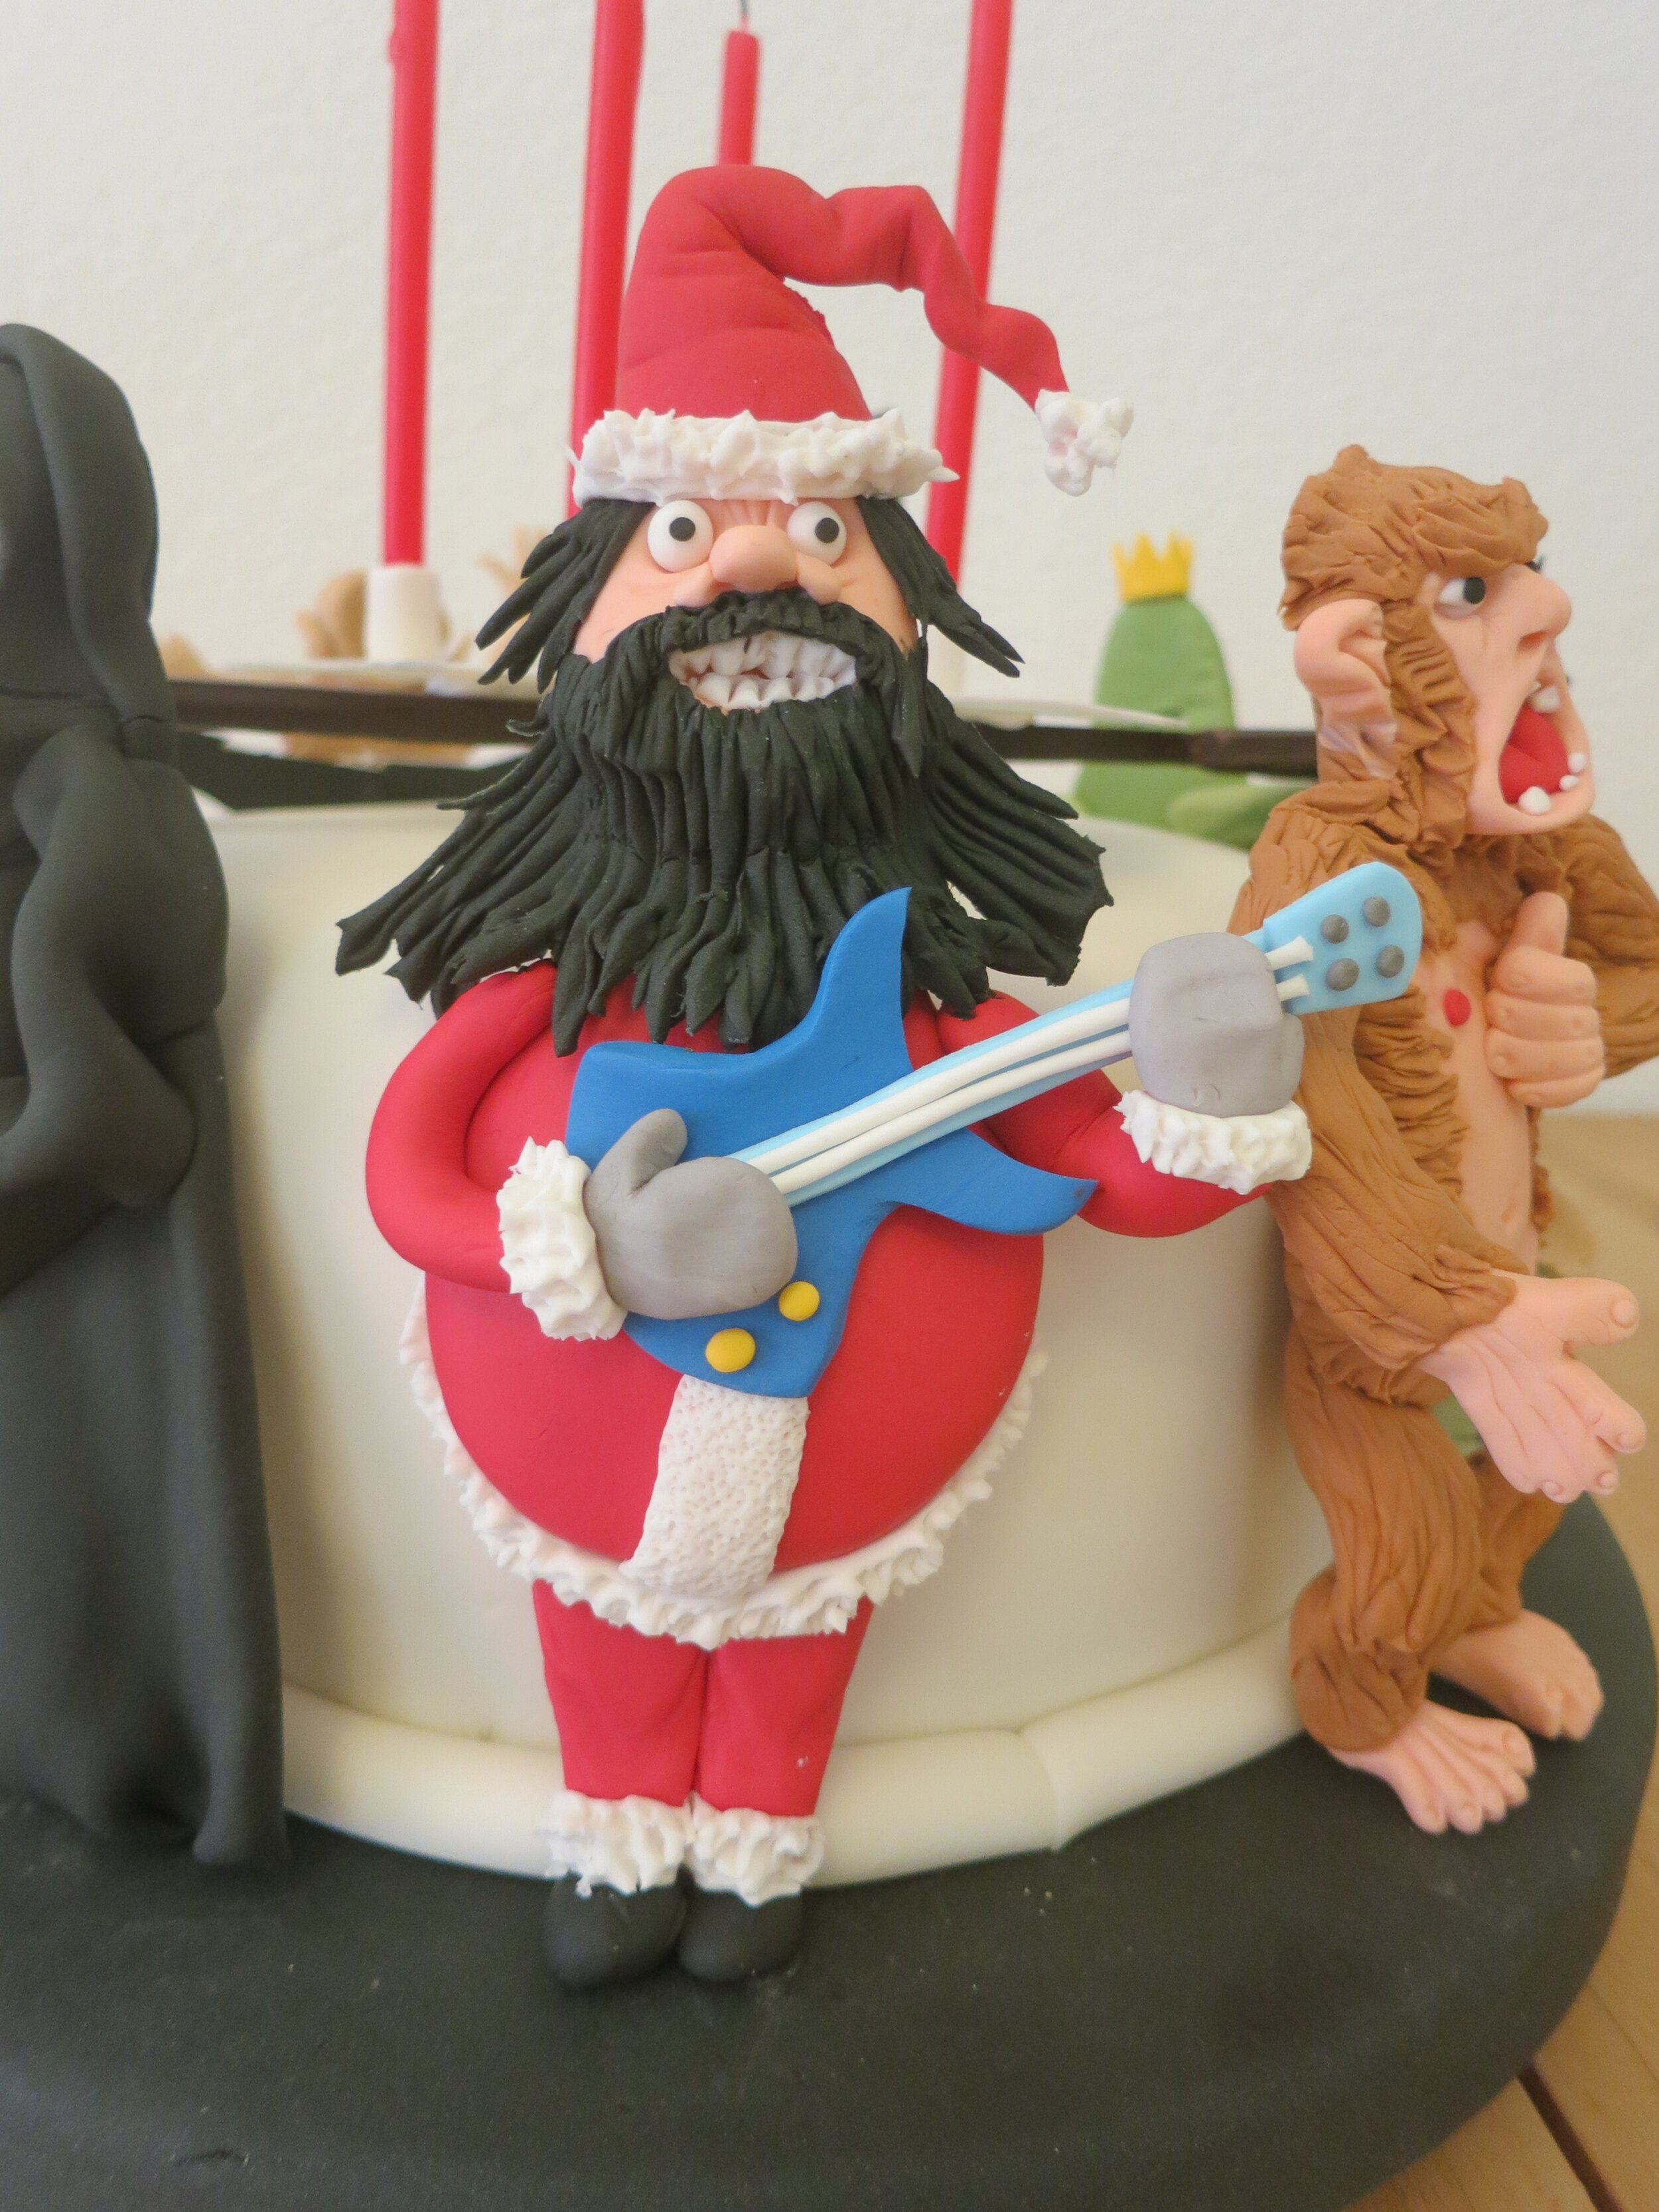
Holiday Candy 2018
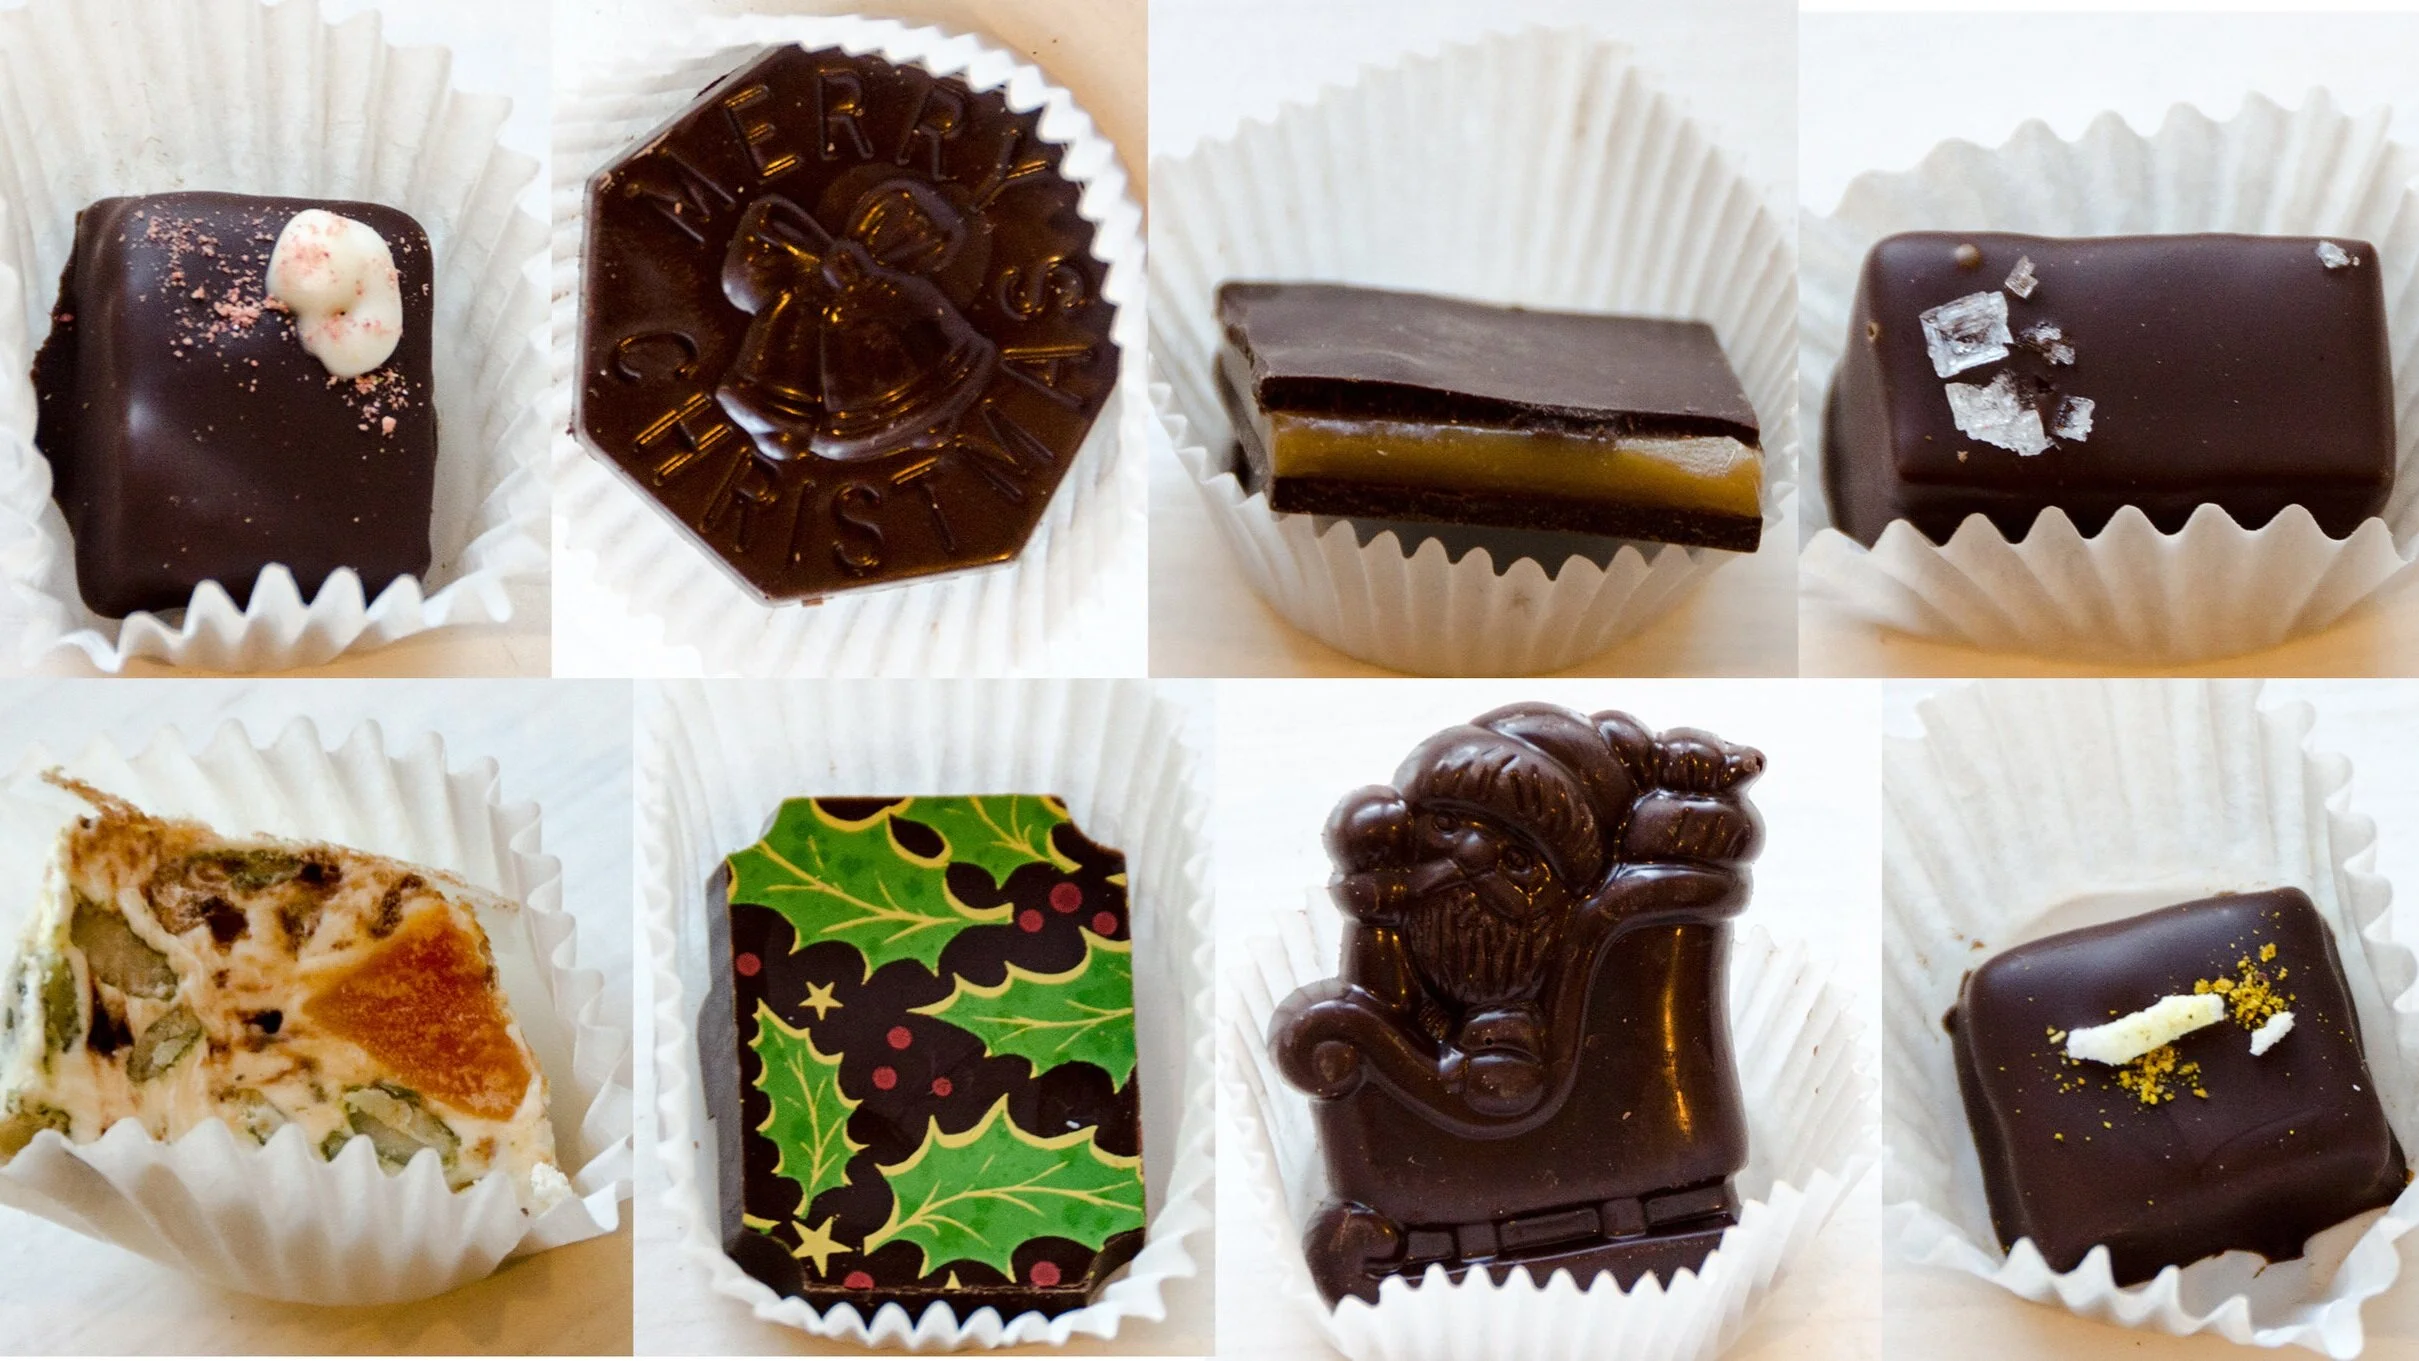
Flavors include coffee-chocolate squares, sesame seed brittle, crème fraîche, cinnamon-marshmallow with chocolate ganache, eggnog, and ginger-rum.
Flavors include coffee-chocolate squares, sesame seed brittle, crème fraîche, cinnamon-marshmallow with chocolate ganache, eggnog, and ginger-rum.
Mega Rayquaza Cake
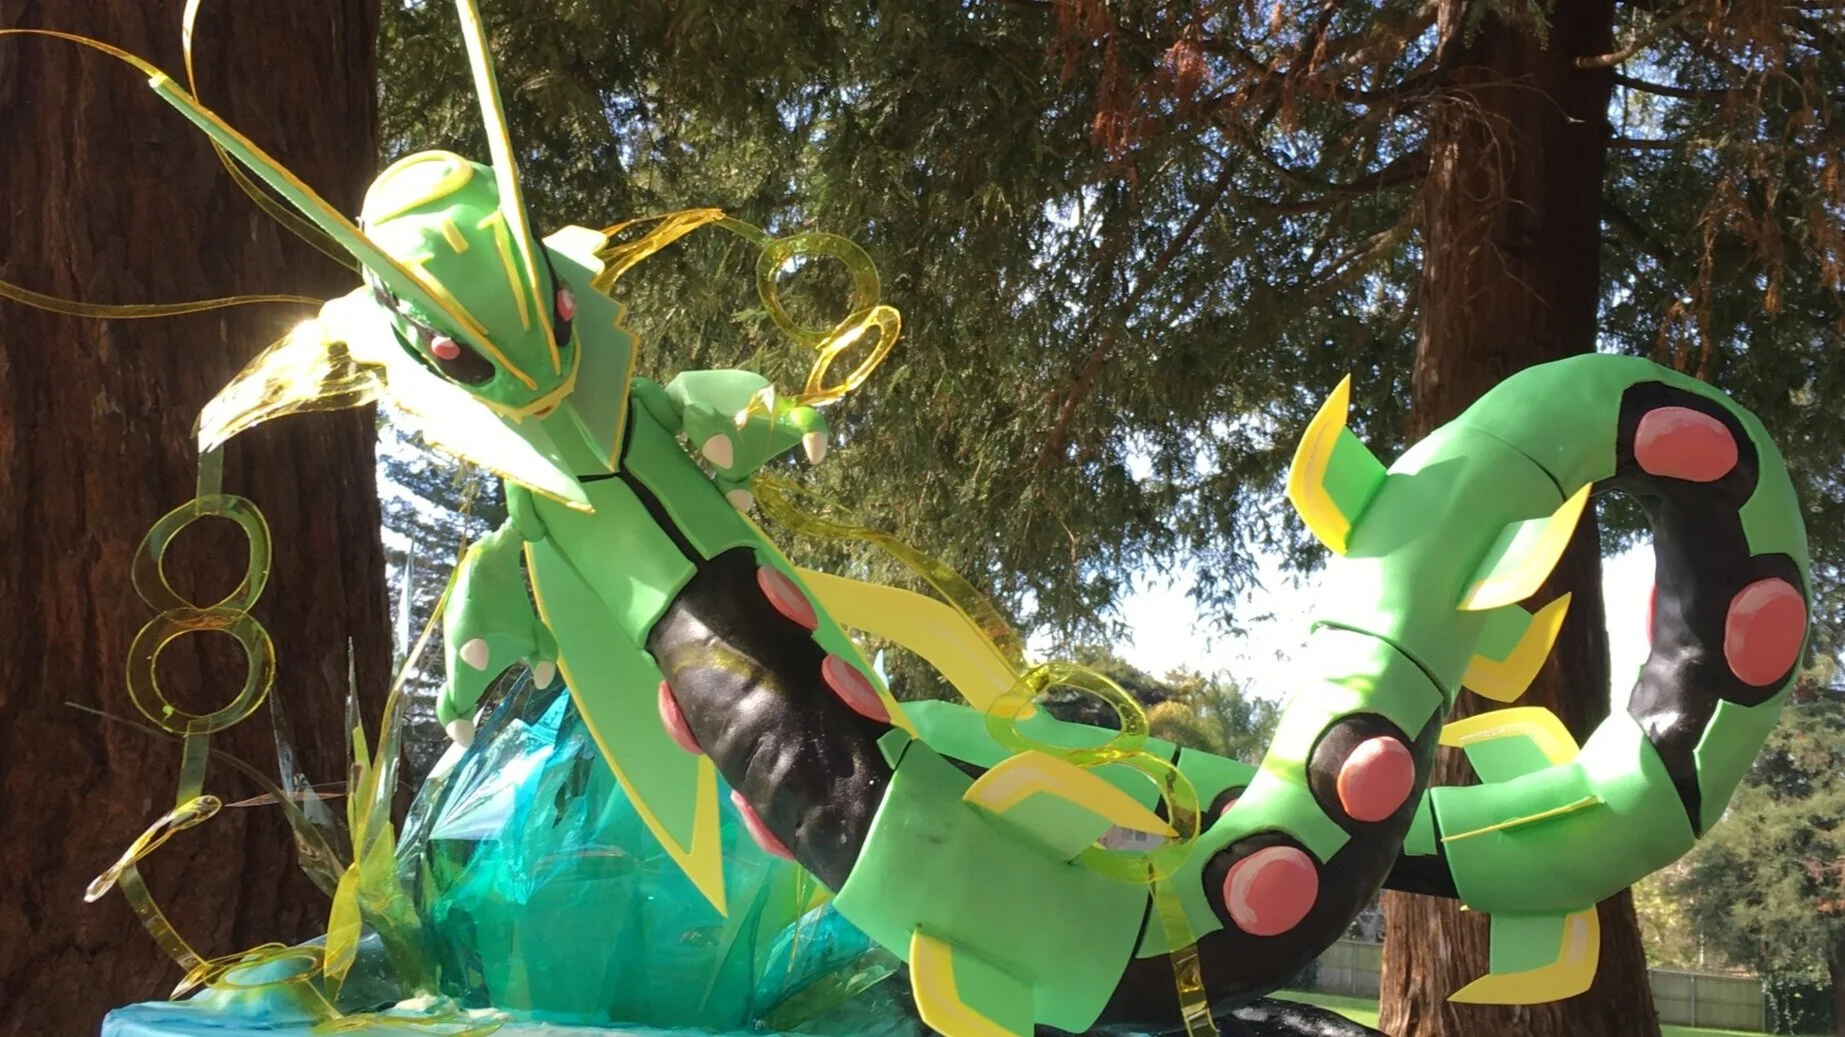
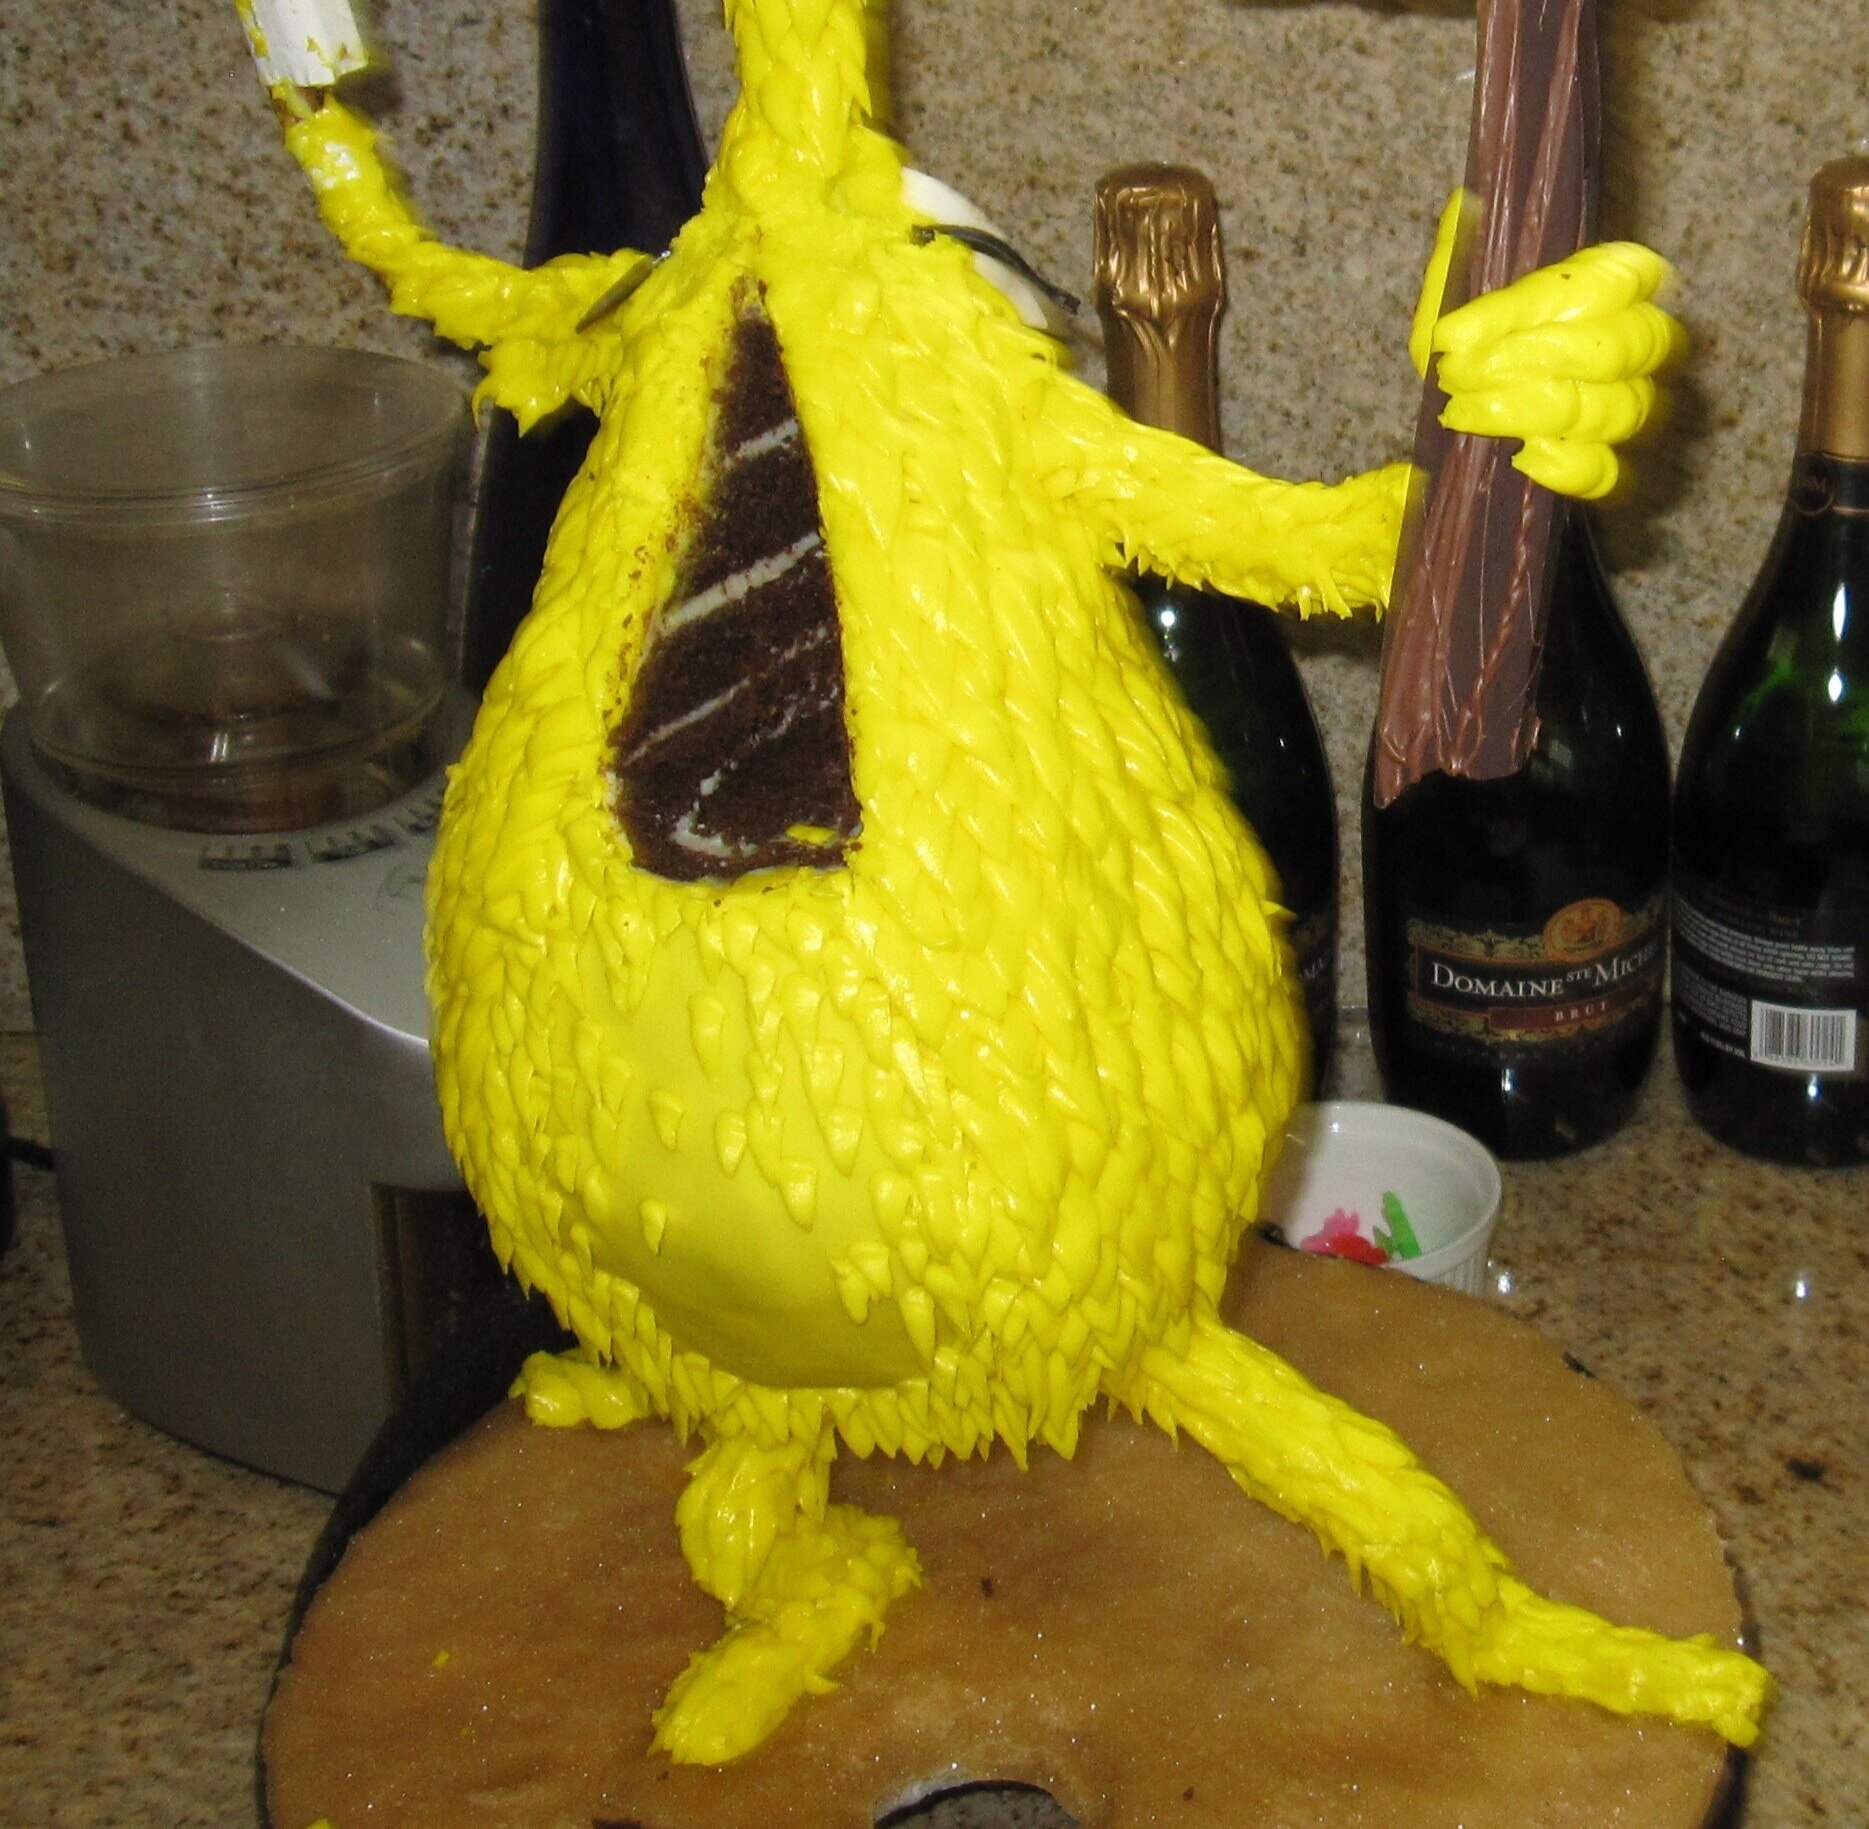
My niece wanted a Mega Rayquaza cake. It’s not really the most conducive shape for a cake, but I like a challenge.
My niece wanted a Mega Rayquaza cake. If you’re not familiar with Mega Rayquaza, it looks something like this:
It’s not really the most conducive shape for a cake, but I like a challenge. It’s made by threading little cylinders of cake, reinforced with discs of chocolate, over a bent steel rod.
The details are all fondant and gum paste, except for the weird trailing tendril things, which are gelatin.
It wound up being extremely bouncy, which made the drive from our house to the park where the party was kind of stressful and it did suffer some slight damage along the way. All in all, not my cleanest work ever, but a pretty cool shape to build out of cake nonetheless.
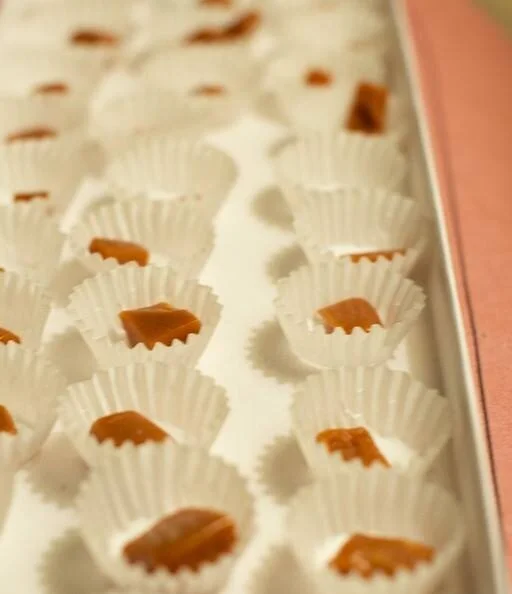
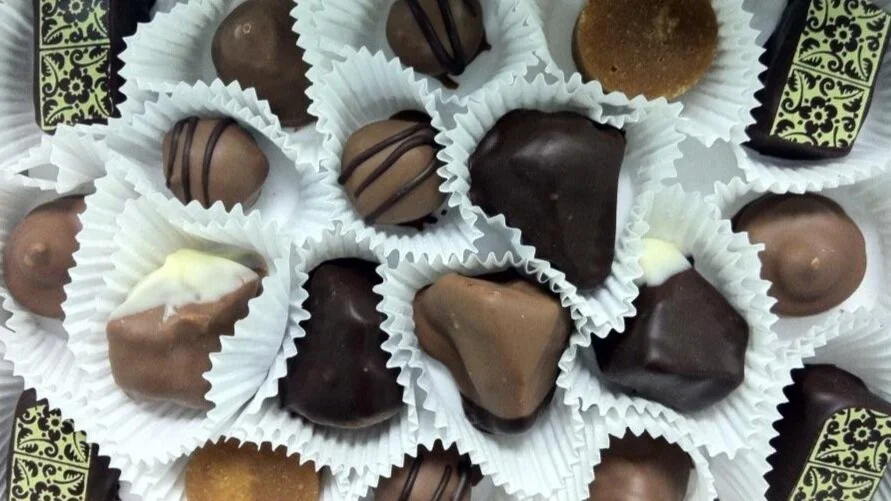
Holiday Candy 2016
Flavors include nougat, curry, toffee, habanero mango, strawberry balsamic vinegar, and coffee chocolate.
Cars Pit Crew Cake
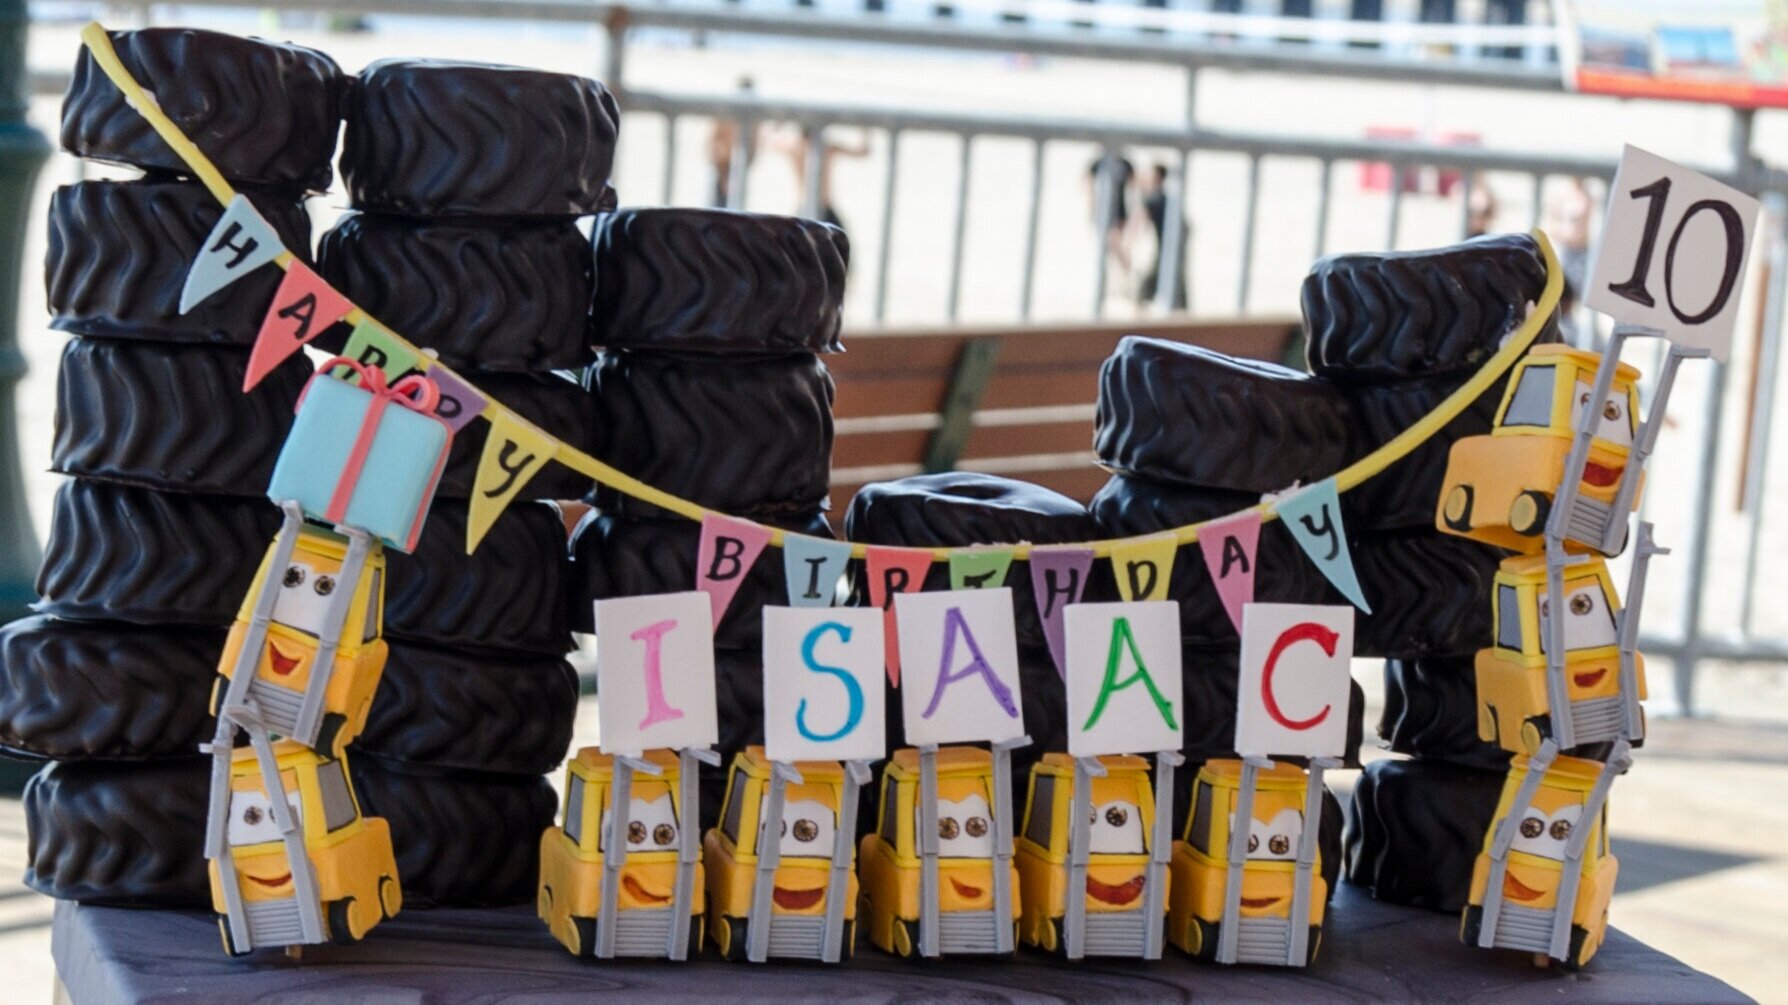
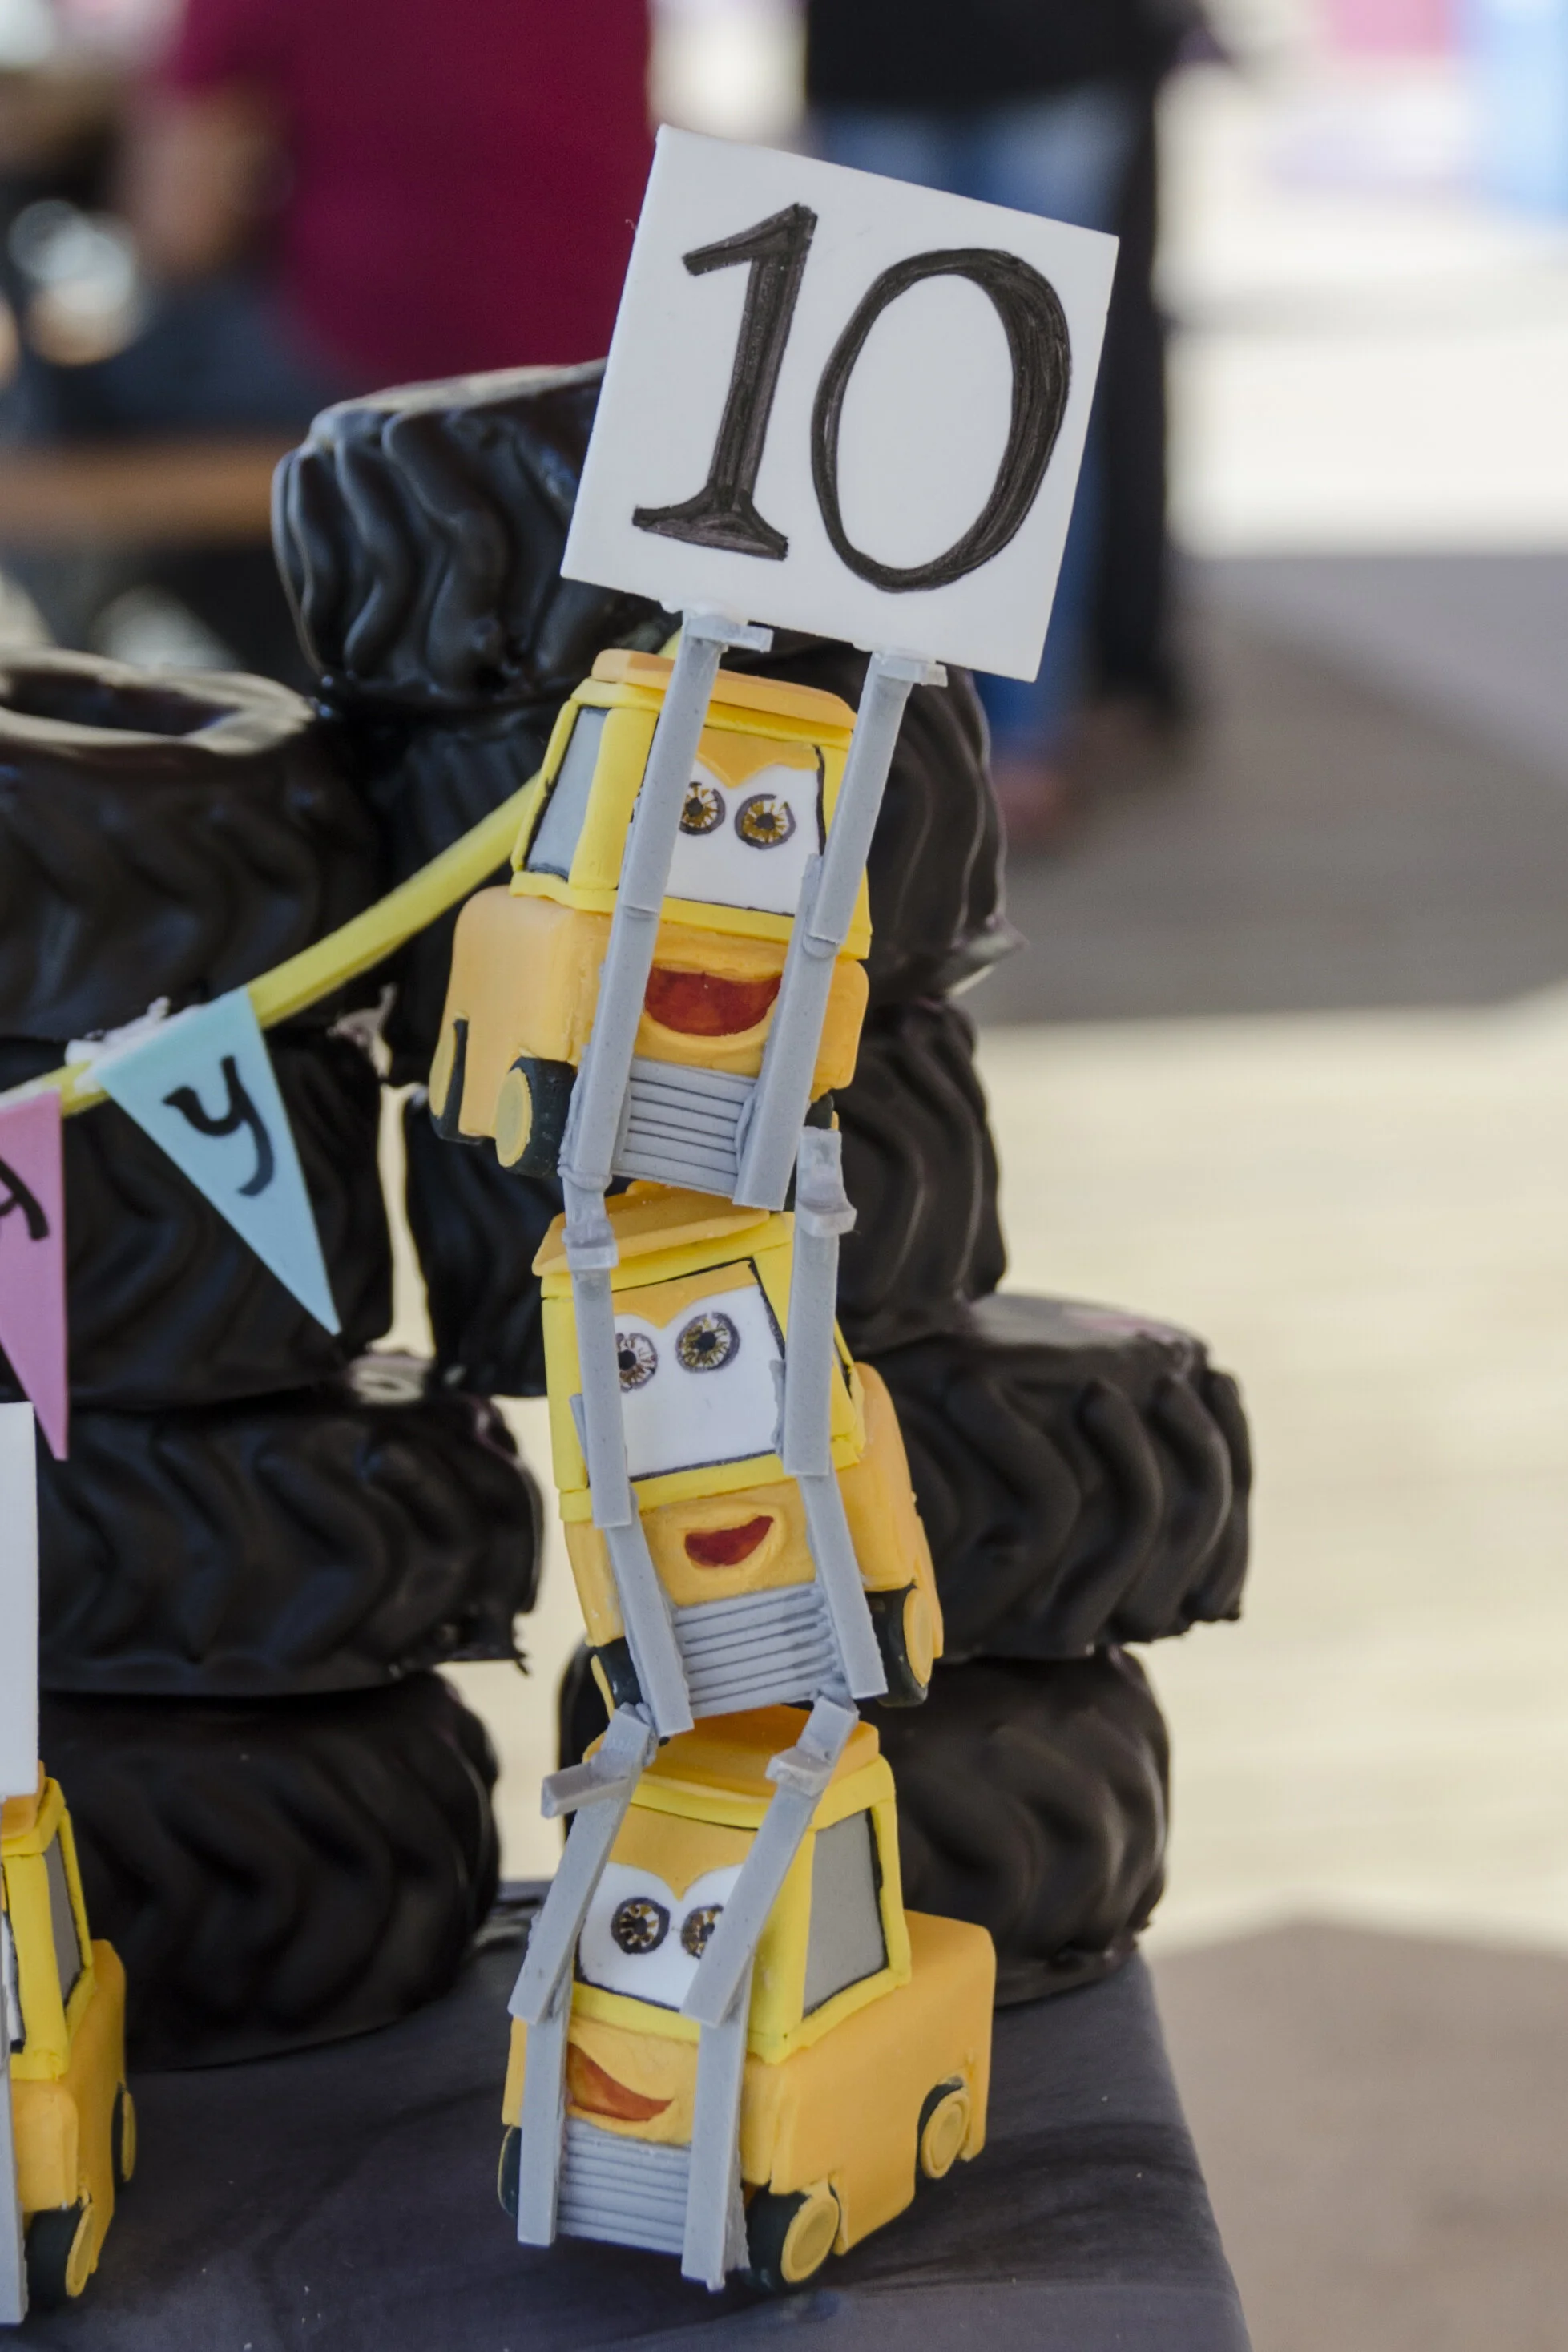
My little friend Isaac really likes the pit crews from Cars. Fortunately, if there is one thing I’m good at, it’s making anthropomorphic vehicles out of gum paste.
My little friend Isaac really likes the pit crews from Cars. Fortunately, if there is one thing I’m good at, it’s making anthropomorphic vehicles out of gum paste. Over the years, I’ve had a lot of experience.
Because I also like to build automata, I decided to make the pit crew dance.
I really wanted to make it voice activated, with a headset like the pit crew boss. I have successfully made a voice activated automaton before, but for some reason I couldn’t get this one to work so I had to settle for a switch. In the end, the switch was probably better because it was easier for Isaac to use than the voice activation would have been and he really enjoyed turning it on and off while carefully examining the mechanism.
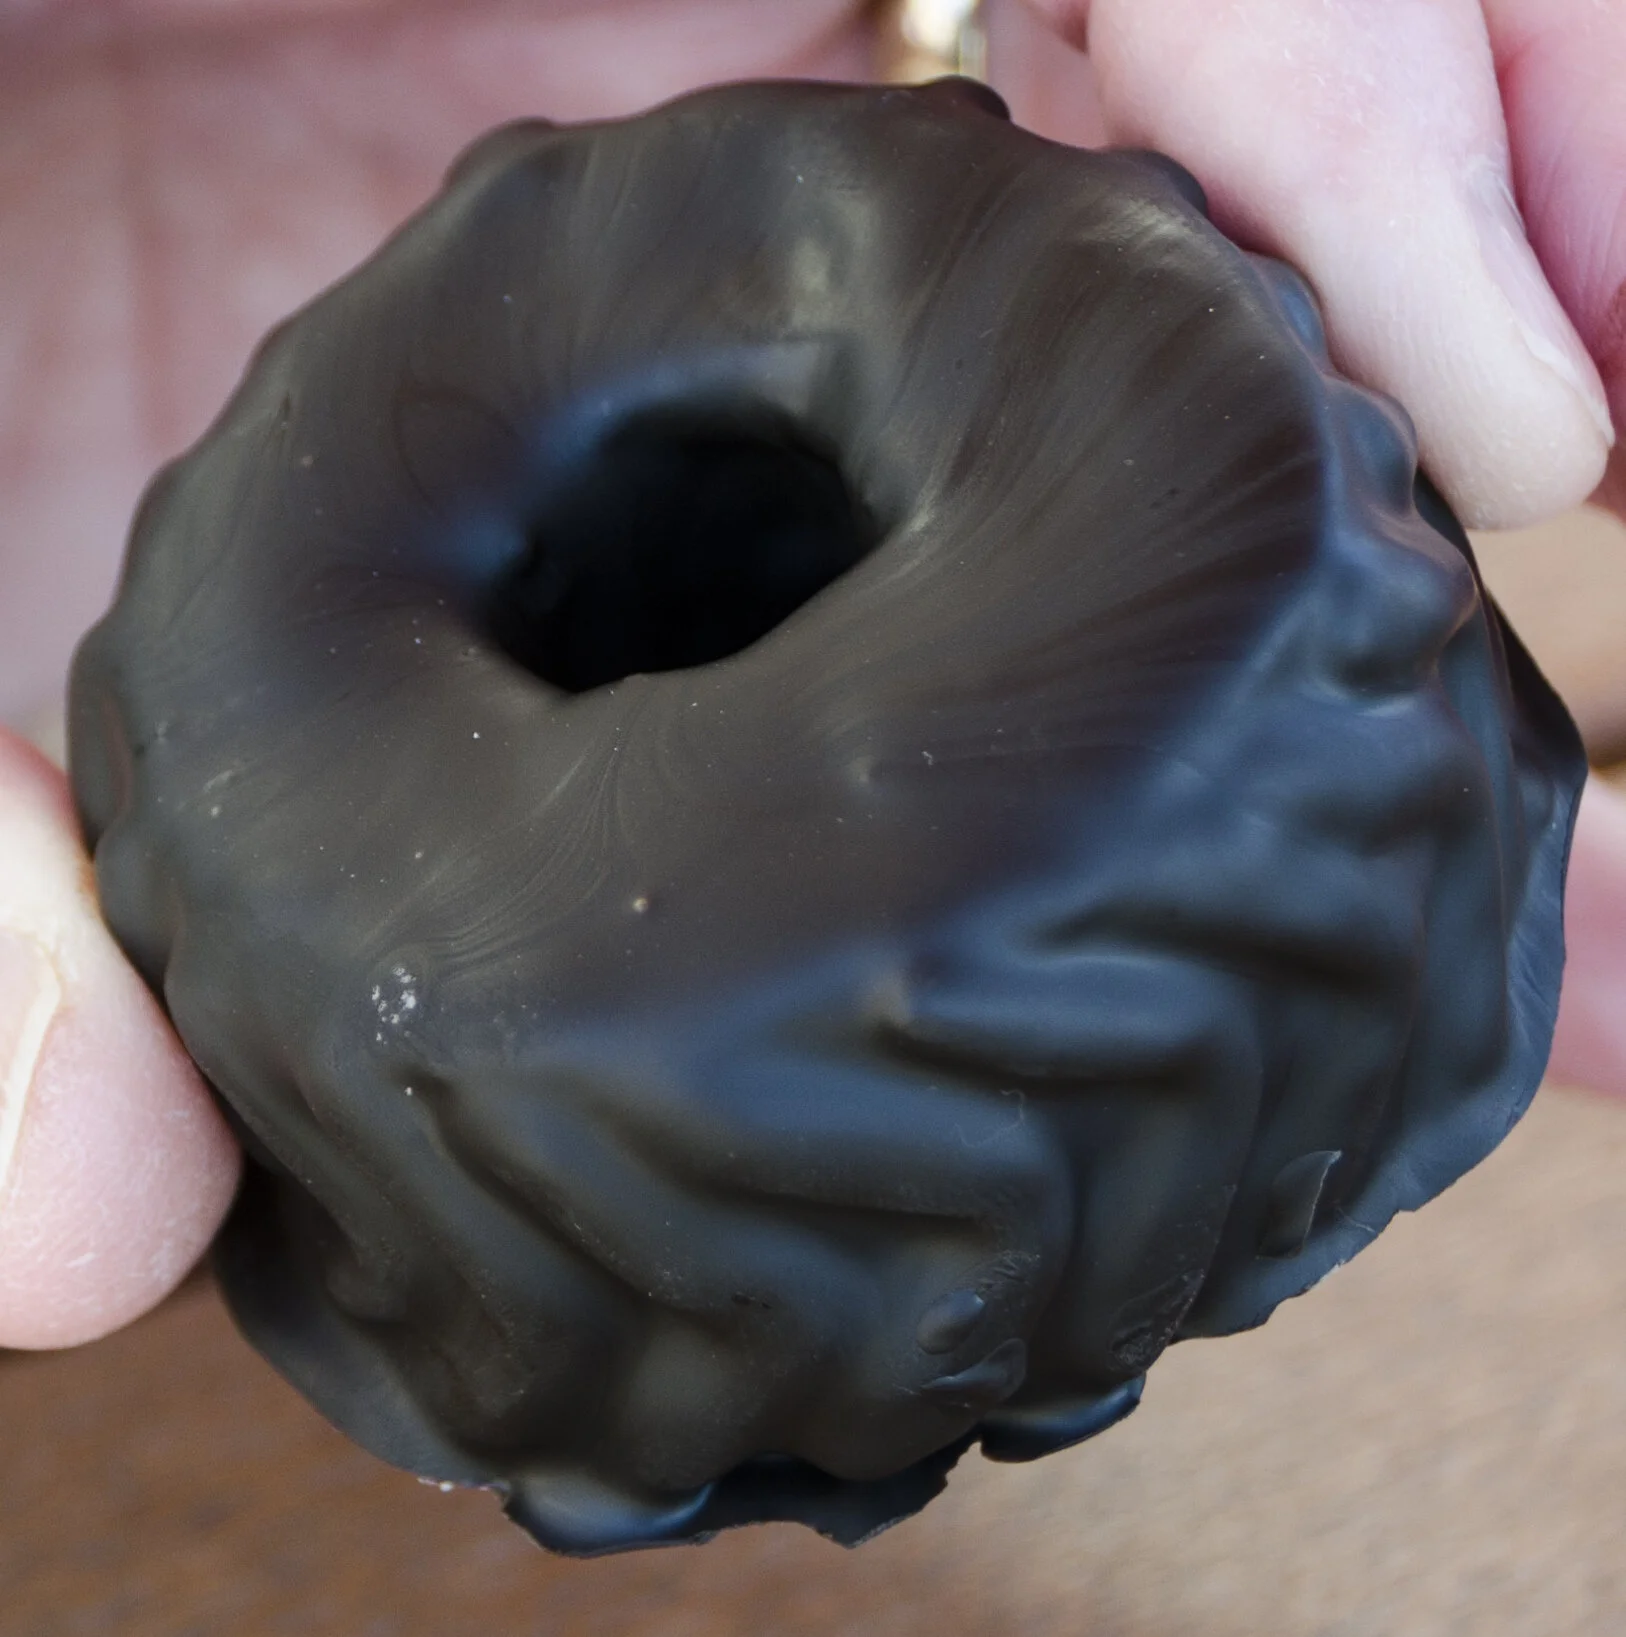
The actual cake is the tires behind the pit crew. They’re a basic sponge cake with a raspberry or blackberry jam filling, with modeling chocolate treads, dipped in dark chocolate.
They were kind of like really fancy Donettes. Which is to say they were fabulous. If I do say so myself.
History of Life Wedding Cake
This is the third wedding cake that I have ever made. Which means that, amazingly, there are three couples in the world with that level of trust in me. The bride is in law school and the groom is a paleontologist. The wedding was on September 3, which is the anniversary of the signing of the Treaty of Paris.
This is the third wedding cake that I have ever made. Which means that, amazingly, there are three couples in the world with that level of trust in me
The bride is in law school and the groom is a paleontologist. The wedding was on September 3, which is the anniversary of the signing of the Treaty of Paris, which, as everyone knows, is the treaty that ended the American Revolutionary War and in which Britain recognized the United States as an independent nation. Just kidding, I had no idea what the Treaty of Paris was; I had to google it.
This is the design we came up with.
Each tier represents an era of the evolution of life on Earth – Paleozoic, Mesozoic, and Cenozoic. The tiers get progressively shorter as you move up the cake, to suggest the shorter duration of each era. The overall shape is meant to evoke this kind of spiral shape that is often used in images describing the history of life.
Each tier has a “couple” on it, as well as other iconic forms of life from that era. The Paleozoic tier has a couple of trilobites.
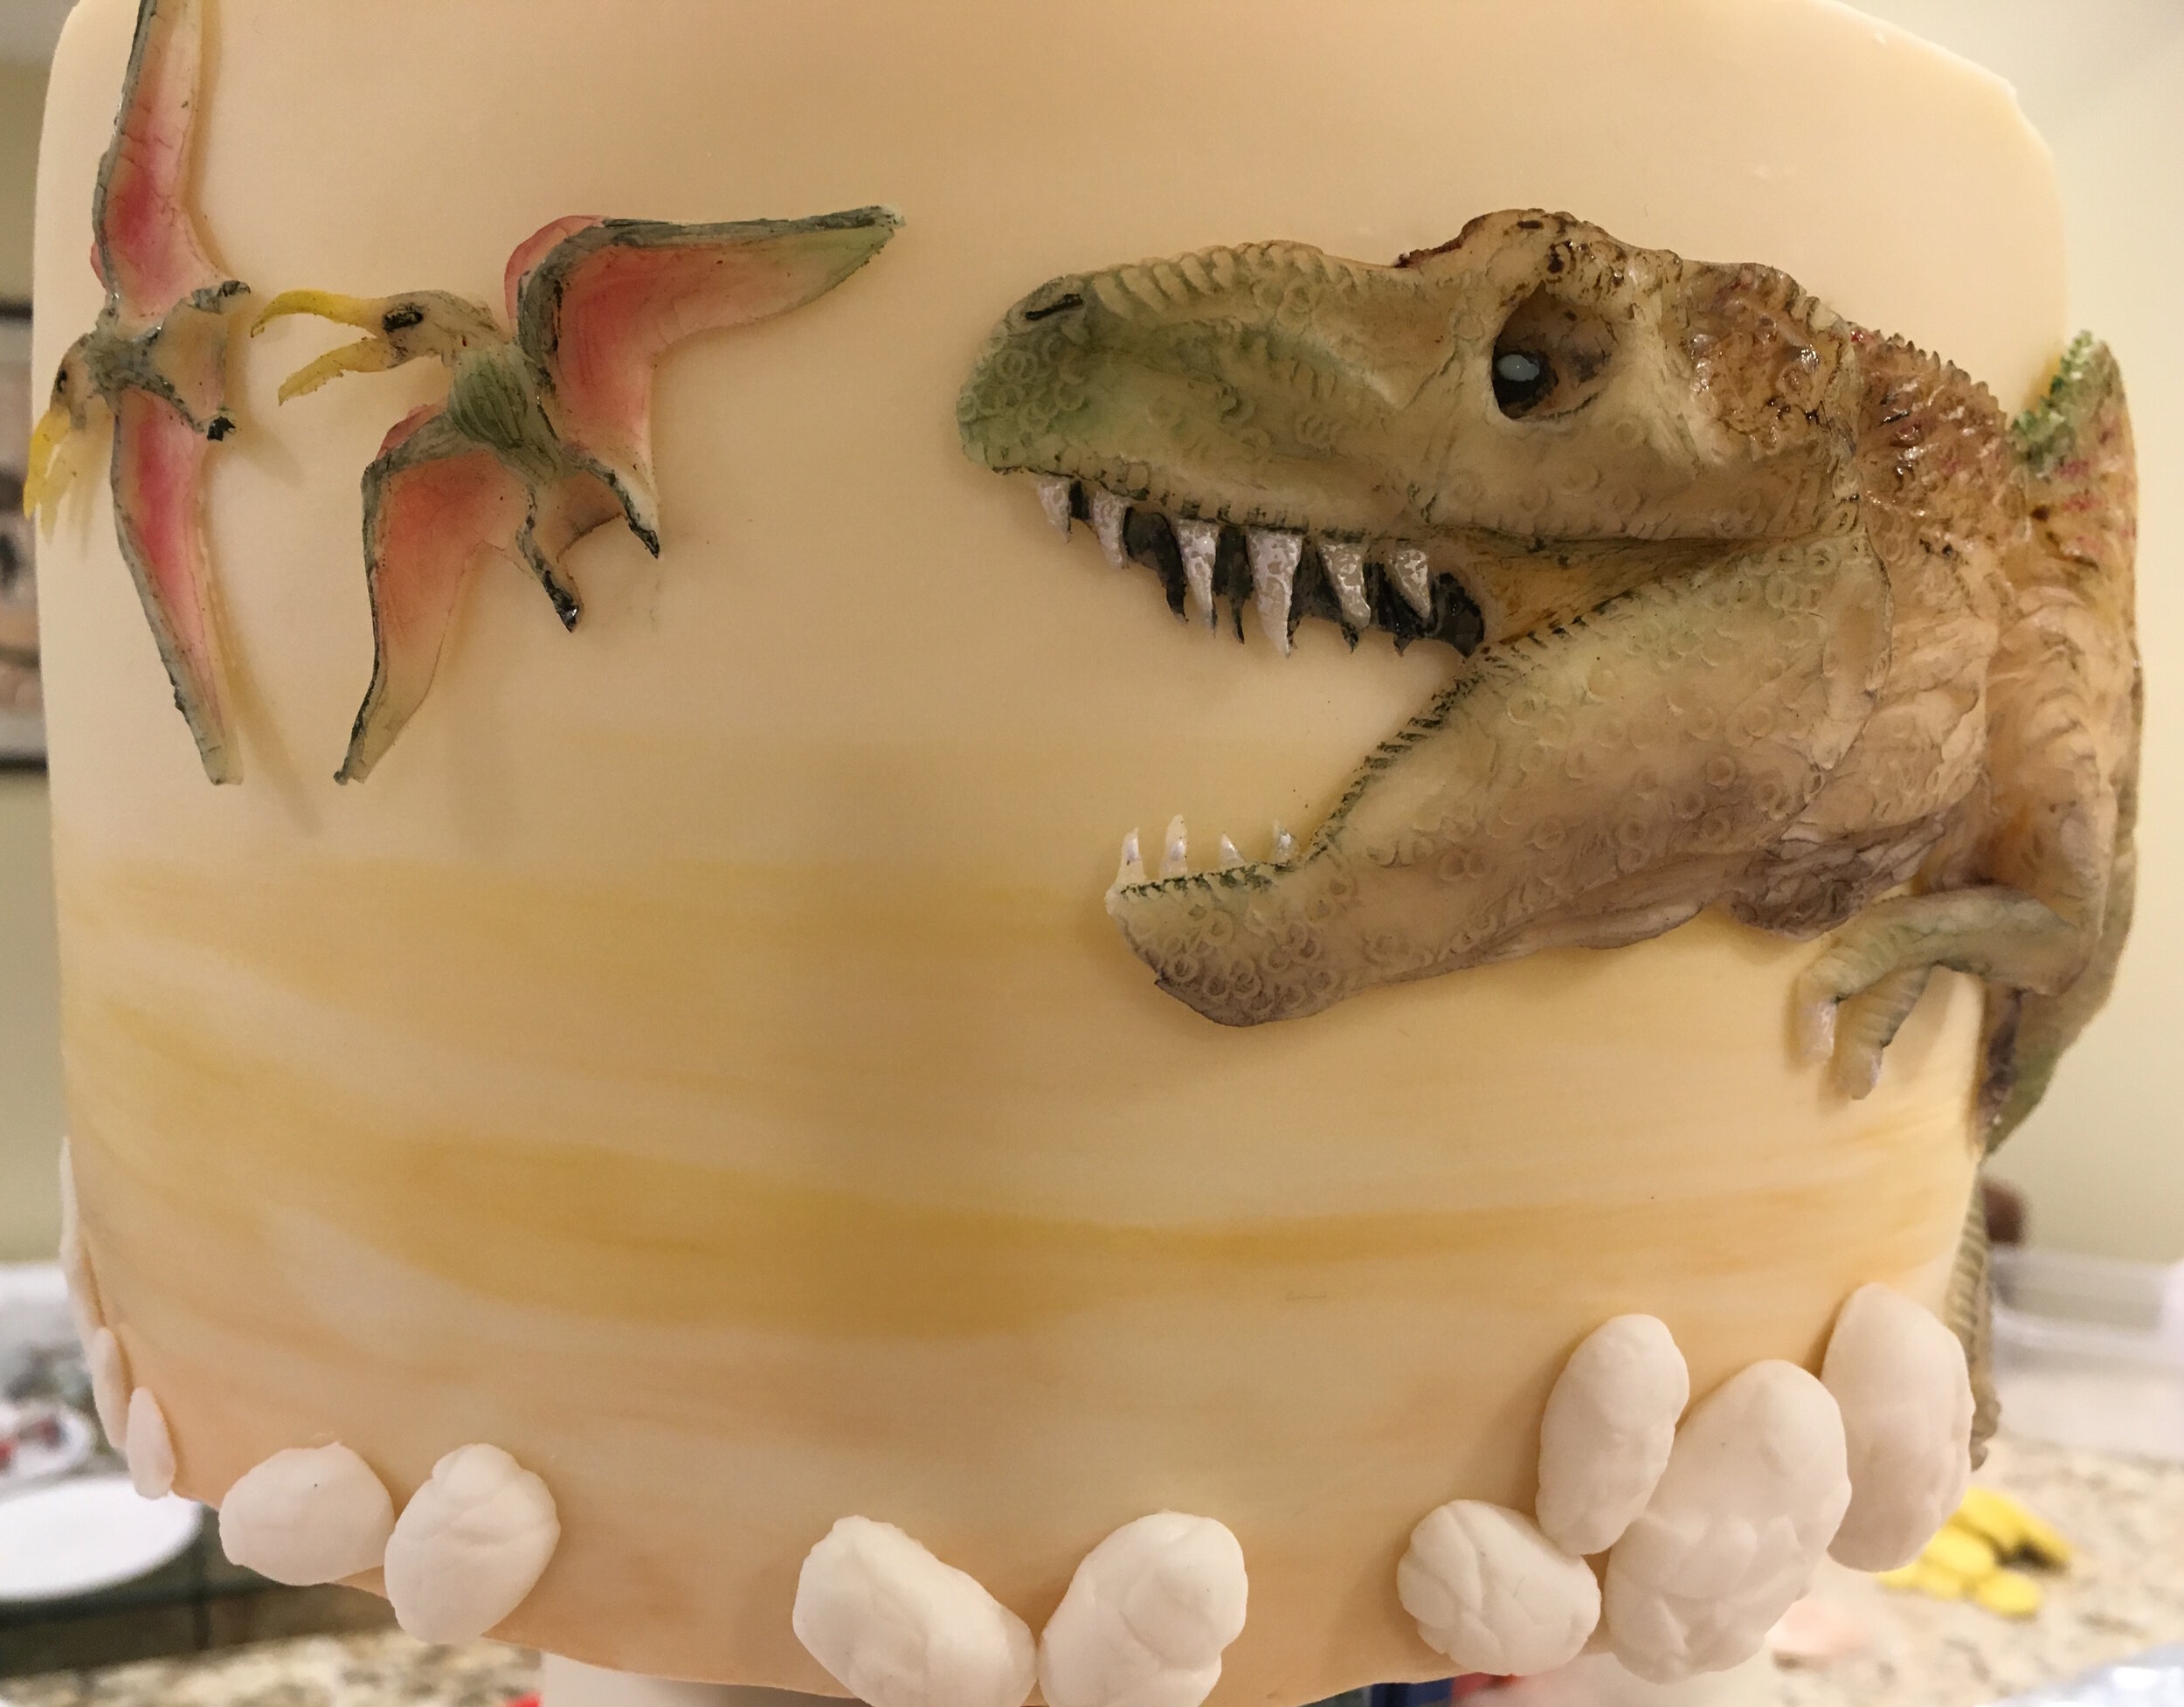
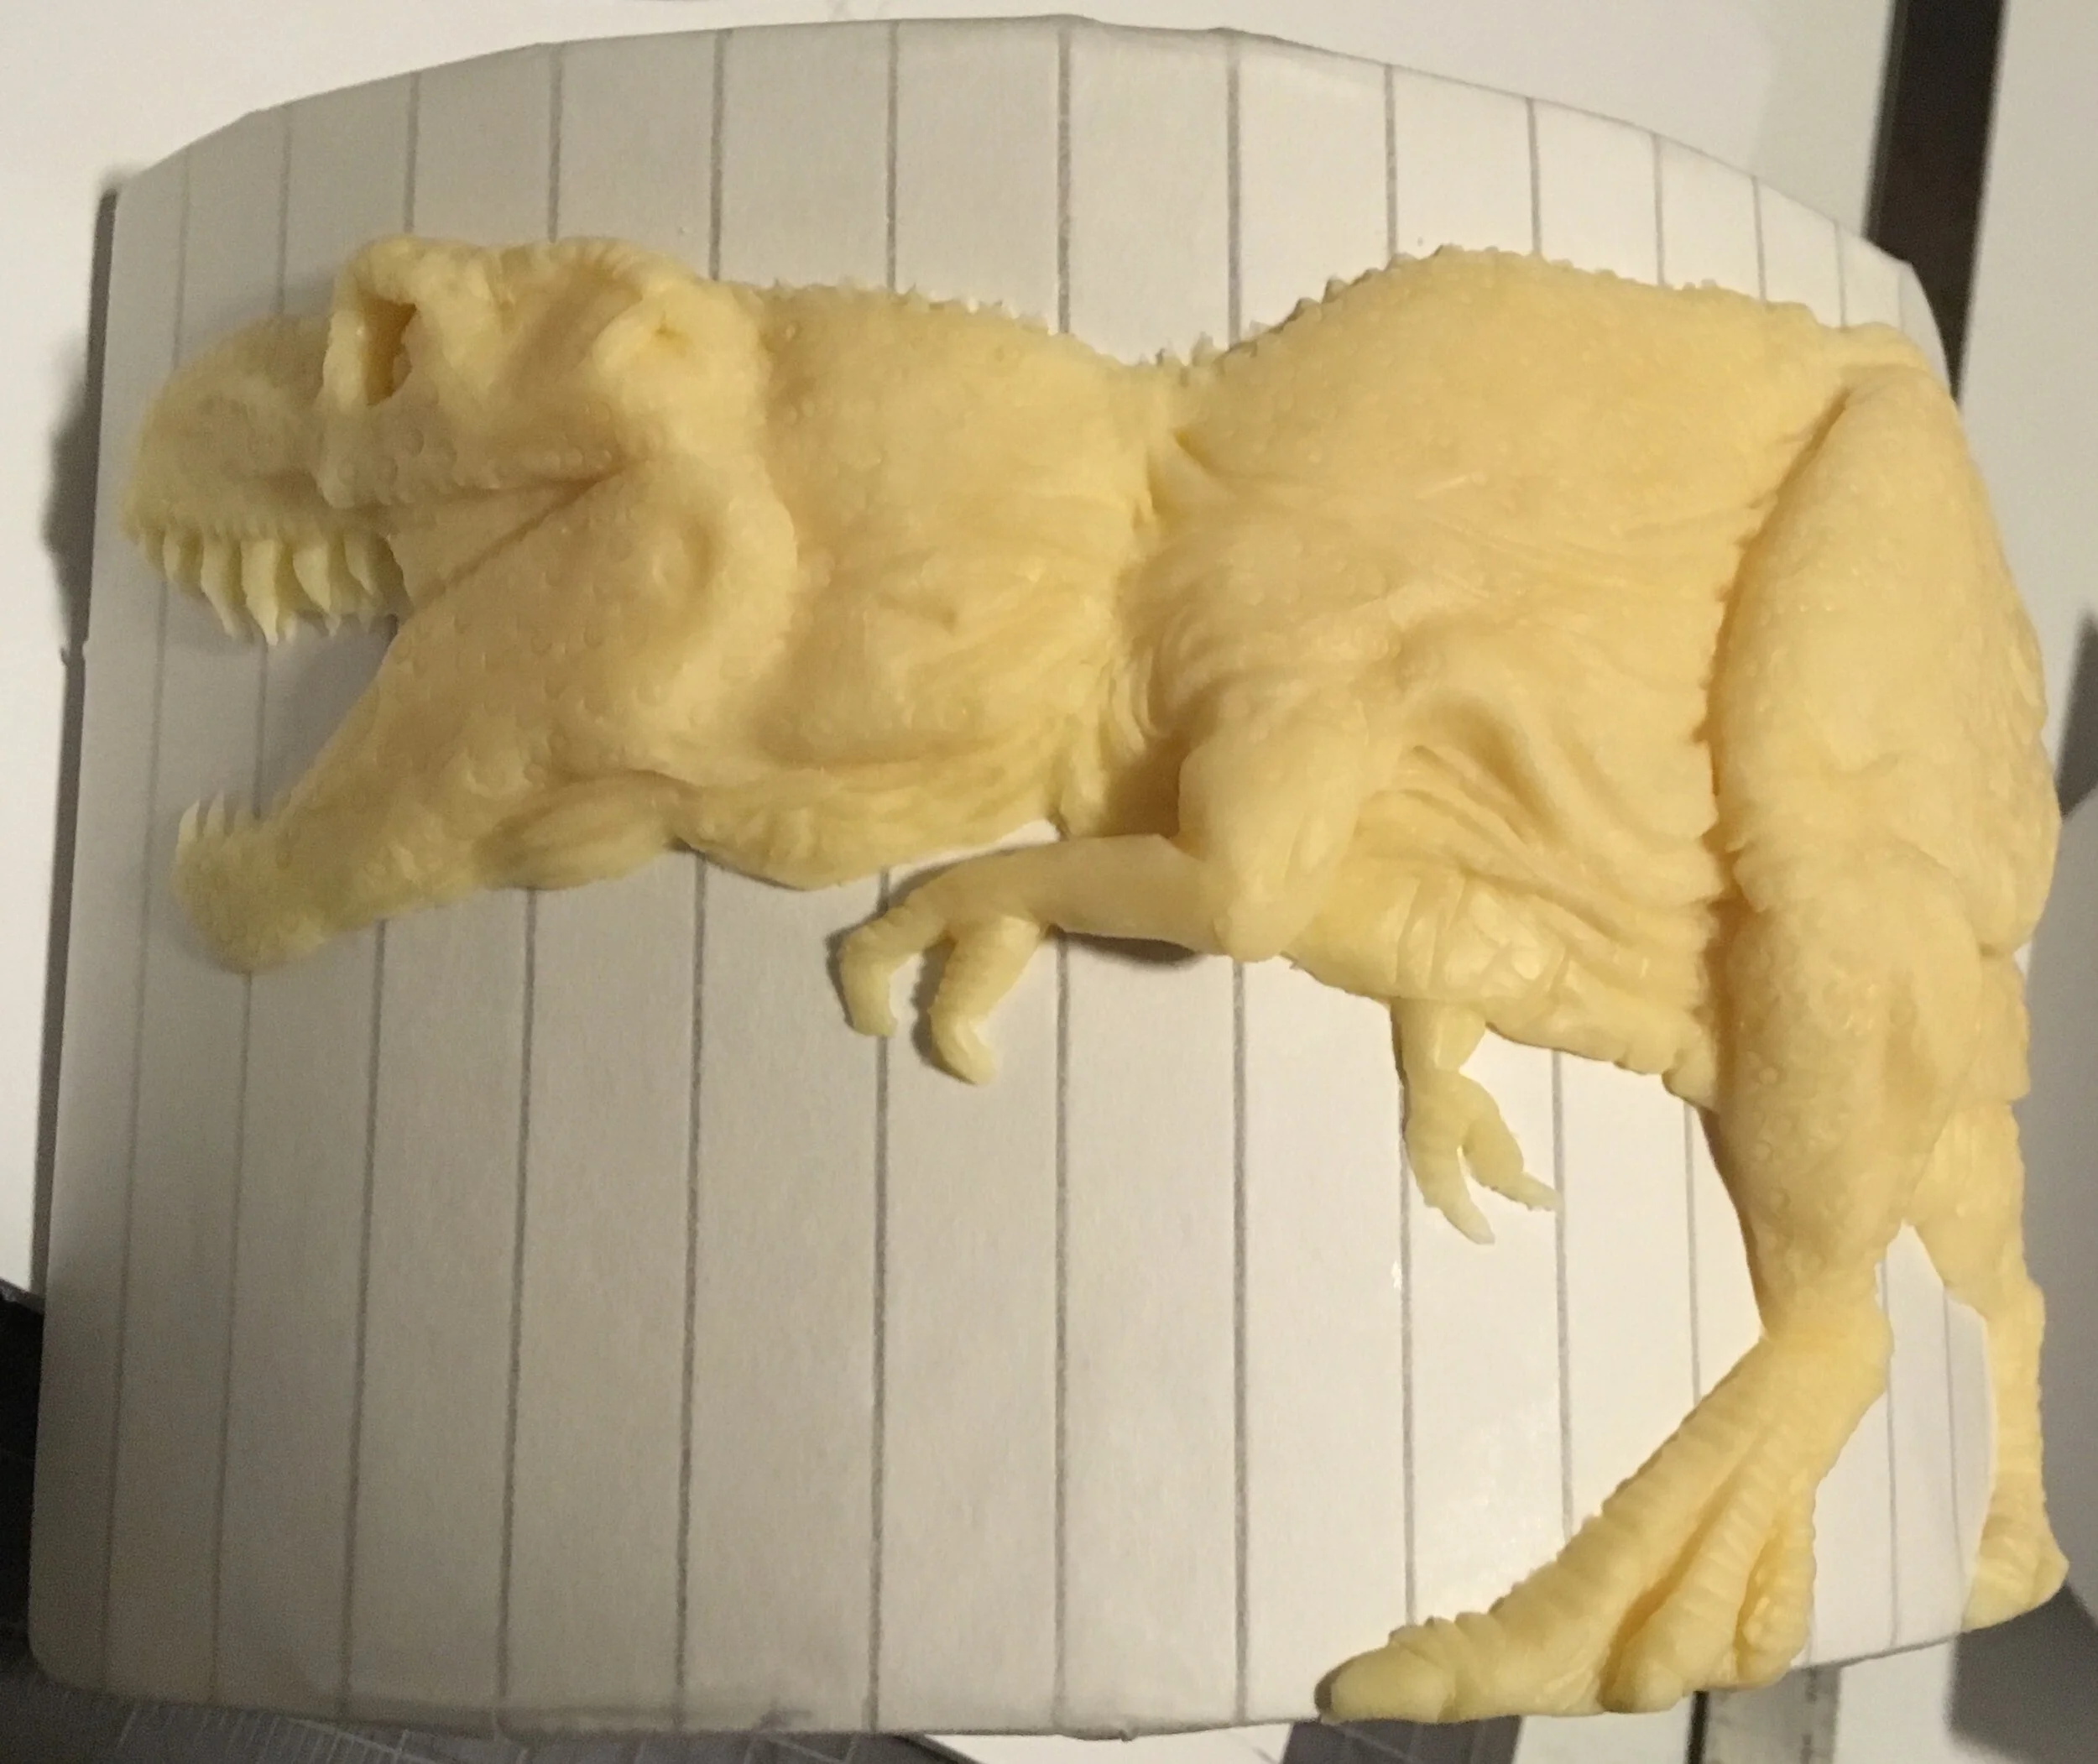
The Mesozoic era features a Tyrannosaurus Rex chasing a fleeing pair of pterosaurs. Note the T-Rex's feathers.
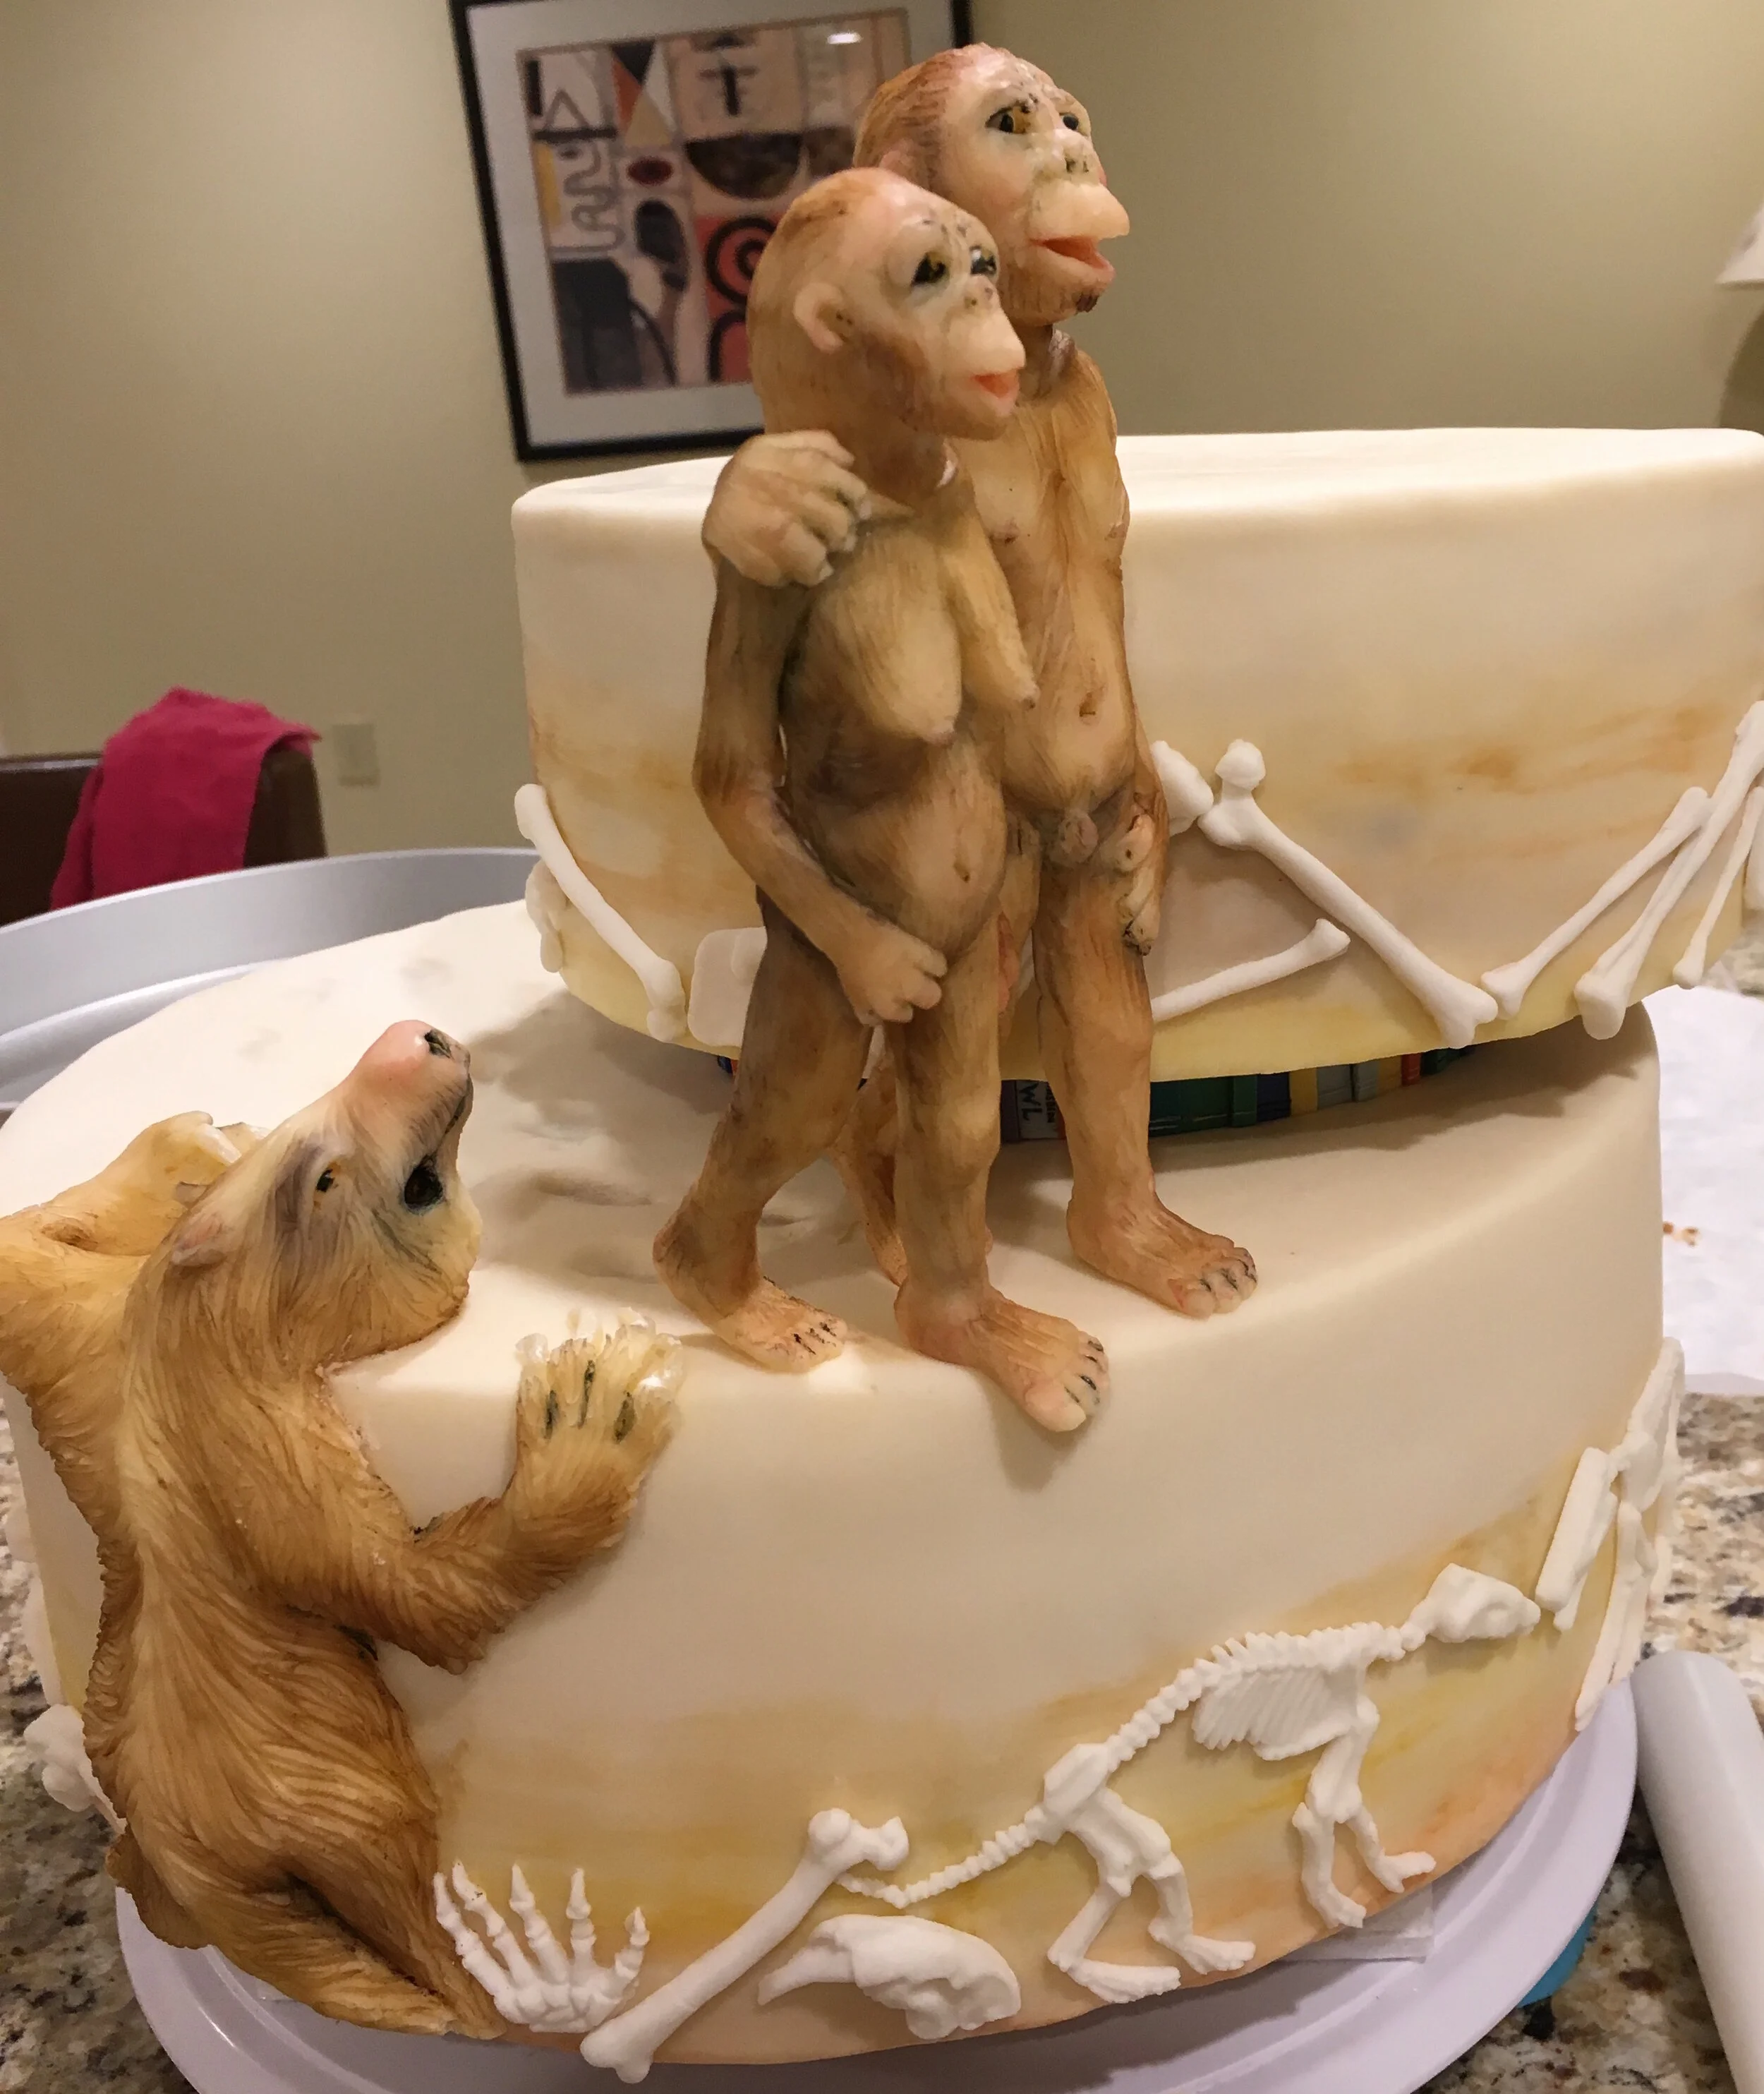
And the Cenozoic era tier has a megatherium (which is kind of giant prehistoric ground sloth) and a couple of hyaenodont skeletons (the groom’s PhD dissertation centered on hyaenodonts).
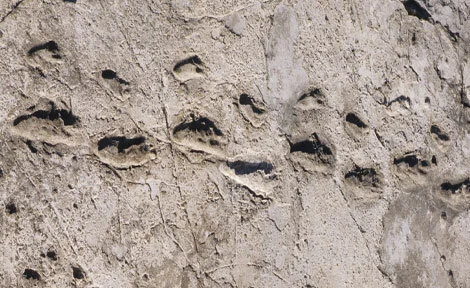
On top of that tier walks a couple of Australopithecus, which I’m told is something that the groom has been imagining on his wedding cake since he was a little boy. It’s inspired by these fossilized footprints that suggest that an Australopithecus couple might have walked next to each other, hand in hand.
The cake is covered with a mix of fondant and modeling chocolate and all of the figures are sculpted out of modeling chocolate colored with powdered food coloring. I made all the large figures in advance, over forms made to mimic the curvature of the cake tiers. That way I could make them well in advance and bring them in my carryon, since I had to fly cross-country for the wedding. (I didn’t fly with the whole cake. I arrived three days early and rented an Air BNB with a full kitchen to do the actual baking and assembly.
For the smaller fossils and bones at the base of each tier, I made molds out of food-safe silicon, so that when I assembled the cake I could just push some fondant into the mold and stick it on the cake.
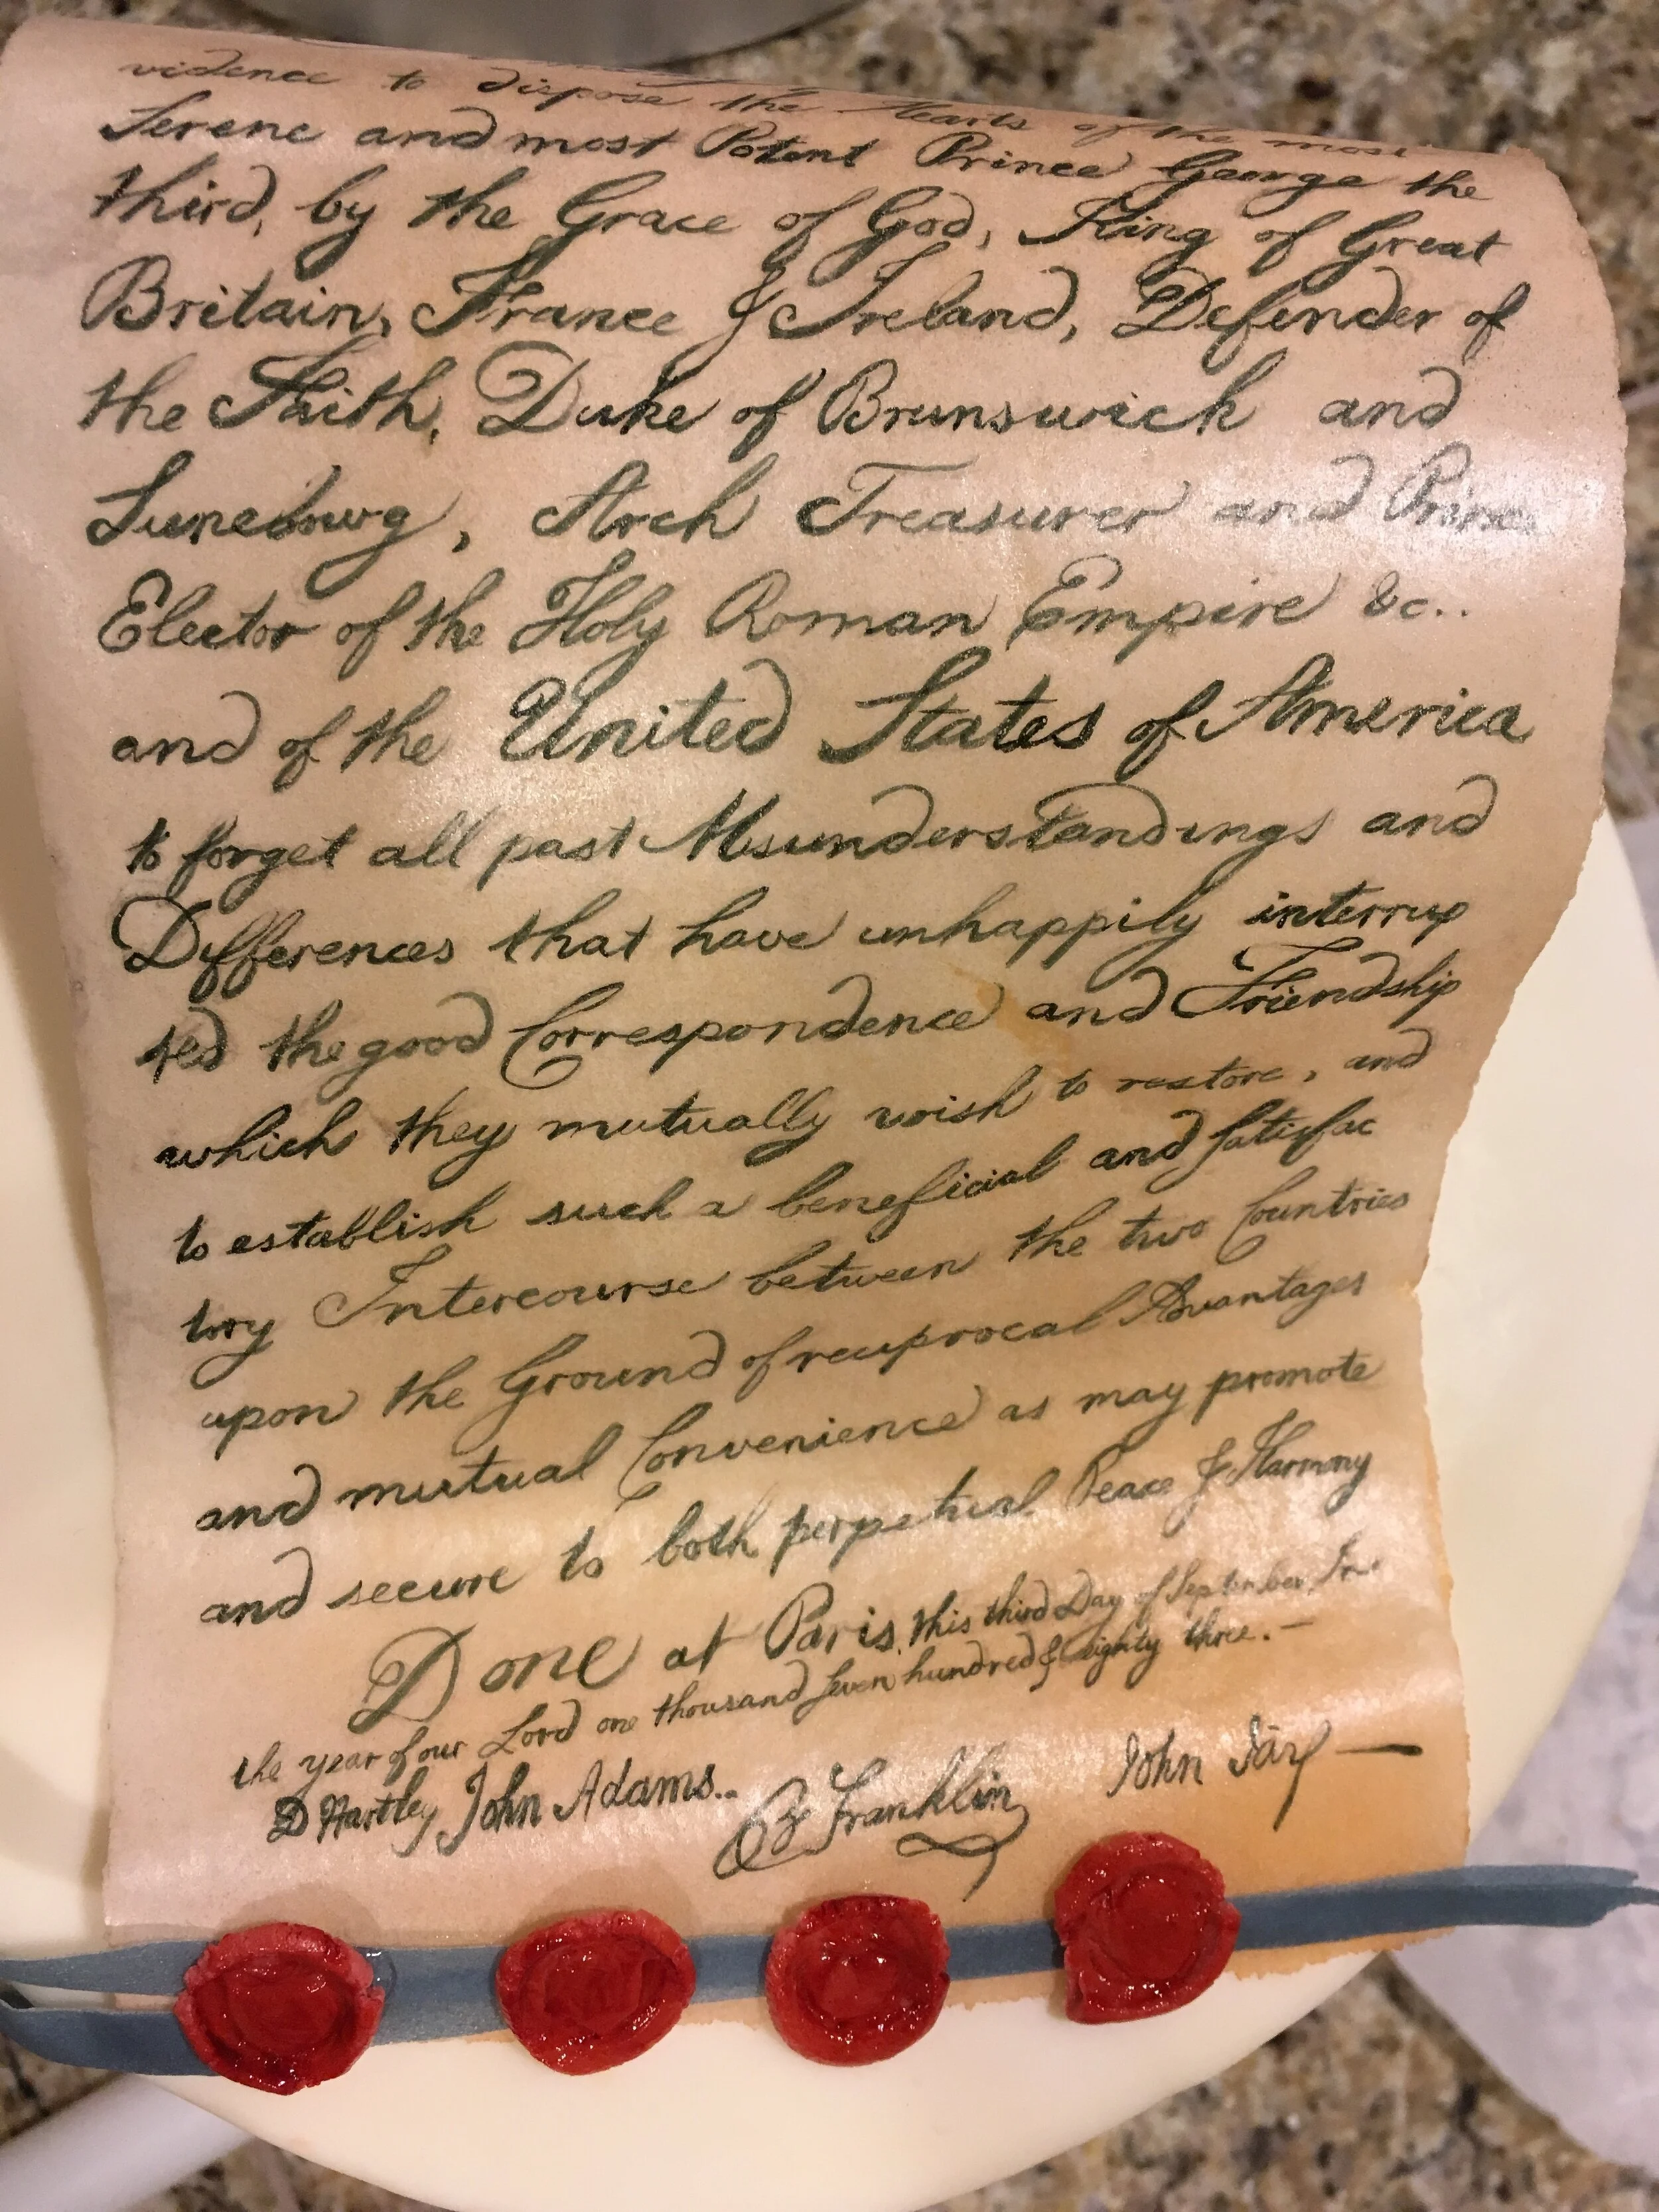
Of course, Australopithecus would have been nude and the couple understandably didn’t want exposed genitalia on their wedding cake. They also wanted to incorporate the Treaty of Paris, so I was delighted to discover that the Treaty of Paris has a nice blue ribbon at the bottom, running underneath the signatories’ seals. So I made a replica of the Treaty of Paris for the top of the cake with a long ribbon on the bottom to wrap around the couple’s inappropriate bits. Although if you look closely at the above photo before I put the ribbon in place, you’ll see that I couldn’t resist making the Australopithecus couple anatomically correct.
It's made of edible wafer paper with the actual text of the Treaty of Paris hand painted with food coloring. Of course it’s not the entire text, as the treaty is far too long for that. Using images I downloaded of the actual document, I photoshopped the signatures onto the bottom of the first paragraph. Then I printed it out at the actual size I needed for the cake. I turned this into basically edible transfer paper by coating the back of the paper with powdered food coloring. I put this on top of the wafer paper and transferred the text onto the wafer paper by tracing the printed image with a toothpick. Then I went back over the traced text with paste color and a detail brush. To get the graceful curve, I lightly sprayed the back of the wafer paper with water and then set it over and under a couple of rolling pins to dry.
The lowest tier and the dividers between the evolutionary era tiers are encircled with books, which are meant to bring in the bride’s studiousness. They also offered a great opportunity for personalization as the bride and groom sent me a list of all their most influential books. The dividers between the tiers are quite small and made so that they can be popped into place to conceal the cake’s internal support. Those books are just gum paste with the titles painted on.
The books on the bottom tier are much larger and can be seen from the top as well as the sides, so they required more detail to be convincing. So I made pages out of wafer paper and stuck them together with piping gel. Once that was dry, I wrapped each book in a gum paste cover and then painted the title onto the spine. In most cases, I was able to find real cover art from the book to base it on.
Inside, the cake flavors are vanilla, orange, ginger, and chocolate in alternating layers to suggest different strata of dirt. We wanted people to be able to have an archeological experience while eating the cake, so I buried chocolate fossils inside each layer. I made custom molds for the fossils, based on sculptures that I did representing various fossils that would have been common in each of the cake’s eras. With these molds, I cast the fossils in white, milk, and dark chocolate and then embedded them in the cake layers as I was stacking this cake. Then as the guests ate the cake, they got to excavate their chocolate fossils.
The drive from the Air BNB was about half an hour and not over the greatest roads. I enlisted the bride’s brother to help me deliver the cake, since he has an SUV with enough space. He is a former Army Ranger, yet apparently still found the pressure of the drive terrifying. I don’t blame him. I hate driving with cakes. We arrived at the venue without incident, though.
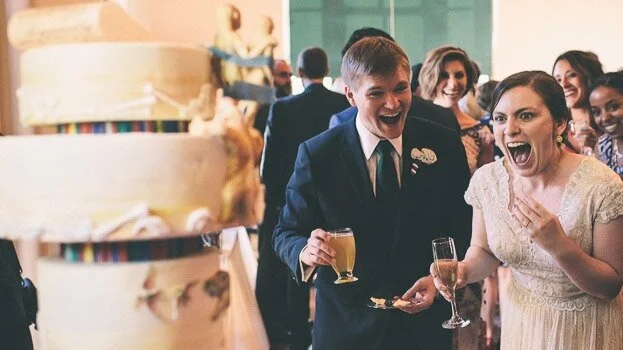
One of the groom’s paleontology friends created a museum card to accompany the cake, explaining all the different fossils, inside and out. He even gave a little introductory speech before they cut the cake. And apparently some of the groom’s paleontology colleagues even said my T-Rex was one of the best reconstructions they have ever seen in any medium. But, really, this photo is the best part.
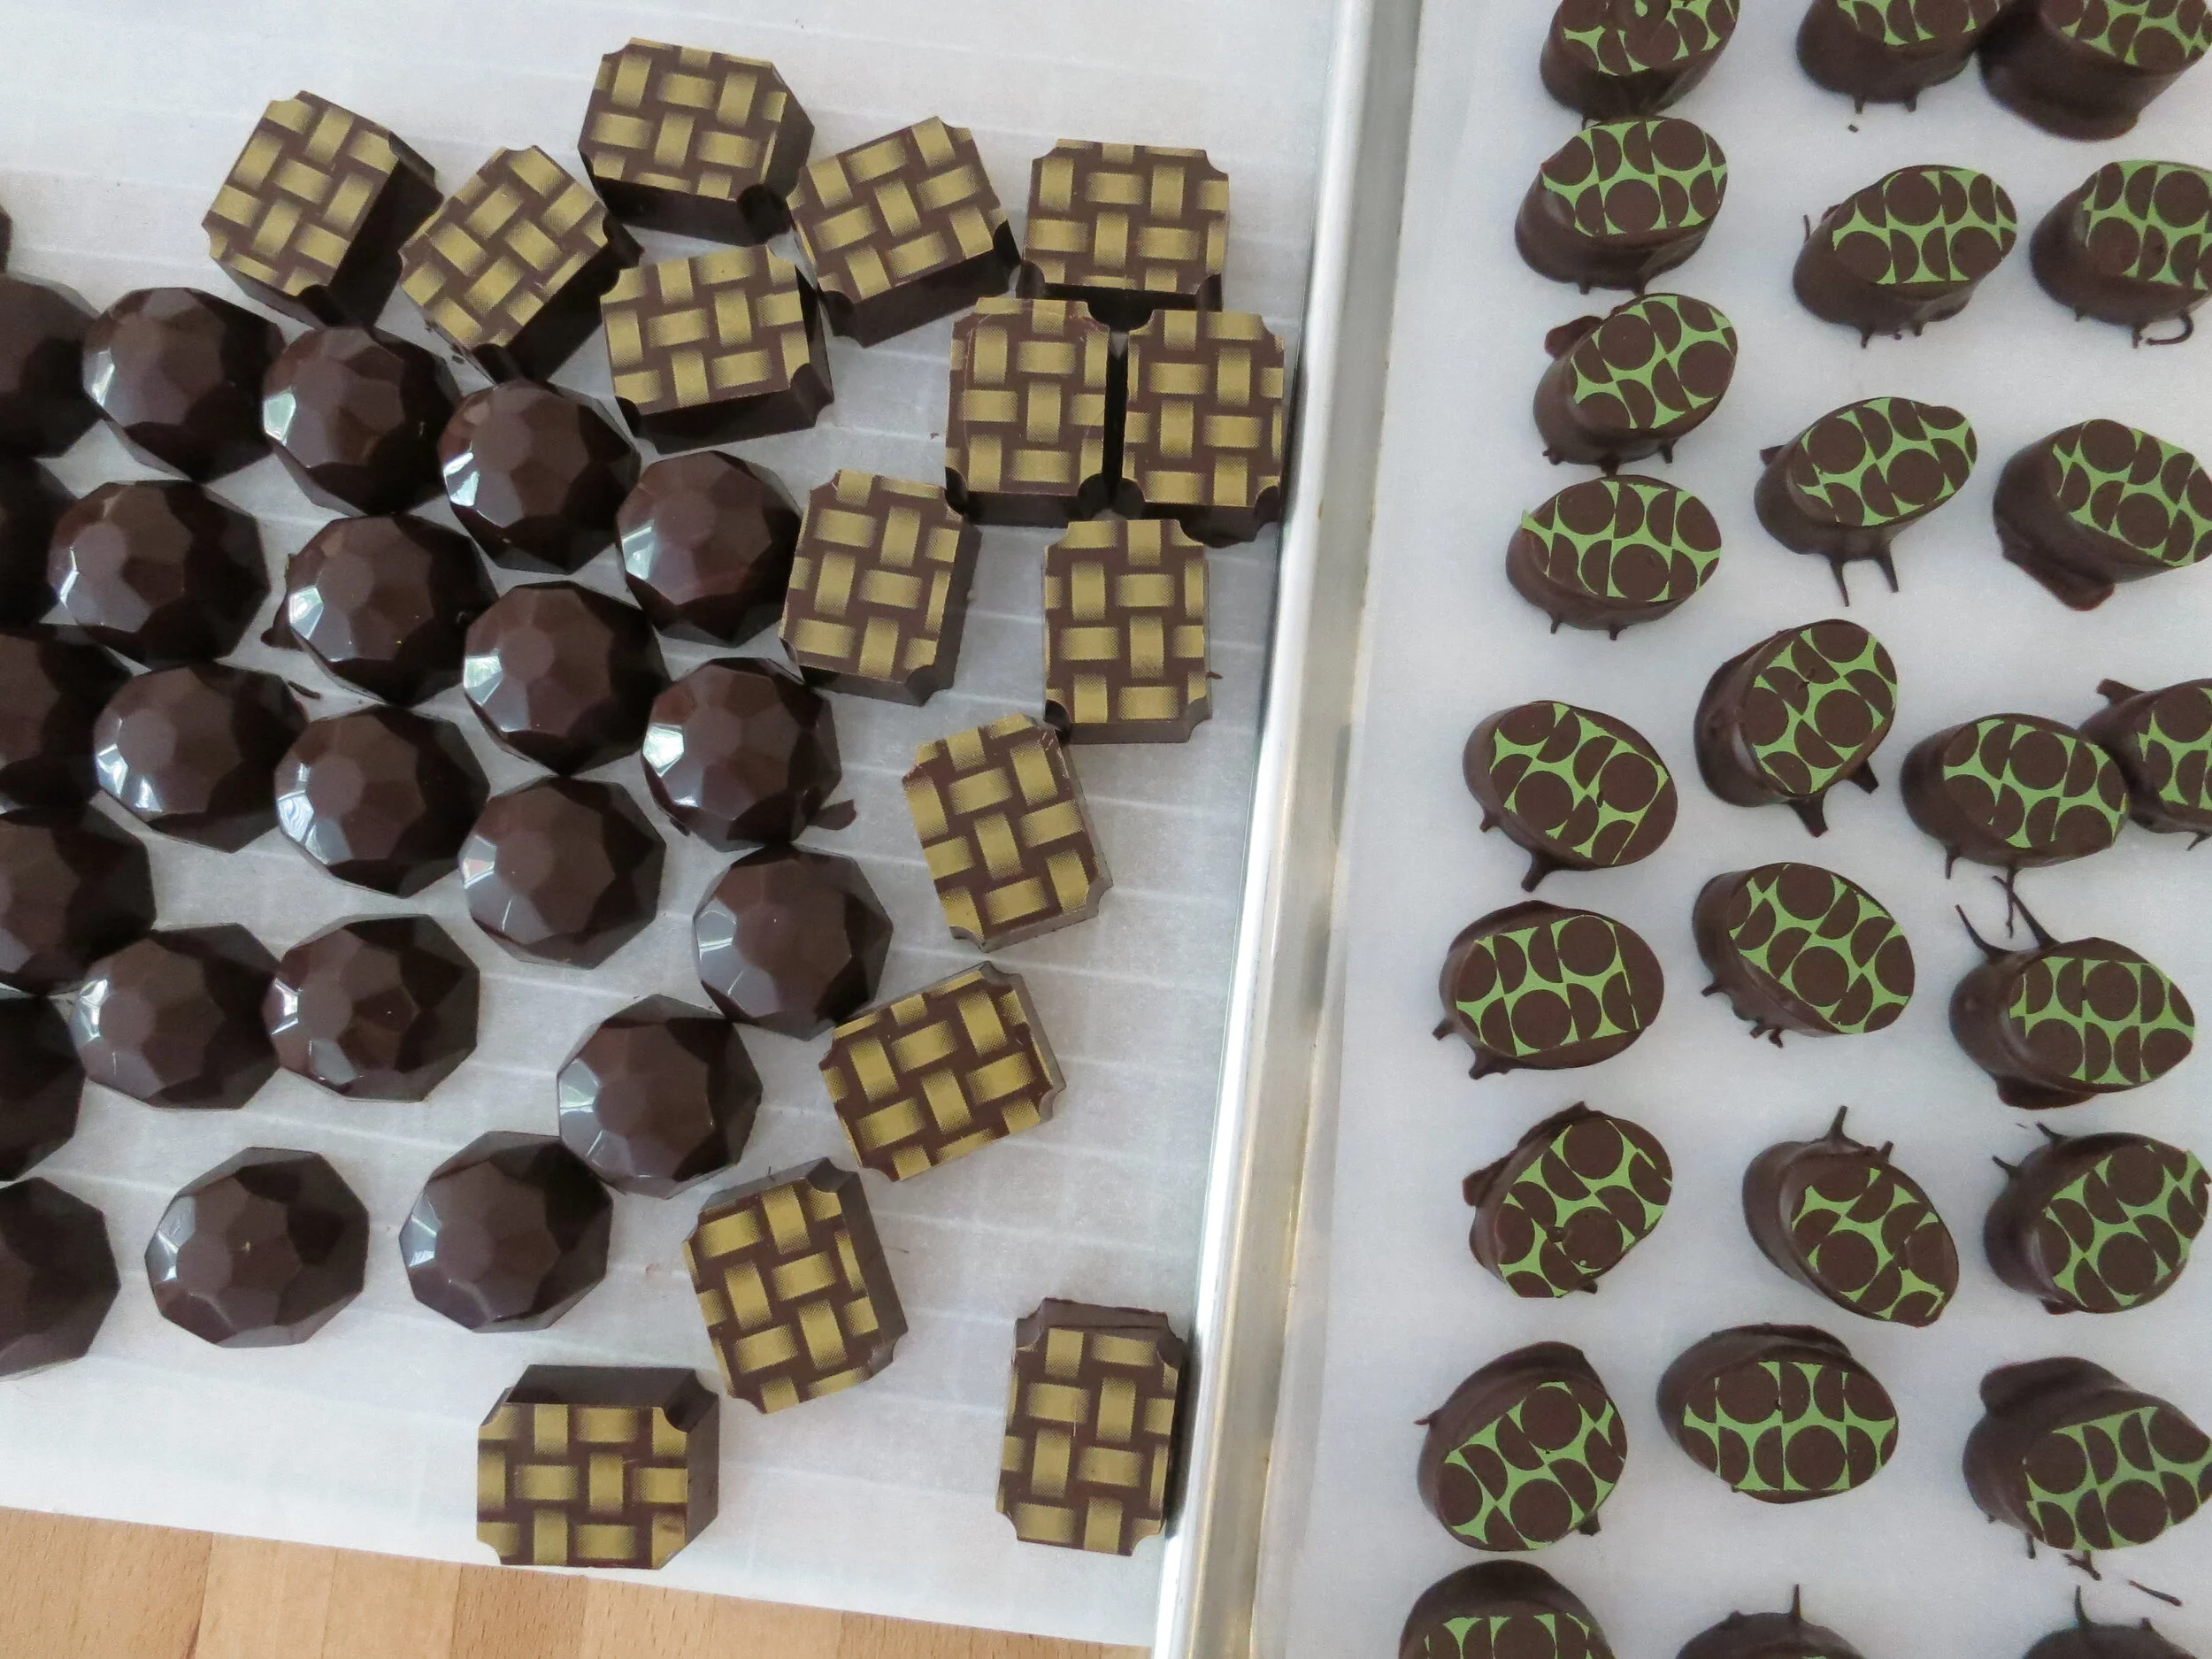
Holiday Candy 2015
Flavors include dark chocolate sunbutter cups, sunflower seed toffee and brittle, coffee chocolate disks, chocolate-covered dried cranberries, and peppermint bark.
Flavors include dark chocolate sunbutter cups, sunflower seed toffee and brittle, coffee chocolate disks, chocolate-covered dried cranberries, and peppermint bark.
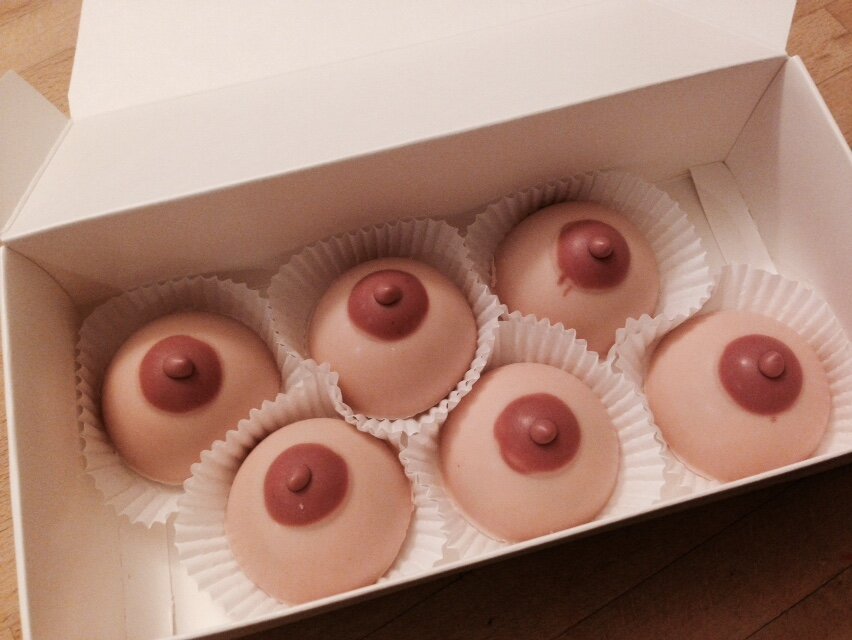
Breast Chocolates
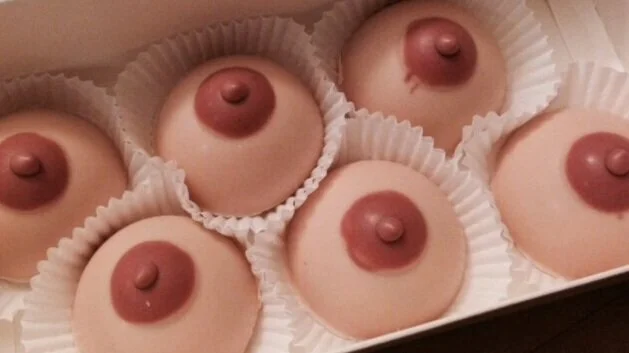
My aunt was diagnosed with breast cancer. I made these to let her know I was thinking of her.
My aunt was diagnosed with breast cancer. I made these to let her know I was thinking of her.
Miss Julie
My friend Kristin Hunt invited me to create aphrodisiac candy recipes for a production of Miss Julie at Northeastern Illinois University - roasted garlic marshmallow, salted truffle caramels, red wine gummies, habanero cotton candy, and oyster white chocolate ganache.
My friend Kristin Hunt invited me to create aphrodisiac candy recipes for a production of Miss Julie at Northeastern Illinois University. These photos are from the production, so I didn’t make the candy myself, but they are my recipes - roasted garlic marshmallow, salted truffle caramels, red wine gummies, habanero cotton candy, and oyster white chocolate ganache. There were also black pepper conversation hearts, but that one was Kristin’s recipe, not mine. I tried to invent oyster cordial cherries, but I couldn’t get them not to be gross.
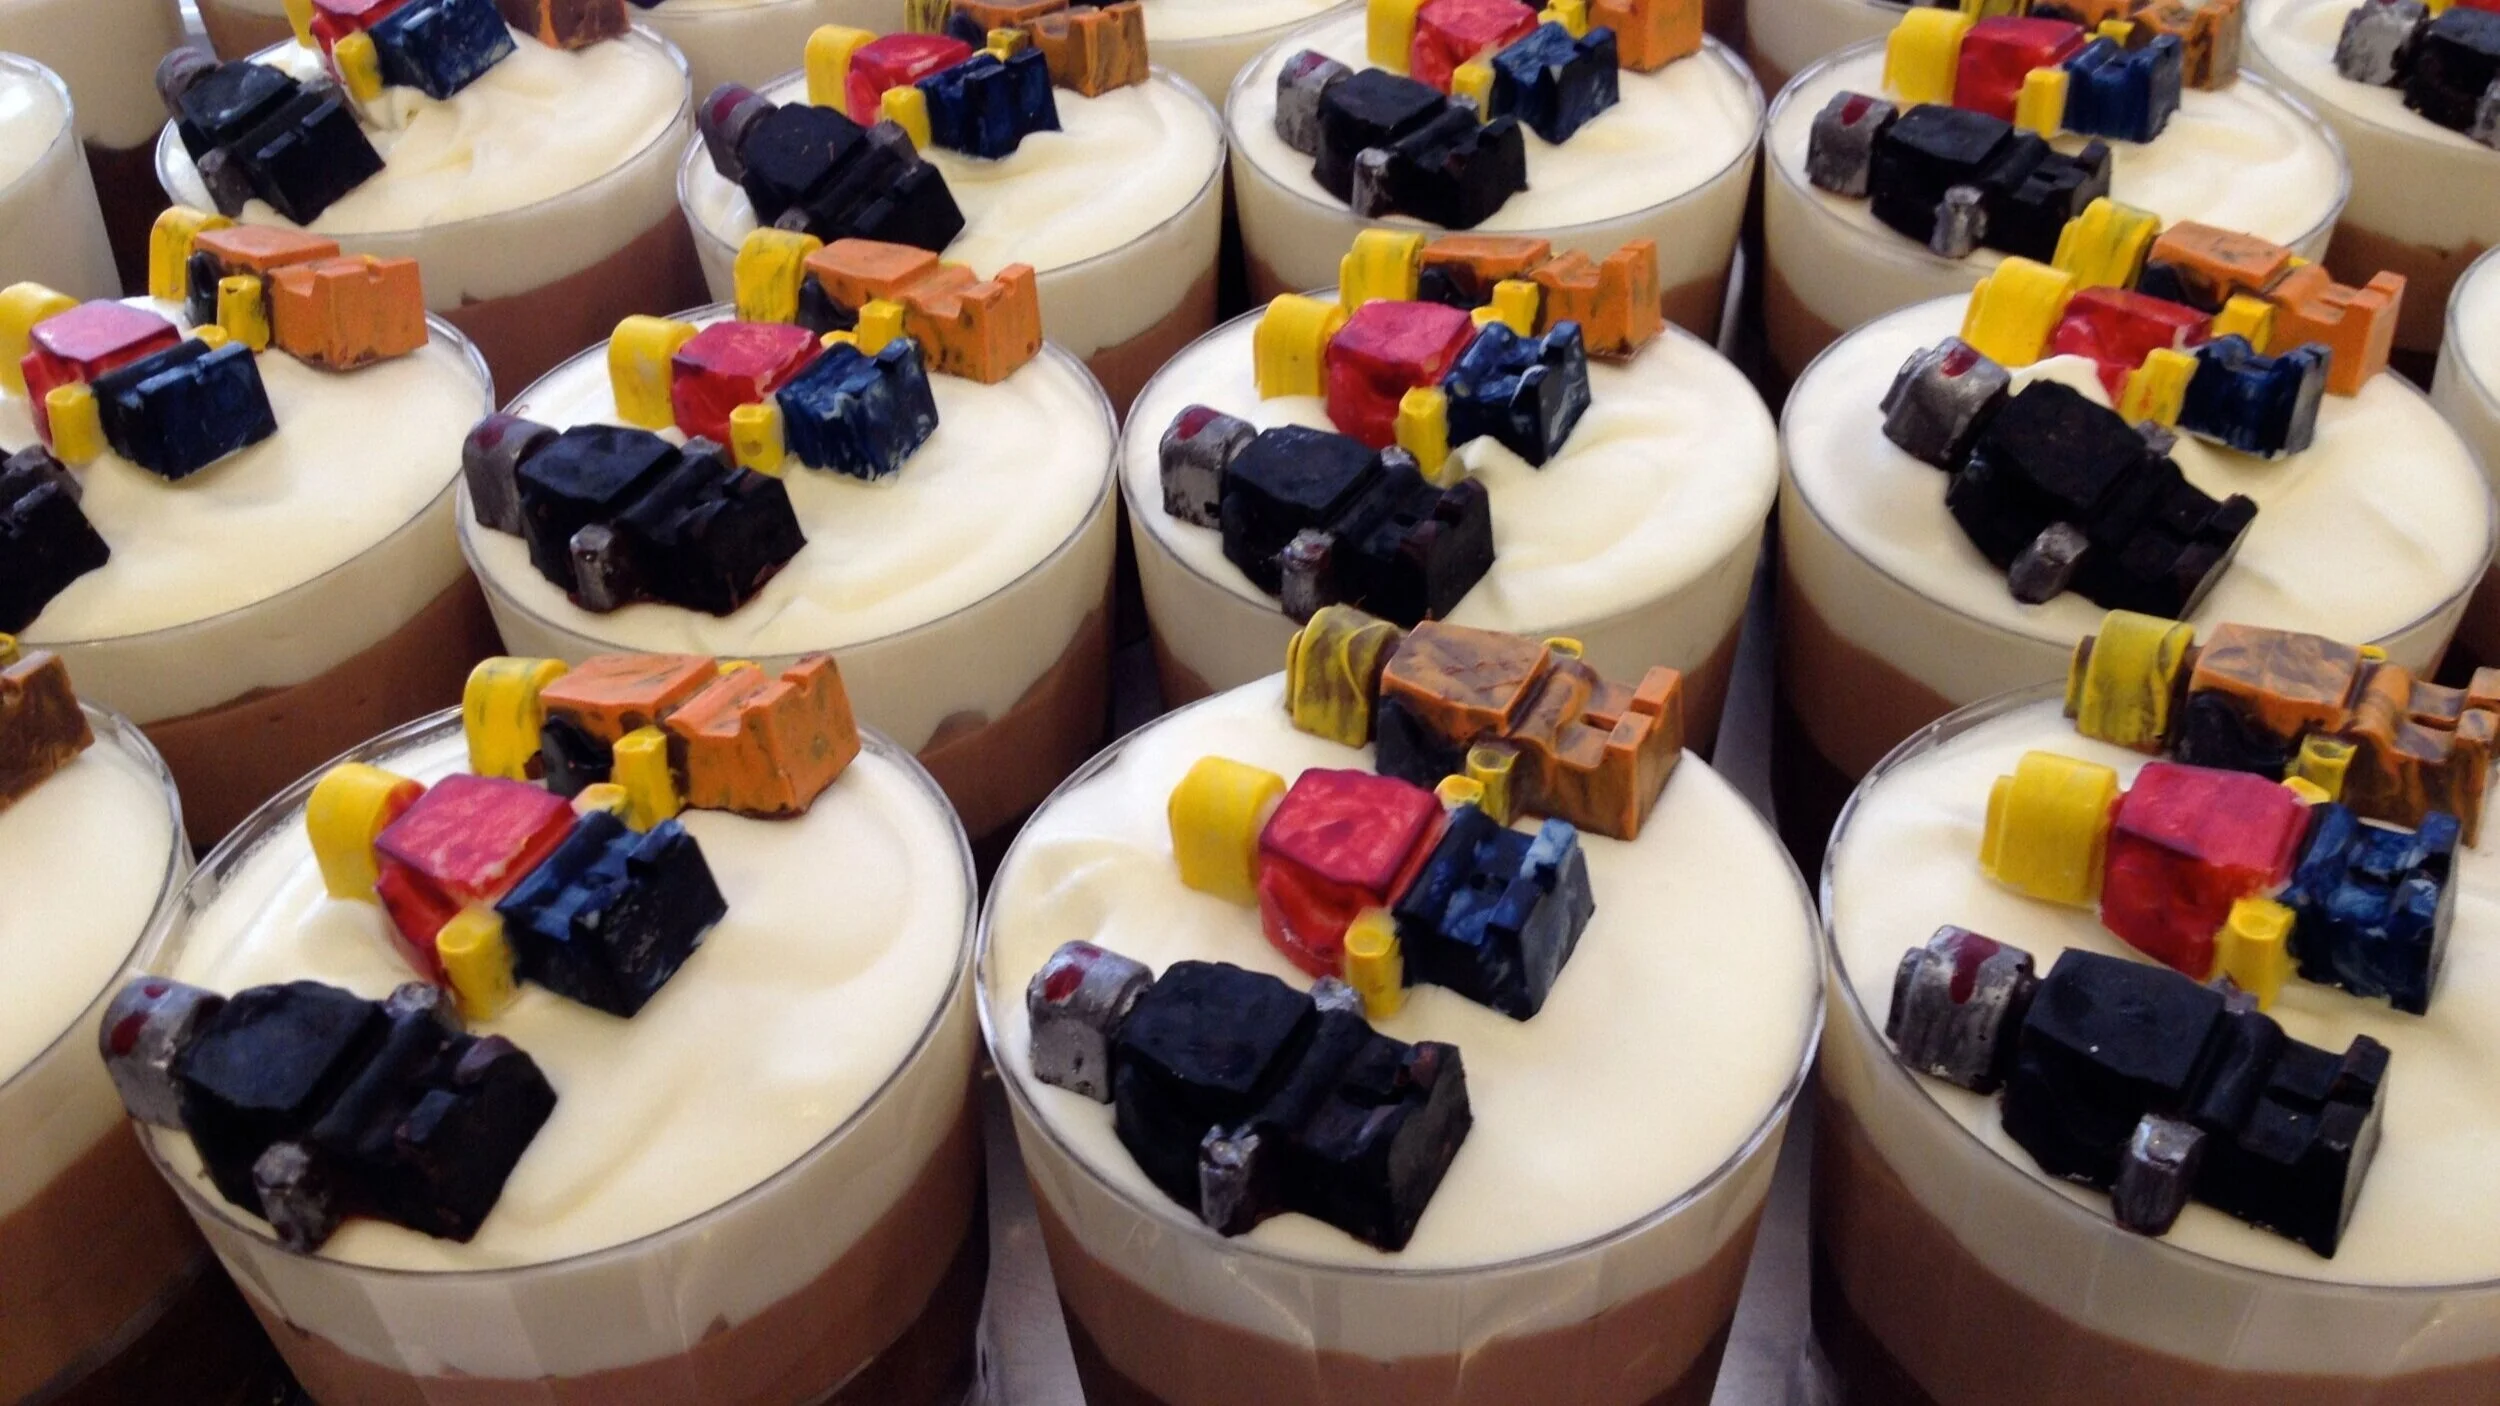
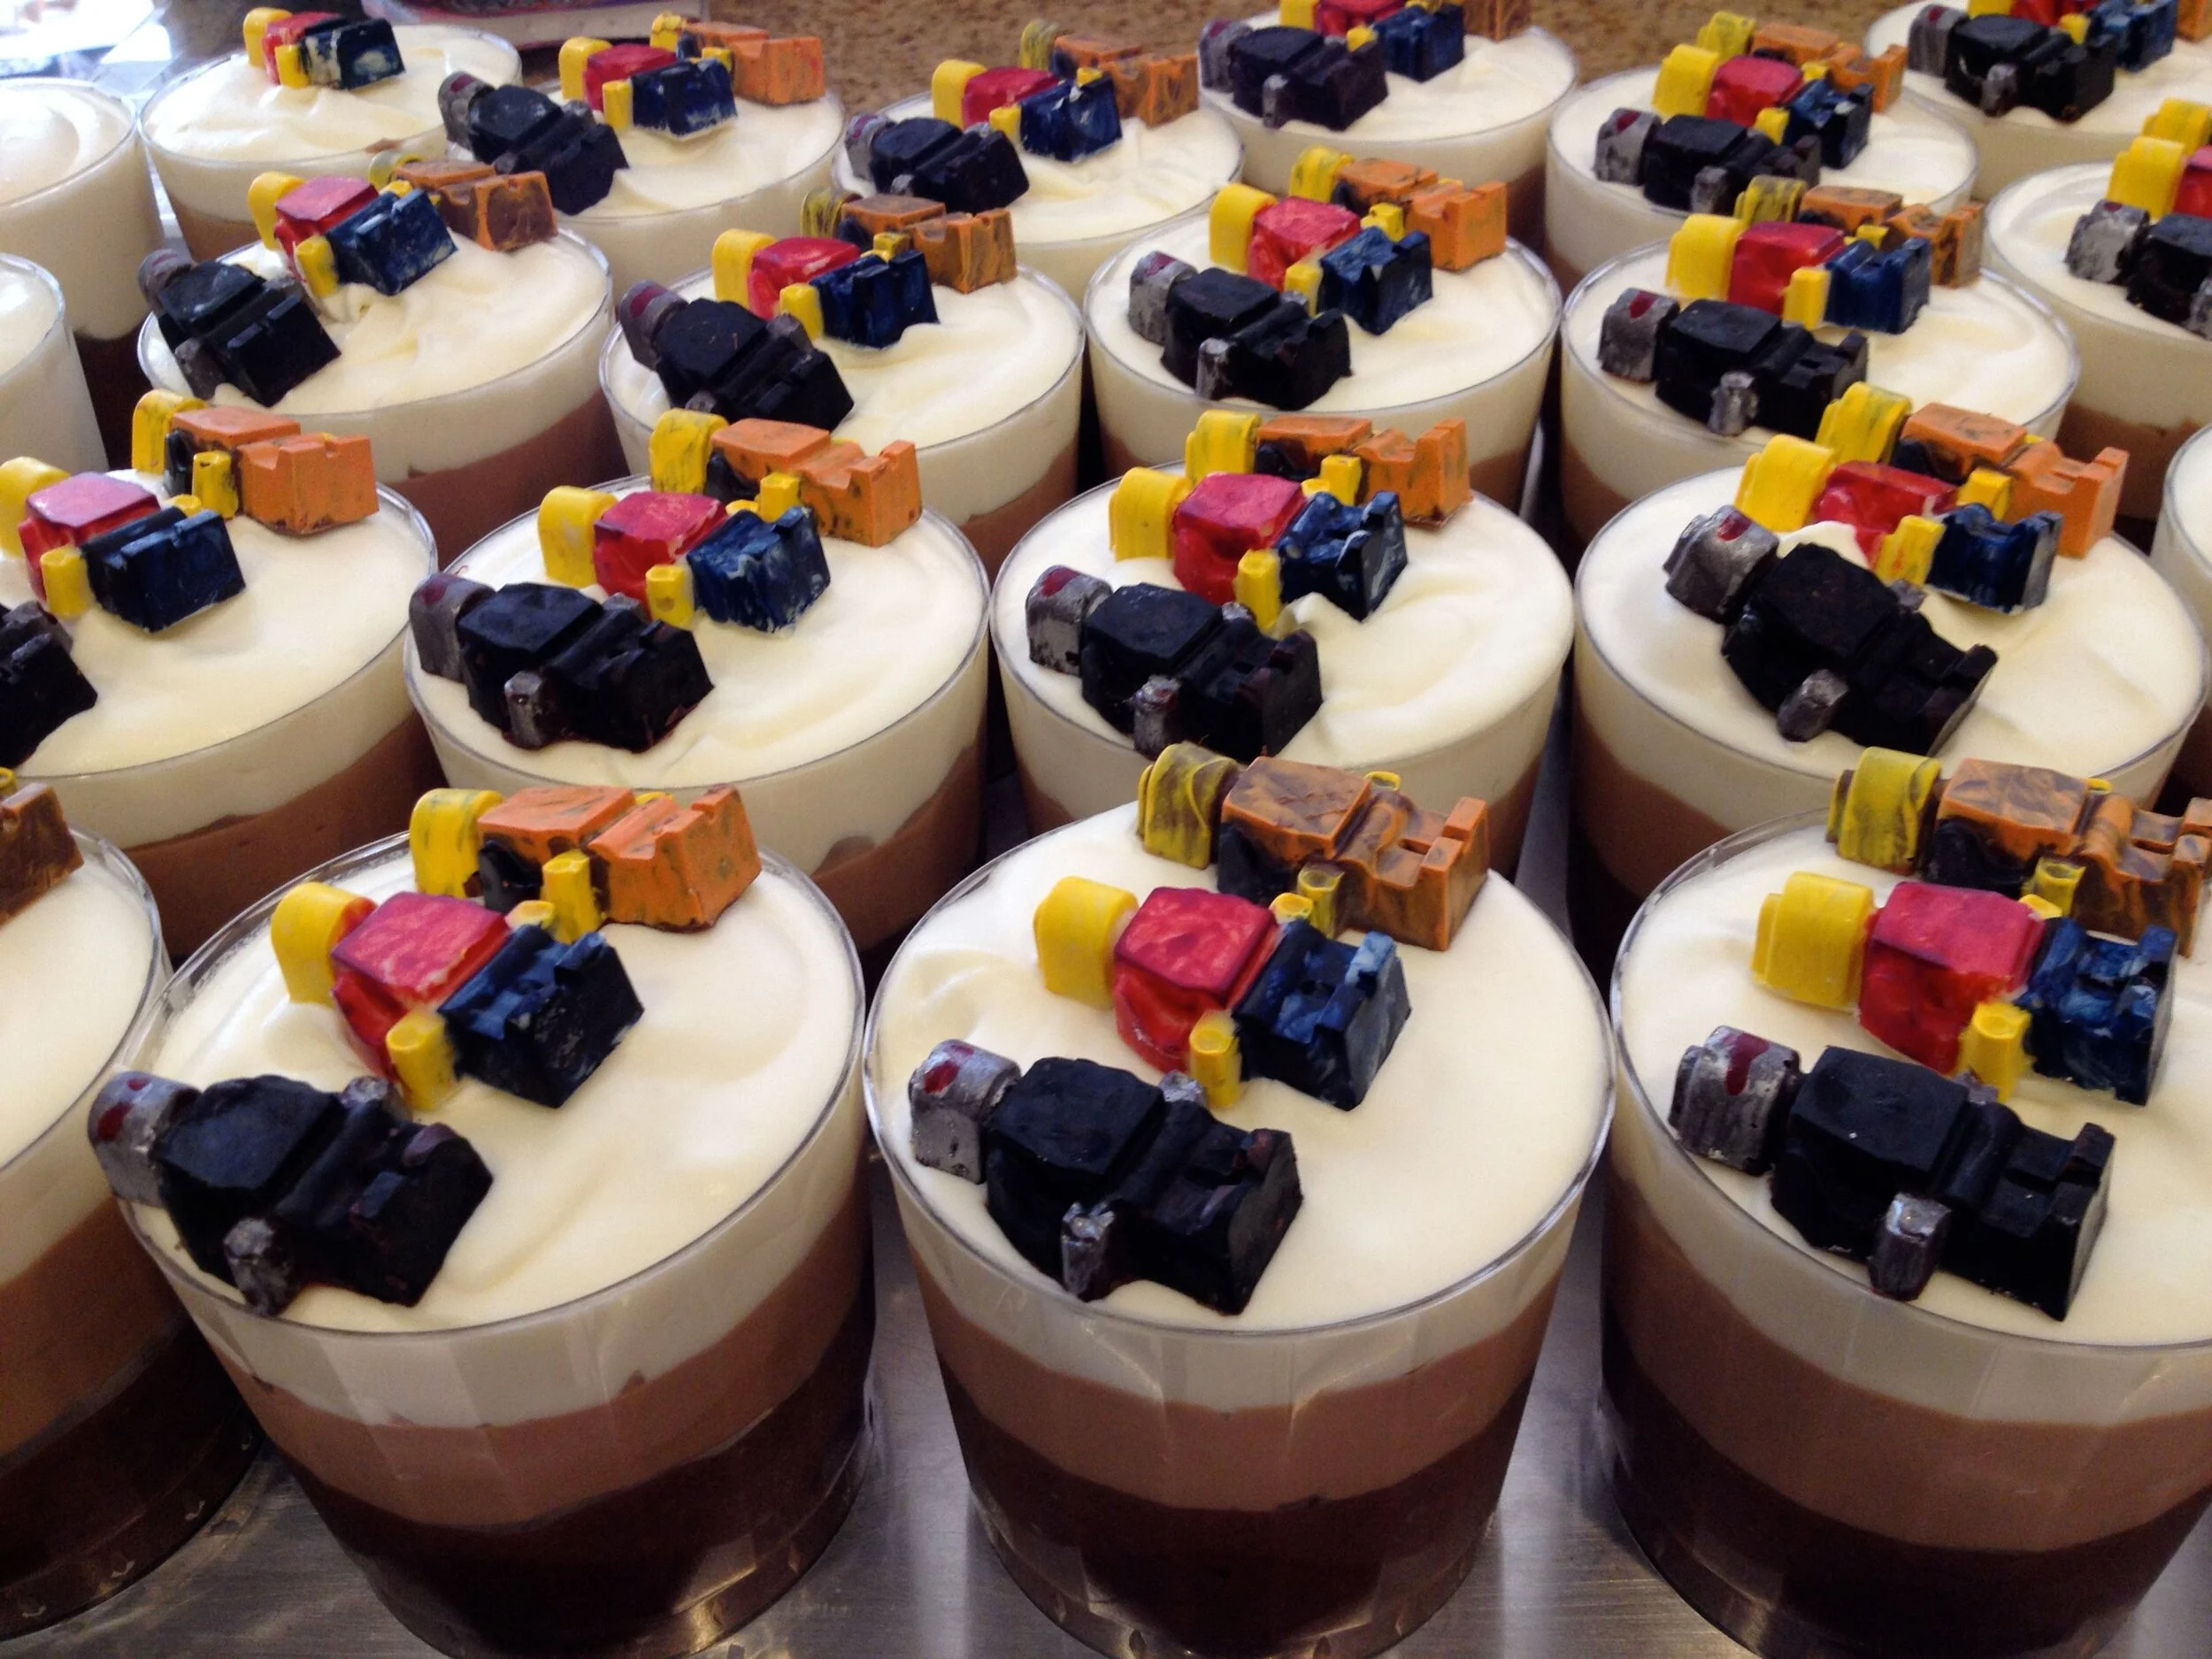
Lego Figure Mousse
For her birthday this year, my niece didn’t want a fancy cake, just triple chocolate mousse cups with Lego figures on them.
For her birthday this year, my niece didn’t want a fancy cake, just triple chocolate mousse cups with Lego figures on them.
Holiday Candy 2013
Flavors include raspberry caramel, pistachio marzipan, almond and pistachio nougat, lime ganache, and swiss rocks with almonds.
Head Chopping Cake
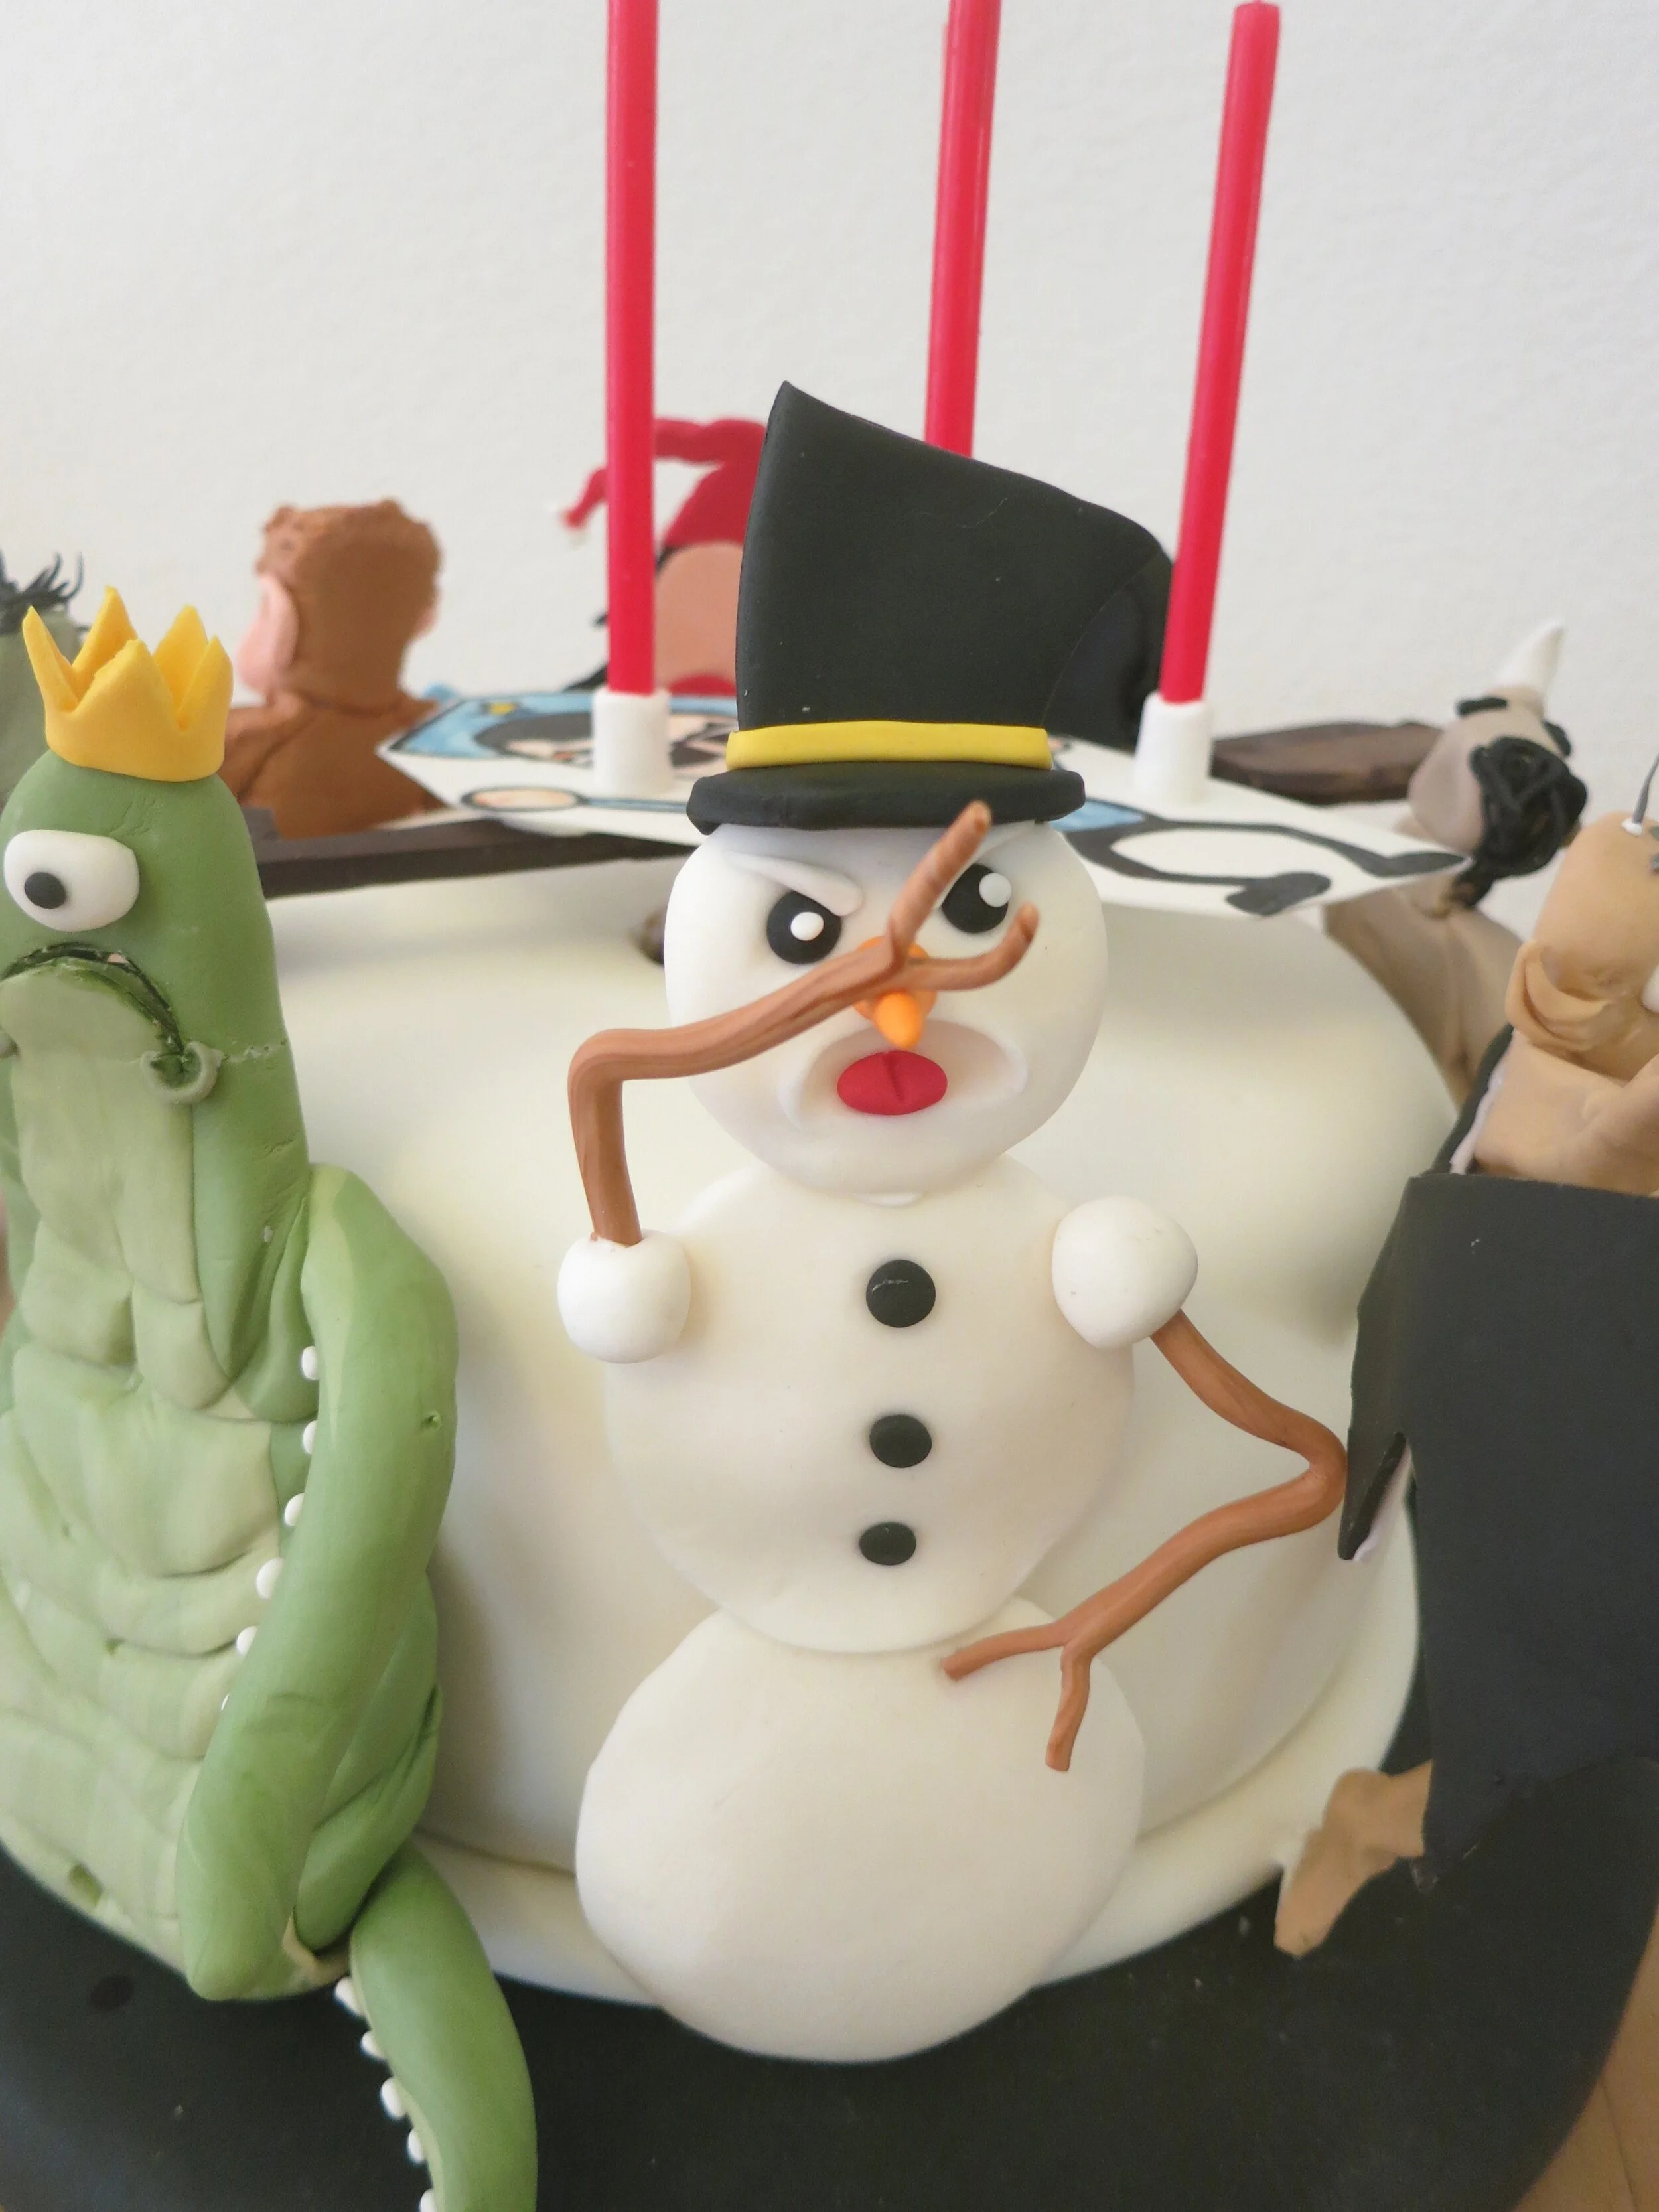
When I asked Sam what cake he wanted for his fourth birthday, of course he wanted an Axe Cop cake like his sister had.
When I asked Sam what cake he wanted for his fourth birthday, of course he wanted an Axe Cop cake like his sister had. I didn’t have time to make Sam quite as large a cake as I made for Alex, so I just went with a simple 8” round cake with a row of bad guys around the perimeter.
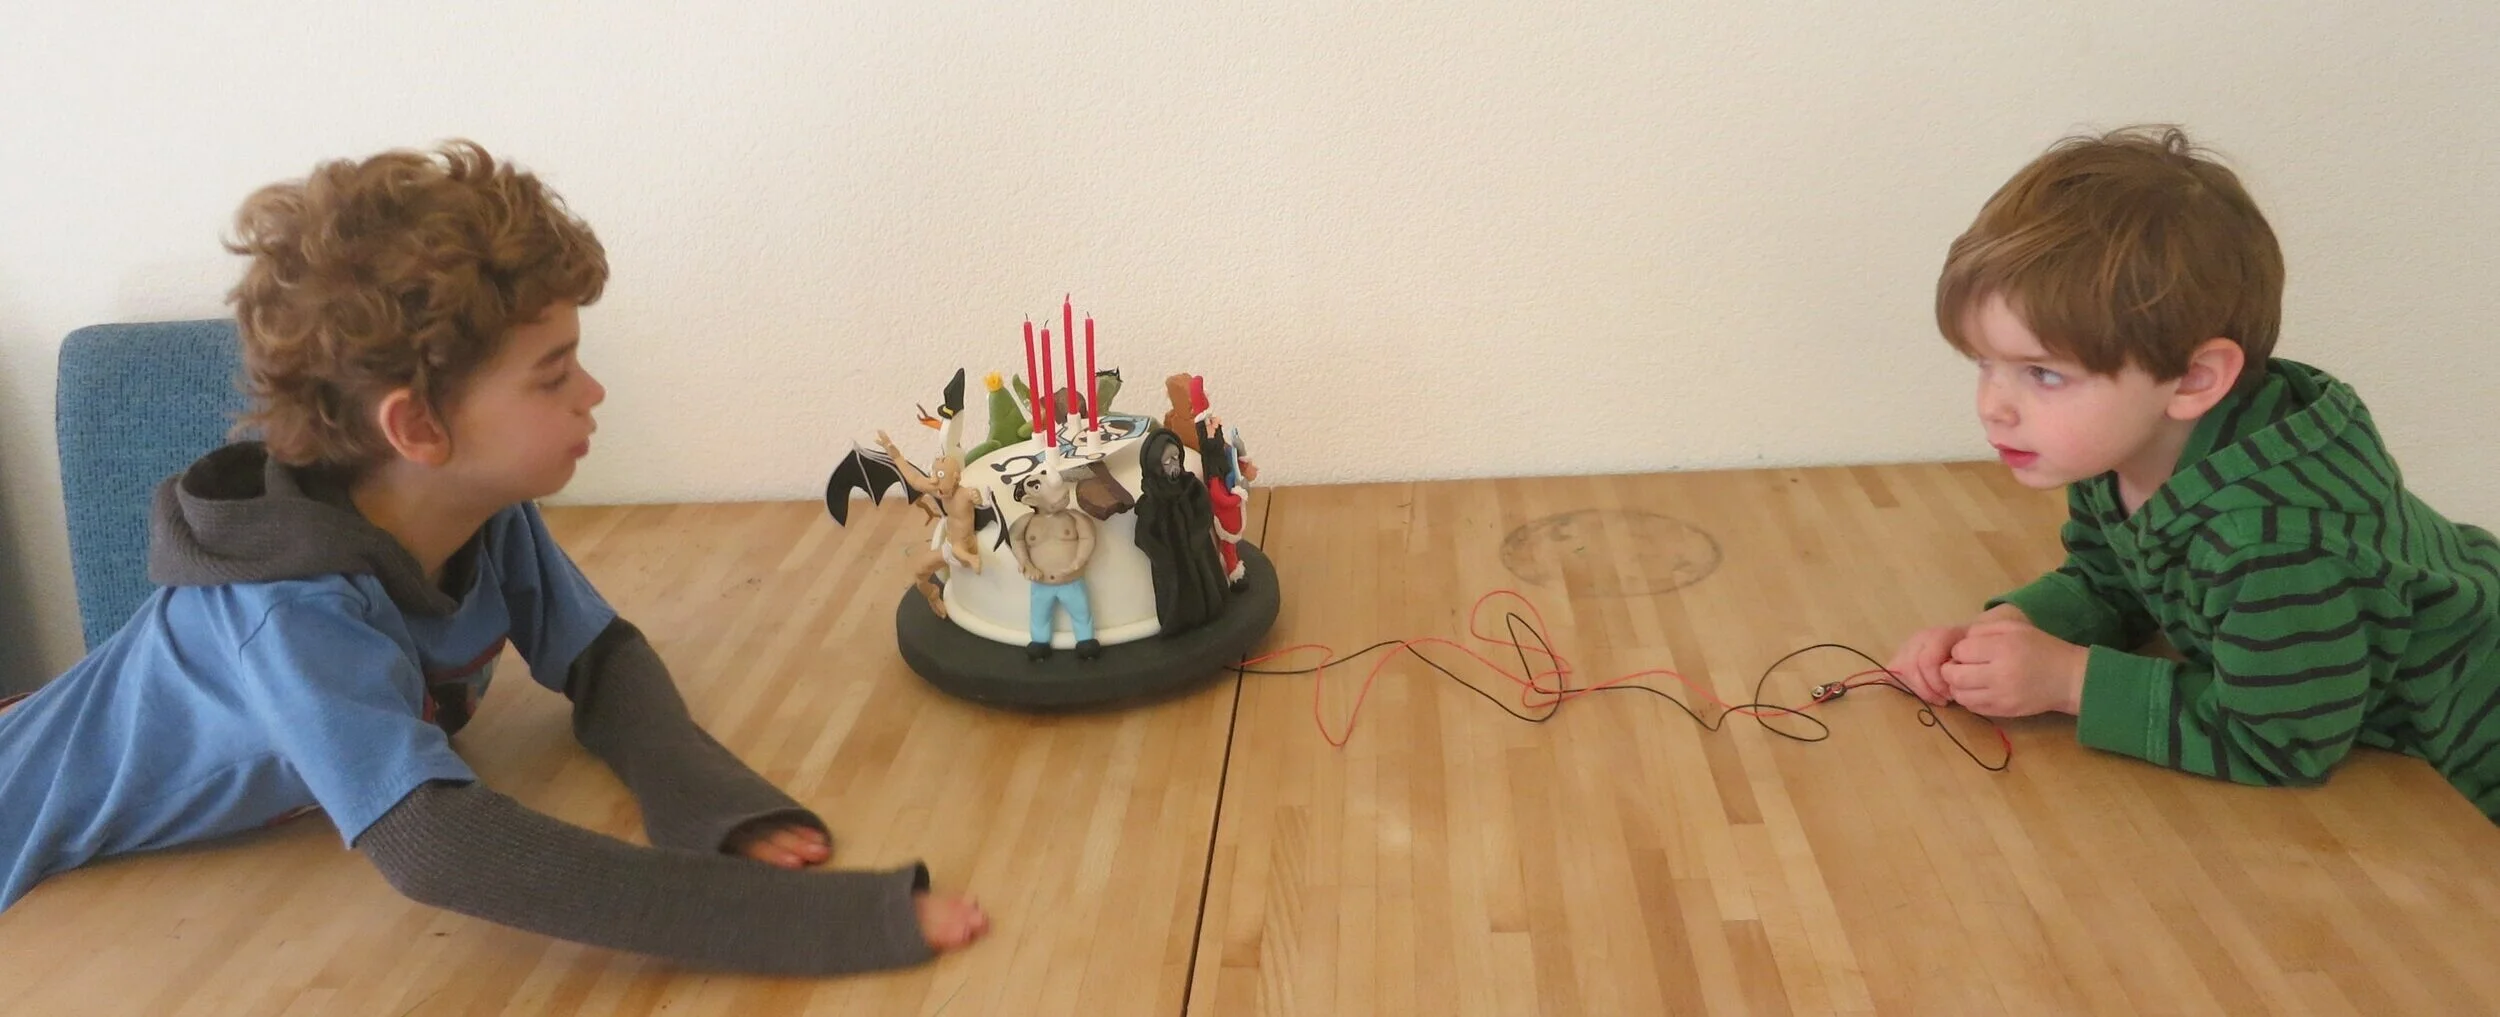
I stuck a motor in the middle, so that I could attach chocolate axes to chop the bad guys’ heads off. I really needed a stronger motor and a better way to attach the chocolate axes, but we did eventually manage to decapitate and/or knock over all the gum paste bad guys.
Sugar Dome
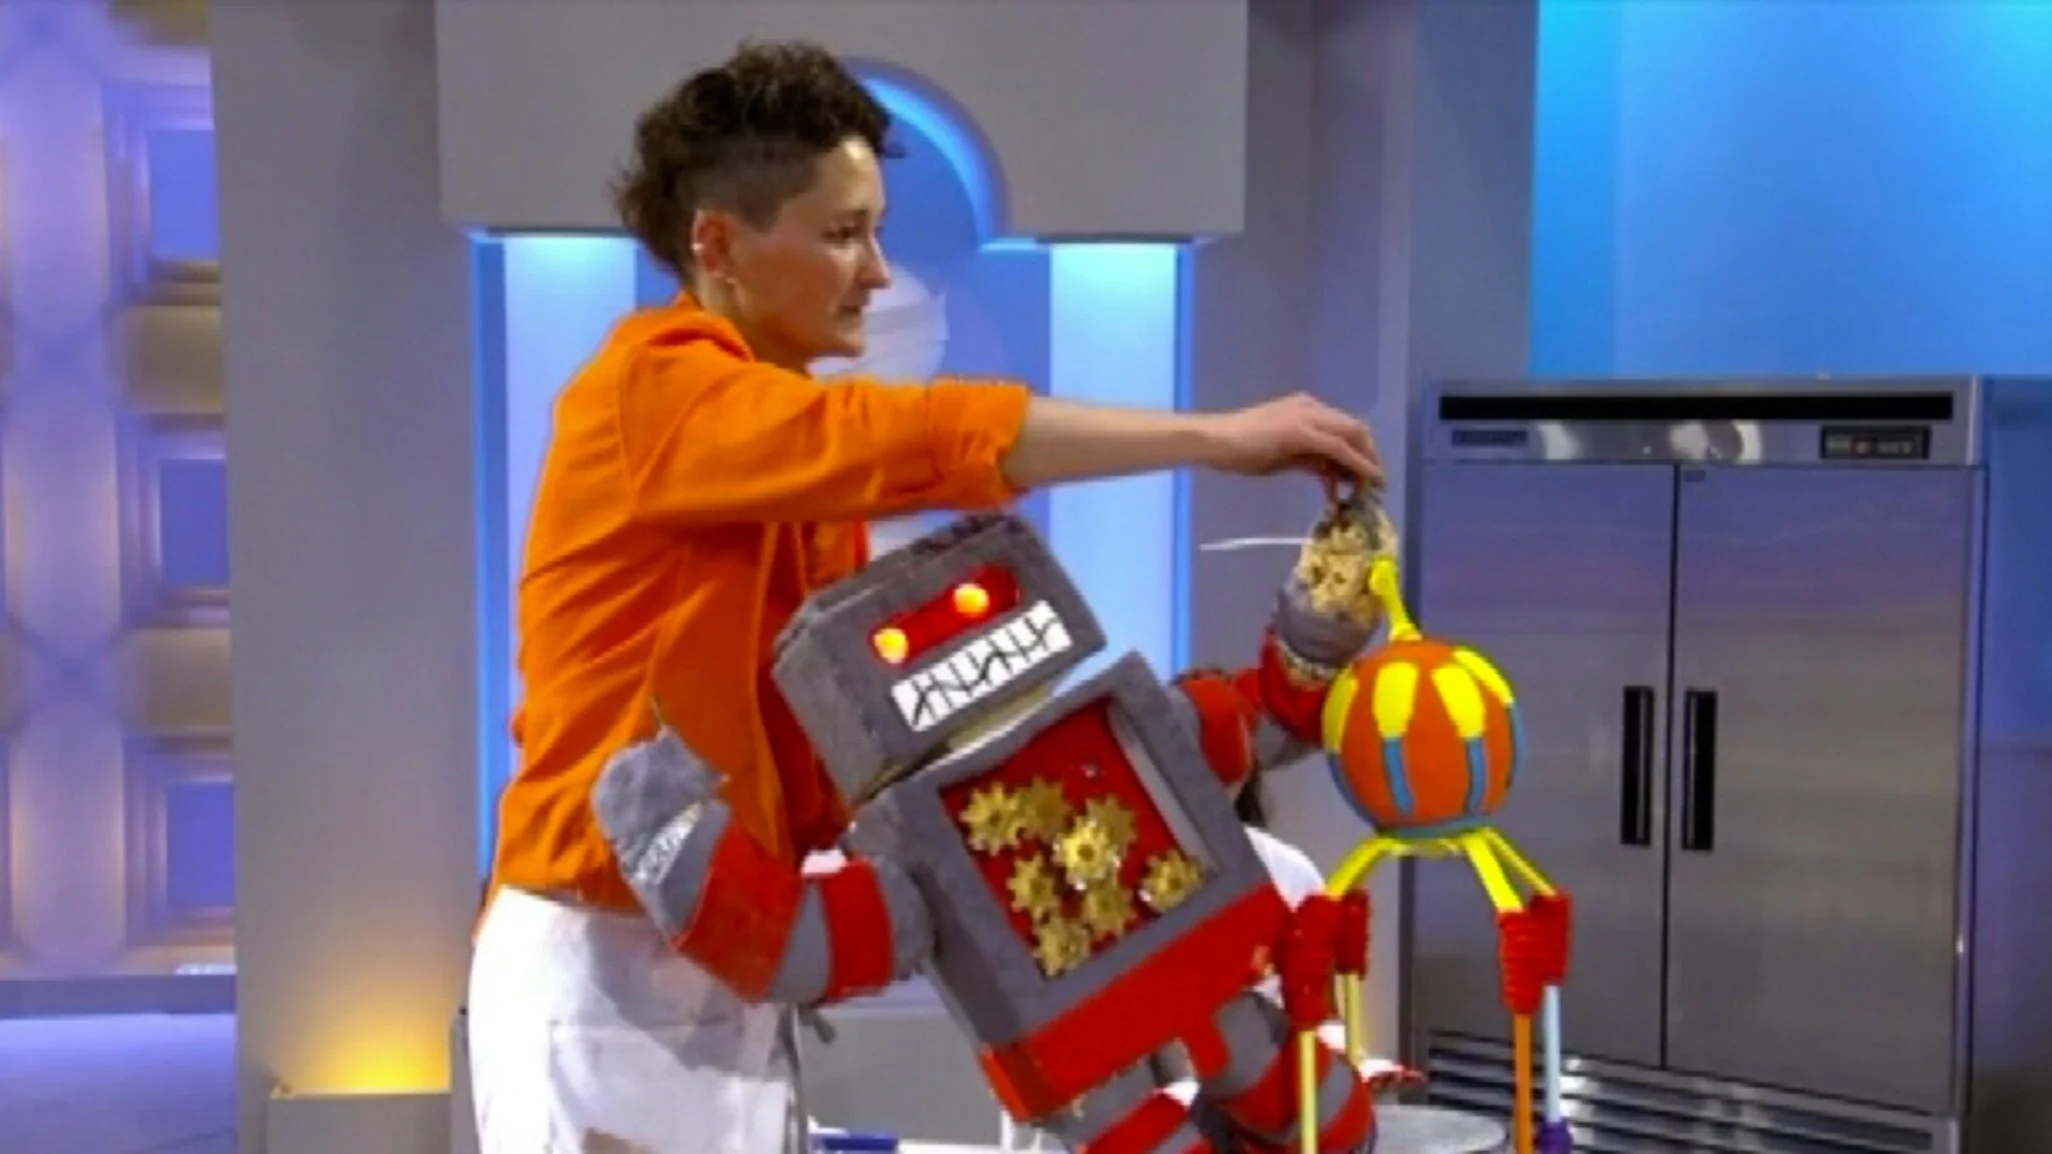
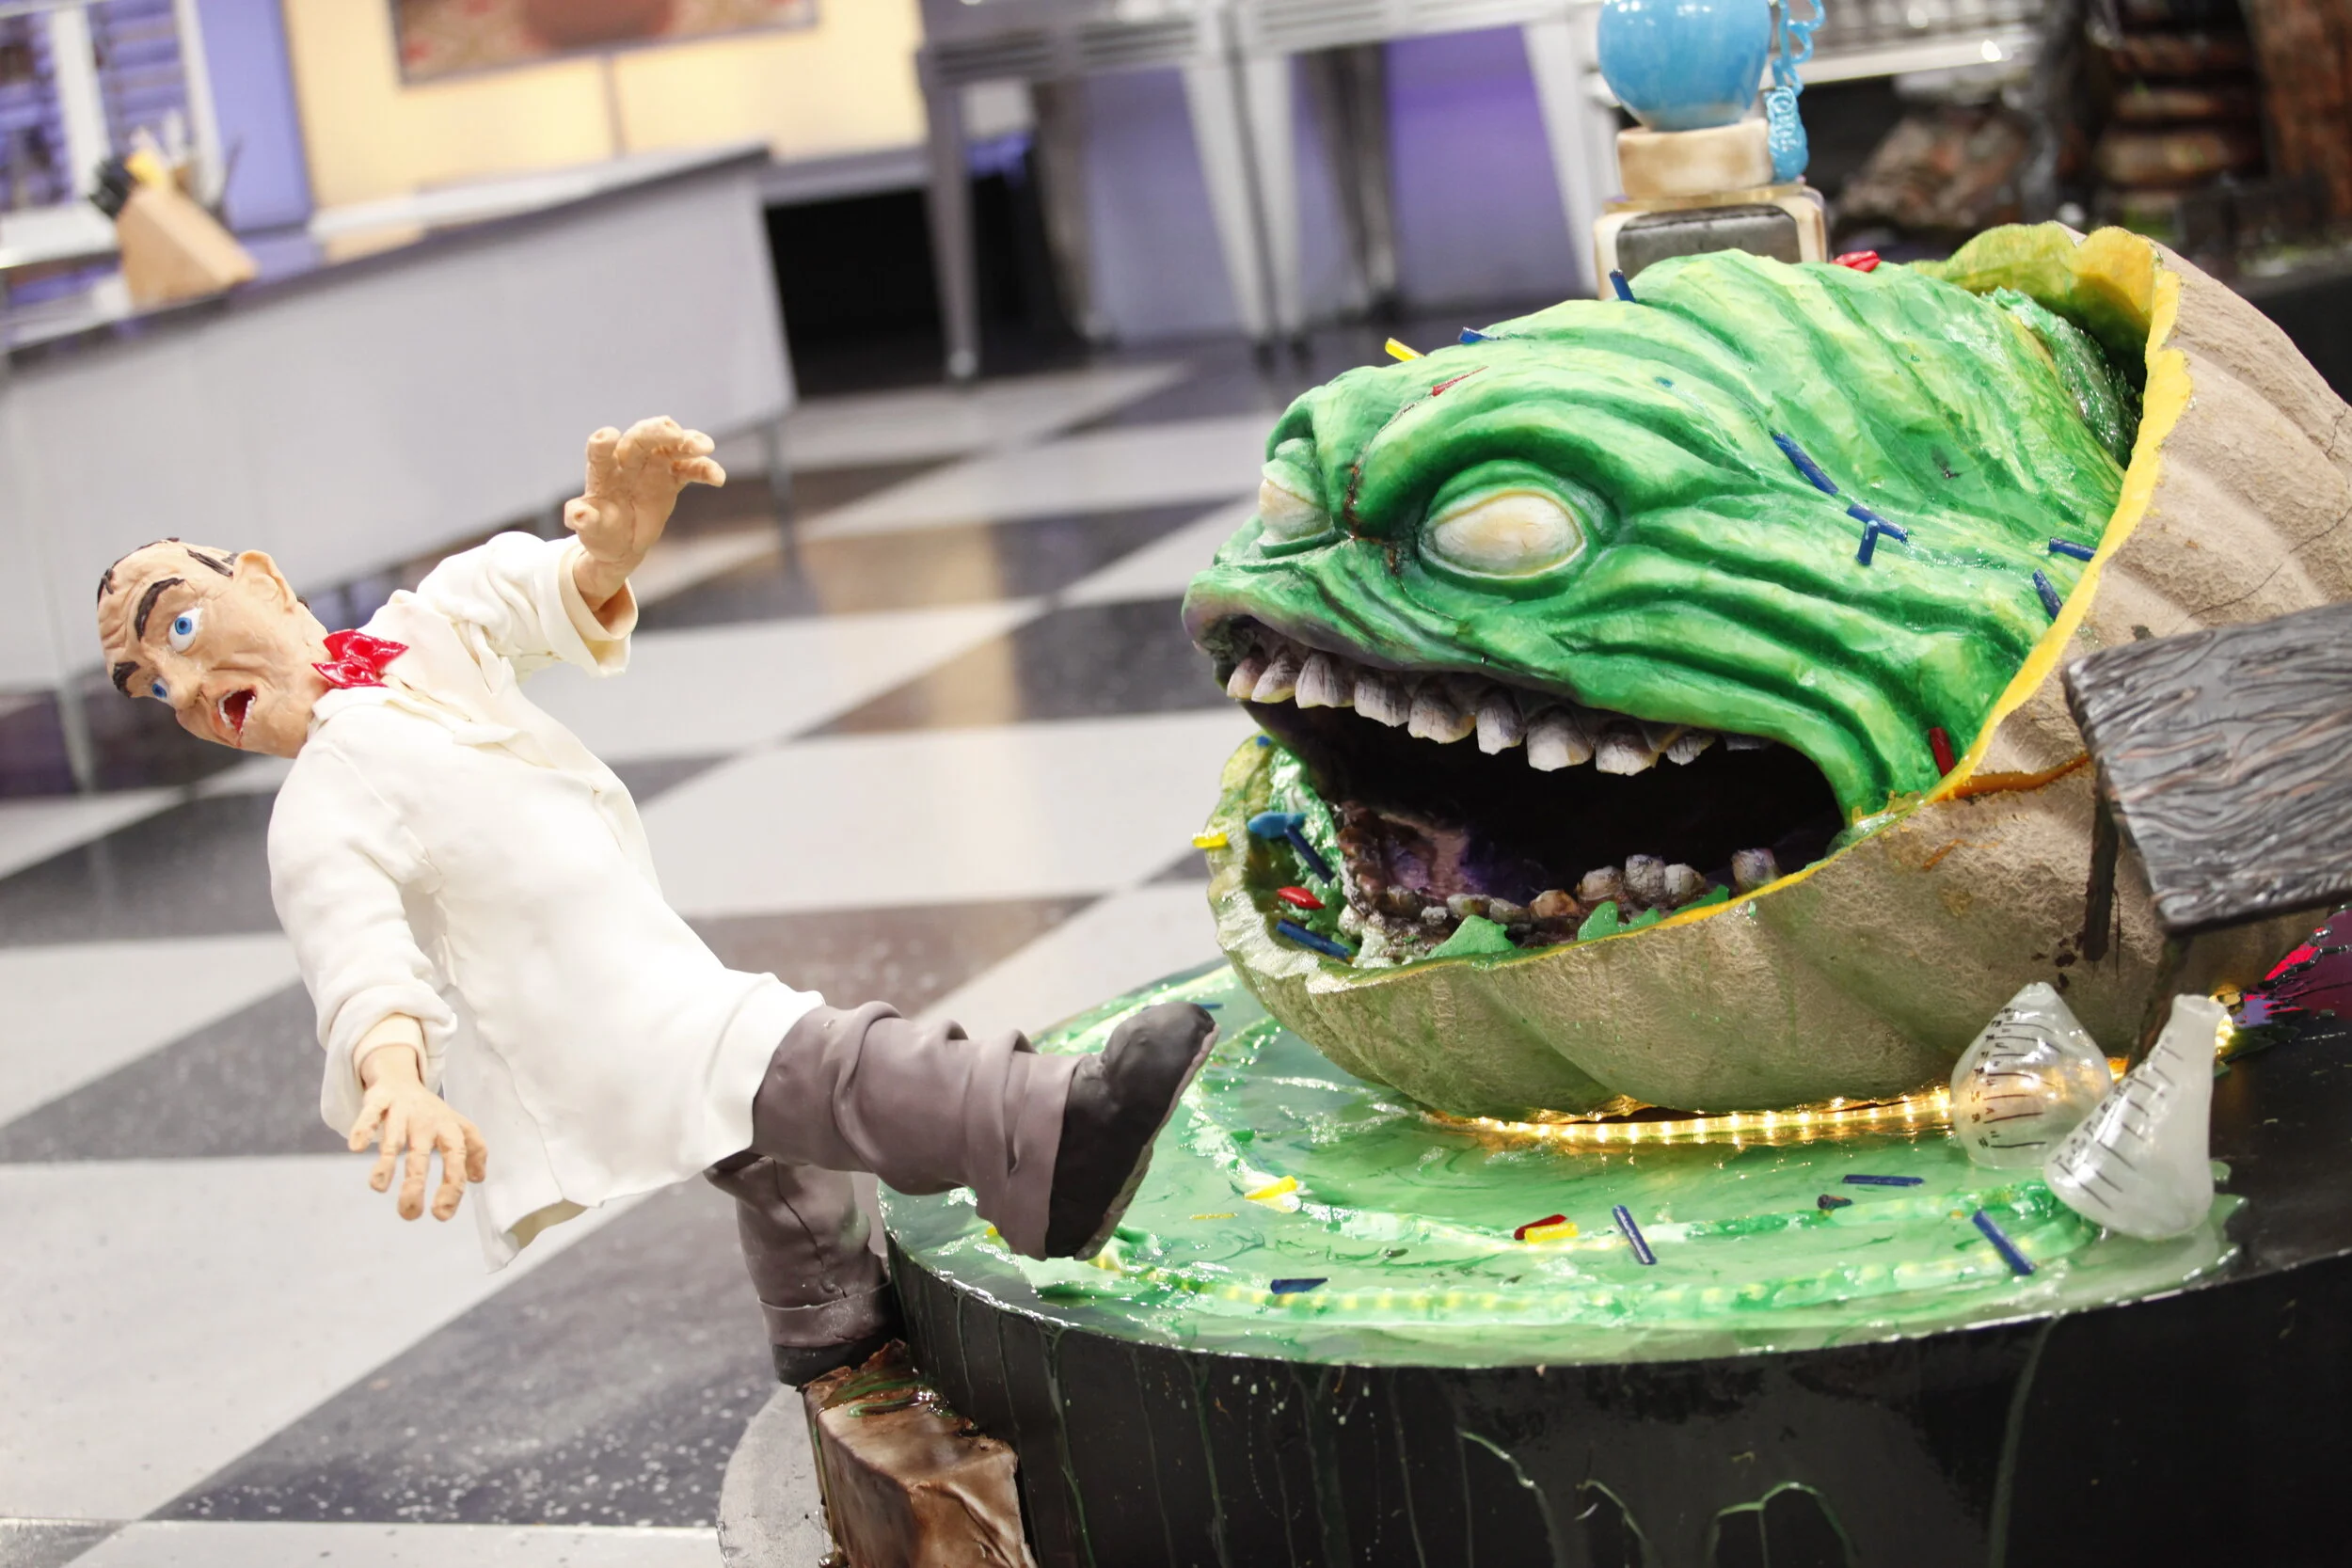
I’m back on Food Network, on the Sugar Dome episode “When Toy Stores Come to Life at Night!”
Halloween Wars!
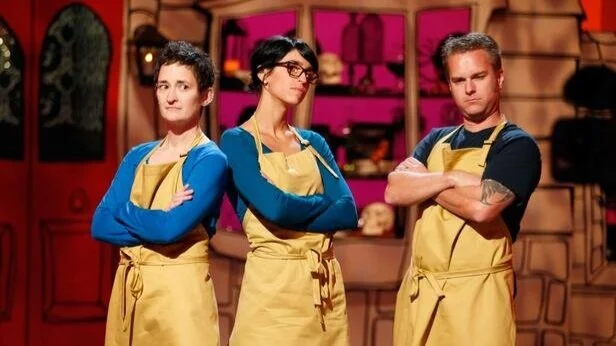
Check it out – I’m a warrior of Halloween Wars! You can watch my TV debut on Food Network, October 7th at 9:00 Eastern and Pacific.
Check it out - I'm a warrior of Halloween Wars! You can watch my TV debut on Food Network, October 7th at 9:00 Eastern and Pacific.
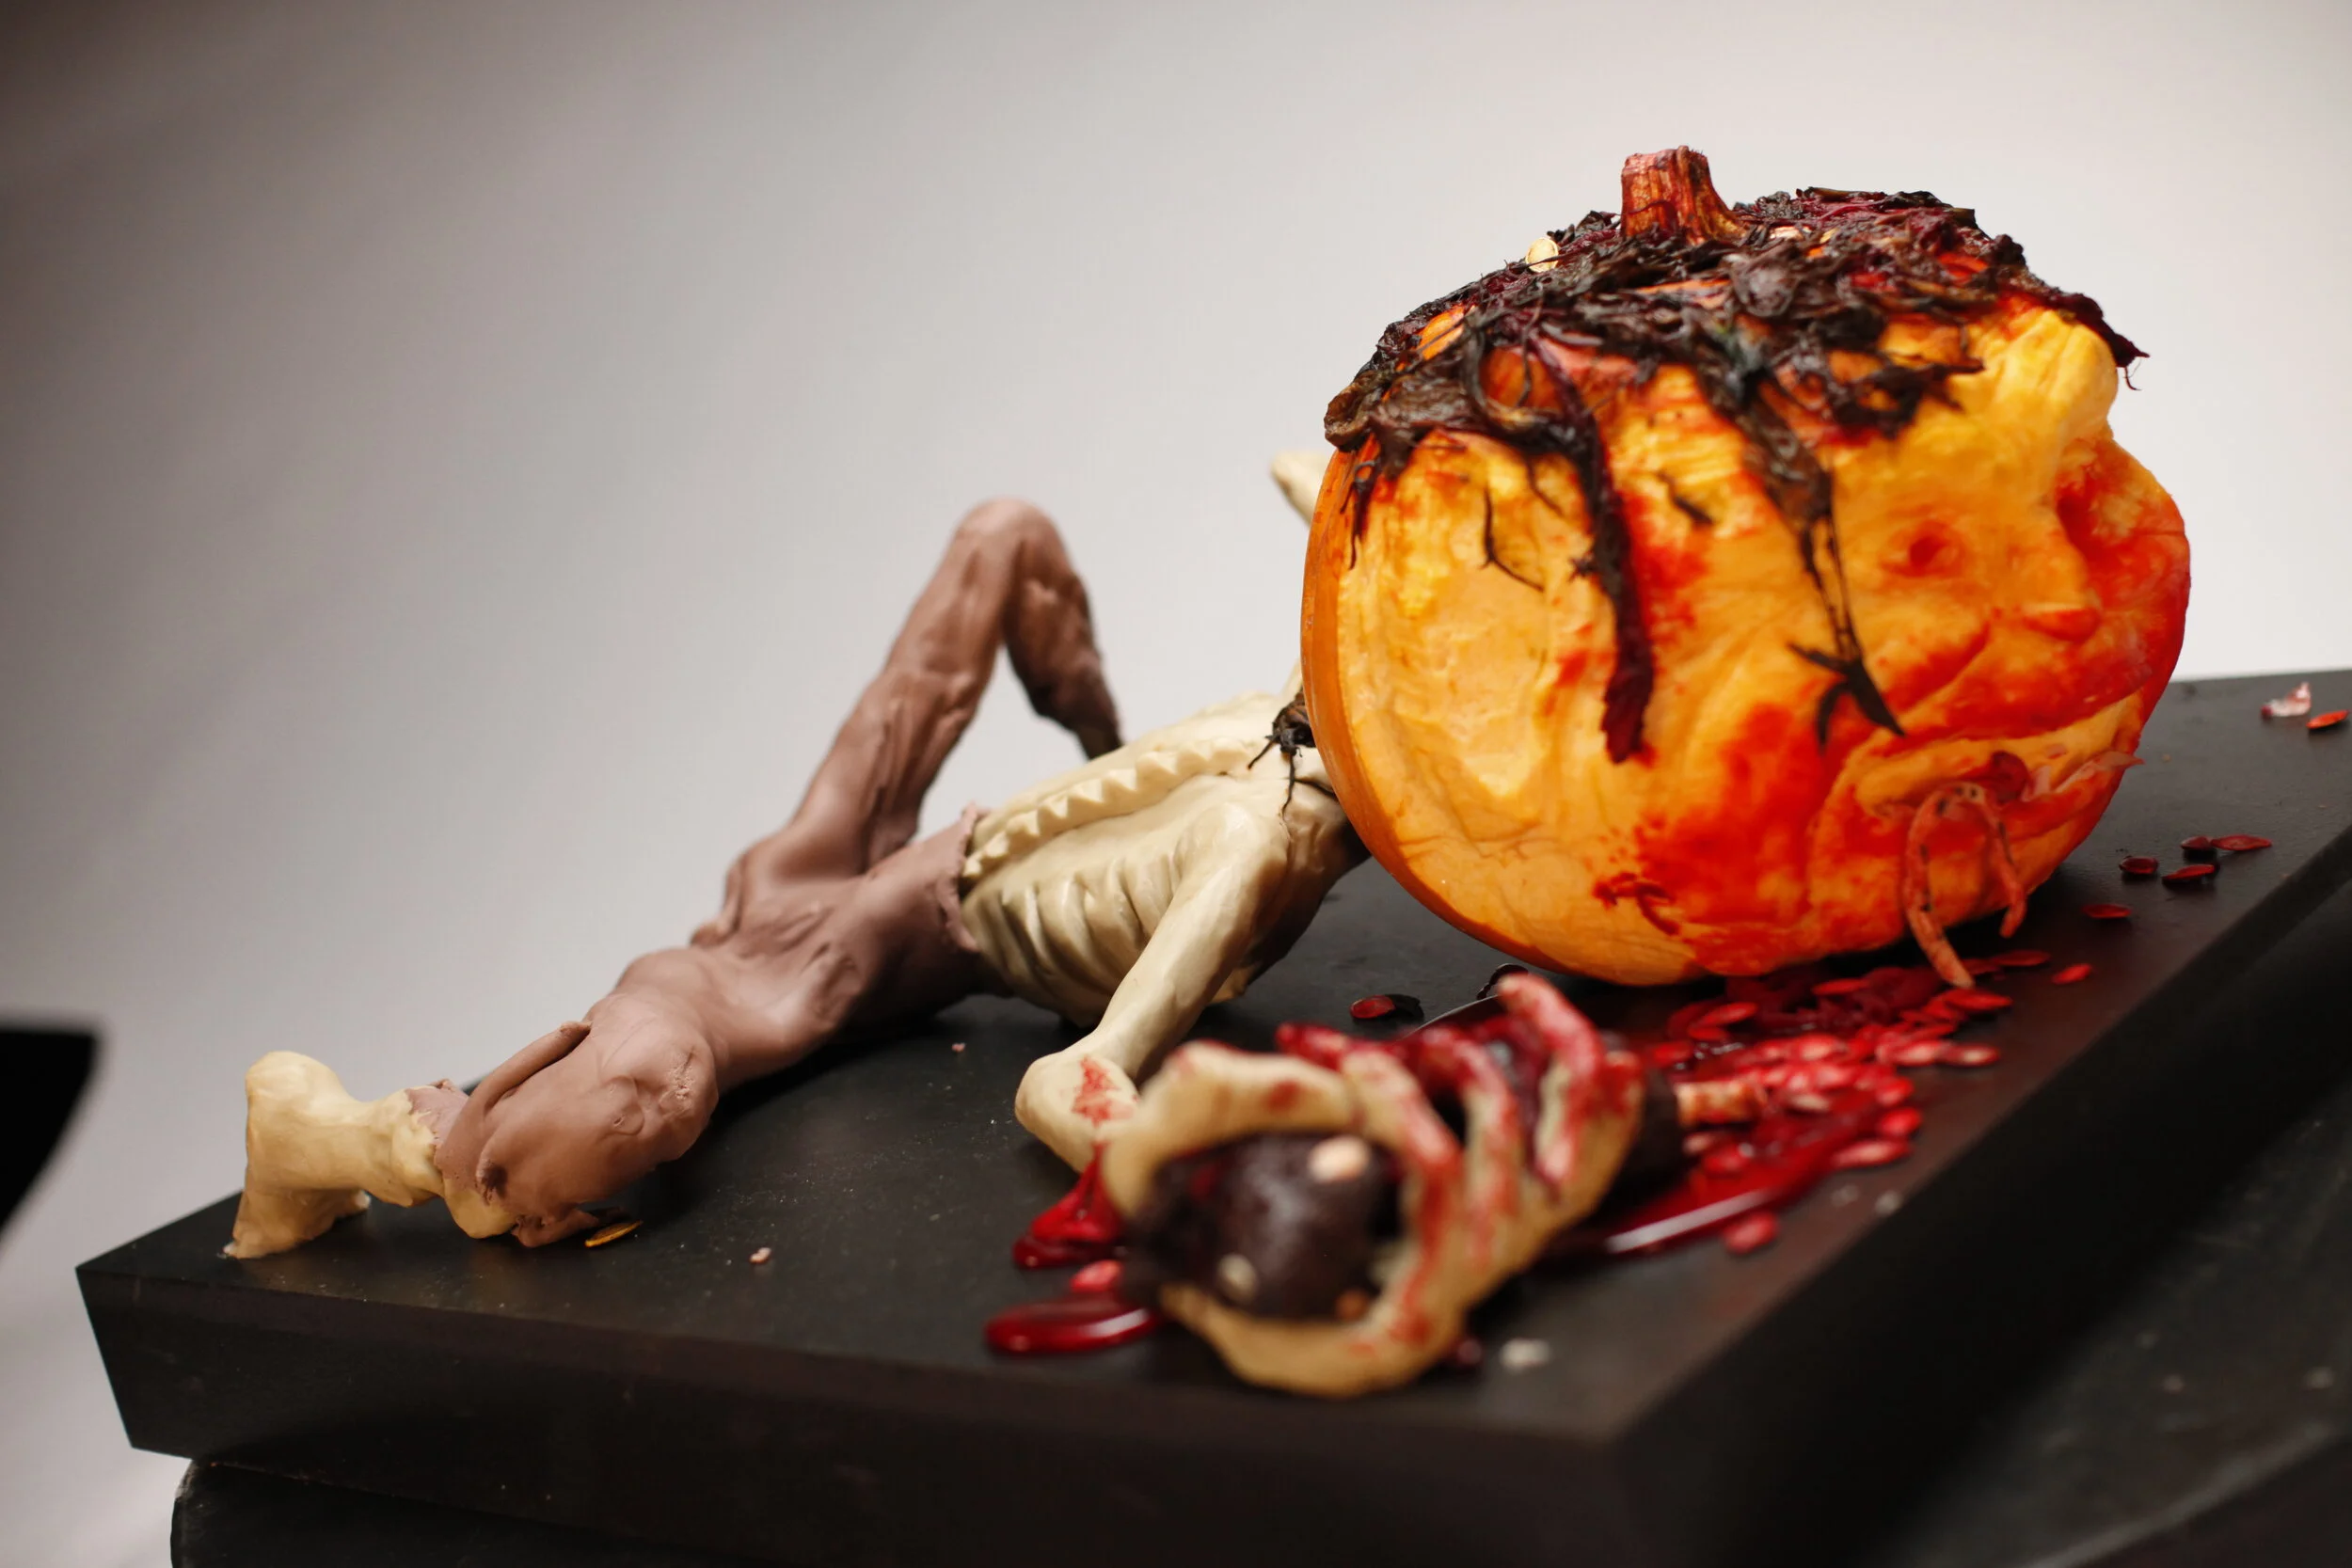
UPDATE: Here are the pieces we made.
Eyeball Cordial Cherries
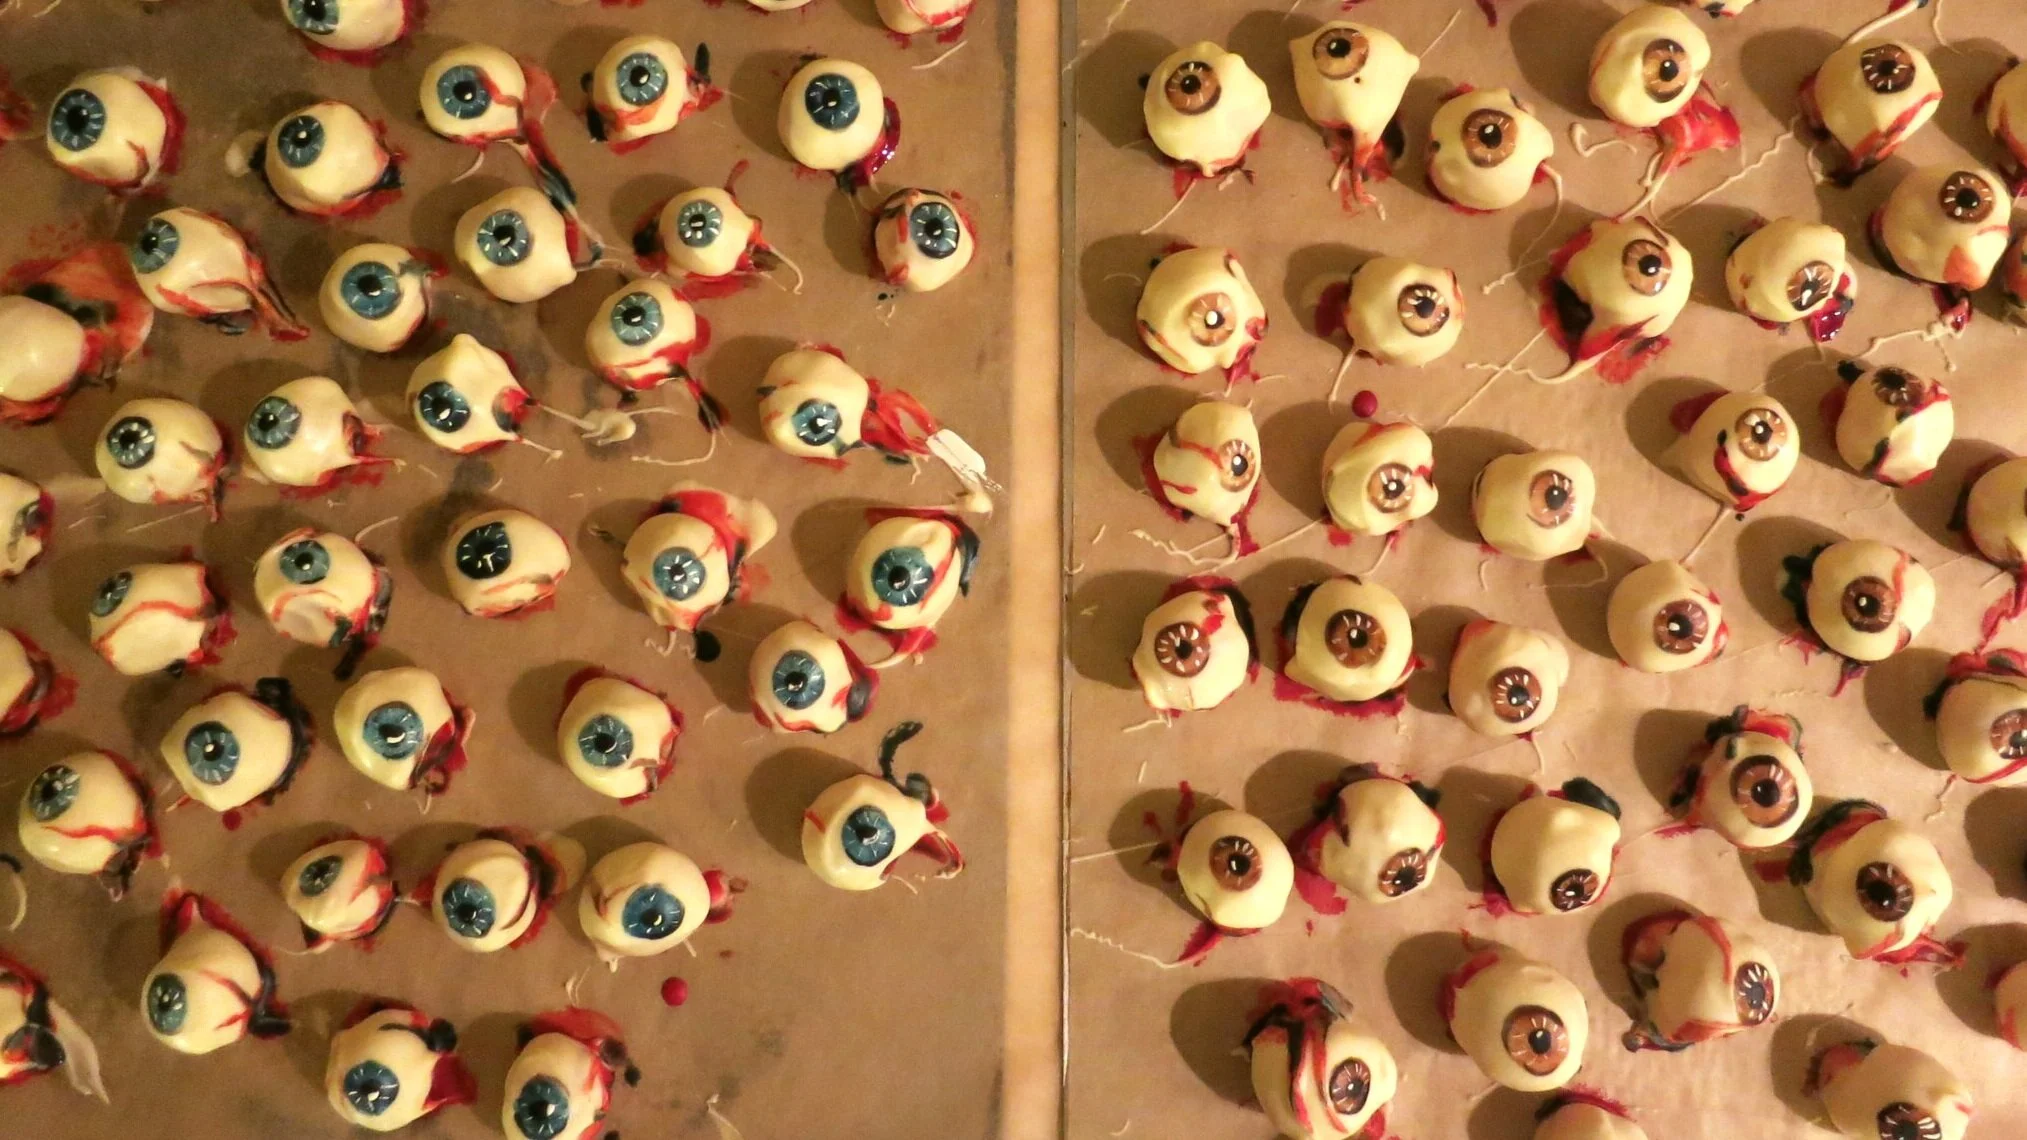
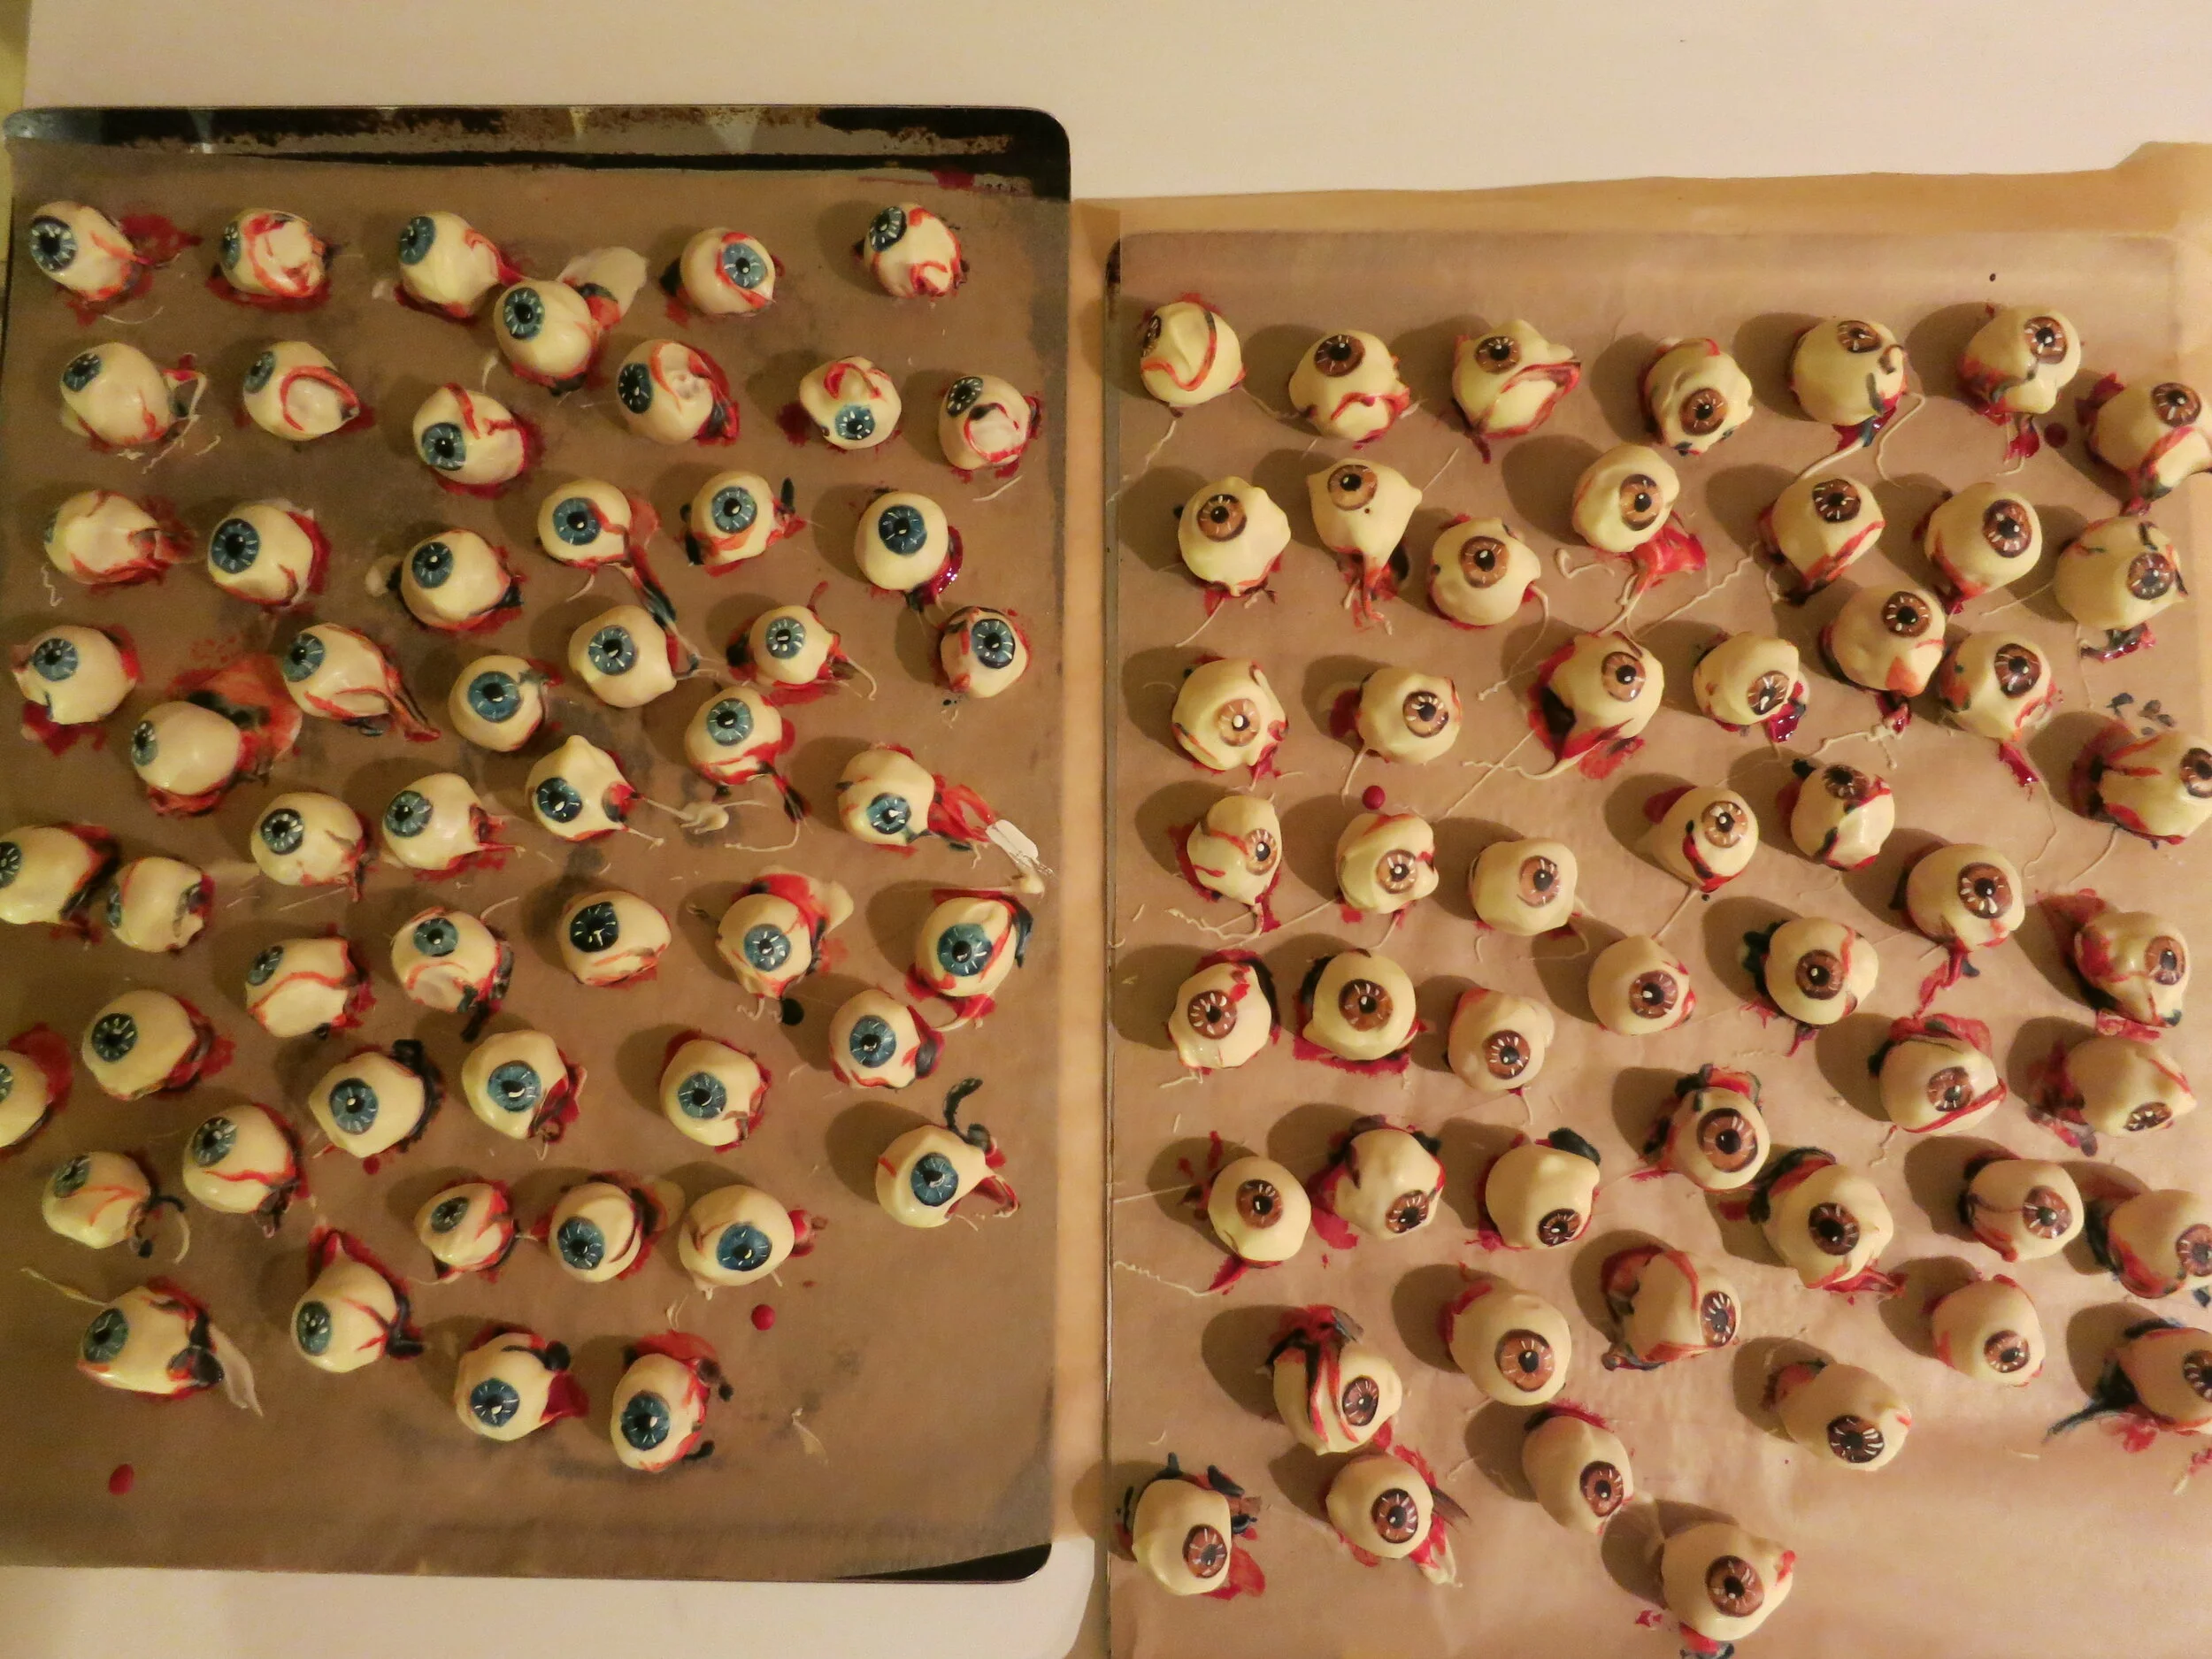
One of my personal favorite candy invention. They squish just like a real eyeball (maybe?) when you bite into them and they taste delicious!
One of my personal favorite candy inventions. They squish just like a real eyeball (maybe?) when you bite into them and they taste delicious! The color of the iris distinguishes between the brandy-soaked and non-brandy soaked varieties.
Axe Cop Cake
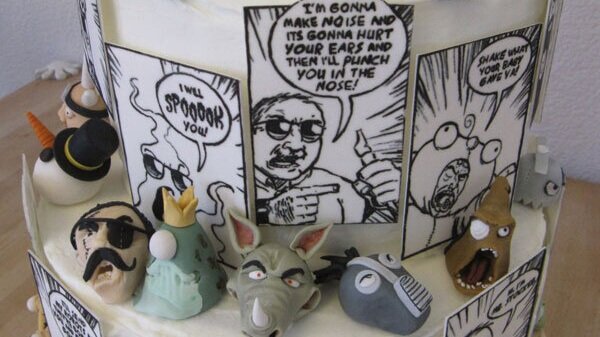
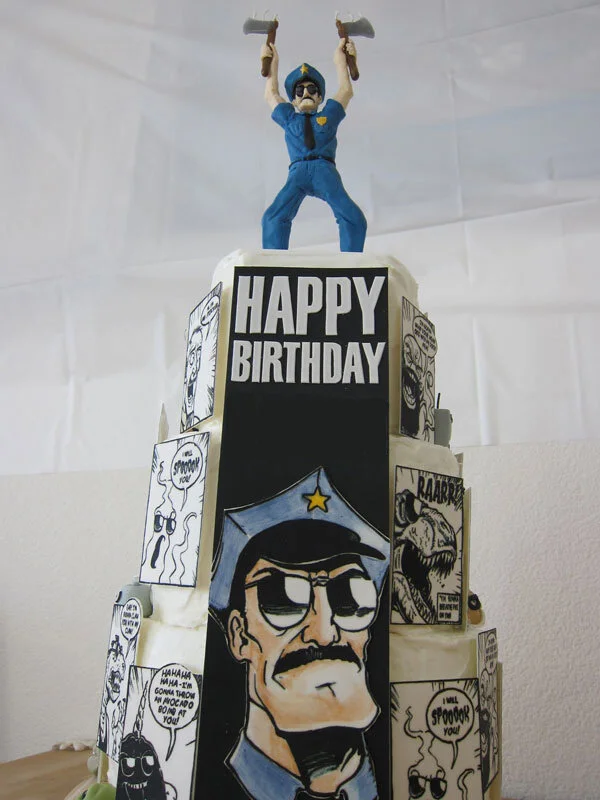
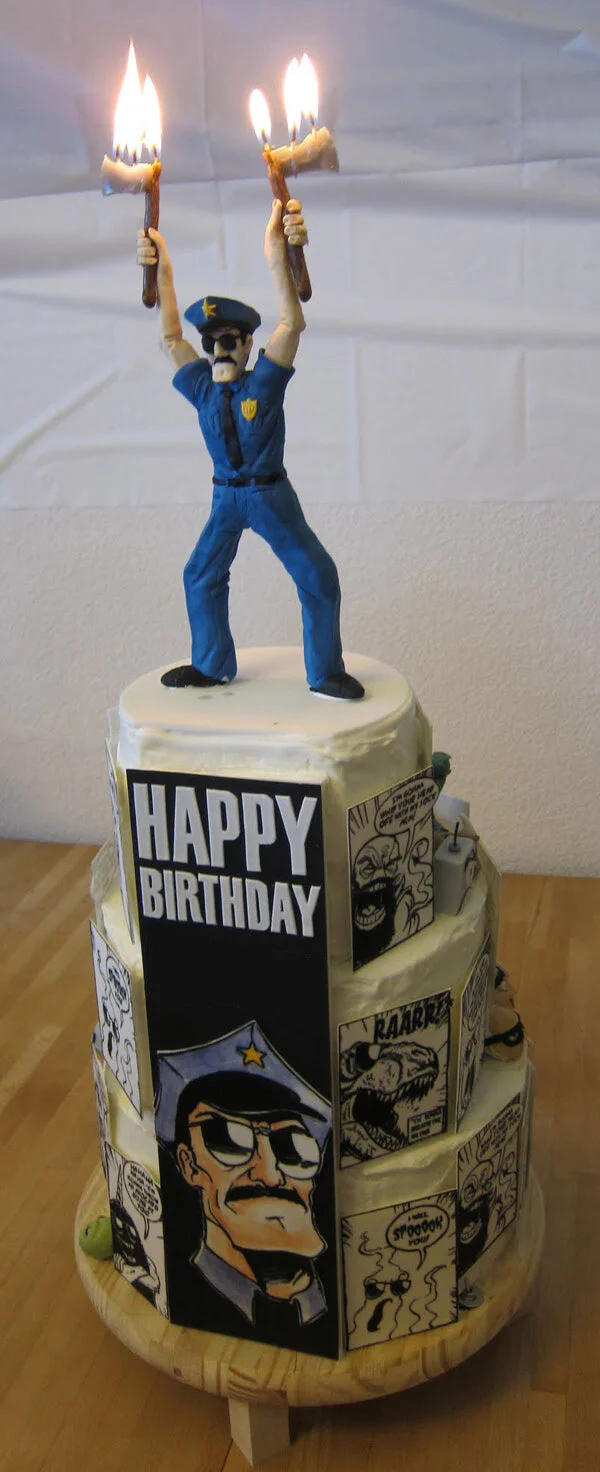
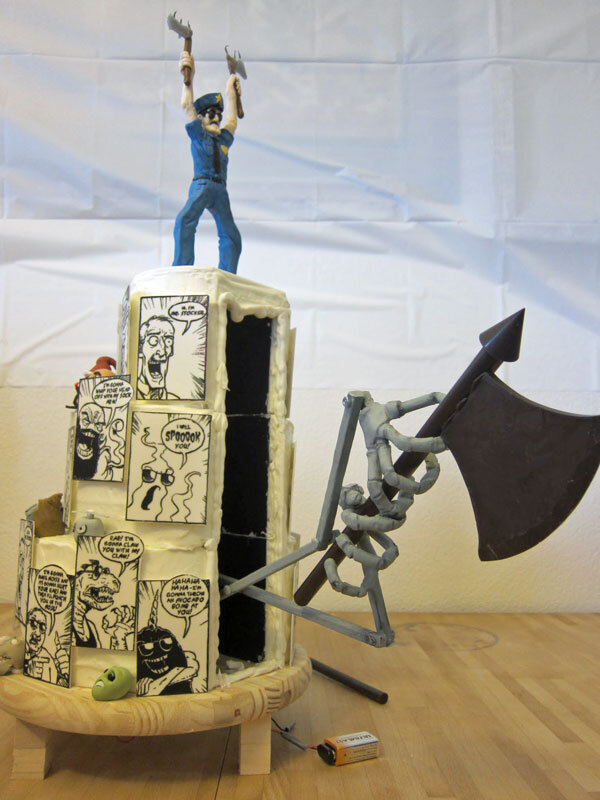
For my niece’s sixth birthday we decided on an Axe Cop theme. Axe Cop’s favorite food is birthday cake with a candle of himself on it, so I took that as my starting place for the cake.
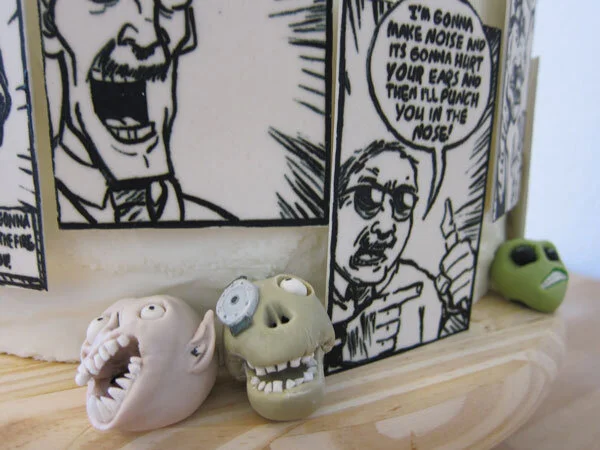
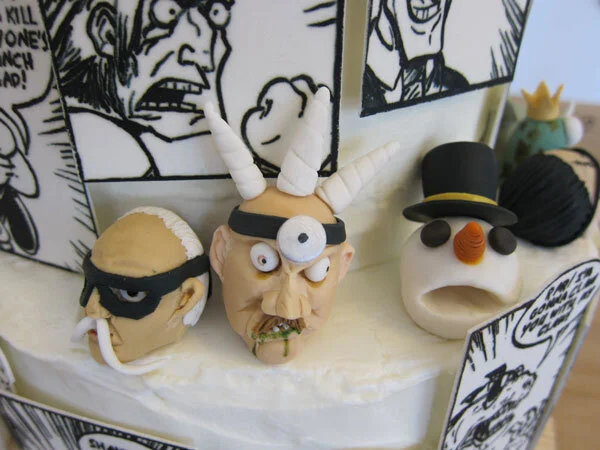
The cake topper is gum paste with axe candles in his hands. The gum paste comic panels around the sides are all of Axe Cop’s team members with their catch phrases. The gum paste heads are bad guys’ heads that Axe Cop has chopped off.
Axe Cop also has a robot that lives in his moustache and hands him weapons at need. So I made robot arms holding a chocolate axe and concealed them inside the cake. Right before we served the cake, Alex flipped the switch and the arm smashed dramatically out of the cake. Sadly, the chocolate axe broke on the way out, but I had a spare on hand for the photo op.
Sneetch Cake
I have been looking forward to seeing my niece and nephew perform in school plays since before they were born. Finally, my dream has come true. At her pre-K graduation, my niece Alex appeared in their stage adaptation of Dr. Suess’s The Sneetches. To celebrate her accomplishment, I decided to make her a Sneetch cake.
I have been looking forward to seeing my niece and nephew perform in school plays since before they were born. Finally, my dream has come true. At her pre-K graduation, my niece Alex appeared in their stage adaptation of Dr. Suess’s The Sneetches. My completely and totally unbiased expert opinion is that Alex was clearly the best Sneetch in the bunch. To celebrate her accomplishment, I decided to make her a Sneetch cake.
It would have been fairly easy to make a Sneetch sitting down, so of course I didn’t go that route. I wanted to make a standing up Sneetch because it would give me the opportunity to try one of the copper tubing armatures that I always see on Food Network Challenge and Ace of Cakes. I chose to attempt the pose of a proud newly-starred Sneetch thrusting out its belly. Ultimately, I'm not convinced that I fully achieved the balance and expression that I was looking for in the pose, so next time I'll have to take a little more care with the shape of the armature.
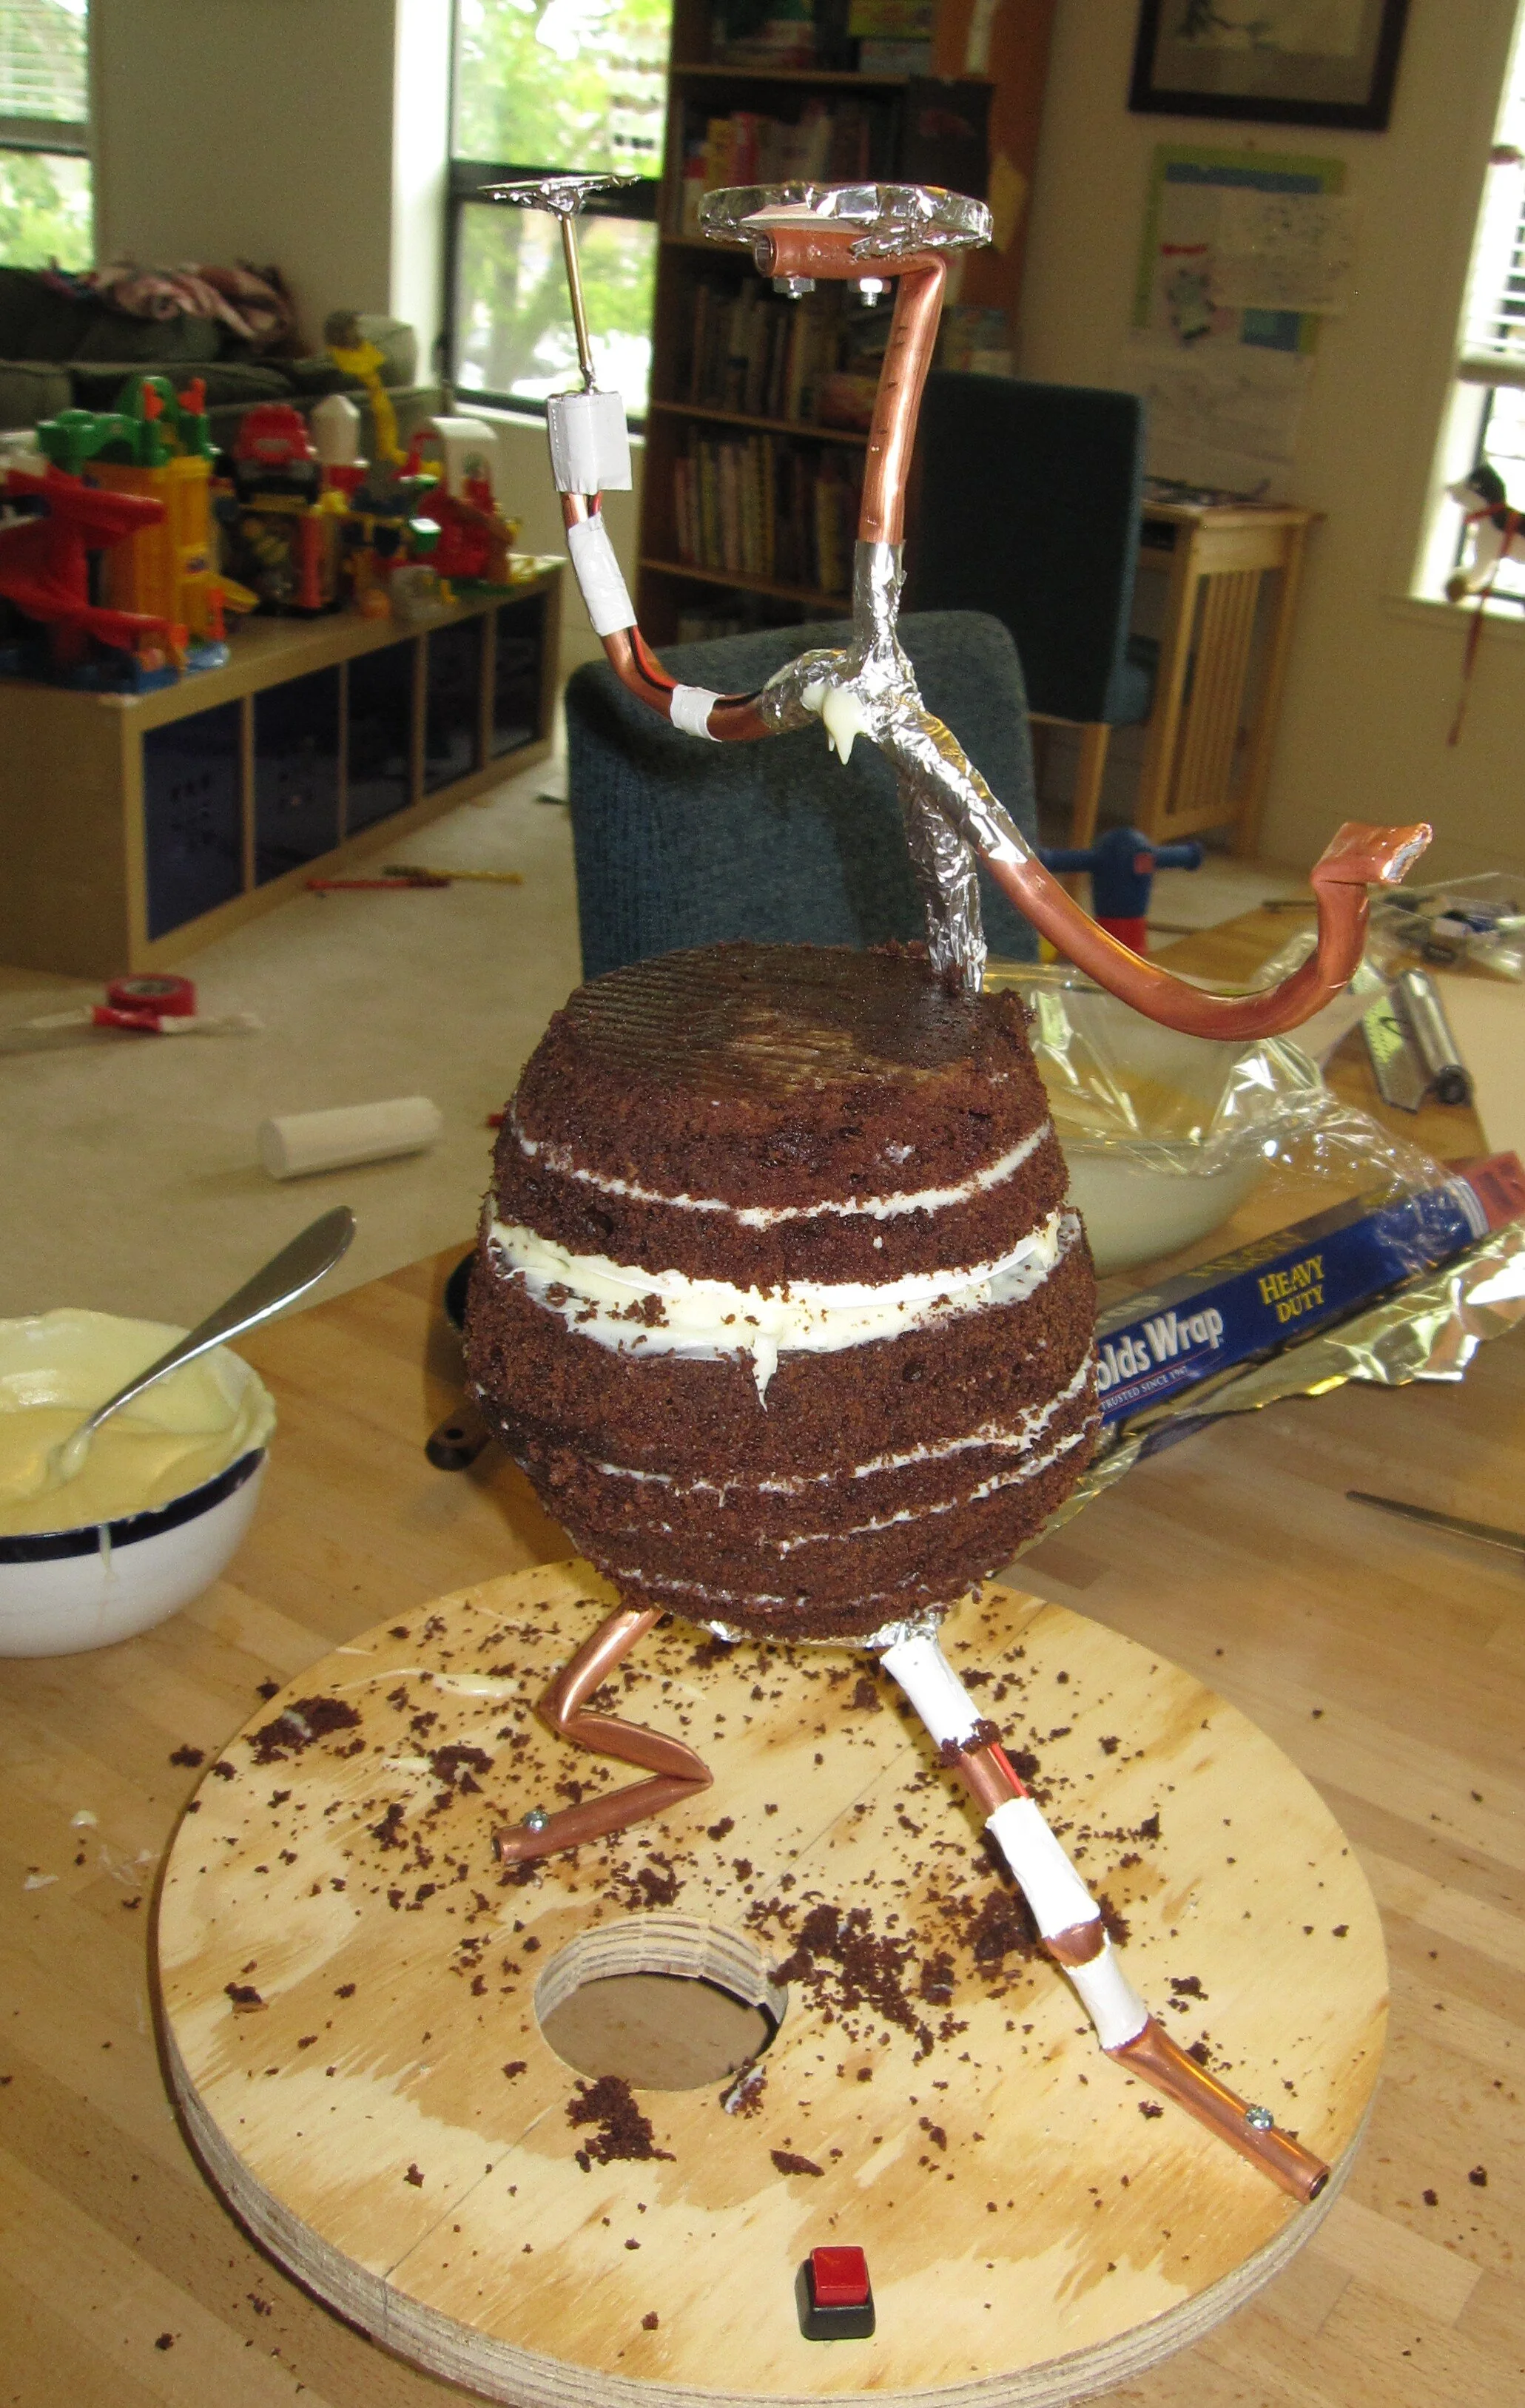
I’m not really sure if I made my armature according to industry best practices, but it seemed to work. I used 3/8” copper tubing, which was relatively easy to bend. I don’t think it would have supported a much larger cake, especially as the tight bends tend to get rather weak. I used ¼” plywood to make the circles to support the butt and the head and then I bolted the whole thing to a ¾” plywood circle for the base.
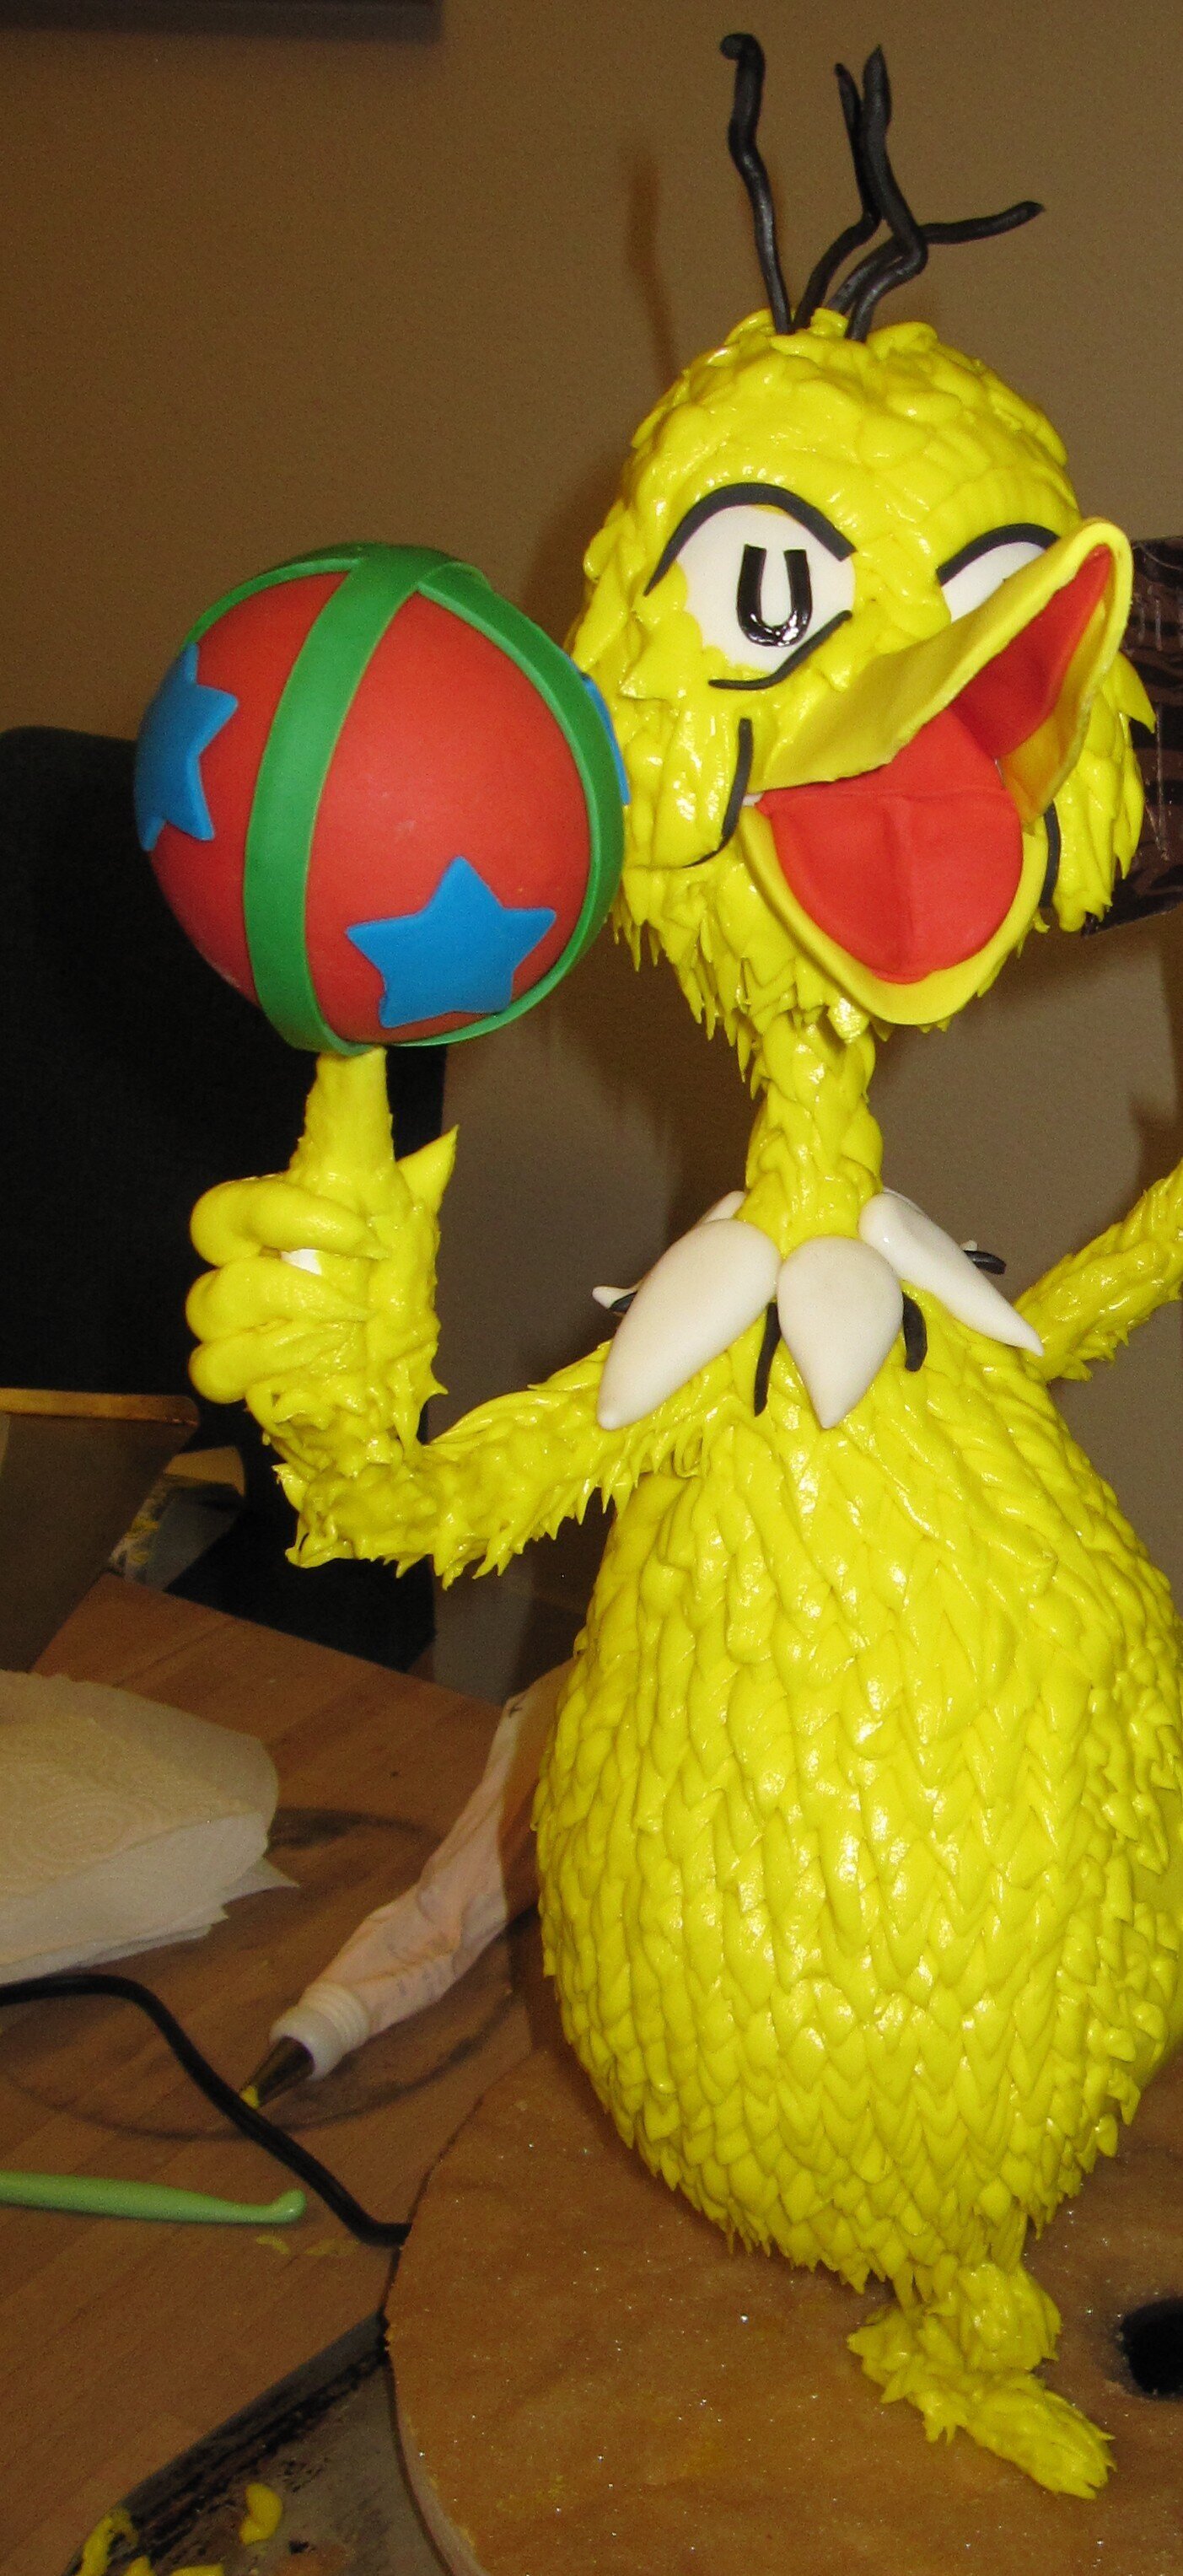
At this point, prior to the actual performance of The Sneetches, I knew nothing about the play except that Teacher Christine was playing the role of Sylvester McMonkey McBean and that it involved playing with a ball. So I decided to have my Sneetch twirling a ball on his finger. Alex and I have also been playing with a motor recently as part of a kit of science experiments related to light. The idea is that if you stick a circle of paper colored, for instance, half blue and half green onto the axle of the motor, when it spins the colors will blend together and you’ll see cyan. My thought was that if I made the ball red, blue, and green and got it to spin fast enough, then the colors would blend in the eye and look white – or at least yellowish grey.
To make this happen, I wired up a little hobby motor and soldered a circular brass platform to the top of it to hold up the cake ball. Because the cake ball was going to be pretty small, I just duct taped the motor to the top of the copper tubing arm.
The only gum paste pieces that I made in advance were the nose / beak (I’m not sure of the exact anatomy of a Sneetch), the eyes, and the ball, which I formed around a 3” diameter rubber ball.
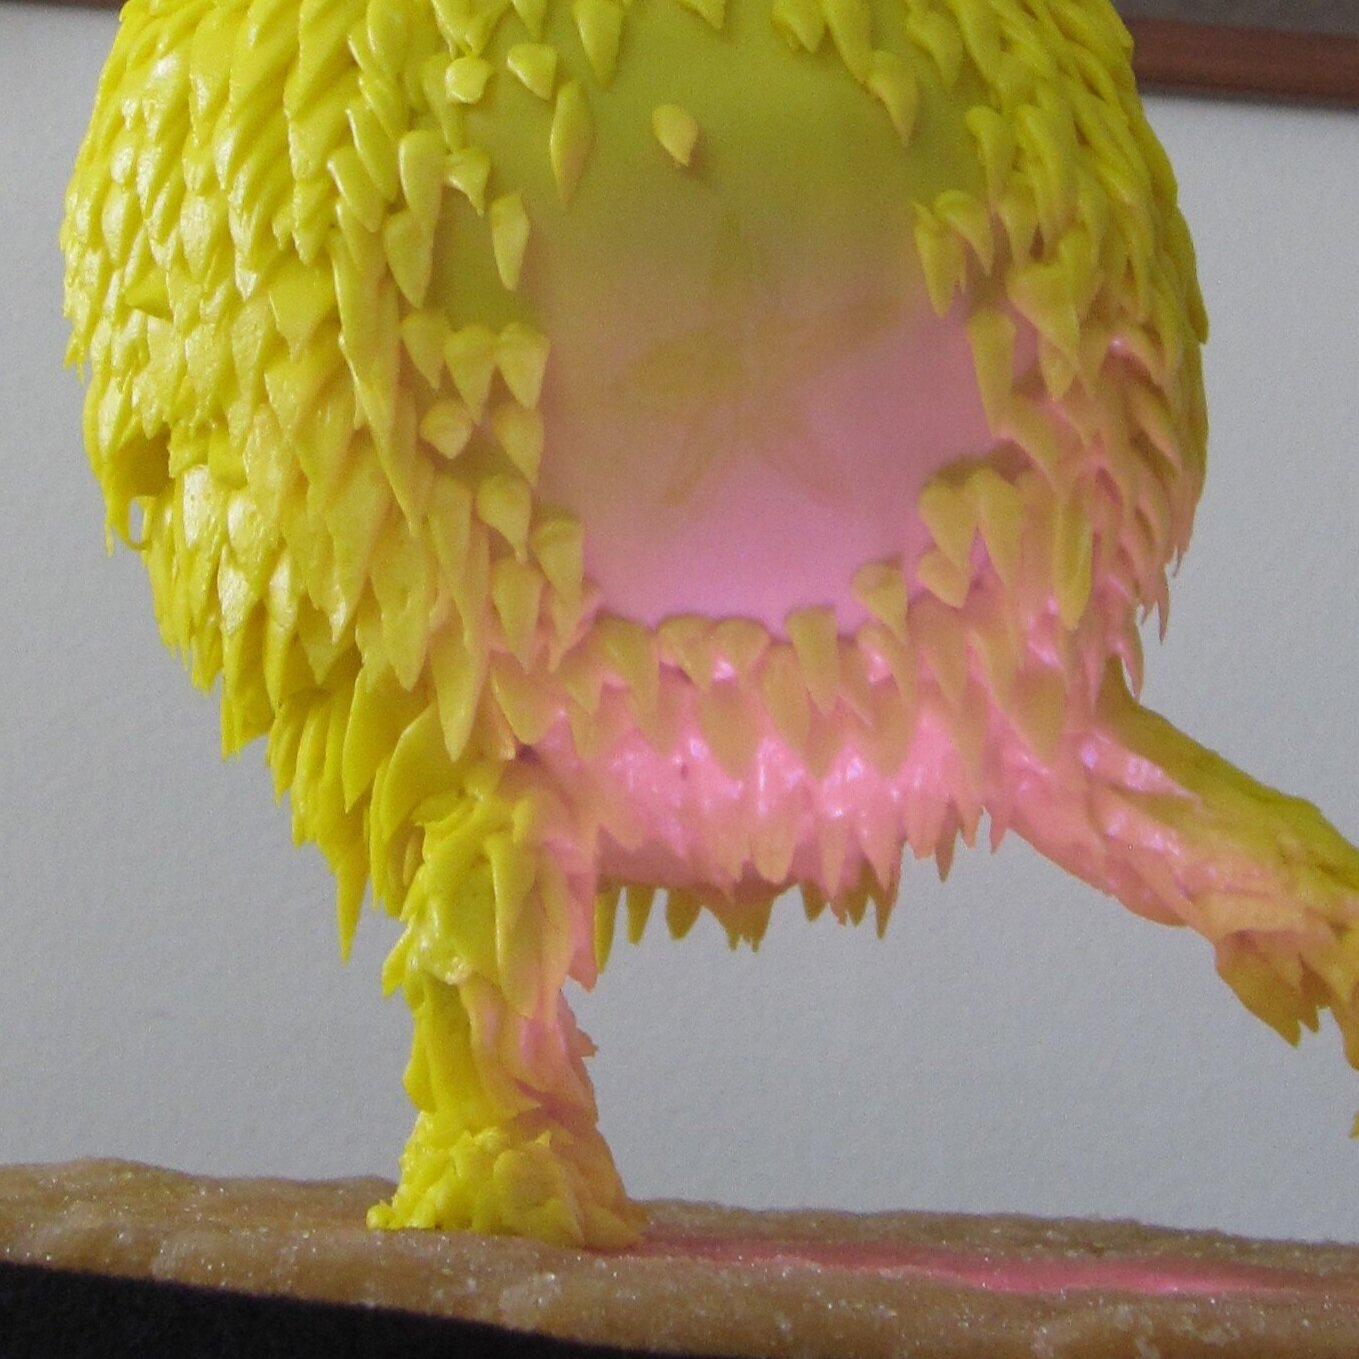
The crux of anything Sneetch-related is, of course, the belly star, or lack thereof. My plan was to attempt to use a technique that I saw Mary Maher use on Last Cake Standing – glow-in-the-dark piping gel. By painting the star with club soda, which contains quinine, which fluoresces under blacklight, and implanting a blacklight in the base of the cake, I hoped to be able to make the belly star appear and disappear like in the story.
The first step in bringing this idea to life as to test the club soda. I tried a couple different ways of incorporating the club soda into piping gel, as well as just painting with the pure club soda. The most effective glow turned out to come from the star painted solely with the pure club soda, but overall it wasn’t really as impressive as I hoped that it would be. But I went ahead with it anyway, by cutting a hole in the cake’s plywood base and sticking my blacklight bulb in underneath. I frankly wasn’t confident that the effect would be anything to write home about, but it was the best I could do for a first try. I covered the base with brown pressed sugar to simulate the Sneetches’ beaches.
Because I was trying to keep the cake small, I started with just six 6” round cakes – 4 for body and two for the head with enough scrap left over for the ball. I torted and filled them using a white chocolate ganache because I wanted to make sure that the cake had the stability that you get from such a firm frosting.
After I carved the cake into the basic shape, I tried out another a new technique that I saw someone do on Food Network Challenge. I don’t remember who I saw doing this, but I think they called it “spackle.” Basically, you take the cut-off scraps of cake and stir it into some icing so that it makes a pretty thick paste. Then you can use the spackle to really smooth out the surface of the cake and fill in any gaps. I found that it worked perfectly to round out the curves of the head and the butt underneath the plywood bases and to fill in the seam where the body cake was notched out around the copper backbone.
For the fur / feathers (again, I’m not sure what kind of animals Sneetches actually are), I decided to used piped buttercream. I don’t generally use a lot of buttercream. I think I may be using a substandard recipe because I often have trouble with my buttercream breaking down. This time was no exception. My buttercream started out at the right consistency, but with the heat of my hand it rapidly got too liquidly in the piping bag. So I didn’t get the definition I was looking for in some of the Sneetch’s coat.
On the belly area, I used a gum paste panel instead of the buttercream so I would be able to paint on the club soda star. This gave me a little trouble in blending the belly into the rest of the body. I’m still not 100% happy with the result, because real Sneetches’ bellies aren’t discernibly different in texture from the rest of their bodies, but I think I did a tolerable job of keeping it from being too jarring.
The ball went together quite easily. I made the ball itself in two halves of red gum paste and then hid the seam with a green gum paste stripe. For the blue to complete my attempt at RGB color mixing I added blue stars. I fully expected Alex to criticize my color choice because in my carelessness I had reversed the colors of the ball as seen in the book. In the book, it’s a blue ball with red stars. Alex is normally a stickler for this kind of detail, but she must have really liked the cake because she actually didn’t even mention the ball colors. I also fully expected that my color mixing wouldn’t be fully successful because I didn’t have the food colors that I really needed. I didn’t have royal blue, so I had to use sky blue and I didn’t have emerald green, so I had to use kelly green.
At this point I also realized that I had constructed the spinning mechanism in such a way that not only would the ball spin, but also the finger that it was sitting on. Oops. Obviously this was unacceptable, so I had to whip up a little gun paste sleeve to conceal the spinning tube underneath the ball.
For the final details, I used a combination of gum paste and dark chocolate tinted with black food coloring. The only thing I really wasn’t happy with was the shape of the eyes. Real Sneetches have eyes that are slightly taller than they are wide. Mine wound up wider than they were tall, which made my Sneetch look slightly untrustworthy.
We served the cake at a very small graduation party. Alex was delighted, though she was also deeply concerned with the effects.
When we plugged in the blacklight it got very hot, which began to melt the pressed sugar above it. So Alex spent the entire few minutes that the blacklight was on begging us to turn it off, apparently under the impression that it might melt the entire cake. The star did show up a little bit in the blacklight, but it certainly wasn’t an attention-grabbing effect.
The ball spun well, though not fast enough to fully blend the colors the way that I had hoped. Again, Alex was deeply concerned, this time because the ball’s rotation shook the entire cake on its thin little legs.
Alex’s little brother Sam was especially delighted with the cake ball. For days after he ate it, he kept asking us, “Where’s-a cake ball?” and we had to keep reminding him that it was in his tummy.
Peep and the Big Wide World Cake
When it came time to design my nephew Sam’s second birthday cake, I turned to Sam’s older sister, Alex, to help me conceptualize the cake. Alex came up with the idea that Sam might like a duck cake, which I thought was a very good idea. Sam loves animals of all kinds. After further discussion, I suggested that we should make a cake based on the TV show Peep and the Big Wide World, which could include not only Quack (a duck), but also Peep (a chick) and Chirp (a baby bird).
When it came time to design my nephew Sam’s second birthday cake, I turned to Sam’s older sister, Alex, to help me conceptualize the cake. Sam, while remarkably verbal for a two-year-old, still cannot be relied up to respond to specific questions in a direct manner.
At first, Alex suggested various vehicle-based concepts because Alex loves vehicles. Eventually, I was able to convince Alex that we should base the cake design primarily on things that Sam likes, which may not correlate directly to things that Alex likes. At this point, Alex came up with the idea that Sam might like a duck cake, which I thought was a very good idea. Sam loves animals of all kinds. After further discussion, I suggested that we should make a cake based on the TV show Peep and the Big Wide World, which could include not only Quack (a duck), but also Peep (a chick) and Chirp (a baby bird). Since Quack is very much attached to his pond, I decided that it would be fun to make Quack float in a lake of blue Kool-Aid. As it turns out, blue Kool-Aid is difficult to find, but Gatorade makes an absolutely disgusting flavor that was the perfect color for Quack’s pond, so I used that instead.
This is almost the first cake I’ve made that was primarily landscape-based, rather than primarily object- or character-based. Each major character in Peep and the Big Wide World has a special landscape feature with which he or she is associated. Quack has his pond; Chirp perches in her big tree; Peep lives in an old tin can. I also decided to include “the most beautiful flower,” because I really like that episode, and a caterpillar. The caterpillar is a minor character in the show, but Sam had recently said “caterpillar,” which he pronounced something like “patta-putter,” when I was reading to him. I thought this was absolutely adorable and I hoped that, if I put a caterpillar on his cake, he might say it again.
All of this required a great deal of advance work in gum paste and in chocolate. Most of the gum paste work was fairly conventional – cutting leaves and flower petals out of gum paste and draping them over various things to get graceful curves. The can was easily accomplished by wrapping gum paste around an actual tin can.
I was quite proud of Chirp’s tree. Rather than making the tree out of gum paste or fondant, I decided to make it out of chocolate. While I have taken classes in chocolate-work and I frequently make truffles and such, this was my first attempt at making anything this big out of chocolate, at least since the white chocolate rib cage of the Thorax Cake. The first step in casting the tree was to cut the basic shape out of foam core. Then I made a soft bed of cocoa powder by sifting it into a baking tray. I pushed the foam core positive into the cocoa powder to make the negative mold, then piped tempered milk chocolate into the depression in the cocoa powder. Then I flipped the piece of foam core over and did the same thing again to make the other side of the tree. Once those pieces had set, I glued them together with more milk chocolate. After carving off the excess cocoa powder and smoothing out the rough edges with a knife, I was really pleased with the result. And, as it turns out, properly tempered chocolate is much more rigid than my usual building materials of gum paste and fondant. I’m going to have to start incorporating chocolate into my cakes more often.
To create the pond, I bought a big bowl. Then I cut a piece of ½” foam core with a hole in the middle to sit on top of the bowl to support the cake for the land. I also bought a little pump and put it into the pond. The idea was that, if the water was moving, Quack would float around the pond, rather than remaining stationary.
Sculpting the cake into a scenic hilly landscape was easy. Rather than attempting to cover the entire thing in a single piece of fondant, I decided to cover it in a patchwork of various shades of green. This didn’t perfectly mimic the landscape of the show, but I felt that it still captured the cartoony effect.
Installing the tree went remarkably well. I cut a big hole in the cake, poured tempered chocolate into it, and then stuck in the tree. A little more chocolate easily adhered the leaves. It worked perfectly. Have I mentioned that I need to use chocolate more often?
At this point in the project, two days before the birthday party was scheduled, Sam came down with a truly unfortunate case of croup. Sam and his parents spent the day before what was supposed to be his party at the hospital and I spent the day that I had planned to spend finishing Sam’s cake watching Alex and reassuring him that Mommy and Sam would be home soon. Obviously, we cancelled the party. But it was too late not to finish the cake, and the point of the cake was largely to amuse Sam and Alex, rather than our guests, so I decided to finish the cake anyway, even though there was no longer a party at which to serve it.
I had hoped to make Chirp and Peep entirely out of cake, but I discovered that it is basically impossible to make a sphere out of nothing but cake. So I cut some Styrofoam balls in half, covered them in tin foil, and used those for the bottom half of Peep and Chirp, with only the top half made of cake. I was quite pleased with how well I did in covering 3” diameter spheres in a smooth layer of fondant. I also think I did a pretty good job of capturing Chirp’s characteristic expression of frustration and exhaustion after she has failed in an attempt to fly.
For Quack, the major problem was, of course, how to make him float. My plan was to make the bottom half of Quack out of buoyant foam and the top half out of cake. The first thing I discovered was that, if you make something egg-shaped (ie. Quack) half out of lightweight foam and half out of heavyweight cake and then place it in water, it will immediately flip over so that the heavy cake part is underwater. No good. I addressed this problem by gluing a lot of heavy steel nuts to the bottom of the foam, so that the bottom of Quack outweighed the top. This worked, up to a point, but it also necessitated a higher proportion of foam to cake to make up for the increased weight. Quack ended up only about one quarter cake and three quarters foam.
I also conducted some experiments on the solubility of fondant in water and I discovered that if I coated the fondant covering Quack in Crisco I could reasonably expect him not to dissolve for at least a quarter of an hour.
Assembling all the cake elements proved more problematic than I had anticipated for two reasons. First, my plan to stick the gum paste flower and the gum paste milkweed plant for the caterpillar directly into the cake utterly failed to account for the fact that moist cake rapidly erodes the structural integrity of gum paste. In the end I did manage to get the flower standing, but the caterpillar’s plant was ultimately a lost cause and he wound up just perched on a clump of grass.
Second, I had planned to assemble the cake while Sam napped and my sister took Alex out to the museum. As Alex proved to be utterly uninterested in the museum that day, though, they came home early. At first, this was delightful, as she immediately ran up to the not-yet-completed cake and yelled, “I love it!!!”
Unfortunately, this was also the moment at which several pieces of the cake started to fall apart. Peep fell off her can. The flower and the milkweed plant began to collapse. I began to freak out. So we spent the next hour or so forbidding Alex from approaching the cake. “It’s very, very fragile!” “Please be careful!” “Oh, stay behind the train table, please!” The poor little kid just wanted to look at it. Alex, I’m sorry. I should have been more concerned with you than I was with the cake.
Sam woke up at about the moment that I finally managed to get the cake assembled and properly accessorized with gum paste rocks and gum paste tufts of grass. Because I was convinced that several components were about to collapse, we rushed to serve the cake, making this an extremely short-lived object, even by cake standards.
I slightly overfilled Quack’s pond with Gatorade, so that when I actually put Quack in the pond and turned on the pump to agitate the water, it overflowed a bit onto the floor. Other than that, Quack’s floating worked remarkably well. He was a little askew, but he definitely floated, and we were even able to light the two candles that I had adhered to his feet. Remarkably, the bit of cake inside of Quack even remained undamaged and edible.
Poor Sam was probably still recovering from his croup and had just woken up, so he didn’t seem terribly impressed. I’m not sure he understood that it was cake until I dissected Chirp and actually put the cake in front of him. Then he was happy. Sam loves cake. After he finished eating Chirp, he even asked, very sweetly, for “more cake, please?” Happy birthday, Sam!
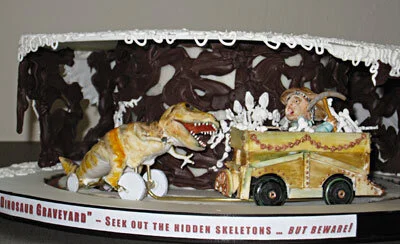
Dinosaur Graveyard Cake
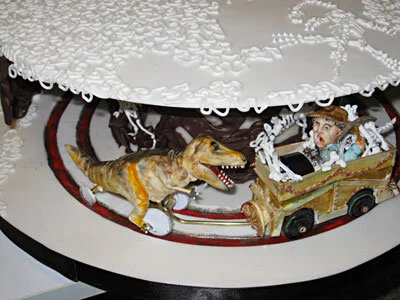
Pastry arts for a good cause – this cake was raffled off at a fundraiser for my niece’s preschool.
Pastry arts for a good cause - this cake was raffled off at a fundraiser for my niece's preschool.
My niece's pre-school was having a fundraiser. My challenge - make a cake for the raffle that fulfilled all of the following conditions: The cake should be:
Small enough that people wouldn't be intimidated by the prospect of eating it.
Sturdy enough that there would be minimal possibility of breakage when the winner transported it home.
Enough like a normal cake in appearance that people would recognize it as such when walking by the raffle table.
Appealing enough to the average two-to-four-year-old that he or she could be counted upon to pester his or her parents into purchasing raffle tickets for it.
Appealing enough to the average parent of a two-to-four-year-old that he or she would be willing, with some childish prompting, to spend a few bucks for a raffle ticket for a good cause.
Appealing enough to me that I wouldn't get bored making it.
Collectively, these represent waaaay more constraints than I have ever had placed on one of my cakes before. Prior to this, my biggest restriction was when my sister and I made a cake for our friends' wedding and they said that, ideally, it probably shouldn't bleed, explode, or catch fire.
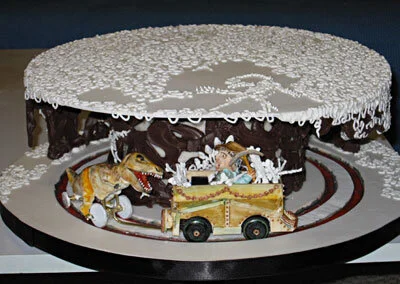
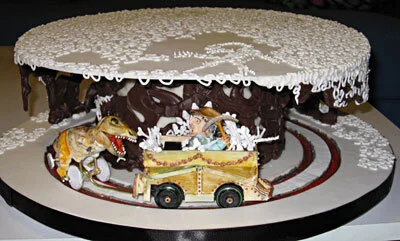
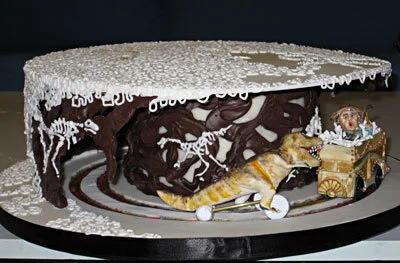
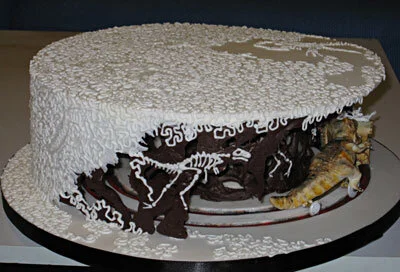
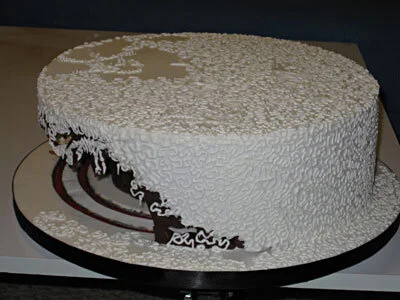
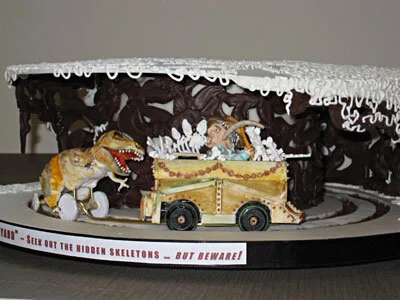
So I had a bit of a challenge developing an initial concept, but ultimately I came up with a solution that I think fulfilled all the requirements. Viewed from one angle it would appear to be an ordinary 12" round cake, covered with white fondant, delicately decorated with cornelli lace, so as to appeal to people who like their cake to look like cake. From the other side, however, the fondant would be cut away to reveal a subterranean tunnel with a train going around and around, so as to appeal to the toddler set. The train would be pursued by a ravenous dinosaur, so as to appeal to me.
I think I can best explain the process of construction by breaking it up into its component elements.
The train:
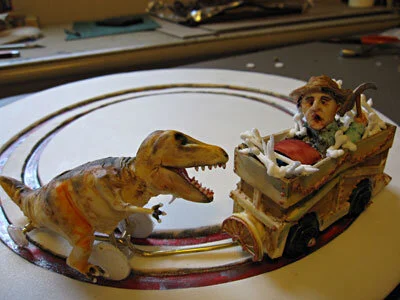
The first thing I needed was a way to make the train go. I figured the easiest thing to do would be to get some kind of battery operated car toy and build my train around it, so I went to Toys R Us. Mind you, I detest Toys R Us, for various reasons that I needn't go into here, but I was in a hurry and it was my best option for a quick solution. The toy I selected was a battery operated Thomas the Tank Engine, which turned out to be delightfully easy to decapitate, leaving me essentially with a AA battery on wheels.
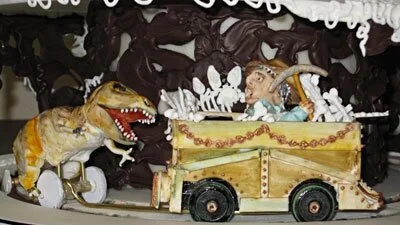
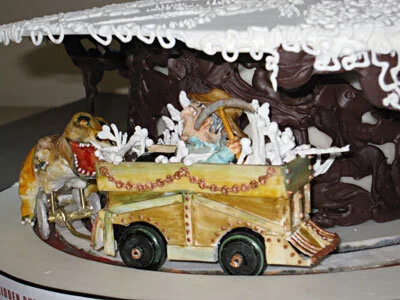
In keeping with the subterranean / archeological theme of the cake, I found a photo of an old-timey mining cart to work from. First I encased the body of the train in a box made of flat gum paste pieces, with semicircles cut out to accommodate the wheels, then I added additional gum paste wooden slats. I used one of the semicircular cut off pieces from the wheels to cover the little magnetic hookup that toy train cars have on the back. I also made a cow catcher for the front. Because of all those cows that archaeologists encounter in underground caves.
I wanted to cover the wheels (which were bright green) with gum paste to make them more rustic and less plastic looking, but every time I tried, the wheels came out too big for the track (more on that later) so I wound up just painting the green wheels with black food coloring.
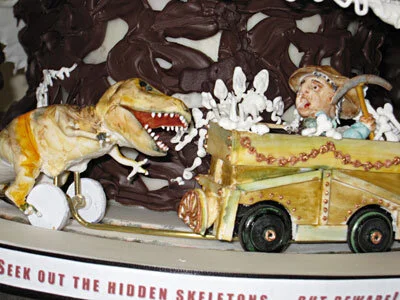
To get some human interest into my tableau, I wanted to put a little gum paste archaeologist in the train car. After all, no self-respecting dinosaur would be chasing an empty train car - a T-Rex in particular would need the prospect of juicy meat to get him moving. I tried to make my archaeologist look really terrified, with a gaping mouth and wide, staring eyes, looking over his shoulder at his dreadful pursuer. I also couldn't resist making him a little Indiana-Jones-style hat and a pickaxe. The train had a big button on top to start and stop it. At first, my plan was to put my little man directly on top of that button so that you had to push on his head to make the train go, but then I realized that was just too risky to be worth it - who wants to see a man with a smooshed head being chased by a dinosaur? So I moved him to right in front of the button and left the button alone. I'm glad I did because by the time I was done some crumbs or something must have fallen into the mechanism because the button got a bit temperamental.
I then put a coat of paint on everything, using paste food colors thinned with vodka. It has recently been pointed out to me that using vodka to paint things intended for children might not be 100% ok, which had never occurred to me. I choose to assume that the majority of the alcohol evaporates away and that what's left is so minimal as to make no difference. Certainly my niece has shown no ill effects from the last three birthday cakes that I've made for her.
With my base coat in place, I was ready to add fine details. I made some royal icing chains and rivets. I also added some royal icing dinosaur bones around my archaeologist, and threw in some oreo cookie crumb dirt for good measure. I used some more vodka (Woo hoo! Par-ty!) with bronze luster dust to make the chains look metallic.
The track:
Now I had an operational train, but a train doesn't do anyone any good unless it goes where you want it to go. So I needed a track. It took me five or six cardboard mockups before I got one where the tracks were the right width and the right distance apart and correctly positioned within the circle of the cake. Once I had a functional mockup that worked with my little toy train, I covered a foamcore circle with a 1/4" thick layer of white fondant and used my mockup as a template to carve the fondant away to create the two concentric circles of the track. With the fondant cut away, I needed to do something to cover the foam core revealed underneath. After a few experiments, I settled on painting the revealed foam core base red (which frankly would have been a lot easier to do had it occurred to me to paint it red before I covered it with fondant). Because I didn't do the world's best job of this, I dusted the track with a lot of brown and black powdered food coloring and silver luster dust to try to conceal my mistakes.
The dinosaur:
A little train by itself might be interesting enough for pre-schoolers, but I have loftier aspirations. To keep my interest, the cake needed a monster. And it had to be Big! Fierce! Mean! Prehistoric! RAAAWR! I settled on T-Rex.
Step 1 - find internet photos. Of course, the internet crazies have conflicting opinions on what T-Rex looked like, so I just picked the skin texture and color scheme that seemed the most appealing to me.
I made two gum paste bodies, because I wasn't sure quite what size I wanted. I wound up using the bigger one. By letting the gum paste dry for a few minutes, so that it developed a bit of a dry shell, and then bending the body a little I was able to create a delightful wrinkly skin texture.
In order for the dinosaur to chase the train, it of course needed to be on wheels. My first idea was to use the wheels from a tiny little toy skateboard. This didn't work at all. For one thing, toy skateboard wheels turn out to be very flimsy and not very well aligned. I know this is a shock, considering that I bought it for $3.95 at Target. For another thing, toy skateboard wheels are extremely small, on the order of 1/8" in diameter. Since my layer of fondant between the two track circles was on the order of 1/4" thick, I clearly had a problem. I tried to salvage my skateboard wheel solution by cutting larger plastic circles and gluing them to the existing skateboard wheels. Then I realized that this was a stupid idea and I should just make the wheels from scratch.
I cut two new sets of plastic wheels, larger for the front, smaller for the back and put hot glue rims on them so as to give them the requisite traction. For the axles I used brass tubing, encased in slightly larger diameter brass tubing to allow it to rotate freely. I attached these to the body of the dinosaur by using royal icing and by cramming brass tubing up into the body.
I tried to mask the wheels a little when I added the gum paste legs, but since I was simultaneously trying to position the legs as if T-Rex was in a full-out run, and since I was trying to conceal four wheels with two legs, I wasn't very successful. I chose a nice muted ochre and brown color scheme, with some purple and green details, again using vodka and paste food colors for paint. Once that dried, I used royal icing to make little teeth and claws. I of course couldn't resist adding a bit of food coloring blood to the tips.
The hookup:
I now had a train on wheels and a dinosaur on wheels but in order to make the dinosaur chase the train I needed to connect the dinosaur to the train. I cut and bent a piece of brass tubing into the correct curve. Gluing it to the dinosaur was easy. Gluing it to the train was exceedingly difficult. First I tried hot glue. Then I tried Superglue. Then I tried hobby cement. Then I tried epoxy. As it turns out, for some inexplicable reason, none of these things stick to the underbody of Thomas the Tank Engine, even after he's been roughed up with a flat file. Eventually I resorted to the king of household glues - Gorilla Glue. Because Gorilla Glue expands as it dries, I was terrified that it would push everything completely out of alignment, but it actually worked.
The tunnel:
With my train and dinosaur set, I needed a tunnel for them to run through. My original plan was to create a nice rocky texture by making a mold in the shape I wanted the tunnel to be, lining it with plastic produce bags (because they release easily from chocolate), filling it with crushed ice, and then pouring tempered chocolate over it. In my imagination, this technique created a beautiful organic texture. In reality, it created absolutely nothing of value because the chocolate set up before it got beyond the first layer of ice. I went to plan B.
Plan B involved making two concentric tubes of chocolate with holes in them to form the inner and outer walls of the tunnel. One would be 6" in diameter, to fit around the 6" round cake that would be in the middle of my creation. The other would be 12" in diameter, leaving a 3" tunnel for the train to pass through.
At first I envisioned creating these tubes by spreading chocolate over bubble wrap (which also releases easily from chocolate), cutting it into appropriate rectangles, and then wrapping the rectangles around cake tins of the appropriate diameter, all while the chocolate was set up enough to cut accurately but malleable enough to wrap around the cylinder. This didn't work either. By the time the chocolate set up enough to cut it was too firm to wrap, so it just cracked when I tried to bend it into the right curve. I was also having problems getting my chocolate in good temper, so it wasn't setting as firmly as I would have liked. Normally I would blame problems like this on my own relatively limited experience working with chocolate. In this case though I'm more inclined to blame the problem on the chocolate itself because, at the same time as I was making this cake, I was also making chocolates to raffle off at the event, and I was having spectacular success tempering chocolate bars that had been sitting in our cabinets for so long that they were essentially just big slabs of chalky blooms. For the cake, though, I was using a new bag of chocolate medallions from my local cake supply store and I couldn't get them in temper to save my life. So I choose to blame the chocolate.
My third plan was to wrap the 6" and 12" cake pans in tin foil and them pipe tempered chocolate onto them in an abstract pattern. Due to my issues with getting my chocolate in temper I was concerned with the stability of the structure and I thought that I might get it to be sturdier and set up faster by mixing in a little corn syrup. This is a technique that I used to good effect when I made the shrunken head truffles, but in this application it just seemed to make the chocolate more brittle. So the technique that I finally ended up with was putting the tin foil wrapped cake tins in the freezer and piping the (sort of) tempered chocolate onto the cold foil in an abstract pattern with lots of open space. This helped the chocolate to firm up quickly when it touched the cold foil so that it wouldn't drip down the sides of the cake pan.
Third time's a charm. This time my plan more or less worked, although I still wasn't happy with the temper of my chocolate and my finished pieces broke in a few places when I unmolded them from the tin foil. But I figured it was nothing I couldn't repair when I put it in place around the cake.
The cake:
The cake itself is actually the most boring part of this story. All I needed was a 6" round cake. I tried a new recipe for chocolate cake, but when I went to torte it I realized that it wasn't baked all the way through, so I had to make an emergency backup cake. Since I didn't have any more cocoa powder I went with a white cake, which turned out fine. I torted and filled that one with buttercream icing. My sister took the incompletely baked cake, carved a hole out of the center to remove the uncooked part, put some ice cream in the middle, and took it to a friend's birthday party so it wasn't a total loss.
The facade:
To make my 6" cake surrounded by chocolate cylinders look like a 12" cake with a chocolate tunnel inside, I premade two pieces of white fondant. One was a simple 12" circle to cover the top of the cake and tunnel. The other piece was to go part way around the perimeter of the cake, but it also had to appear to be cut away so as to reveal the tunnel inside. I rolled out a piece of fondant, then cut it into a sort of ragged trapezoid. I used a ball tool to thin out the rough edges then draped the whole piece over the side of a 12" cake pan to get the right curve. To make sure that these pieces were dry enough to maintain their rigidity I made them a week in advance.
Putting it all together:
With all my components pre-made it was a simple matter to place my 6" round cake in the center of my train track and piece together my chocolate tunnel around it. For some reason my 6" round chocolate cylinder was bigger than I needed it to be, but the fact that it was poorly tempered meant that it was easy to cut a slice off to adjust.
Chocolate tunnel in place, I stuck my fondant circle on top and my curved fondant piece around the edge with some royal icing. I was a bit concerned about the top fondant circle drooping, as a large section of it was unsupported. My concerns were not wholly unfounded, as close examination of the finished cake does uncover some definite unintended curvature to the top of the cake, but as it didn't seem to pose a risk of structural cake failure I didn't let myself get unduly concerned.
In order to integrate the dinosaur with the cake, I incorporated subtle dinosaur skeletons into the cornelli lace that I piped onto the fondant. I used a #2 tip because I was too lazy to use a #1 tip. I also put a couple of dinosaur skeletons onto the inner wall of the chocolate tunnel.
When we set the cake up at the fundraiser, we tried to position it such that children would be able to see it easily, but not grab the train. For the most part, we succeeded. Only at one point during the party did I have to shoo away a toddler who was trying to snatch the dinosaur. The cake was ultimately won in the raffle by one of the kids from my niece's preschool. I hope that he and his family enjoyed it.


