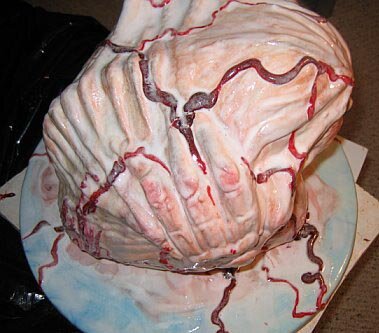
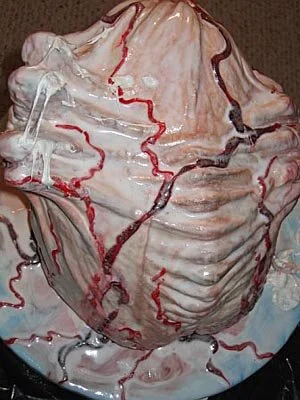
Gelatinous Man Cake
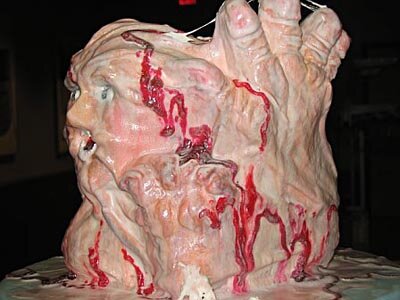
The Gelatinous Man was created for a small art show that some friends and I were hosting at my business school. Very few people at the show actually believed that he was cake until I cut into him, but then everyone agreed that he was delicious. One boy even expressed delight at the way the eyeball squished when he bit into it.
The concept for the Gelatinous Man developed out of a cake that I made when I was taking a Master Class from Colette Peters at the Wilton School for Cake Decorating and Confectionary Art. I referred to it as a Sea God cake. It was essentially a standard 3-tiered cake with a raised face on top spitting out a fountain of gum paste water. This got Colette and I talking about making a cake that had an entire man trapped inside, trying to get out. Naturally, when I finally got around to making the cake, it came out all oozy and bloody and moist. And so the Gelatinous Man was born. Or at least he's on the verge of being born. Or possibly he's just been absorbed into his odd, oozing sack. I can't say for sure. You'd have to ask him.
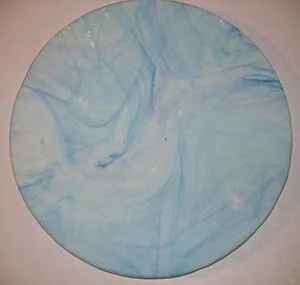
The first step was to make the base, which is simply two circles of 3/8" foam core glued together, one larger than the other. The smaller circle is only there to make it easier to pick up the cake by leaving a space under the upper plate to get your fingers into. It's a little trick I learned from watching cake competitions on the Food Network. The larger circle is covered with fondant, marbled with some royal blue food coloring. Just knead some of the color into the fondant until you come up with a cool marble texture, and then roll it out to about 1/8" thickness. It's very easy to stick the fondant to the foam core by brushing it with water.
I started in on the cake itself by baking four 10" round cakes, using a really great chocolate cake recipe I got from one of Colette's books. I then torted and filled these with a plain chocolate ganache. Because the cake was so tall I had to put a layer of 3/16" foam core, supported by 1/4" dowels, in the middle. I also put a 3/16" foam core circle on the bottom of the cake to make it moveable before it was mounted on the final base. Both pieces of foam core were only 9" in diameter, instead of the 10" diameter of the cake so I would be free to carve into the cake without worrying about running into the foamcore.
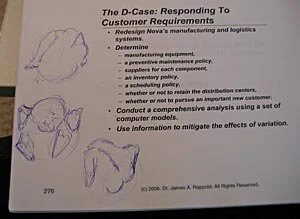
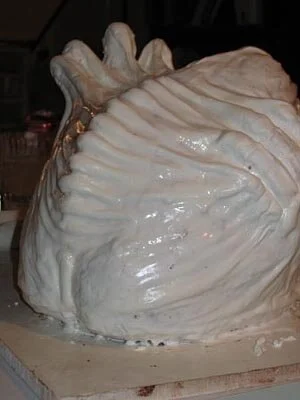
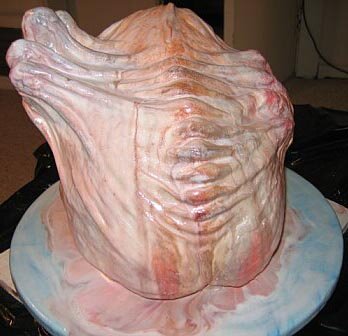
Now for the fun part - carving the cake into the shape of a man trapped in some sort of membranous sack. I had a little sketch, which I had made in the margins of my Operations notebook during class. So I was sculpting a cake while consulting my Operations notes. I found this juxtaposition perhaps unduly amusing, because, as anyone else out there who has gone to business school doubtless already knows, Operations is about the most tedious class in existence (Sorry, Professor Rappold.) and I'm not just saying that because, as I write this, my final Operations project is due in eight hours. Using a paring knife, I started by cutting away the area around the face, the hands, one foot, and one knee. I carved the back into a slope with a ridge of spine running down the middle, then added a little butt crack at the bottom. I had to add some extra pieces to the top of the cake to get the requisite height on the fingers of Gelatinous Man's right hand.
Once I had the basic shape, I sealed the entire cake with a crumb coat of royal icing. Royal icing isn't the greatest tasting icing, of course, but I needed the stability of it to hold up to all the brushing and sculpting that would be required in subsequent steps. I had to wait for that crumb coat to dry before I could proceed to the next step.
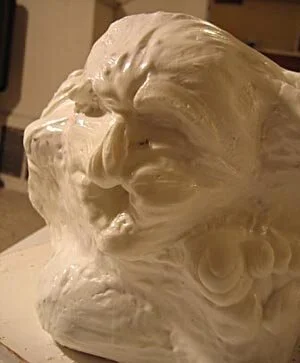
My plan was to sculpt the details of the features by piping them on in essentially the right place, then smoothing and making fine detail with a damp paint brush. My first attempt at this failed because the water on the brush diluted the icing so much that it couldn't maintain its shape. So I scraped it off and started over again with much thicker icing, to the point where I could barely squeeze it out of the bag, and a slightly drier brush. This worked much better.
It took me two passes through using this technique to get the finished shape. The first pass created all the major shapes - toes and palms and cheeks, even details like the creases in the finger joints. The second pass added more fine details and built up heavily frosted areas like the heel, but mostly focused on stretching out the icing between elevated area - between the finger and the spine, for instance, and between the toes and the chin - to make it seem like Gelatinous Man was writhing inside and struggling against a contiguous membranous sack.
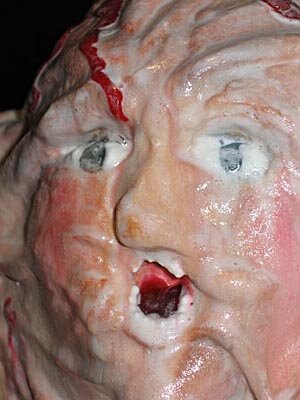
I ran into some difficulty with the nose. I couldn't make it as prominent as I wanted to because the icing wasn't sturdy enough and kept slumping into his open mouth. Clearly I needed something structural to stick into the cake to build the nose around. It needed to be edible, so I ran around my apartment for a while like a chicken with my head cut off, looking for a pretzel, which I already knew I didn't have. Then I stumbled across a packet of Lik-M-Aid that a friend gave me for Valentines Day. The little candy stick, which was already broken in half, was perfect. I stuck the broken end into the cake and built up a frosting nose around the protruding rounded end.
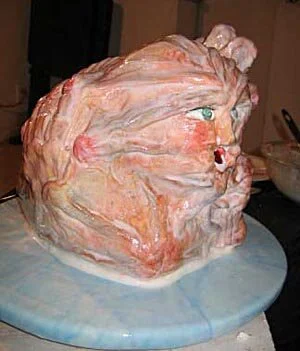
Now for color. My plan was to just add color to the regions that protruded, as if the sack was white but thin, so the flesh color underneath only showed through where Gelatinous Man was exerting pressure on his membranous prison. That plan didn't really pan out because I got carried away with the airbrush, and the whole thing ended up fleshier than I had anticipated. So I made the protrusive parts even darker and redder. Then I sprayed some dark blue and purple vein-ish lines along the stretched membrane areas. I believe that while, obviously, red is important for blood, in order to really evoke gore, you need blues as well. I also added some blue in the as-yet-empty eye sockets and red inside the mouth.
To complete the eyes, I piped in big blobs of clear piping gel for the irises then added royal icing whites over top of the piping gel. A bright red piping gel tongue enhanced the mouth.
With that I was ready to transfer Gelatinous Man onto his blue fondant-covered base. Considering that I was by myself, this went remarkably smoothly and I even got him relatively centered. To clean things up I piped a bead of royal icing around the seam between the cake and the base, and then smoothed it with a damp paintbrush. While I had the icing out, I put some little teeth in Gelatinous Man's mouth.
Now I had a good shape and some decent colors, but the cake still didn't sing. For one thing, it was too neat - no damp oozing, no blood - and for another thing, Gelatinous Man wasn't integrated with his base to create a unified piece.
To create the oozing, damp look I was going for, I made some very, very thin royal icing and used a paintbrush to apply it to the cake. Naturally, such watery icing pooled in the crevices and around the bottom of the cake, giving more of an illusion of depth and an indication of moist membrane. A somewhat unforeseen but beneficial effect of the dripping icing was that it made the airbrushed colors run and bleed. I think it made it look much more natural and frankly, I should have known that was going to happen, since I know that airbrush colors don't really set. It took three coats of this watery icing to really get the depth I was looking for, and by that time a whole bunch of icing had pooled on the base, so that Gelatinous Man appeared to be sitting in a puddle of his own melting flesh. It was a nice look, and effectively joined Gelatinous Man visually with his base.
I almost called it quits at this point, but I still thought it needed a little more, and I had a bunch of piping gel lying around. So I whipped up two different colors of red piping gel - a deep burgundy and a bright red. I painted a stripe of blue food coloring on the inside of a piping bag (I told you I'm a big fan of judicious use of blue in my gore effects.) fitted with a #8 round tip and filled it with the darker red piping gel. It was a little hard to control the piping gel on the vertical surfaces, but I ended up pretty happy with my big veins, so I then used the bright red piping gel in a bag with a #6 tip to make the smaller veins.
Now I had blood, but was once again faced with a piece that seemed unfinished. One more coat of watery icing did the trick, blending the veins into the cake, melting them just enough to make them seem integrated into the membrane rather than disconnected and sitting on top.
Once again I almost called it done. Then I remembered that I had bought a bag of marshmallows in the hopes of melting them into some sort of fibrous tendrils. This worked really well when I tried it on a practice bowl, but less well when I tried it on the cake because it was still a little wet so the marshmallow wouldn't stick easily. So I only used a little bit, but I still think it added a nice touch and it'll probably be a good technique to have in my arsenal in the future. Easy, too - I just popped the marshmallow in the microwave for fifteen seconds, and then stuck it wherever I wanted it with the tip of a knife. I only used three of the marshmallows, but I have since eaten the entire rest of the bag.
I could probably have gone on poking and prodding at this cake forever until it was just an indistinguishable blob of yuckiness, but fortunately, I ran out of time at this point and had to decide that I was done. I think it has firmly established me as the weirdest member of my MBA class.
