Terraria Celestial Event Cake
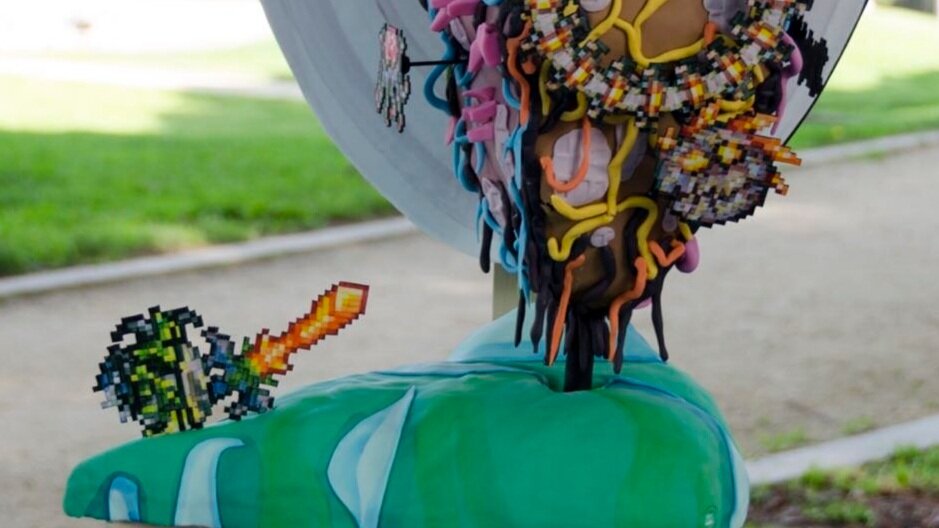
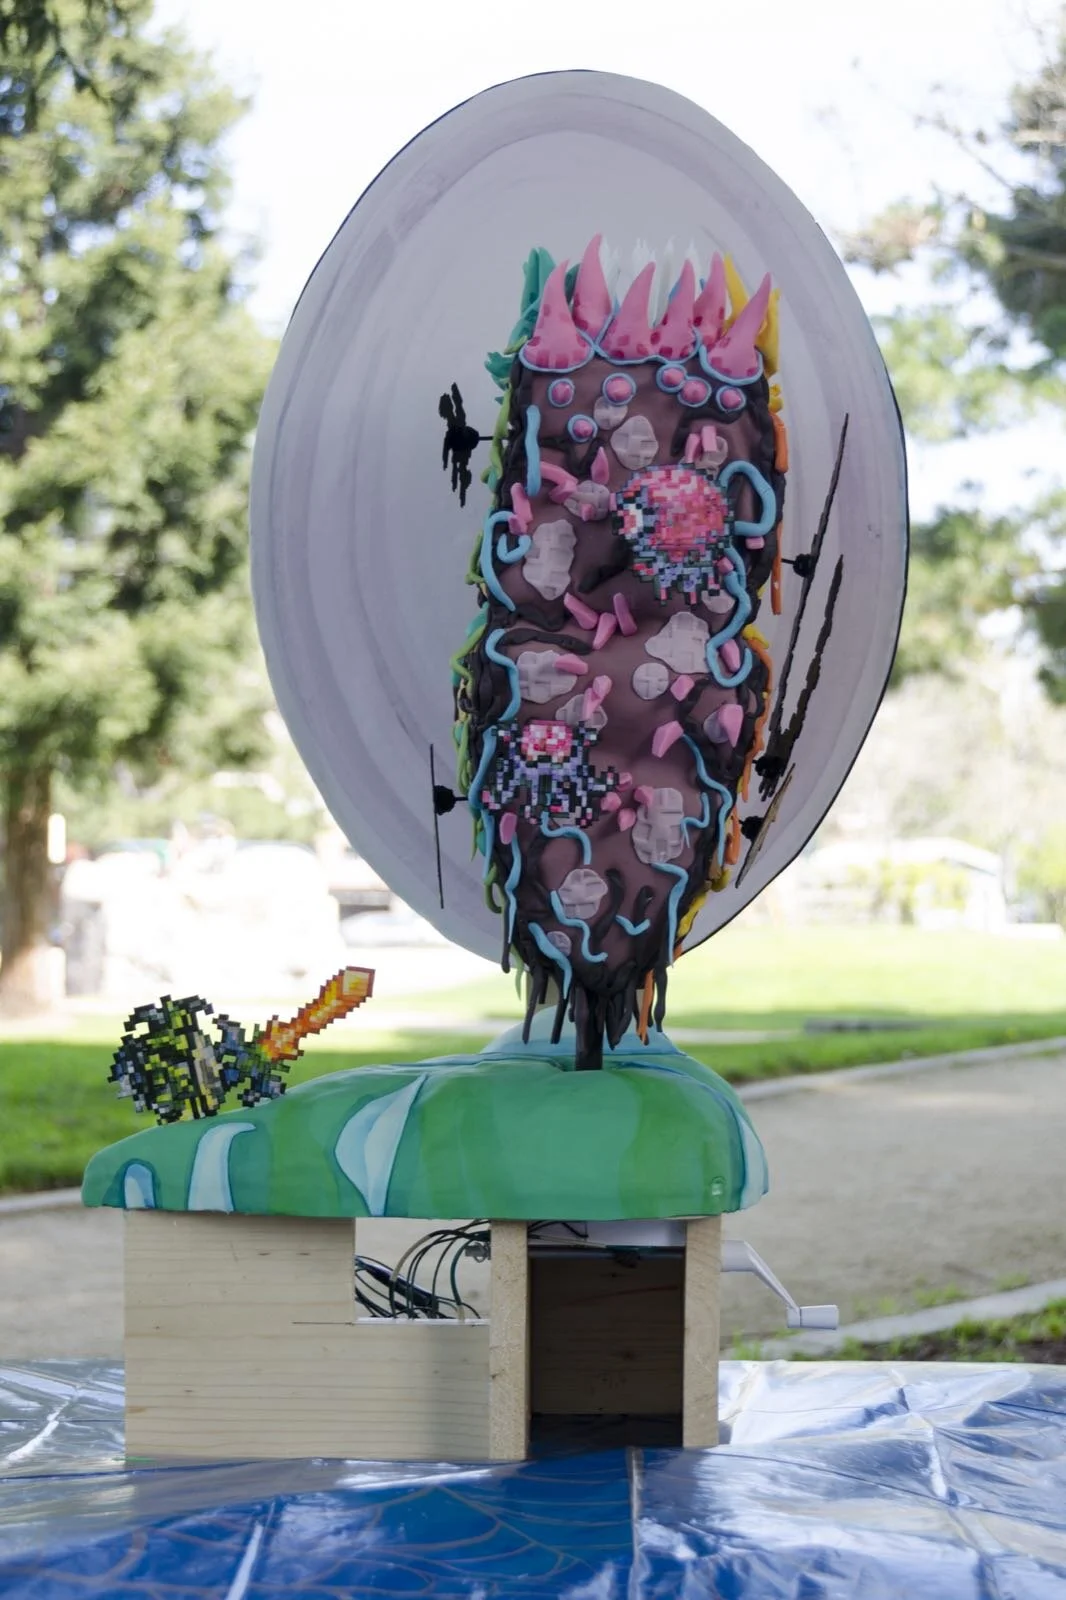
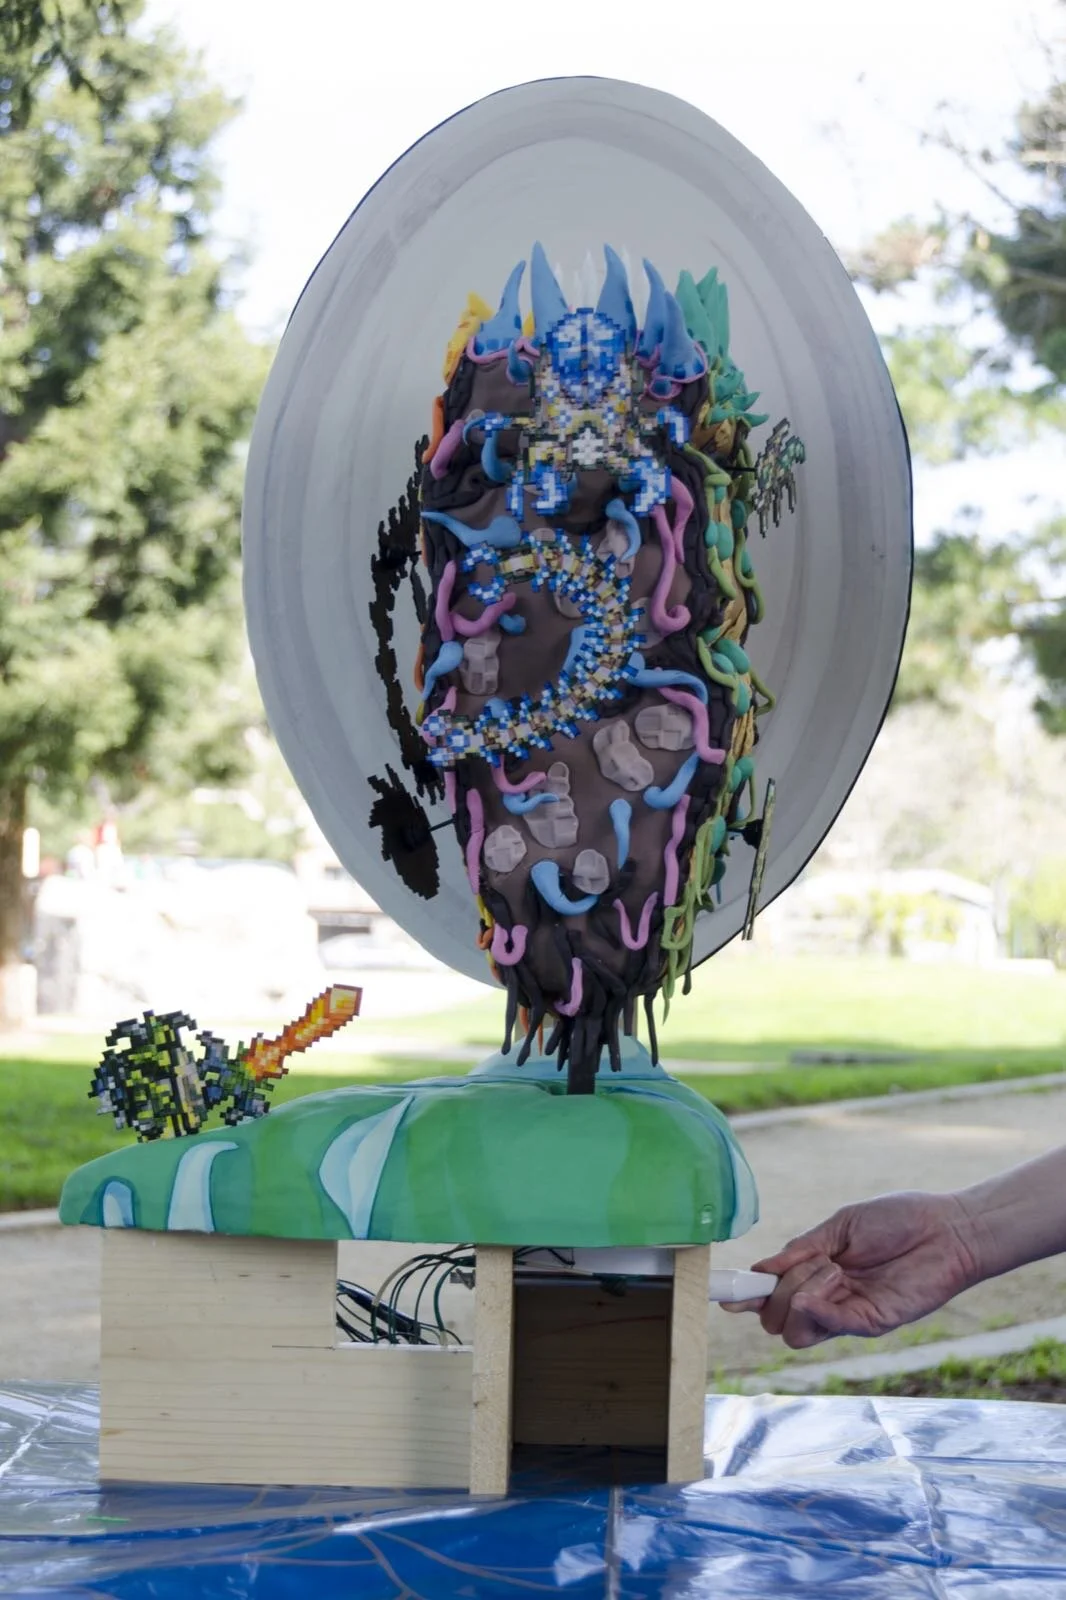
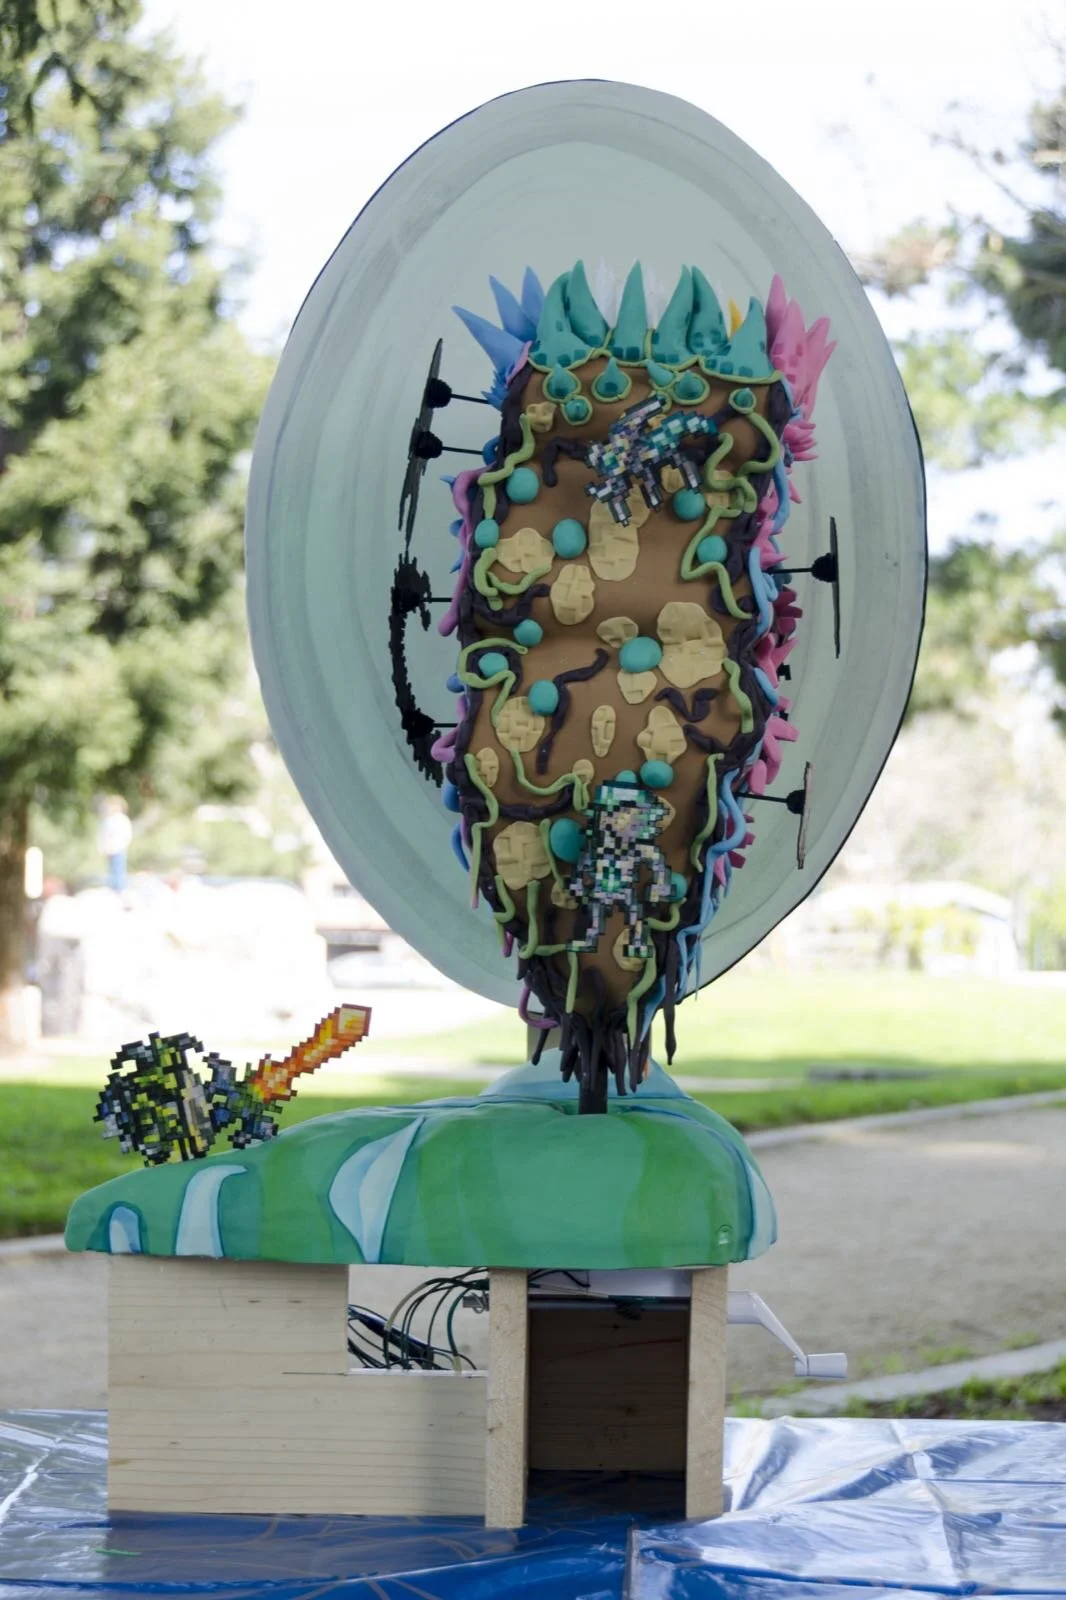
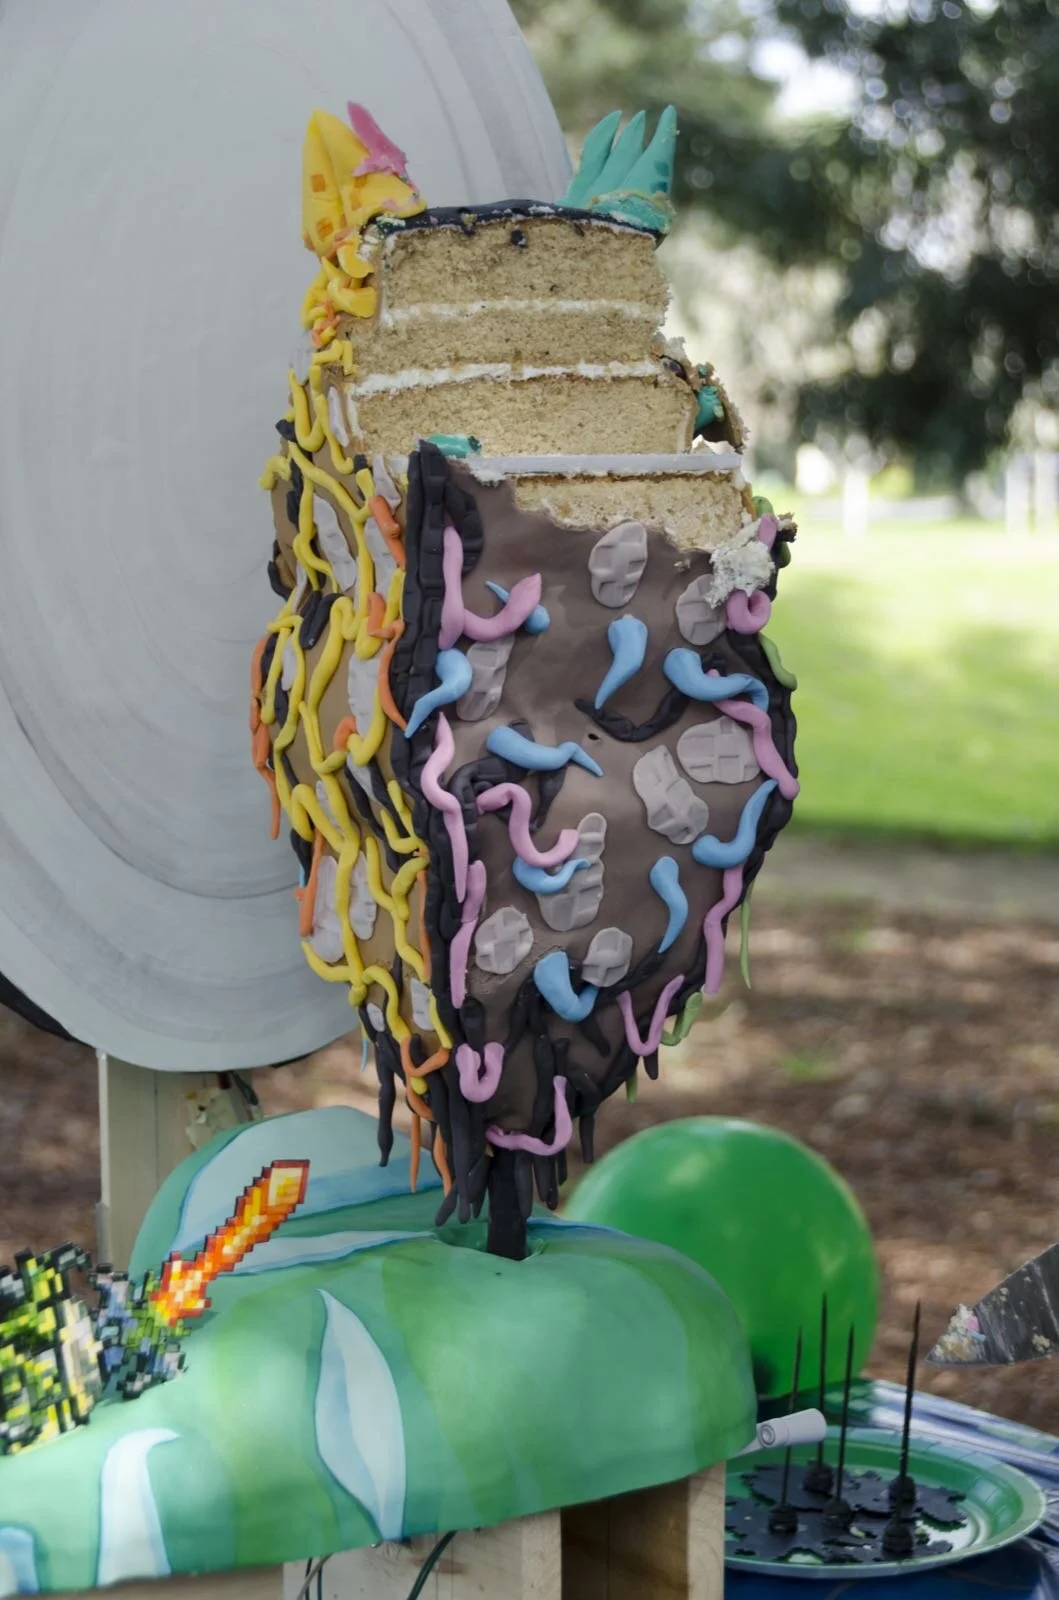
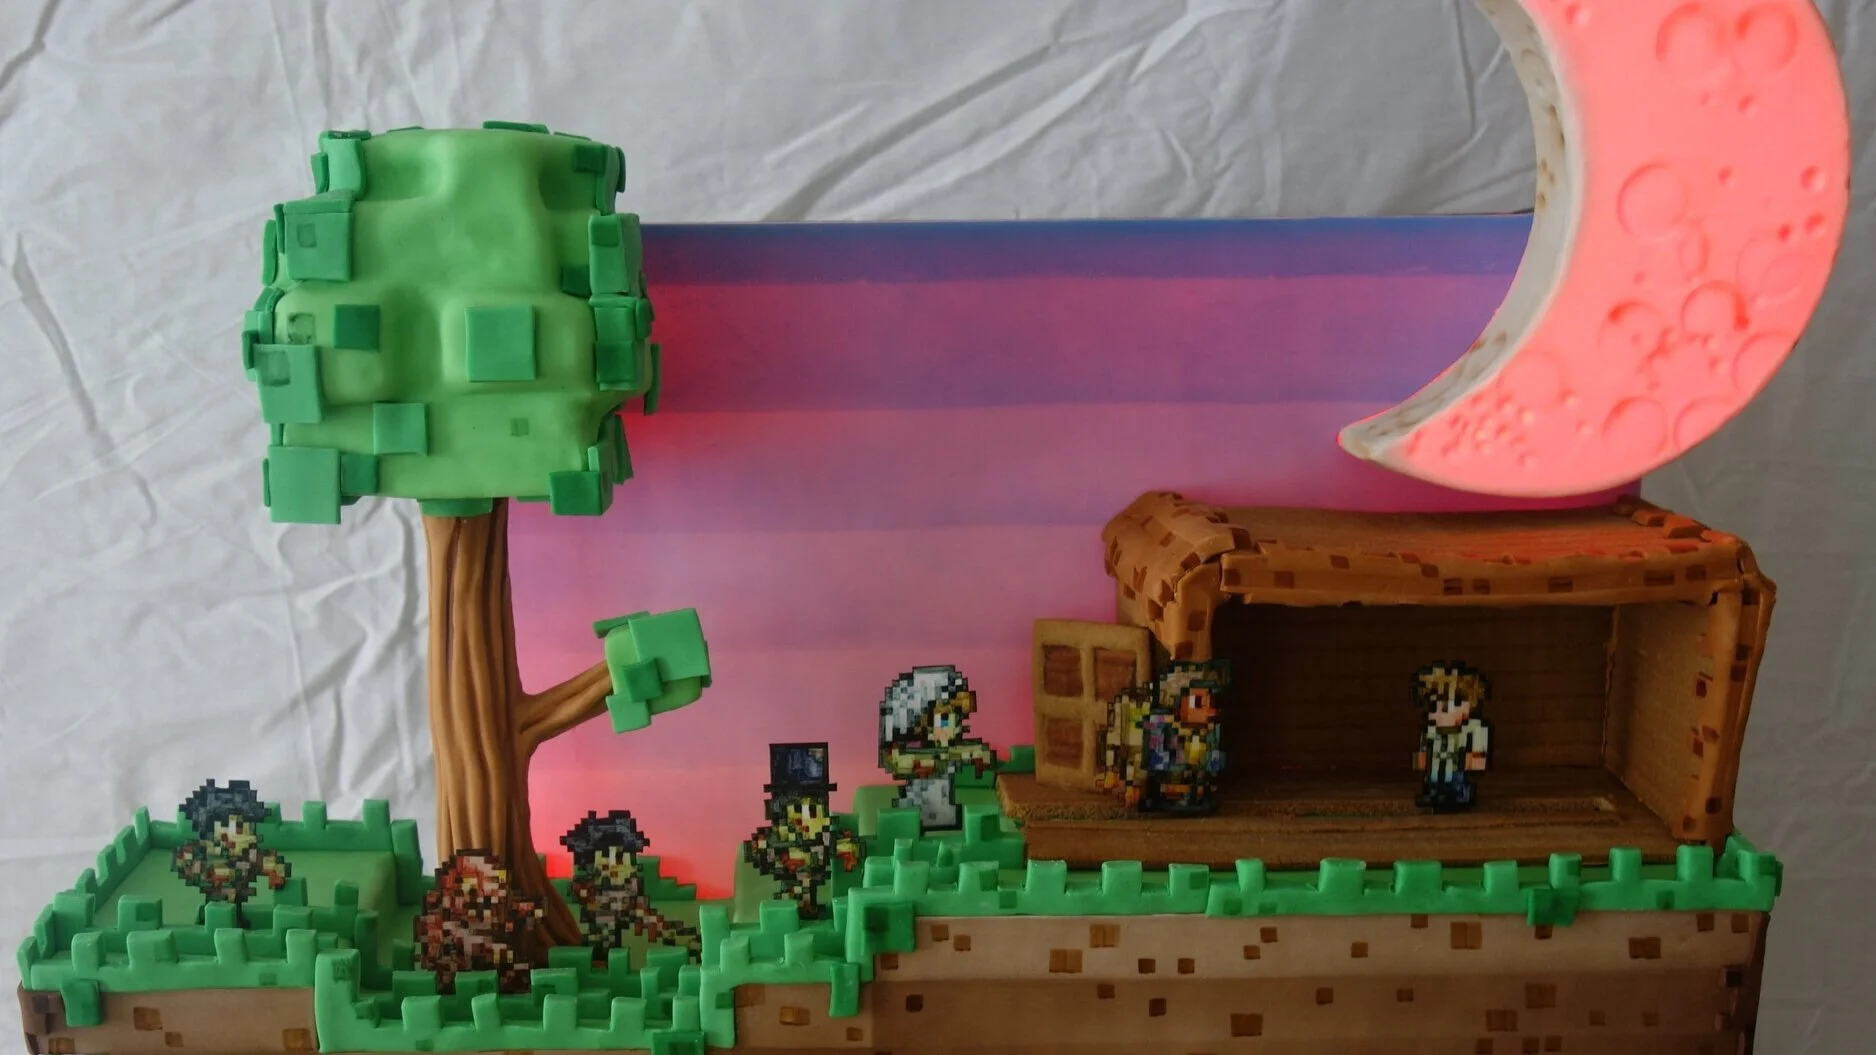
Alex, for her 10th birthday, requested a Terraria celestial event cake, with a four-sided pillar, each side of which corresponds to a phase of the celestial event – Nebula, Stardust, Vortex, and Solar – and includes the appropriate monsters.

Alex, for her 10th birthday, requested a Terraria celestial event cake, with a four-sided pillar, each side of which corresponds to a phase of the celestial event – Nebula, Stardust, Vortex, and Solar – and includes the appropriate monsters.
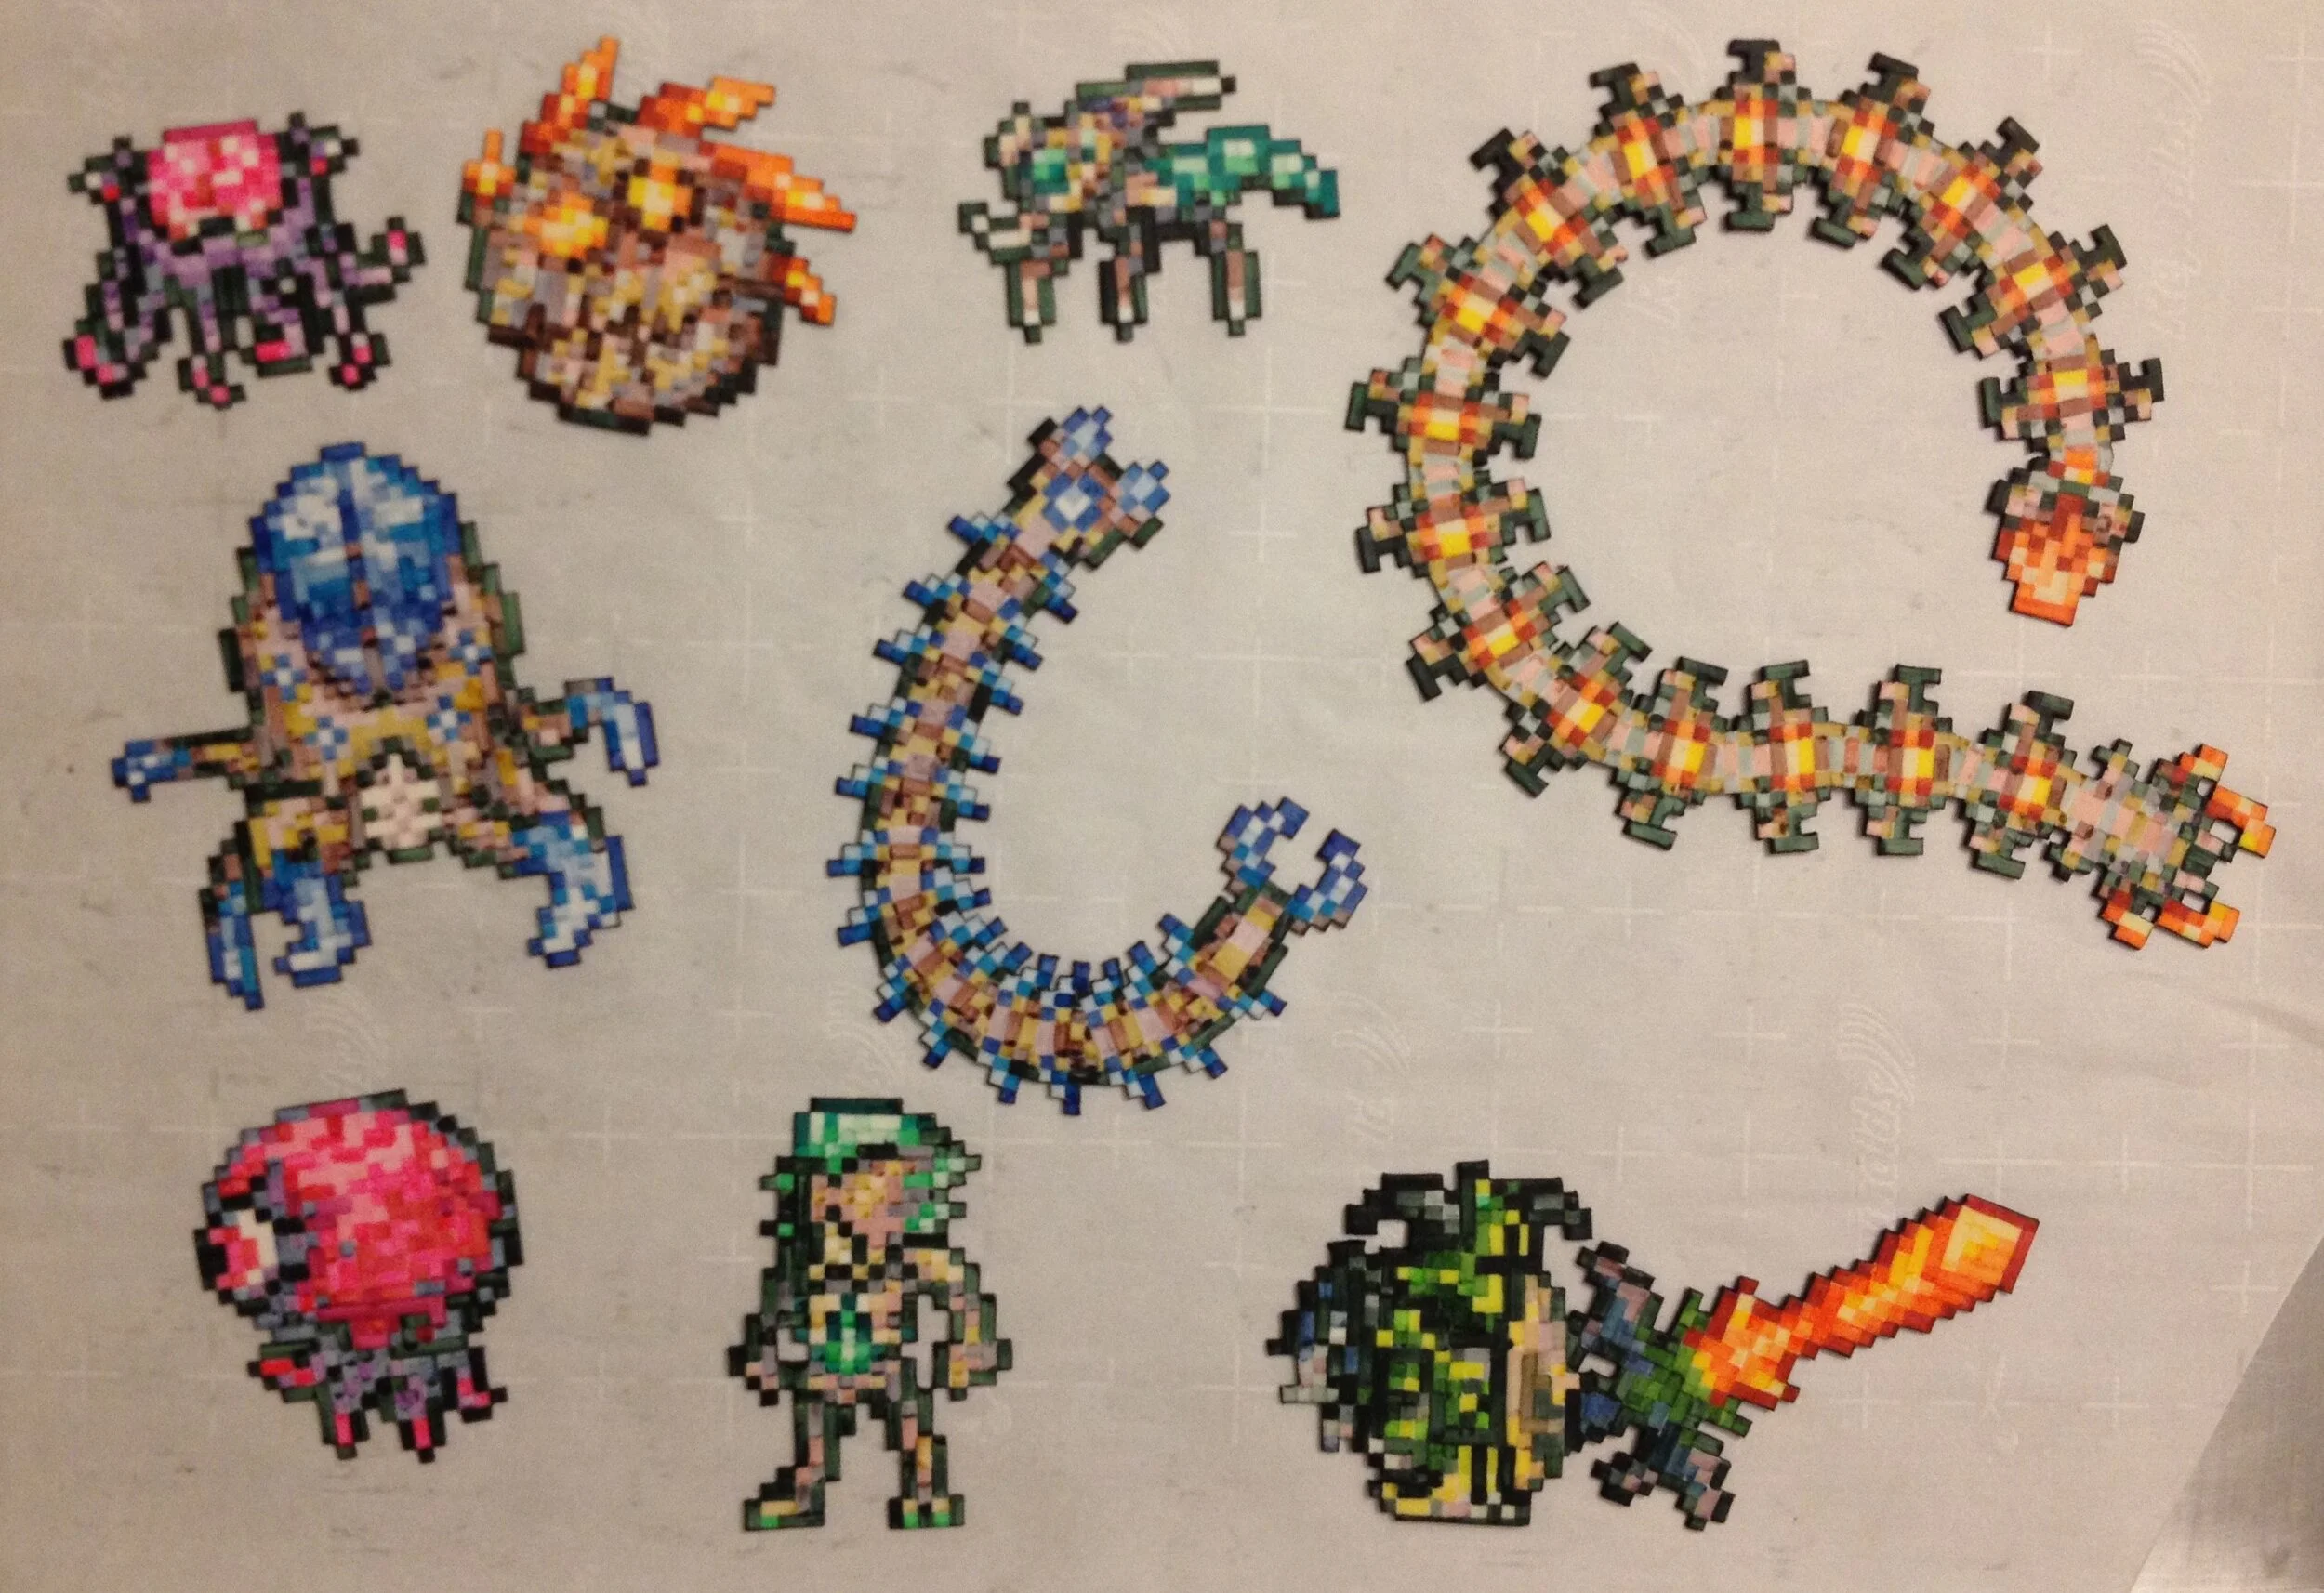
Fortunately, after Sam’s last Terraria cake, I am expert at painting pixel-y gum paste Terraria characters. The guy on the side is Alex’s avatar, with a Horseman’s Blade, which she specifically requested.

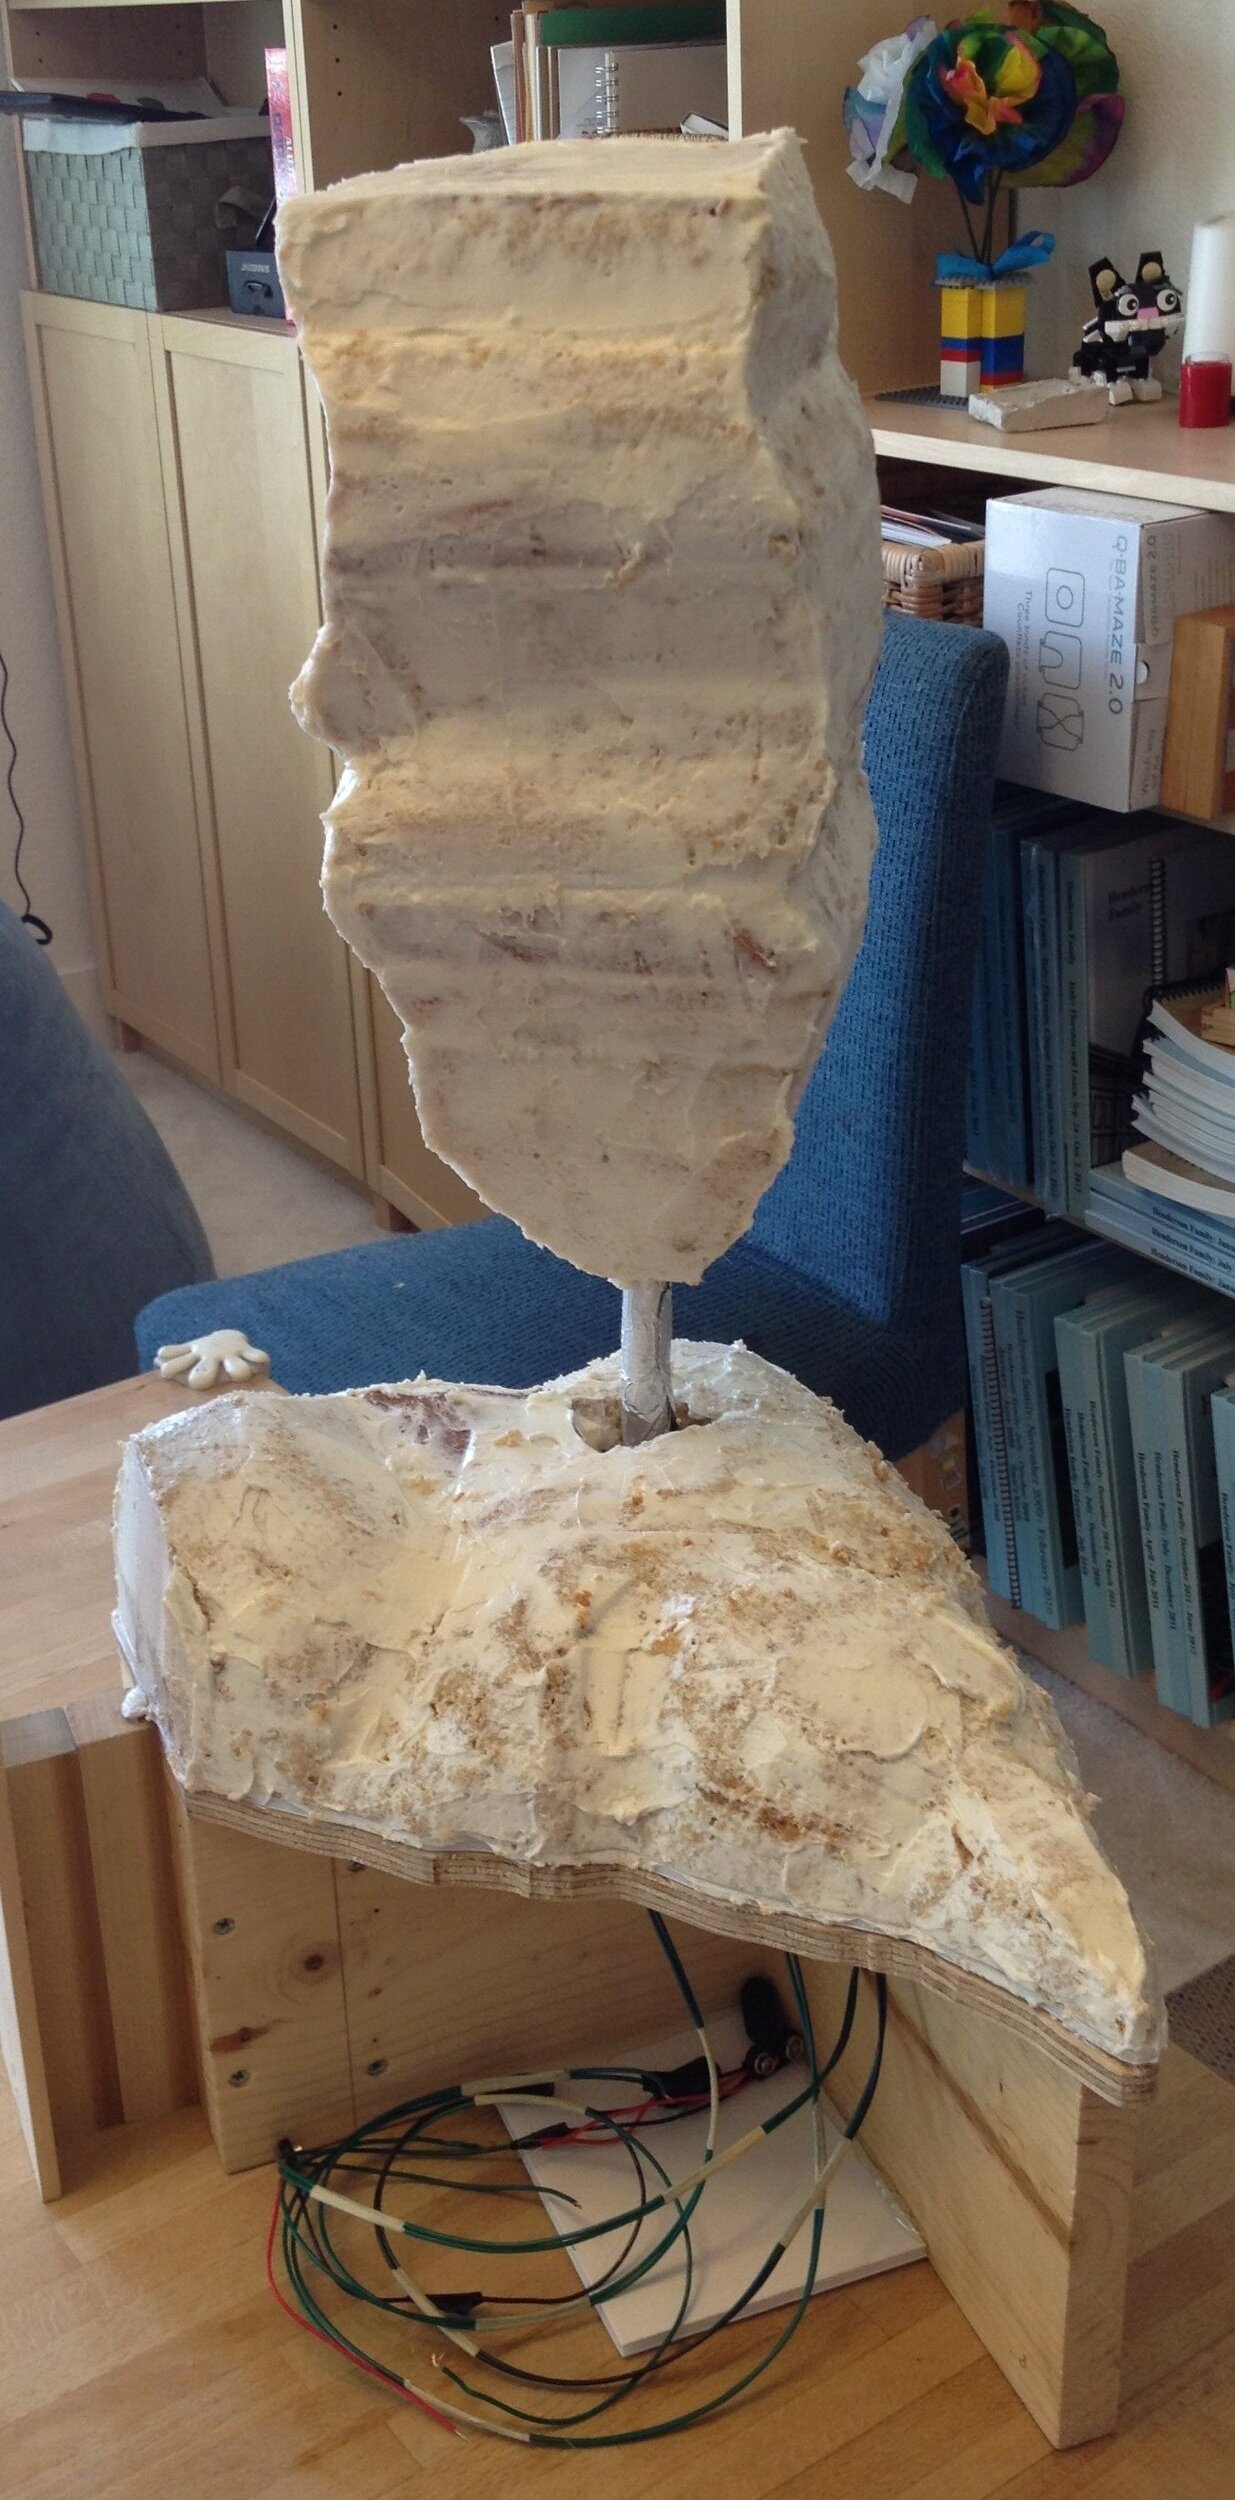
The tower is cake, mounted on a pipe connected to a bevel gear, so that the cake can be turned with a crank.
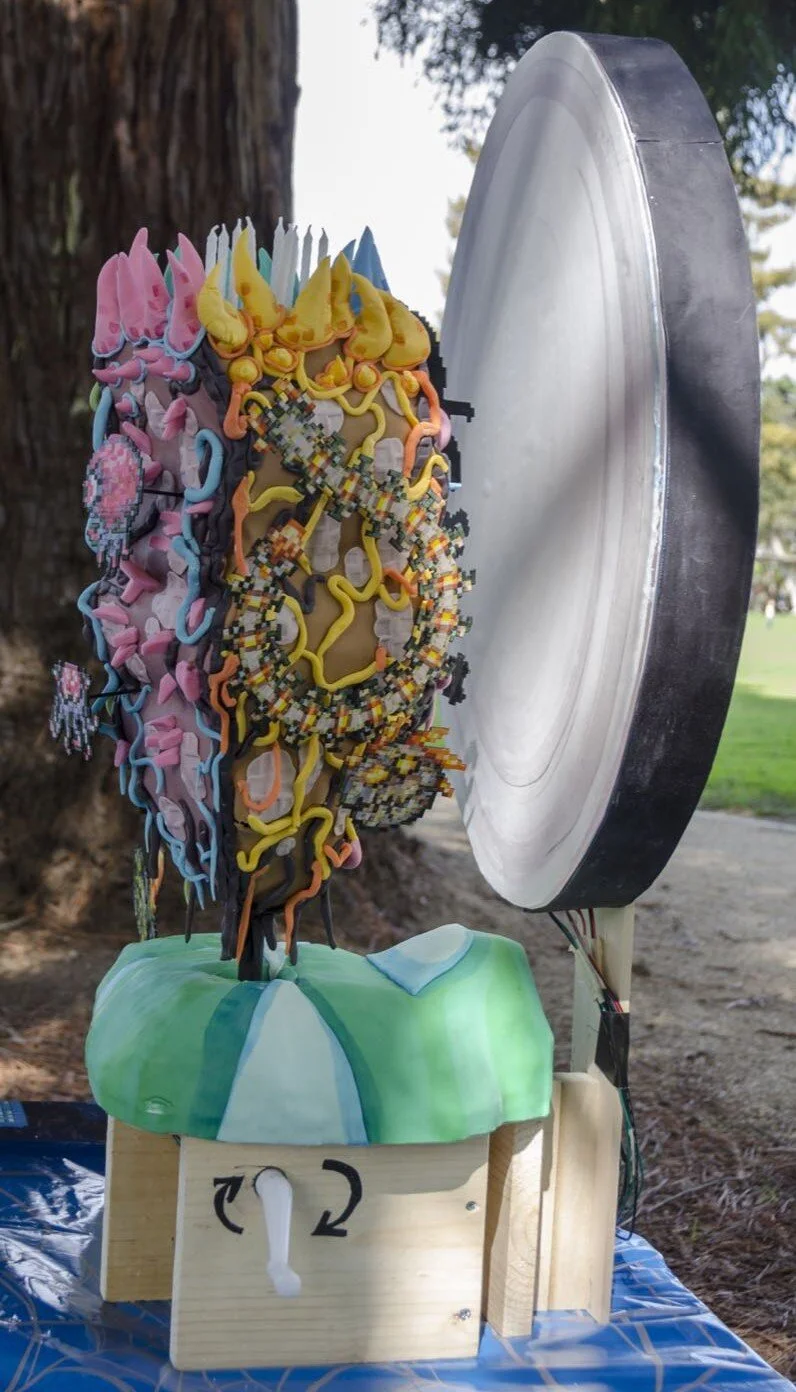
I wanted to make the backdrop change color to correspond with the celestial event phase, so I made a light box like the one I made for the Terraria Blood Moon Cake. Inside are strips of LED tape in pink, yellow, blue, and green. When the cake turned, a strip of copper tape on the gear created electrical connections that lit the appropriate color LEDs as each side of the pillar came to the fore. It quite well at home, but the party was outside on a sunny day, so with that much ambient light the color change was virtually imperceptible.

As usual, I made about four times as much cake as the party required.
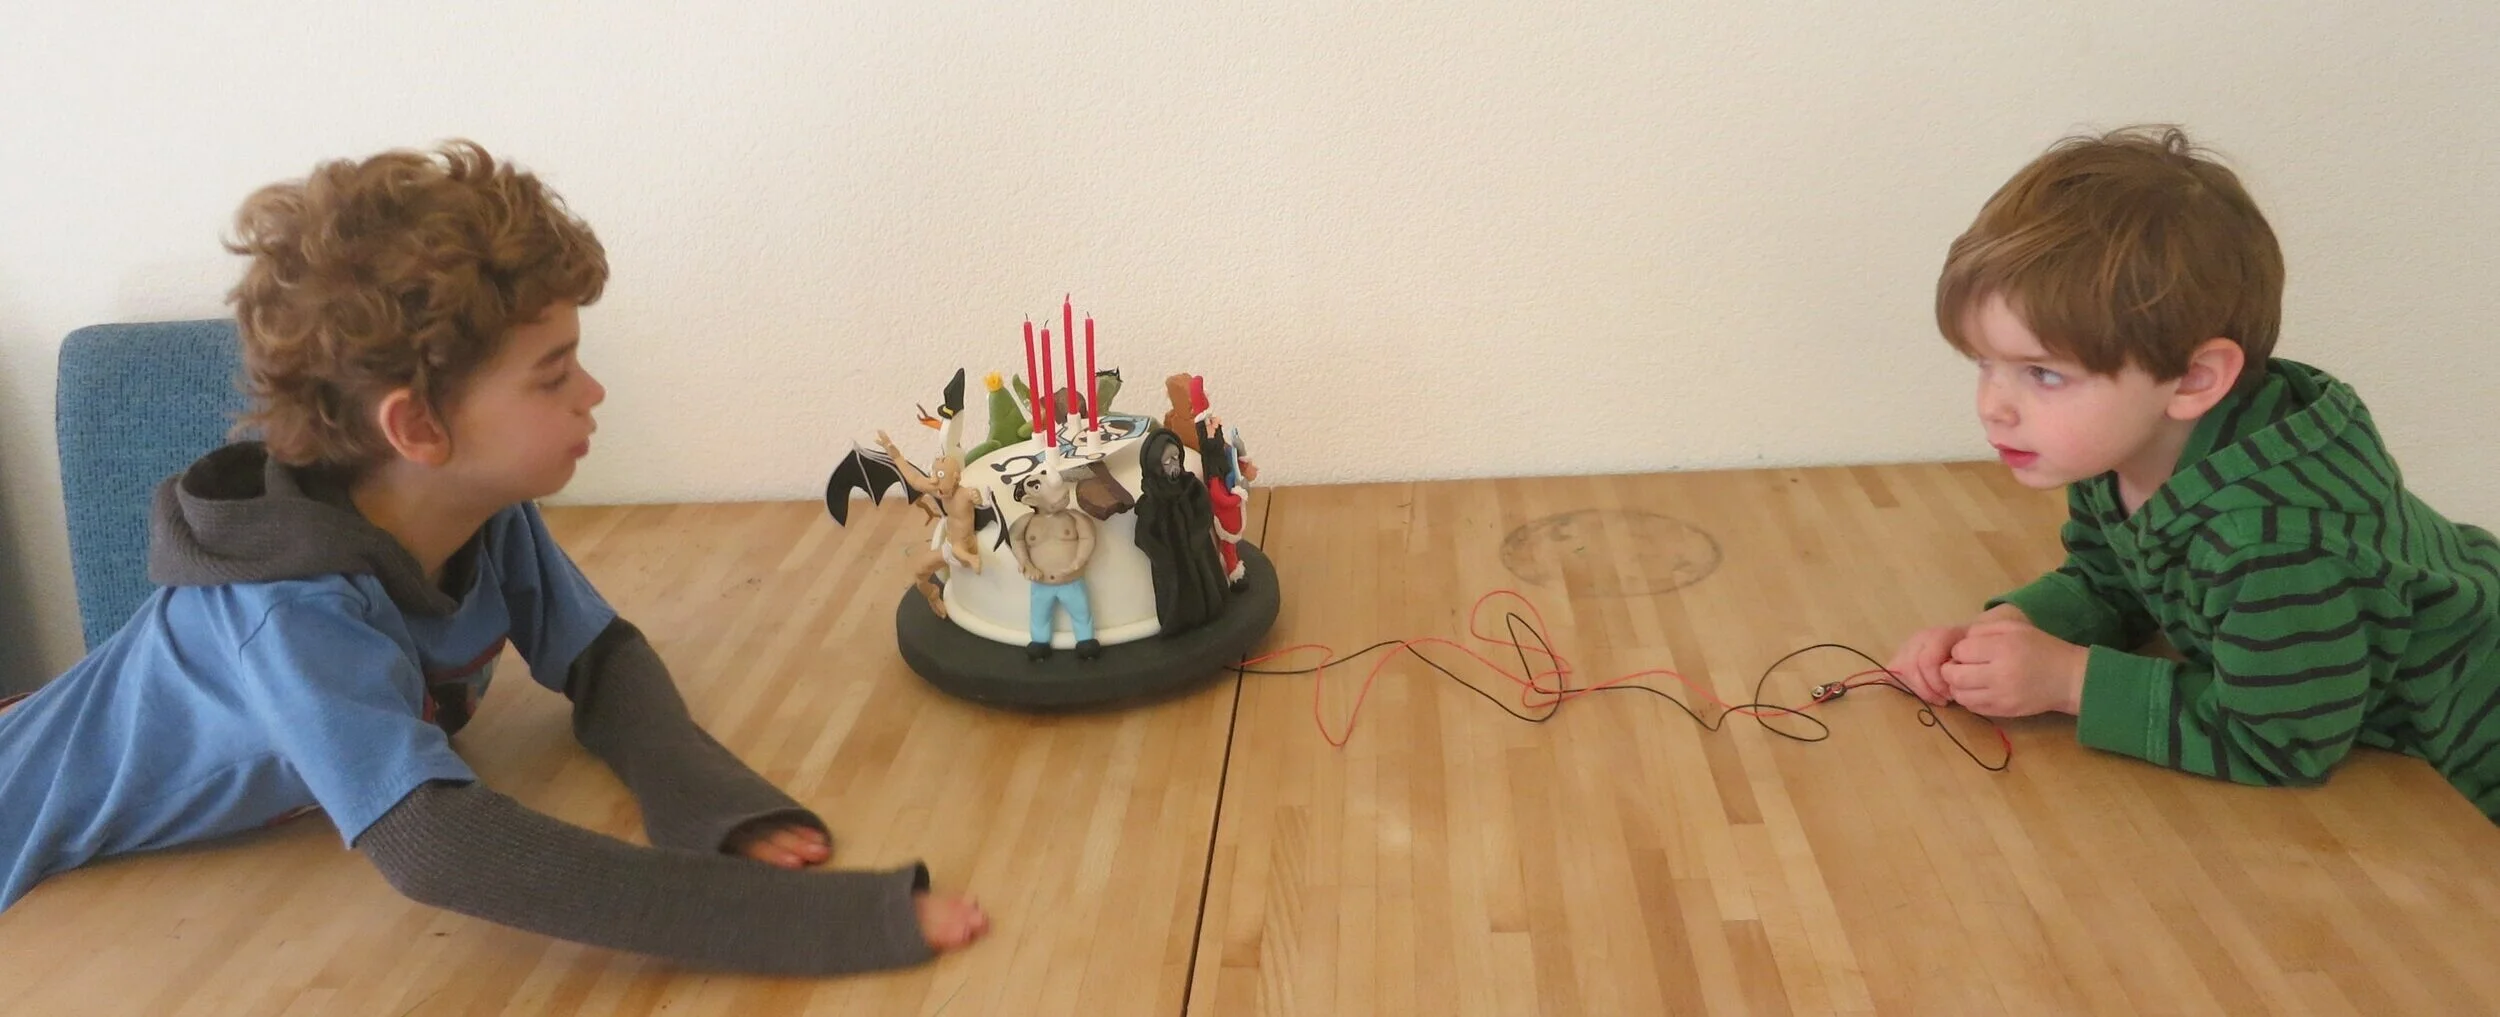
Terraria Blood Moon Cake
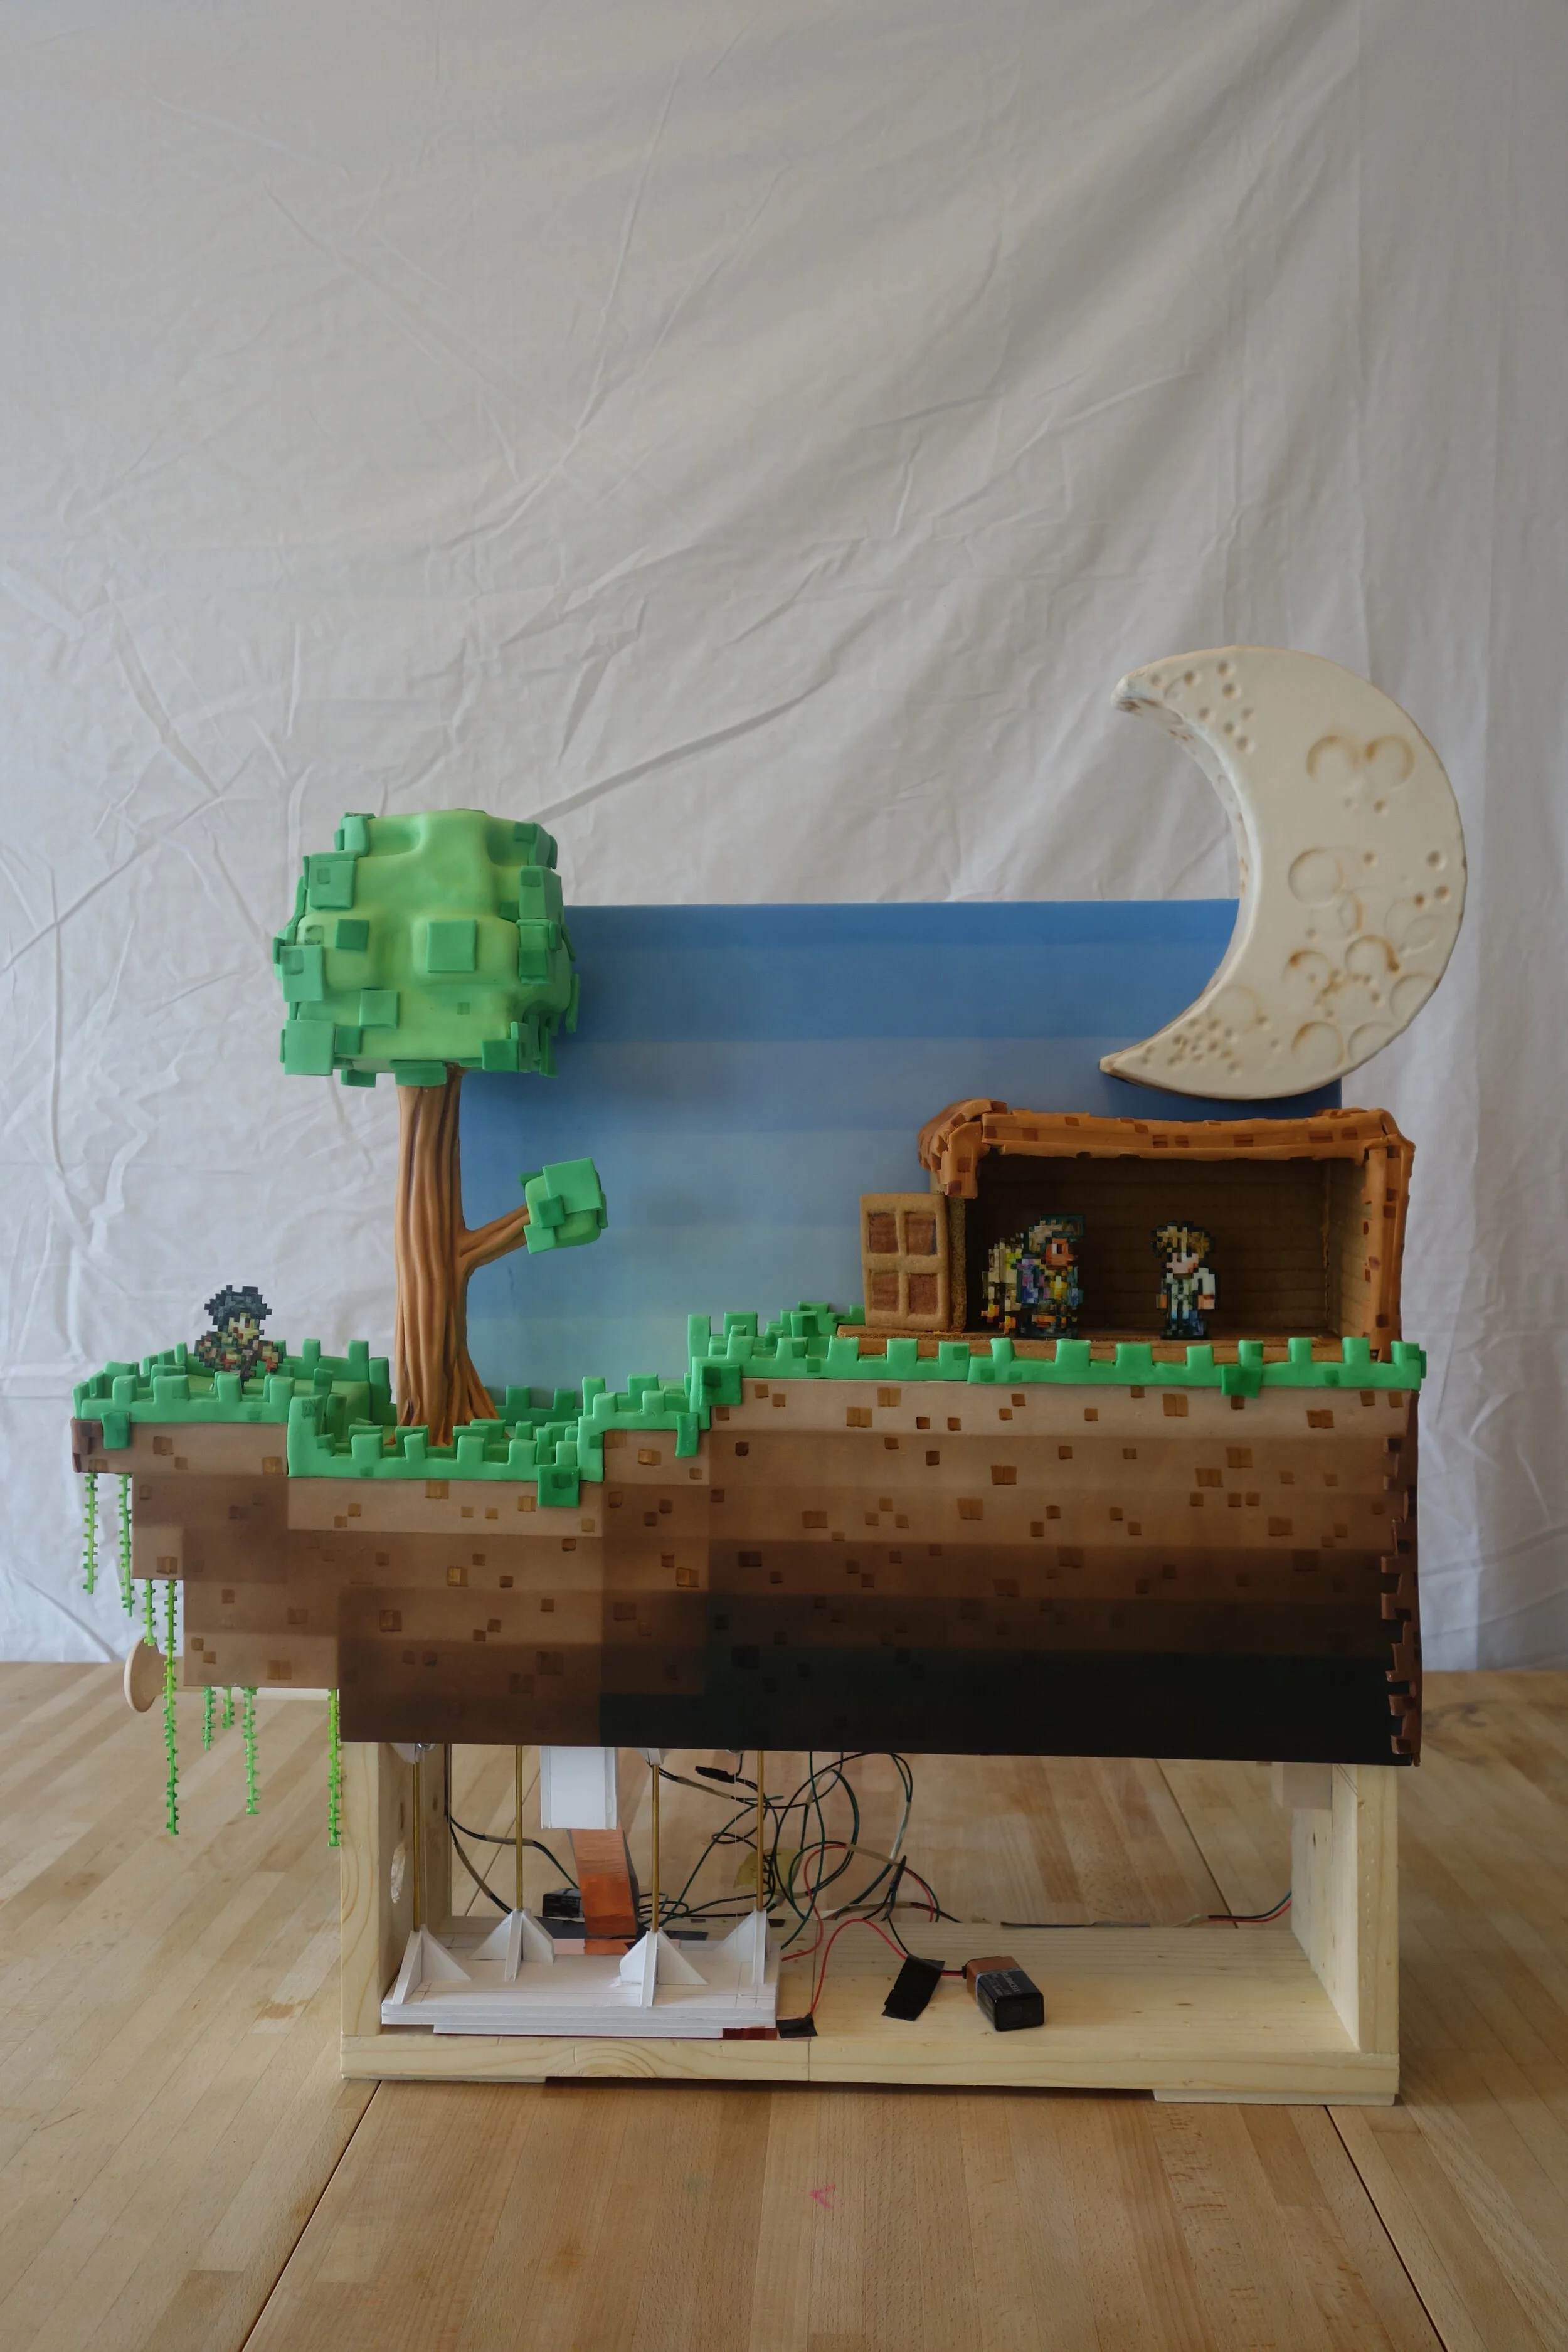
For Sam’s 7th birthday, he wanted a Terraria blood moon cake. Apparently, when there is a blood moon, a lot more zombies come out and there are some kinds of zombies that only appear in the blood moon. So we settled on a design where the moon changed from blue (regular moon) to red (blood moon) and a bunch more zombies rose up out of the ground.
For Sam’s 7th birthday, he wanted a Terraria blood moon cake. Apparently, when there is a blood moon, a lot more zombies come out and there are some kinds of zombies that only appear in the blood moon. So we settled on a design where the moon changed from blue (regular moon) to red (blood moon) and a bunch more zombies rose up out of the ground.

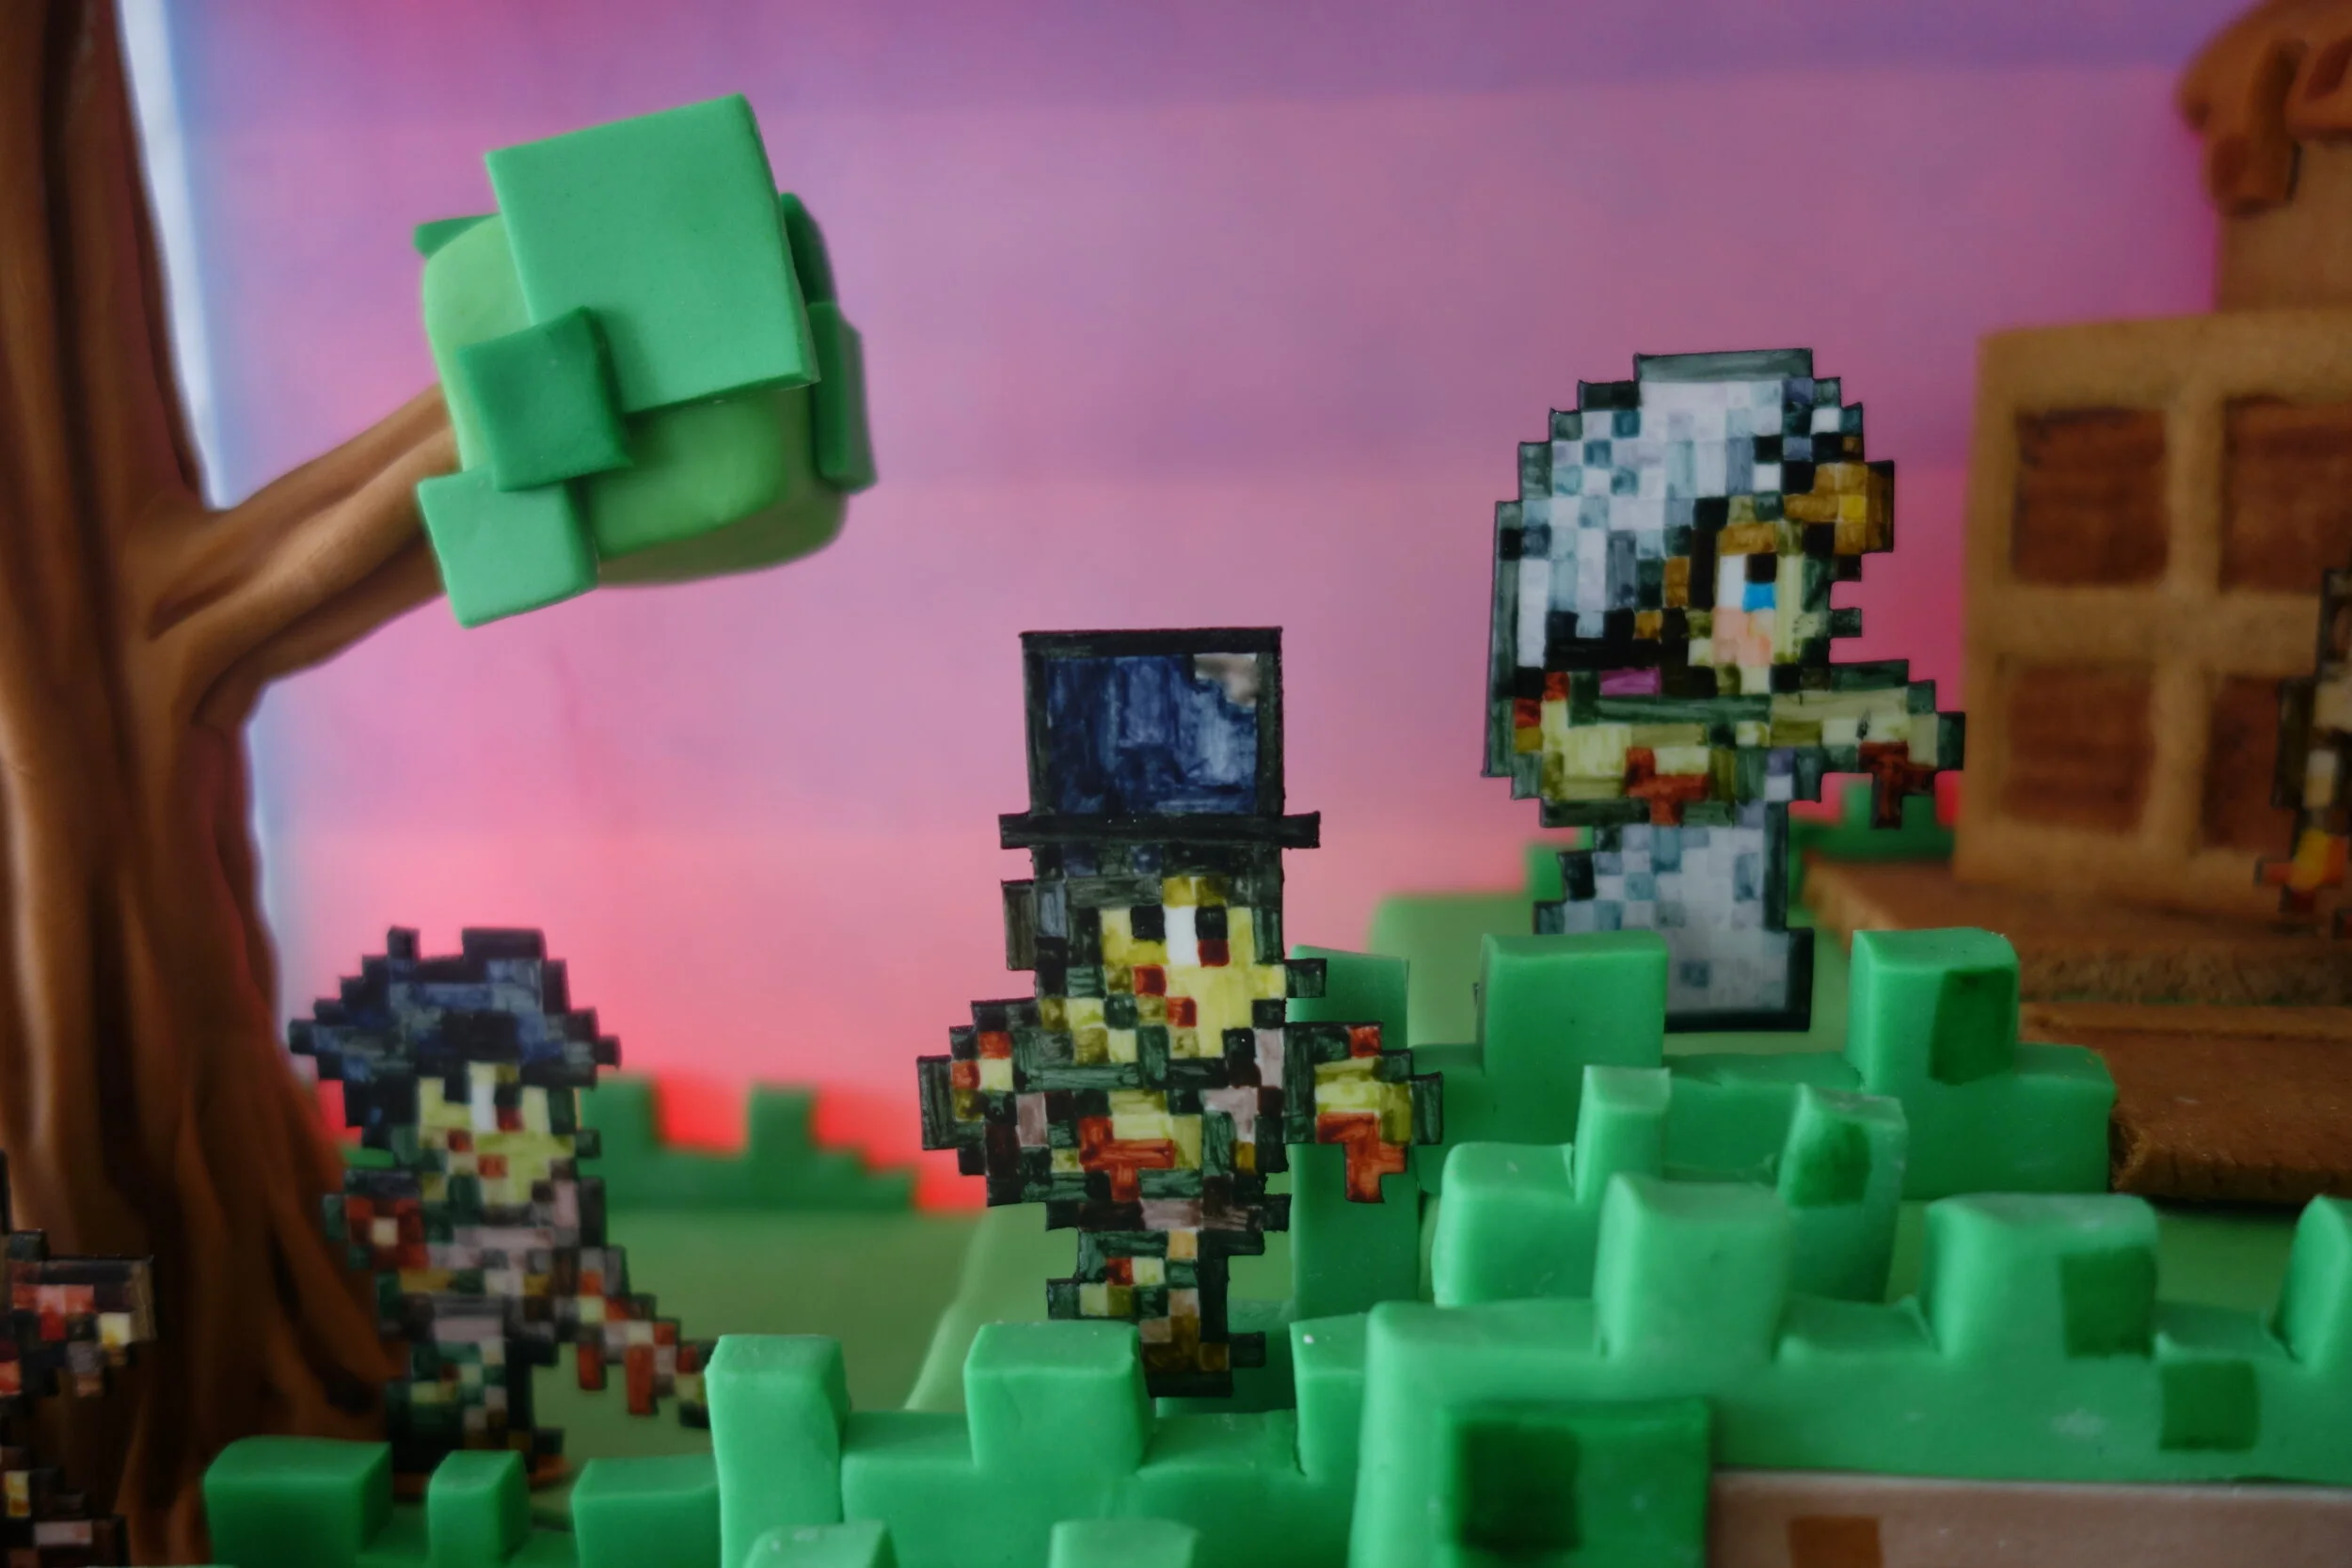
The characters are hand painted gum paste. The blood moon zombies are all mounted on metal tubes that are attached to a little platform. The platform is lifted by fishing line attached to a wooden dowel, so that when the dowel is pulled out, the zombies rise up for the blood moon and when the dowel is pushed in, the zombies sink into the ground for the regular moon.

Sam also wanted his Terraria avatar and the guide NPC, so I included a little house made of gingerbread where they can hide from the zombies and mounted them on a track so they can walk back and forth.

The backdrop and the moon are light boxes with lids of plexiglass covered with fondant. Inside, are rows of red LEDs and rows of blue LEDs. The LEDs are wired through the platform that raises and lowers the zombies, so that the blue LEDs light when the platform is down (regular moon) and the red LEDs light when the platform is up (blood moon).


Inside Out Cake
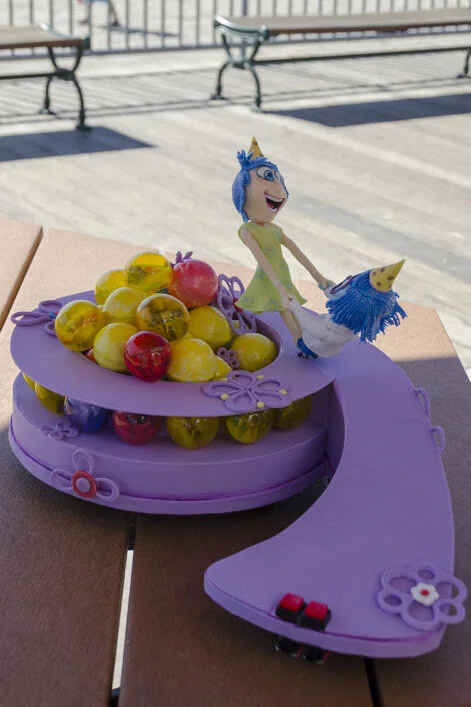
This Inside Out cake was for my friend Isaac’s ninth birthday, which is why it’s in the shape of the number 9.

This Inside Out cake was for my friend Isaac’s ninth birthday, which is why it’s in the shape of the number 9.

The number 9 itself is mostly foam core covered with gum paste, because I needed room to embed LEDs and I didn’t need very much cake because they party was pretty small.

The memories around the edge of the 9 are gelatin bubbles, which are made by dipping partially inflated balloons, coated with shortening, into melted gelatin. They’re surprisingly sturdy once dry and technically edible, though it’s a little like eating plastic.
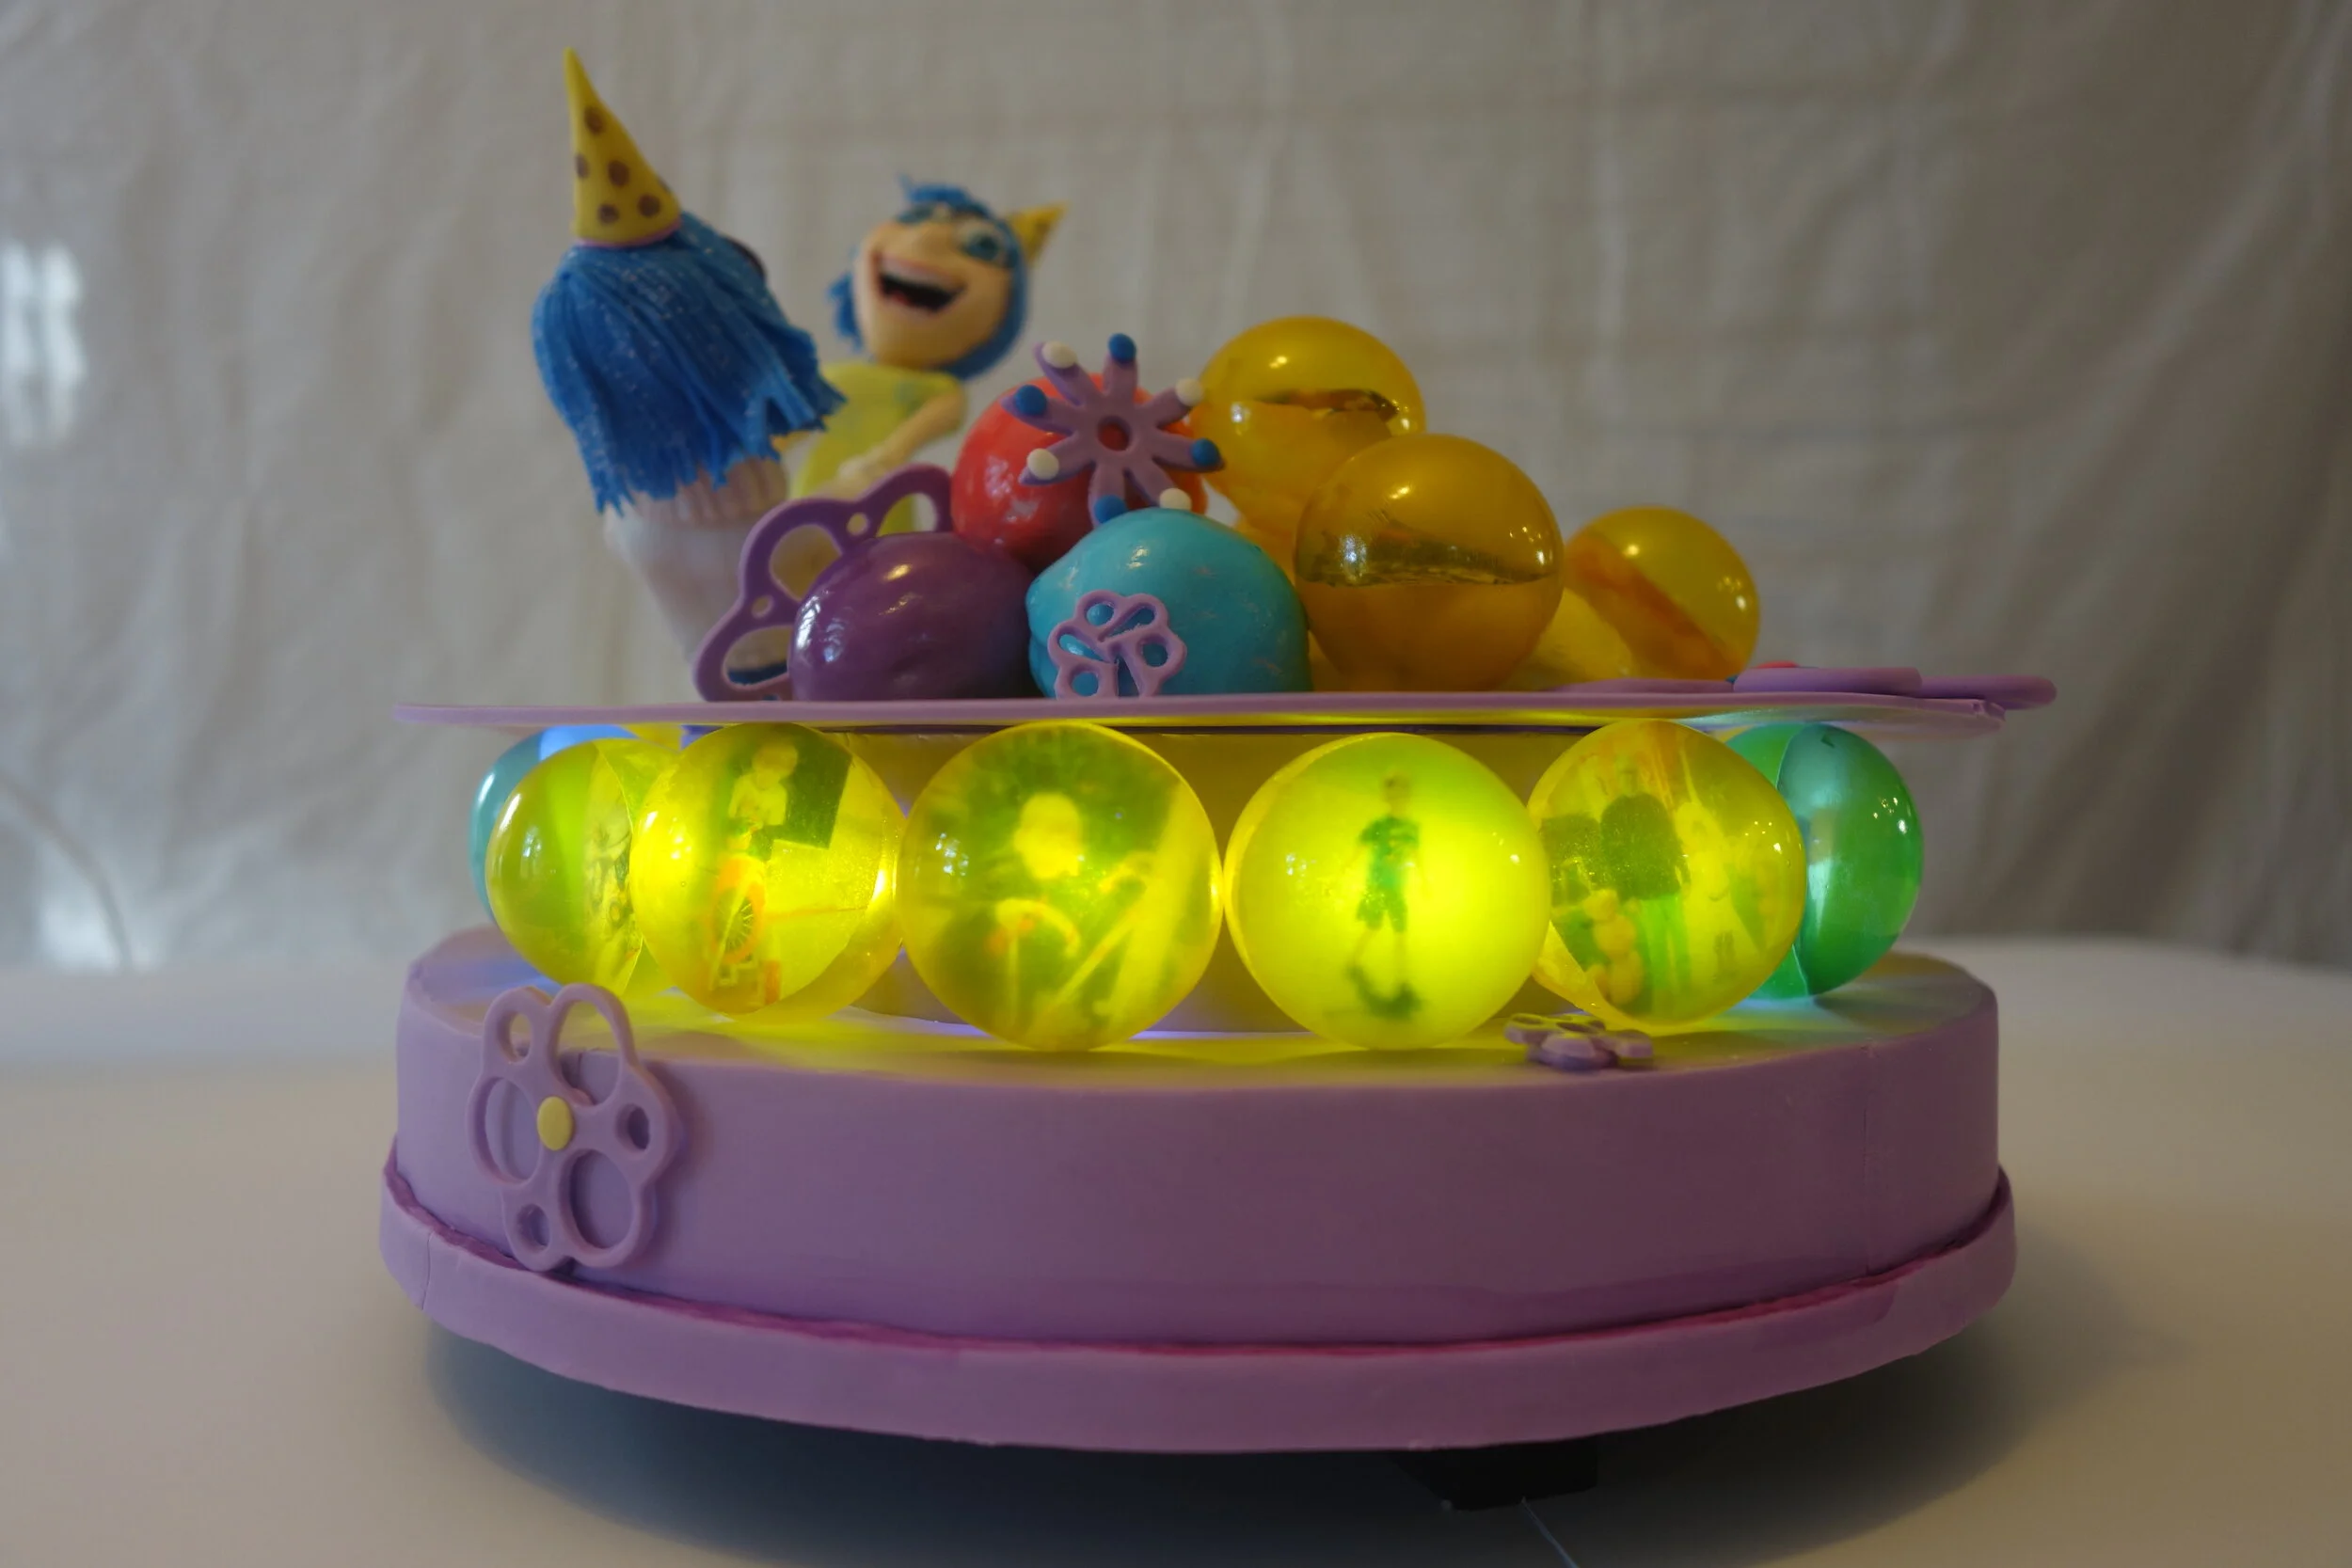
Each memory bubble contains a picture of the birthday boy, at ages from infancy to now, printed on edible wafer paper and each one has an LED behind it.
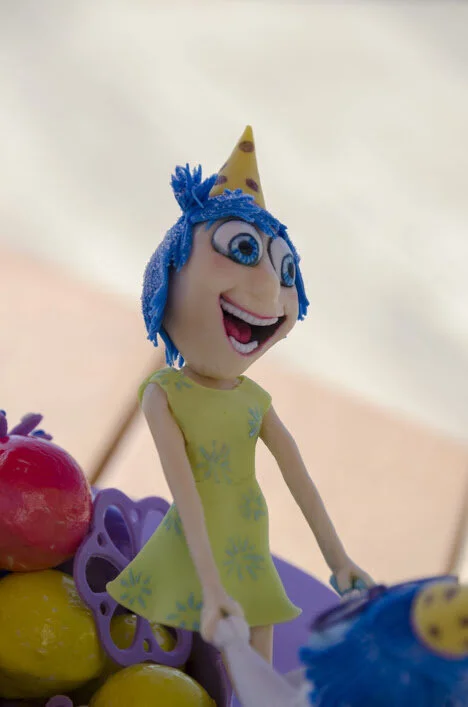

The figures are made of modeling chocolate with gum paste hair and clothes. They are made over a wire armature attached to a motor, so that they can spin joyously around.
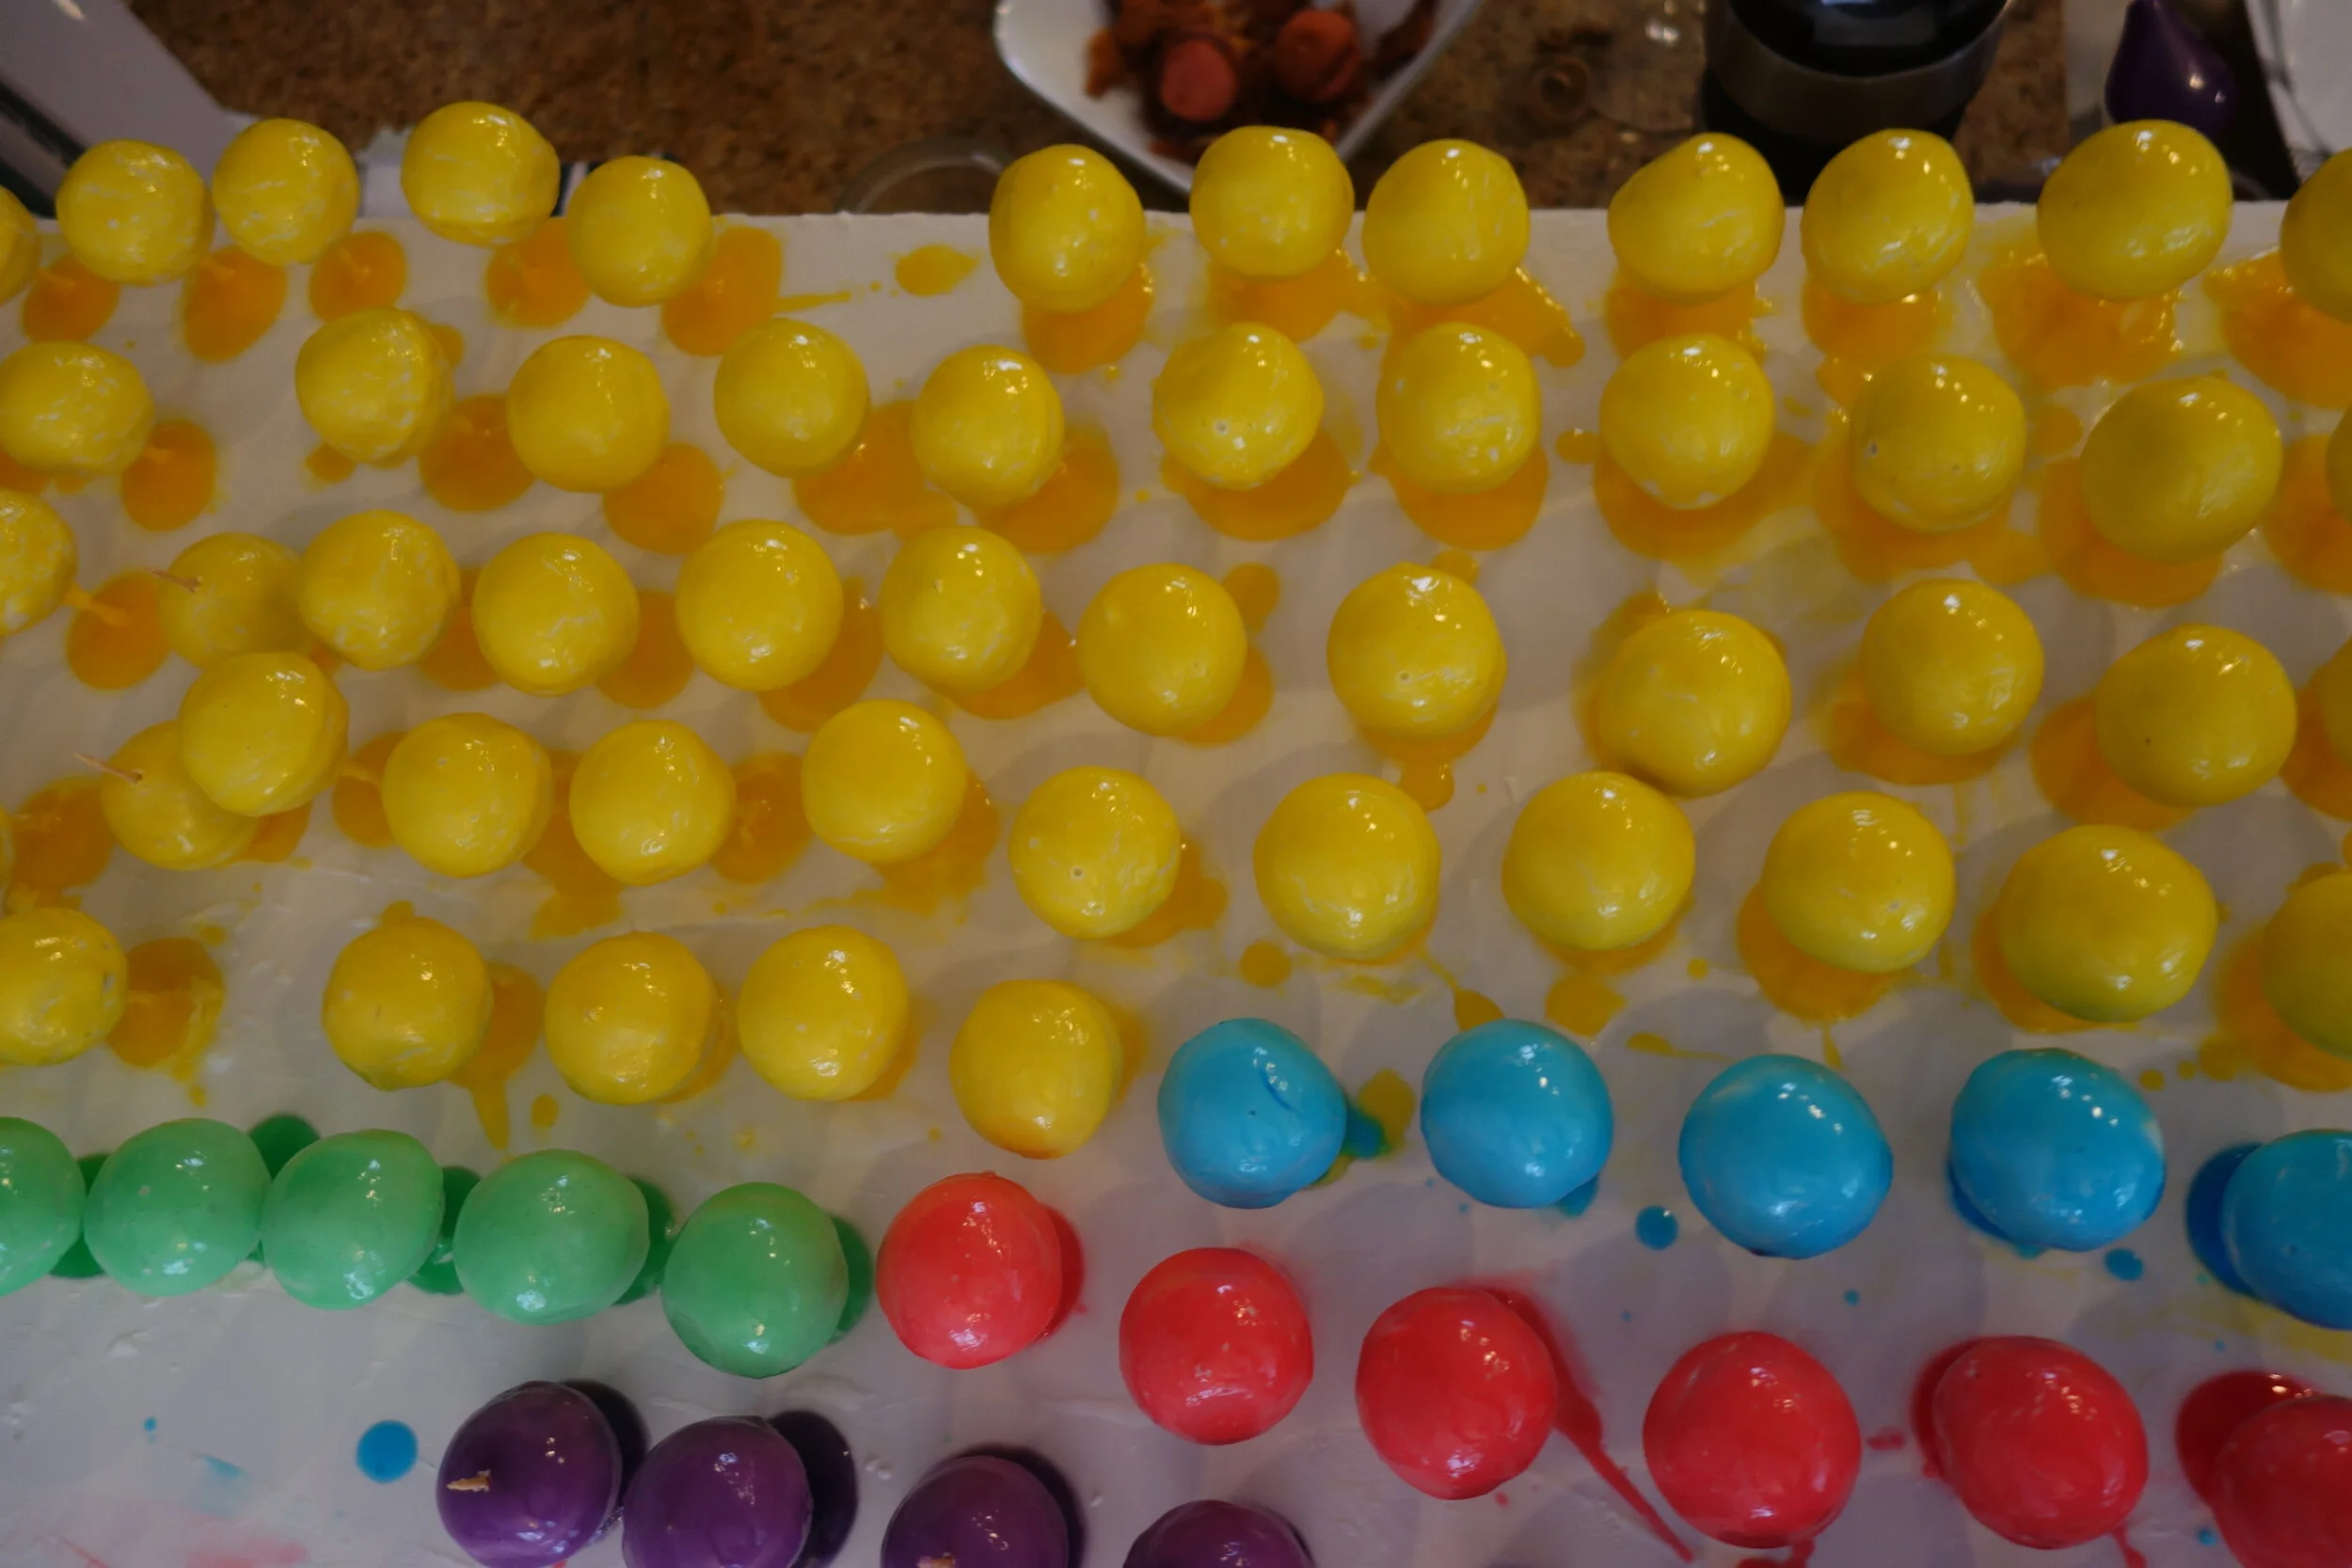
The actual cake is the memory balls in the middle of the 9, which are cake balls dipped in royal icing and then in colored piping gel. I was trying to make cake that was easy to pick up and eat with no utensils, because the party was outside. But I didn’t leave enough time for the piping gel to dry, so they wound up extremely sticky and messy to eat. Still tasty, though.

Clash of Clans Cake
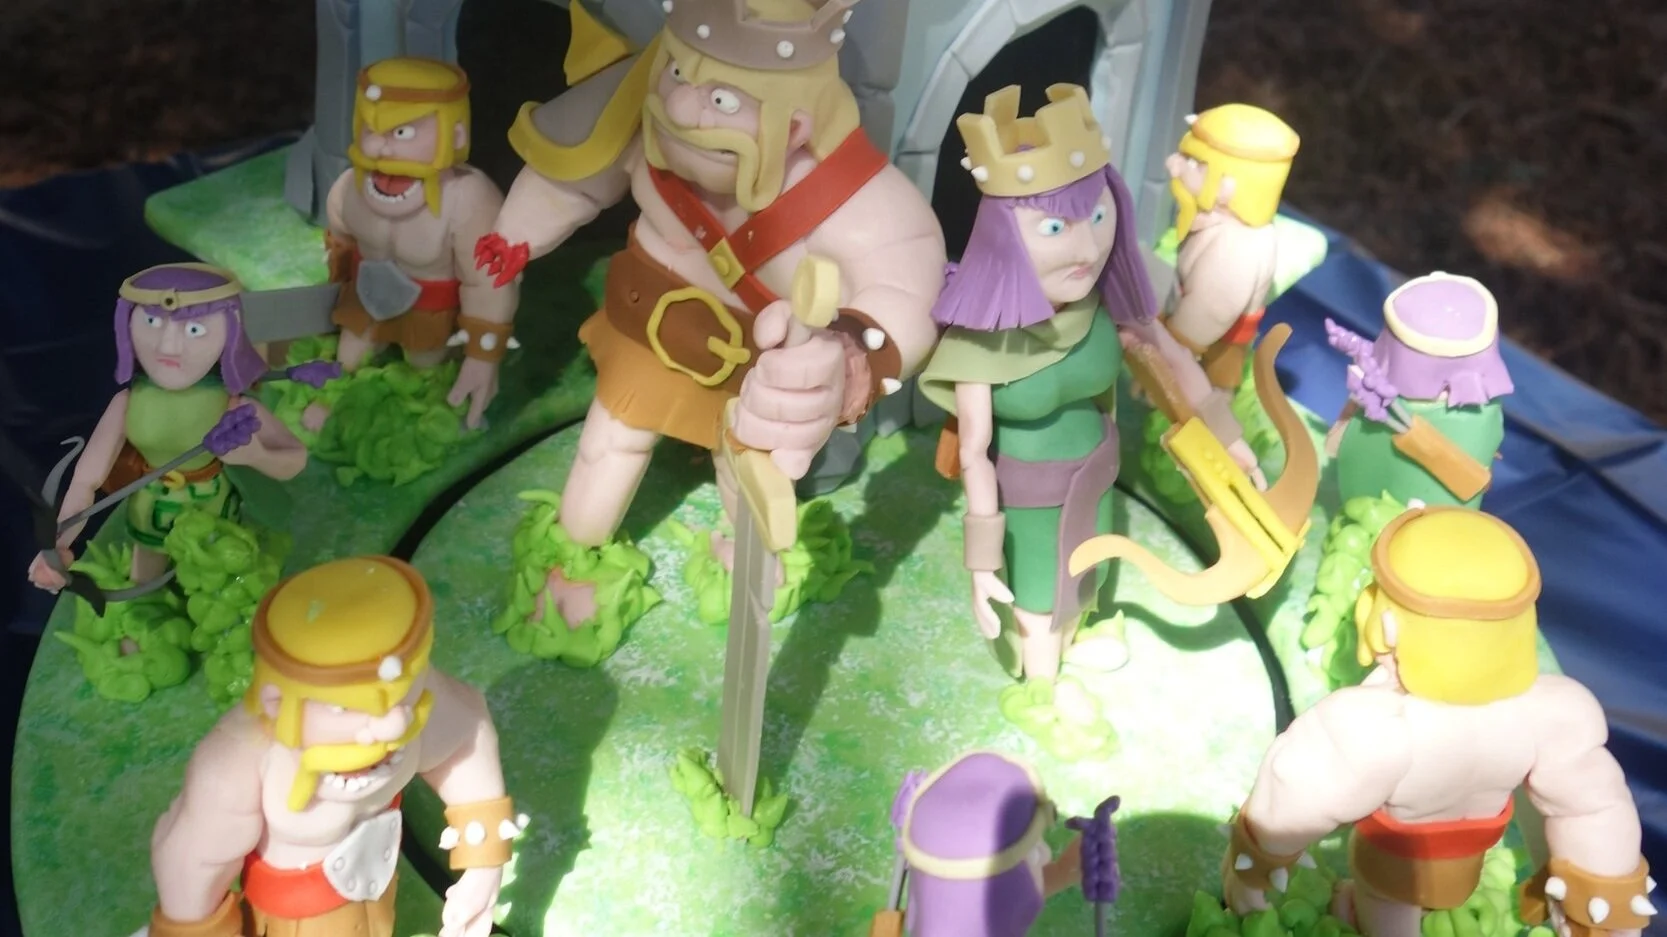
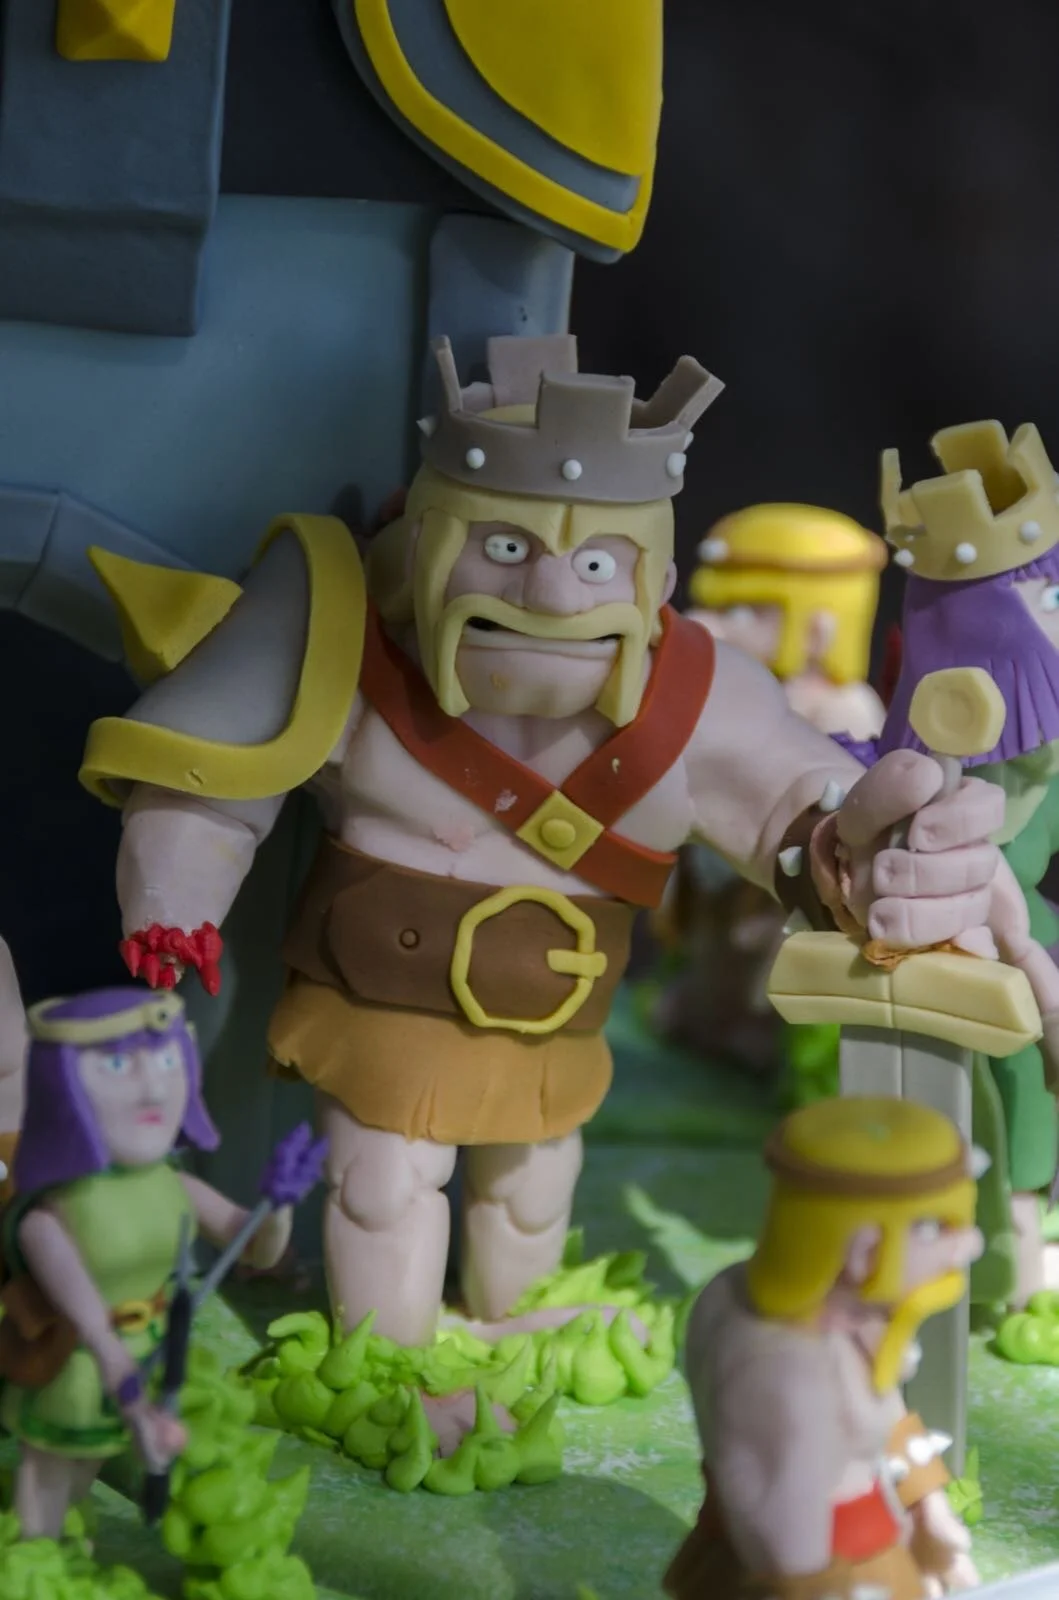
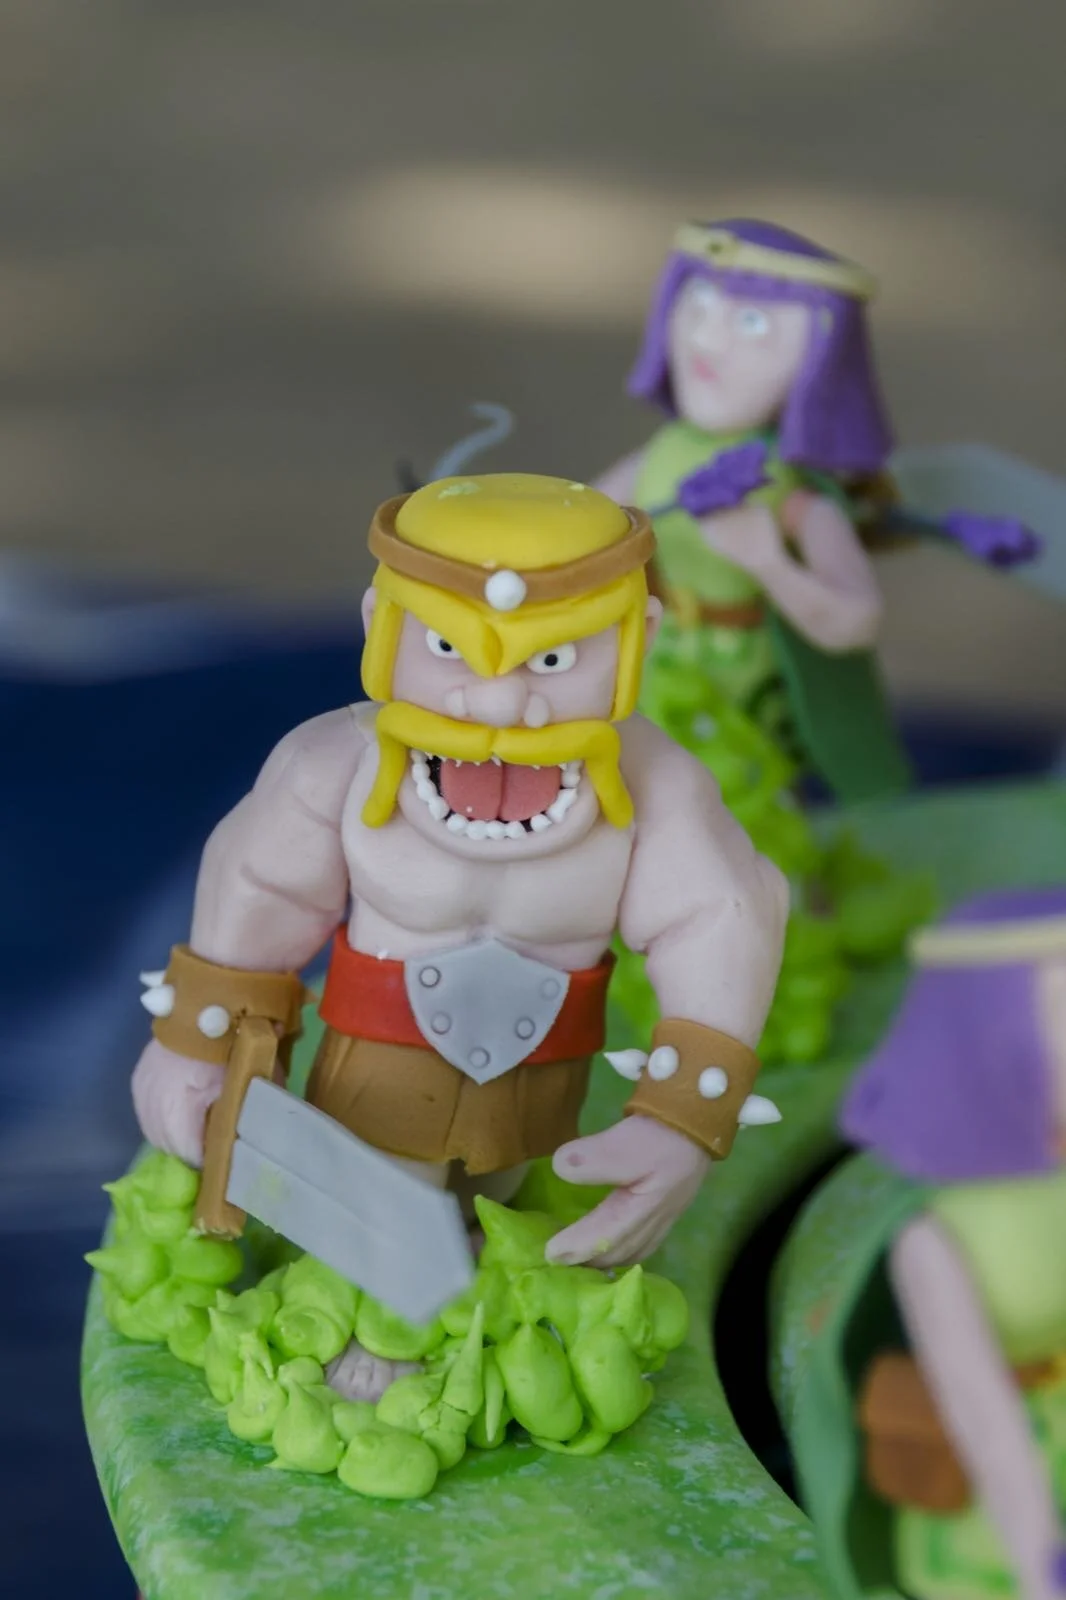
For her 9th birthday, my niece had very specific requirements – a Level 6 Clan Castle from Clash of Clans with an Archer Queen and Barbarian King as well as archers and barbarians.
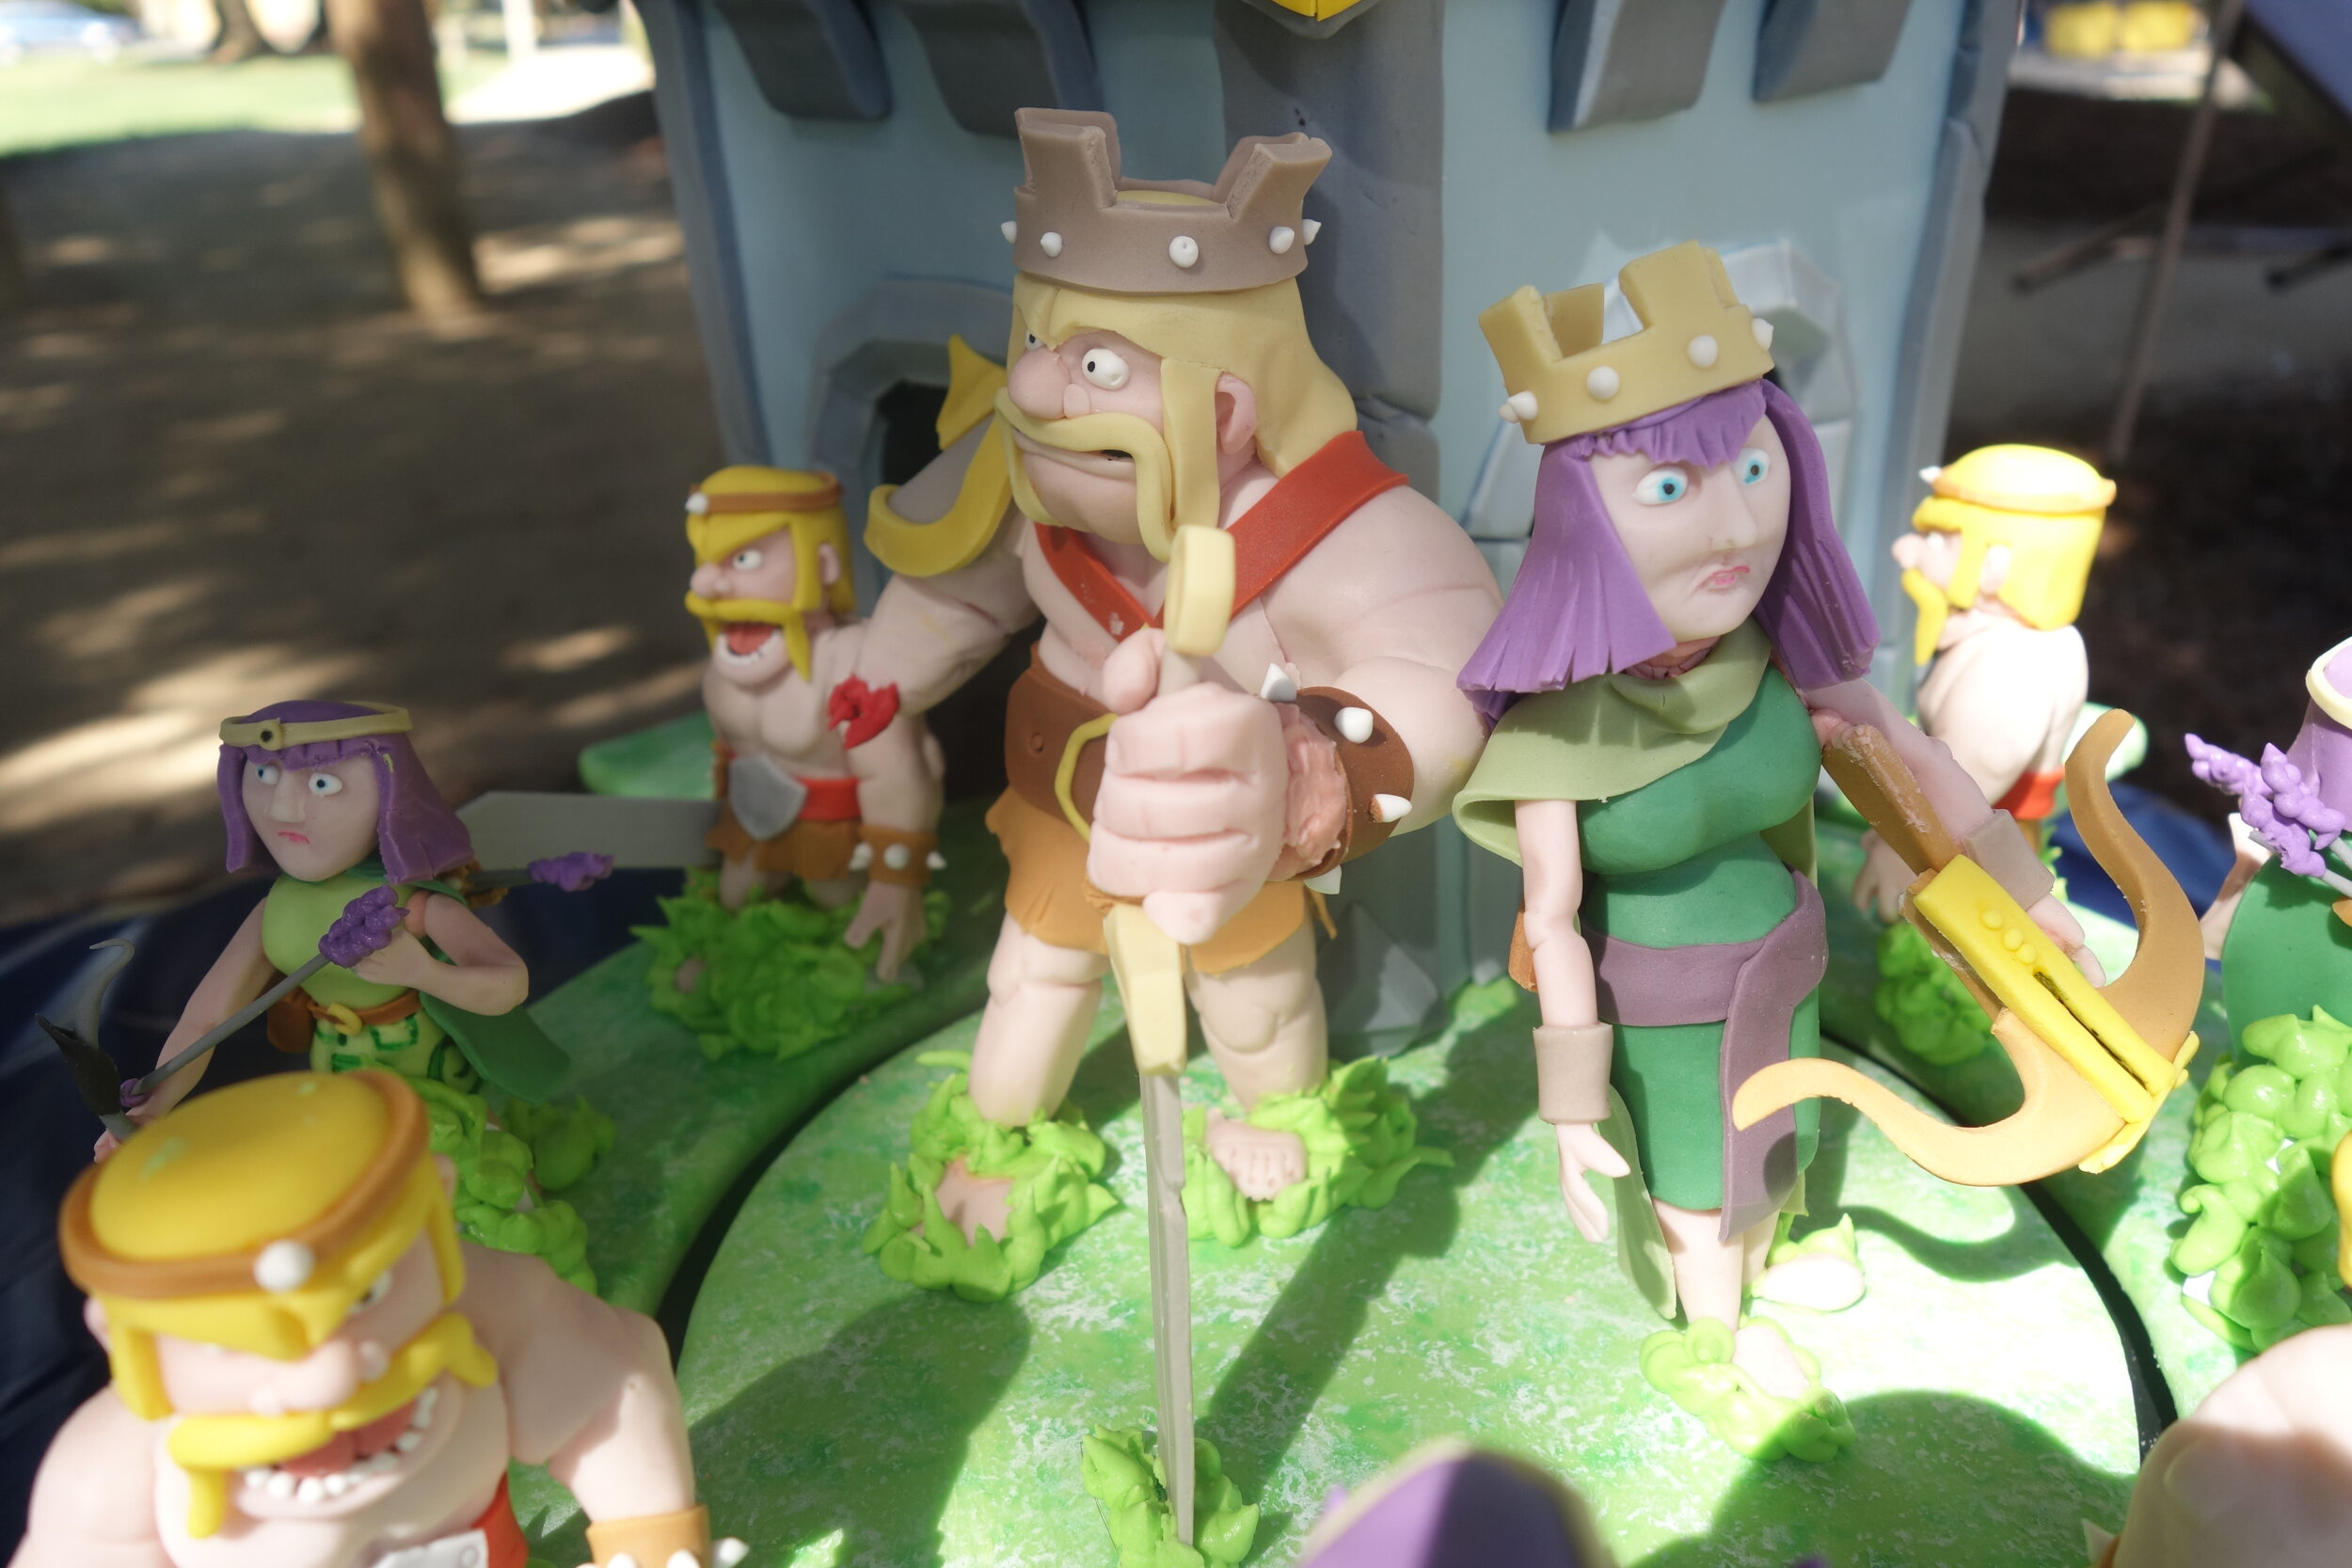
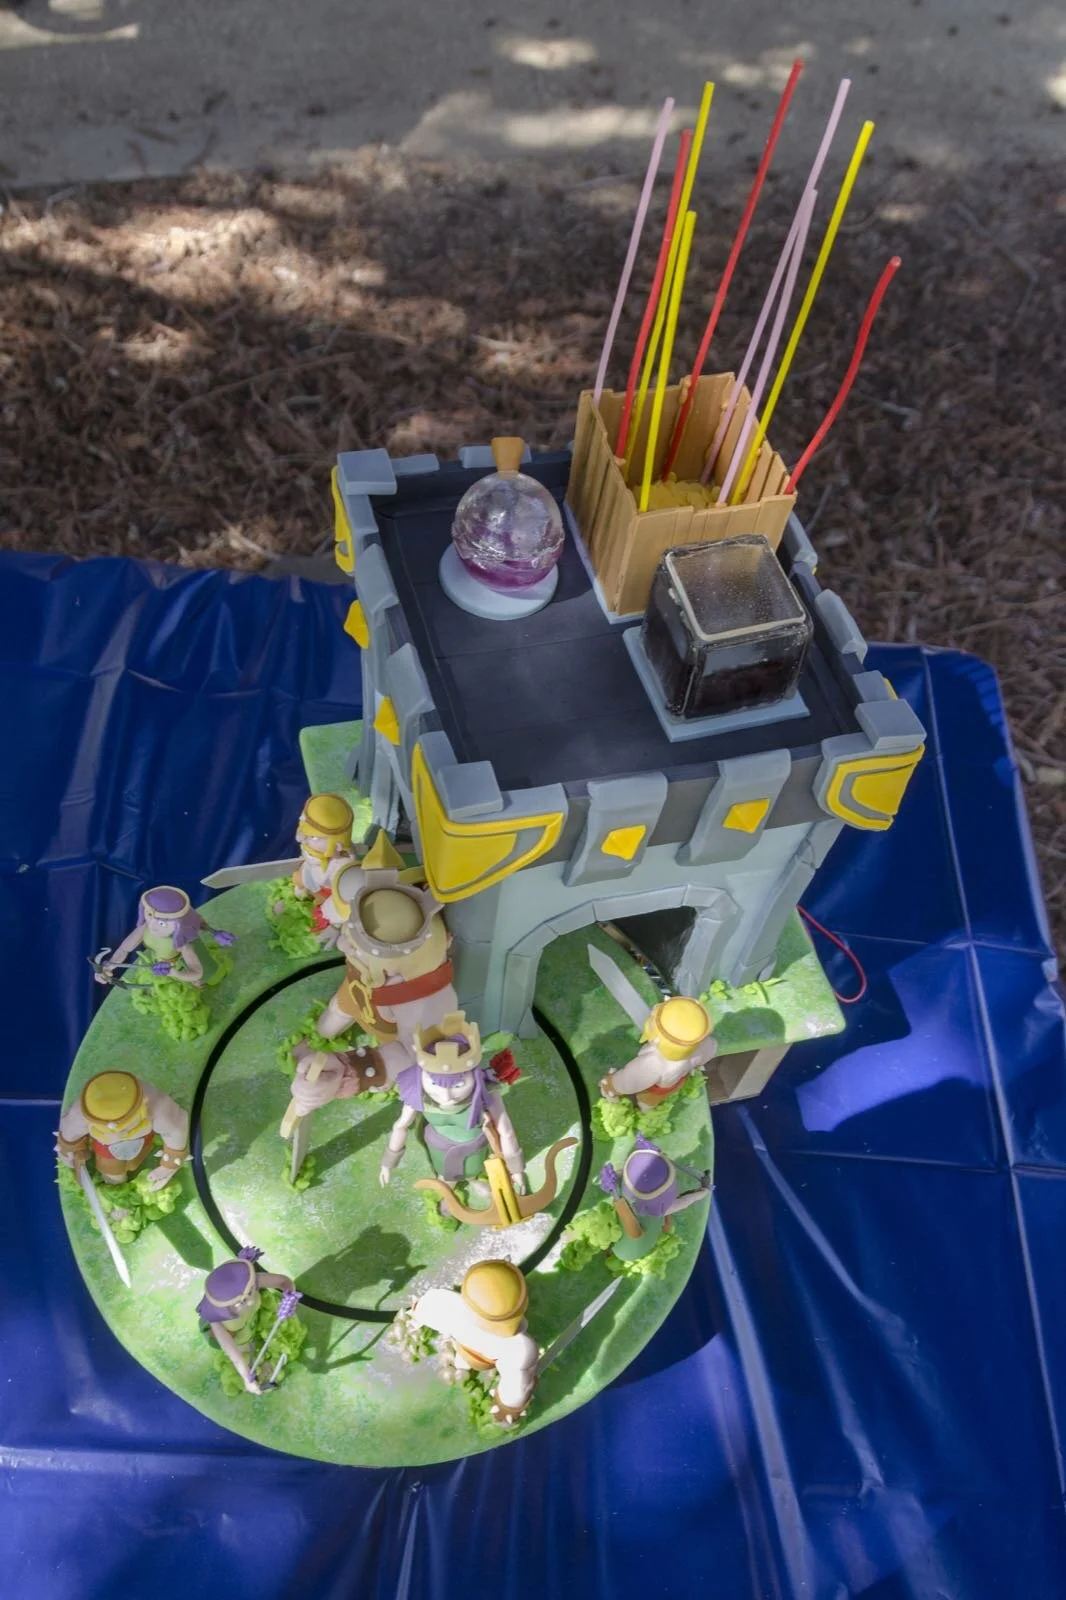
For her 9th birthday, my niece had very specific requirements – a Level 6 Clan Castle from Clash of Clans with an Archer Queen and Barbarian King as well as archers and barbarians. This is actually a fairly reasonable cake request, especially since Clan Castles are nice and square, and therefore quite conducive to being sculpted in cake. I, of course, decided to make it more difficult for myself by trying to make the archers and barbarians march in and out of the castle.

I think I actually built a pretty cool turntable mechanism out of 5-gallon buckets and rubber bands, but sadly once I got all the weight of the figures on it, it didn’t really turn. Oh well.
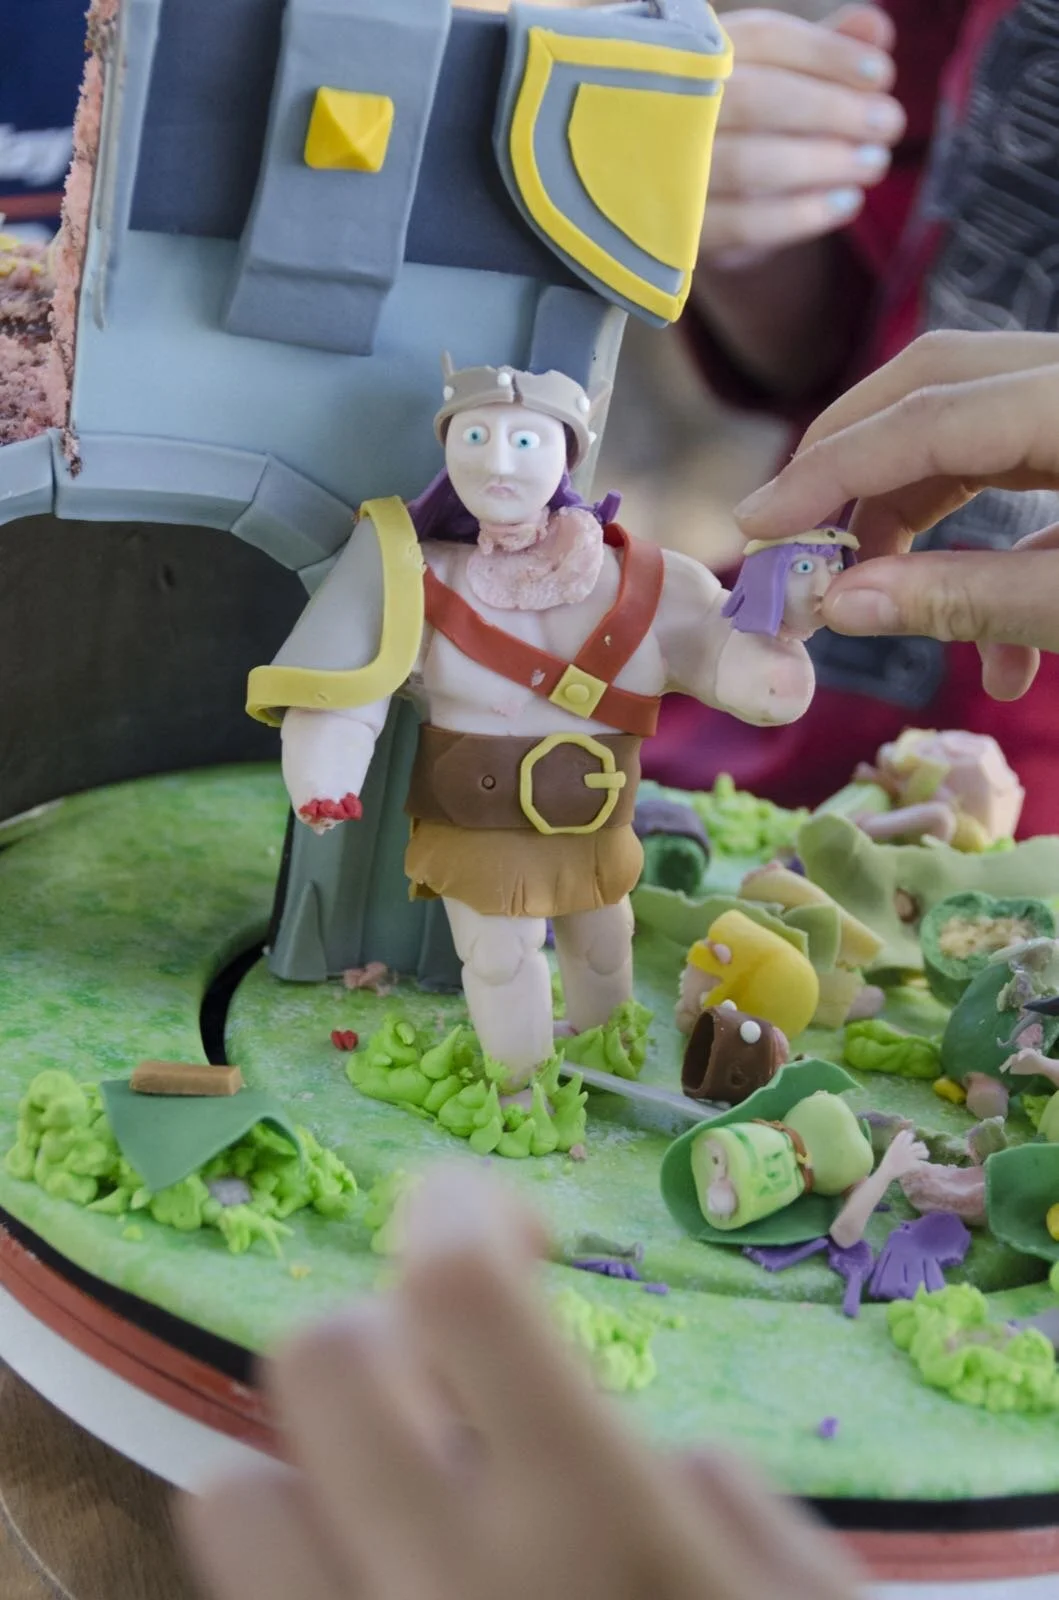
I also had more problems than usual with getting the figures put together. Partially this was because I just didn’t have enough time so the gum paste wasn’t totally dry, but I also had problems with royal icing that just didn’t want to dry. I still don’t know exactly what the problem was. I think I must have mixed it wrong somehow because I’ve never had that problem before. I had so much trouble attaching the Barbarian King’s hand that I ultimately had to leave it off and add some red royal icing so it looked like his hand had been chopped off in battle.
By the time we got the cake to the park for the party I was pretty frustrated, but I did eventually get all the figures standing up. I had to prop some of them up with bits of foam core concealed under green royal icing so that they wound up looking like they were knee-deep in unusually large tufts of grass.
The kids loved it, though, which is the important thing. The best part was after the cake was served when a bunch of the kids dismembered and reassembled the figures like a bunch of miniature Doctor Frankensteins.
Darth Vader Cake
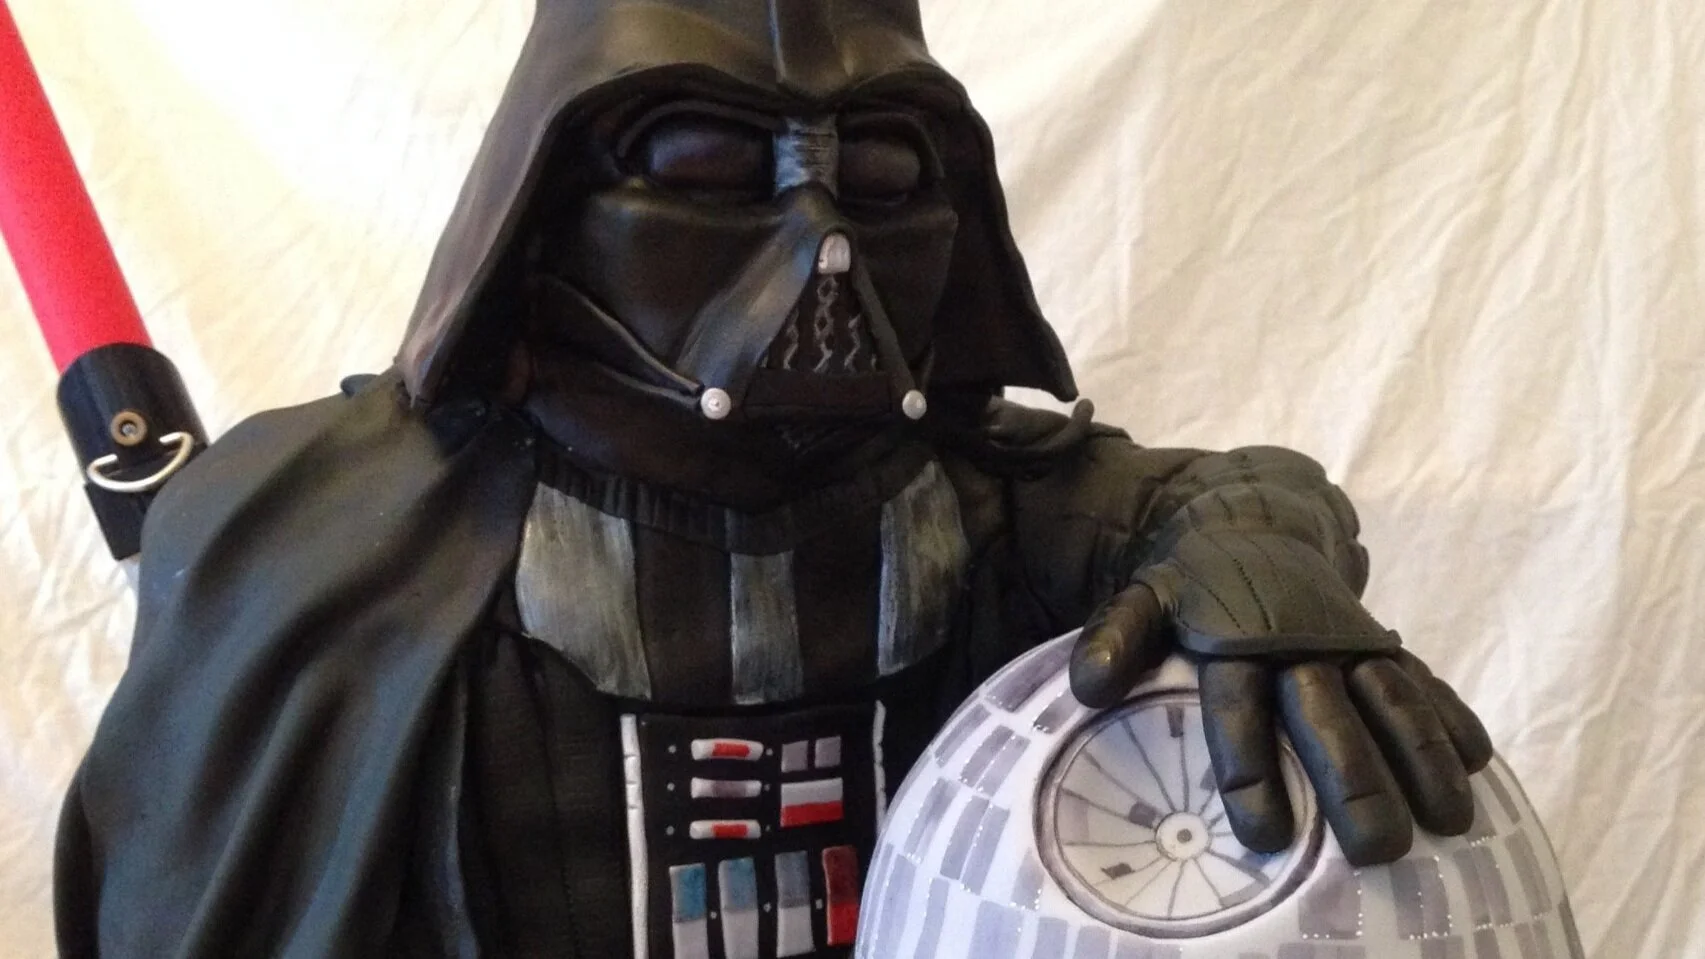
Icing Smiles is a great not-for-profit that arranges for volunteer cake decorators to provide special cakes for critically ill children and their siblings. This is the first cake that I’ve had the opportunity to make through them.
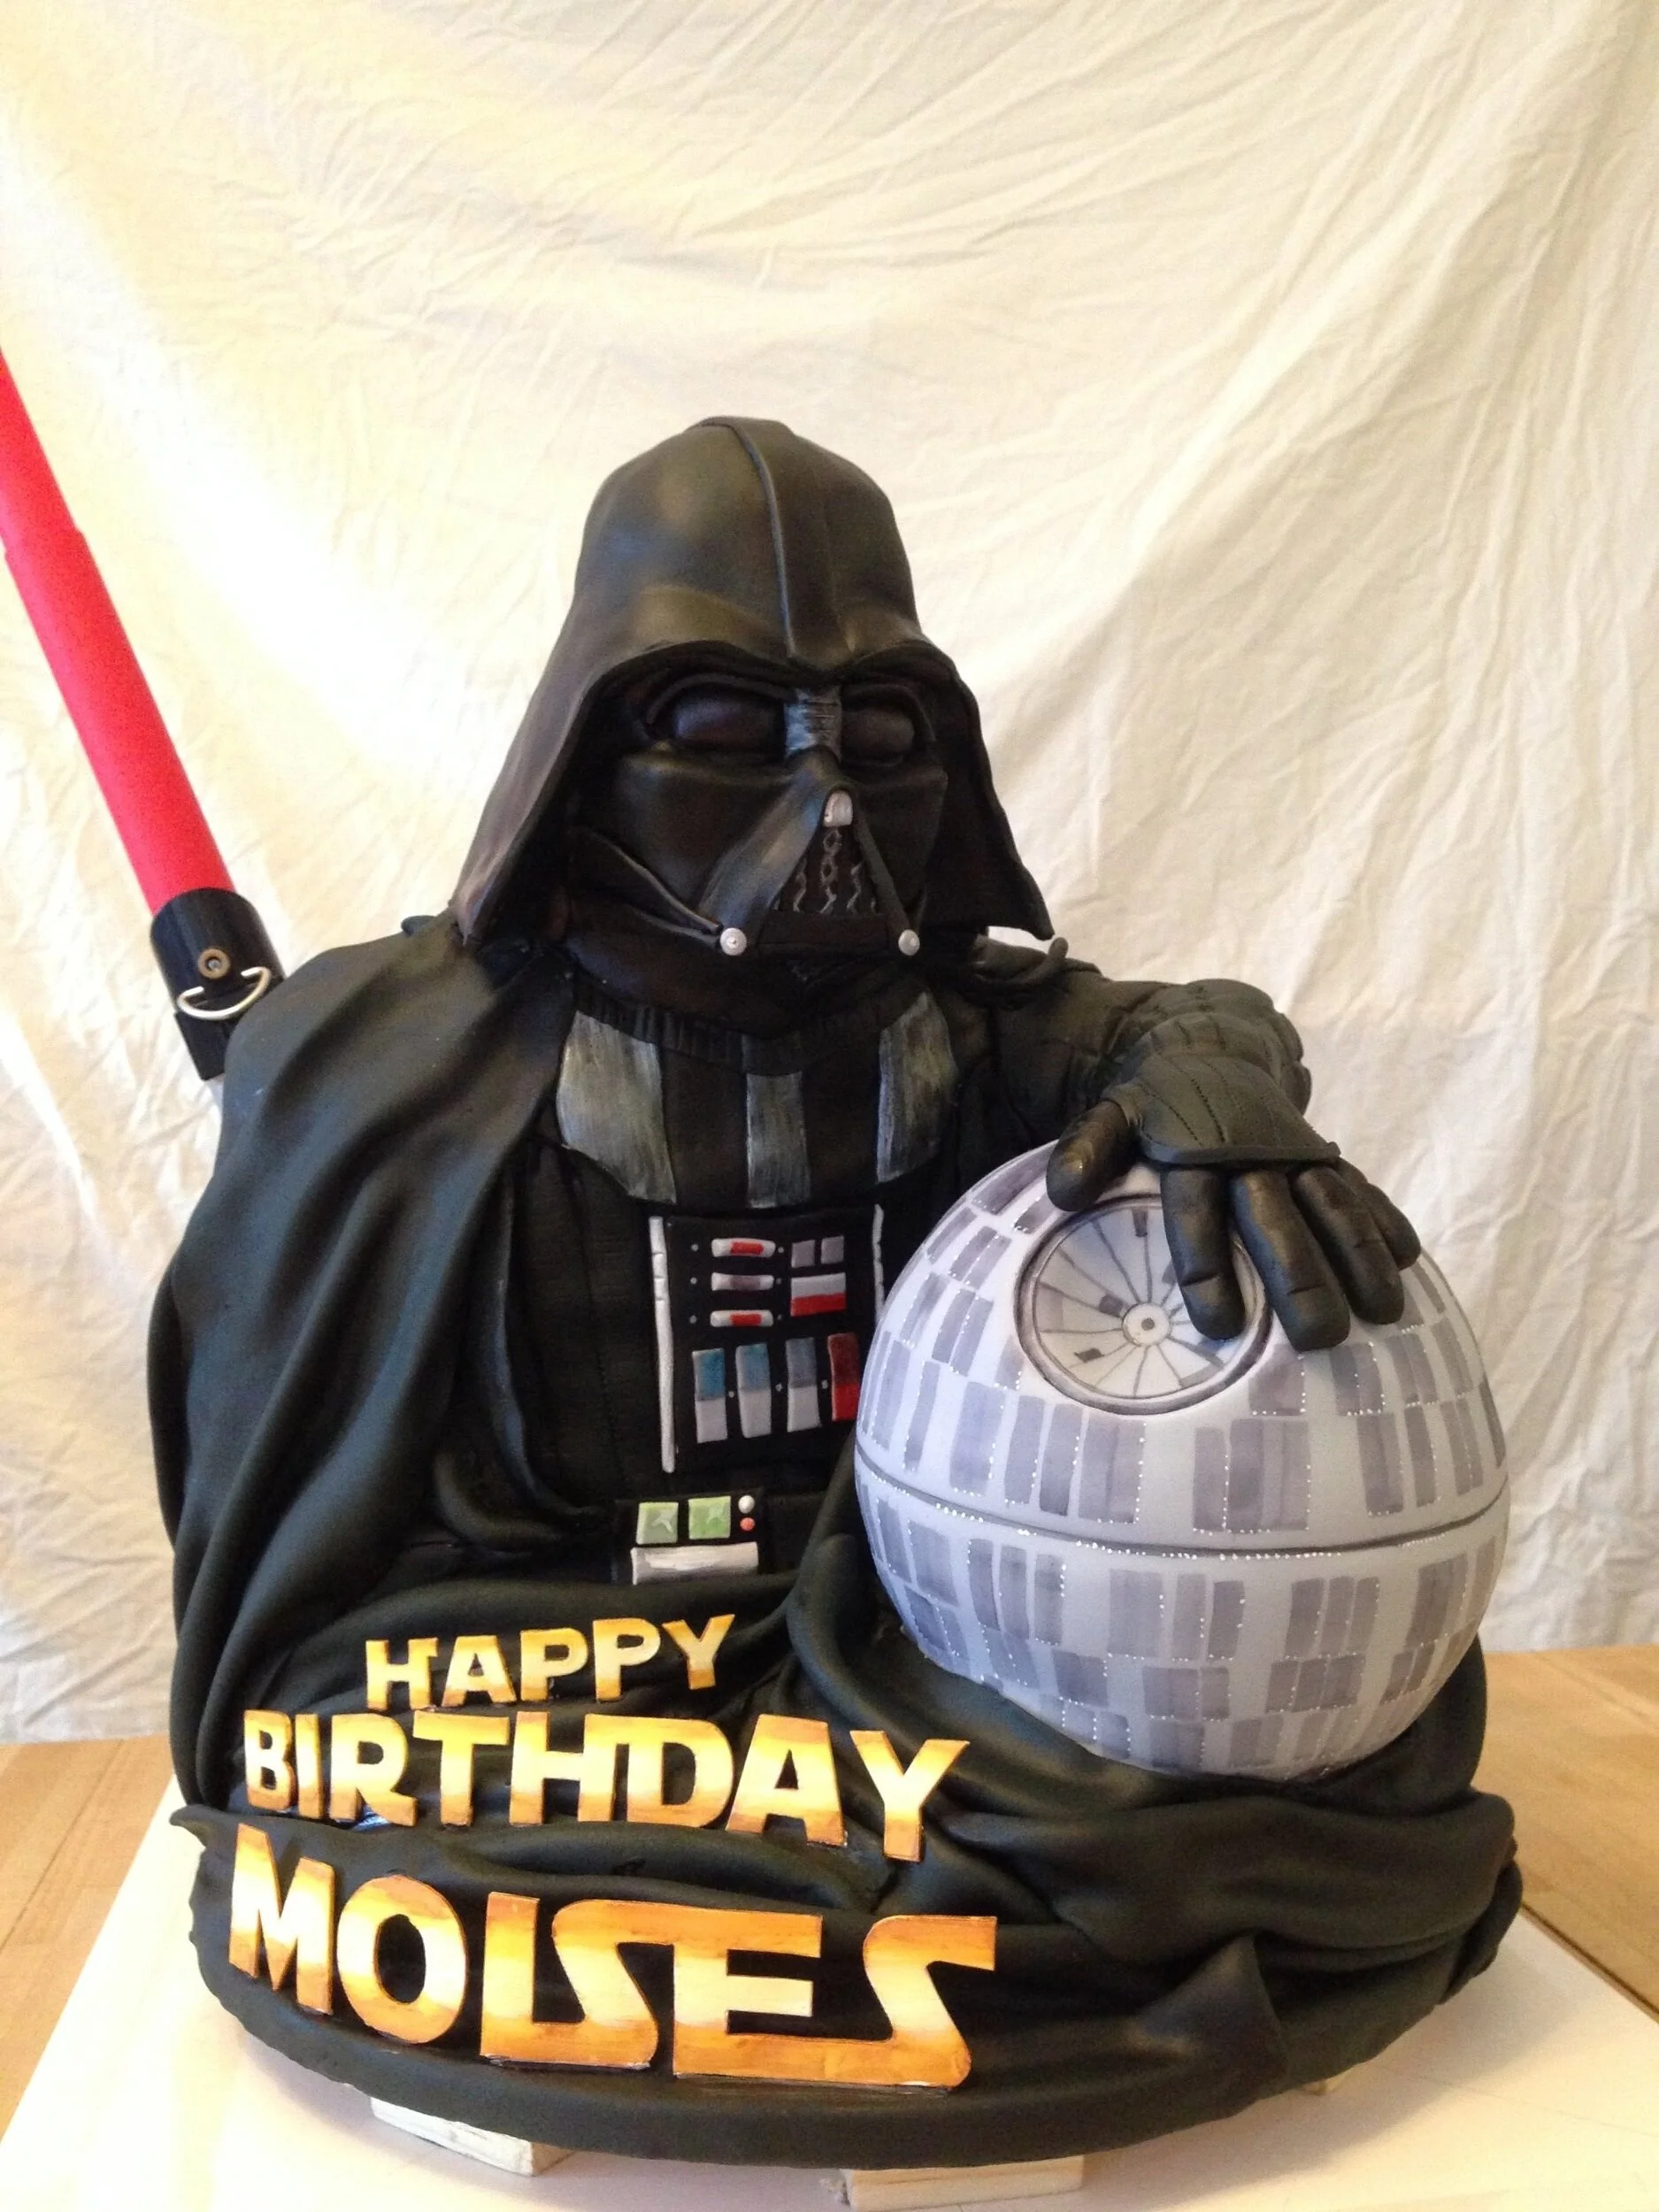
Icing Smiles is a great not-for-profit that arranges for volunteer cake decorators to provide special cakes for critically ill children and their siblings. This is the first cake that I've had the opportunity to make through them. I actually was pretty nervous about it, because this is the first cake I've ever made that wasn't for family, friends, or a nationally televised competition.
I'm told Moises was really happy with it, so I'm happy, too.


Dem Bones Cake
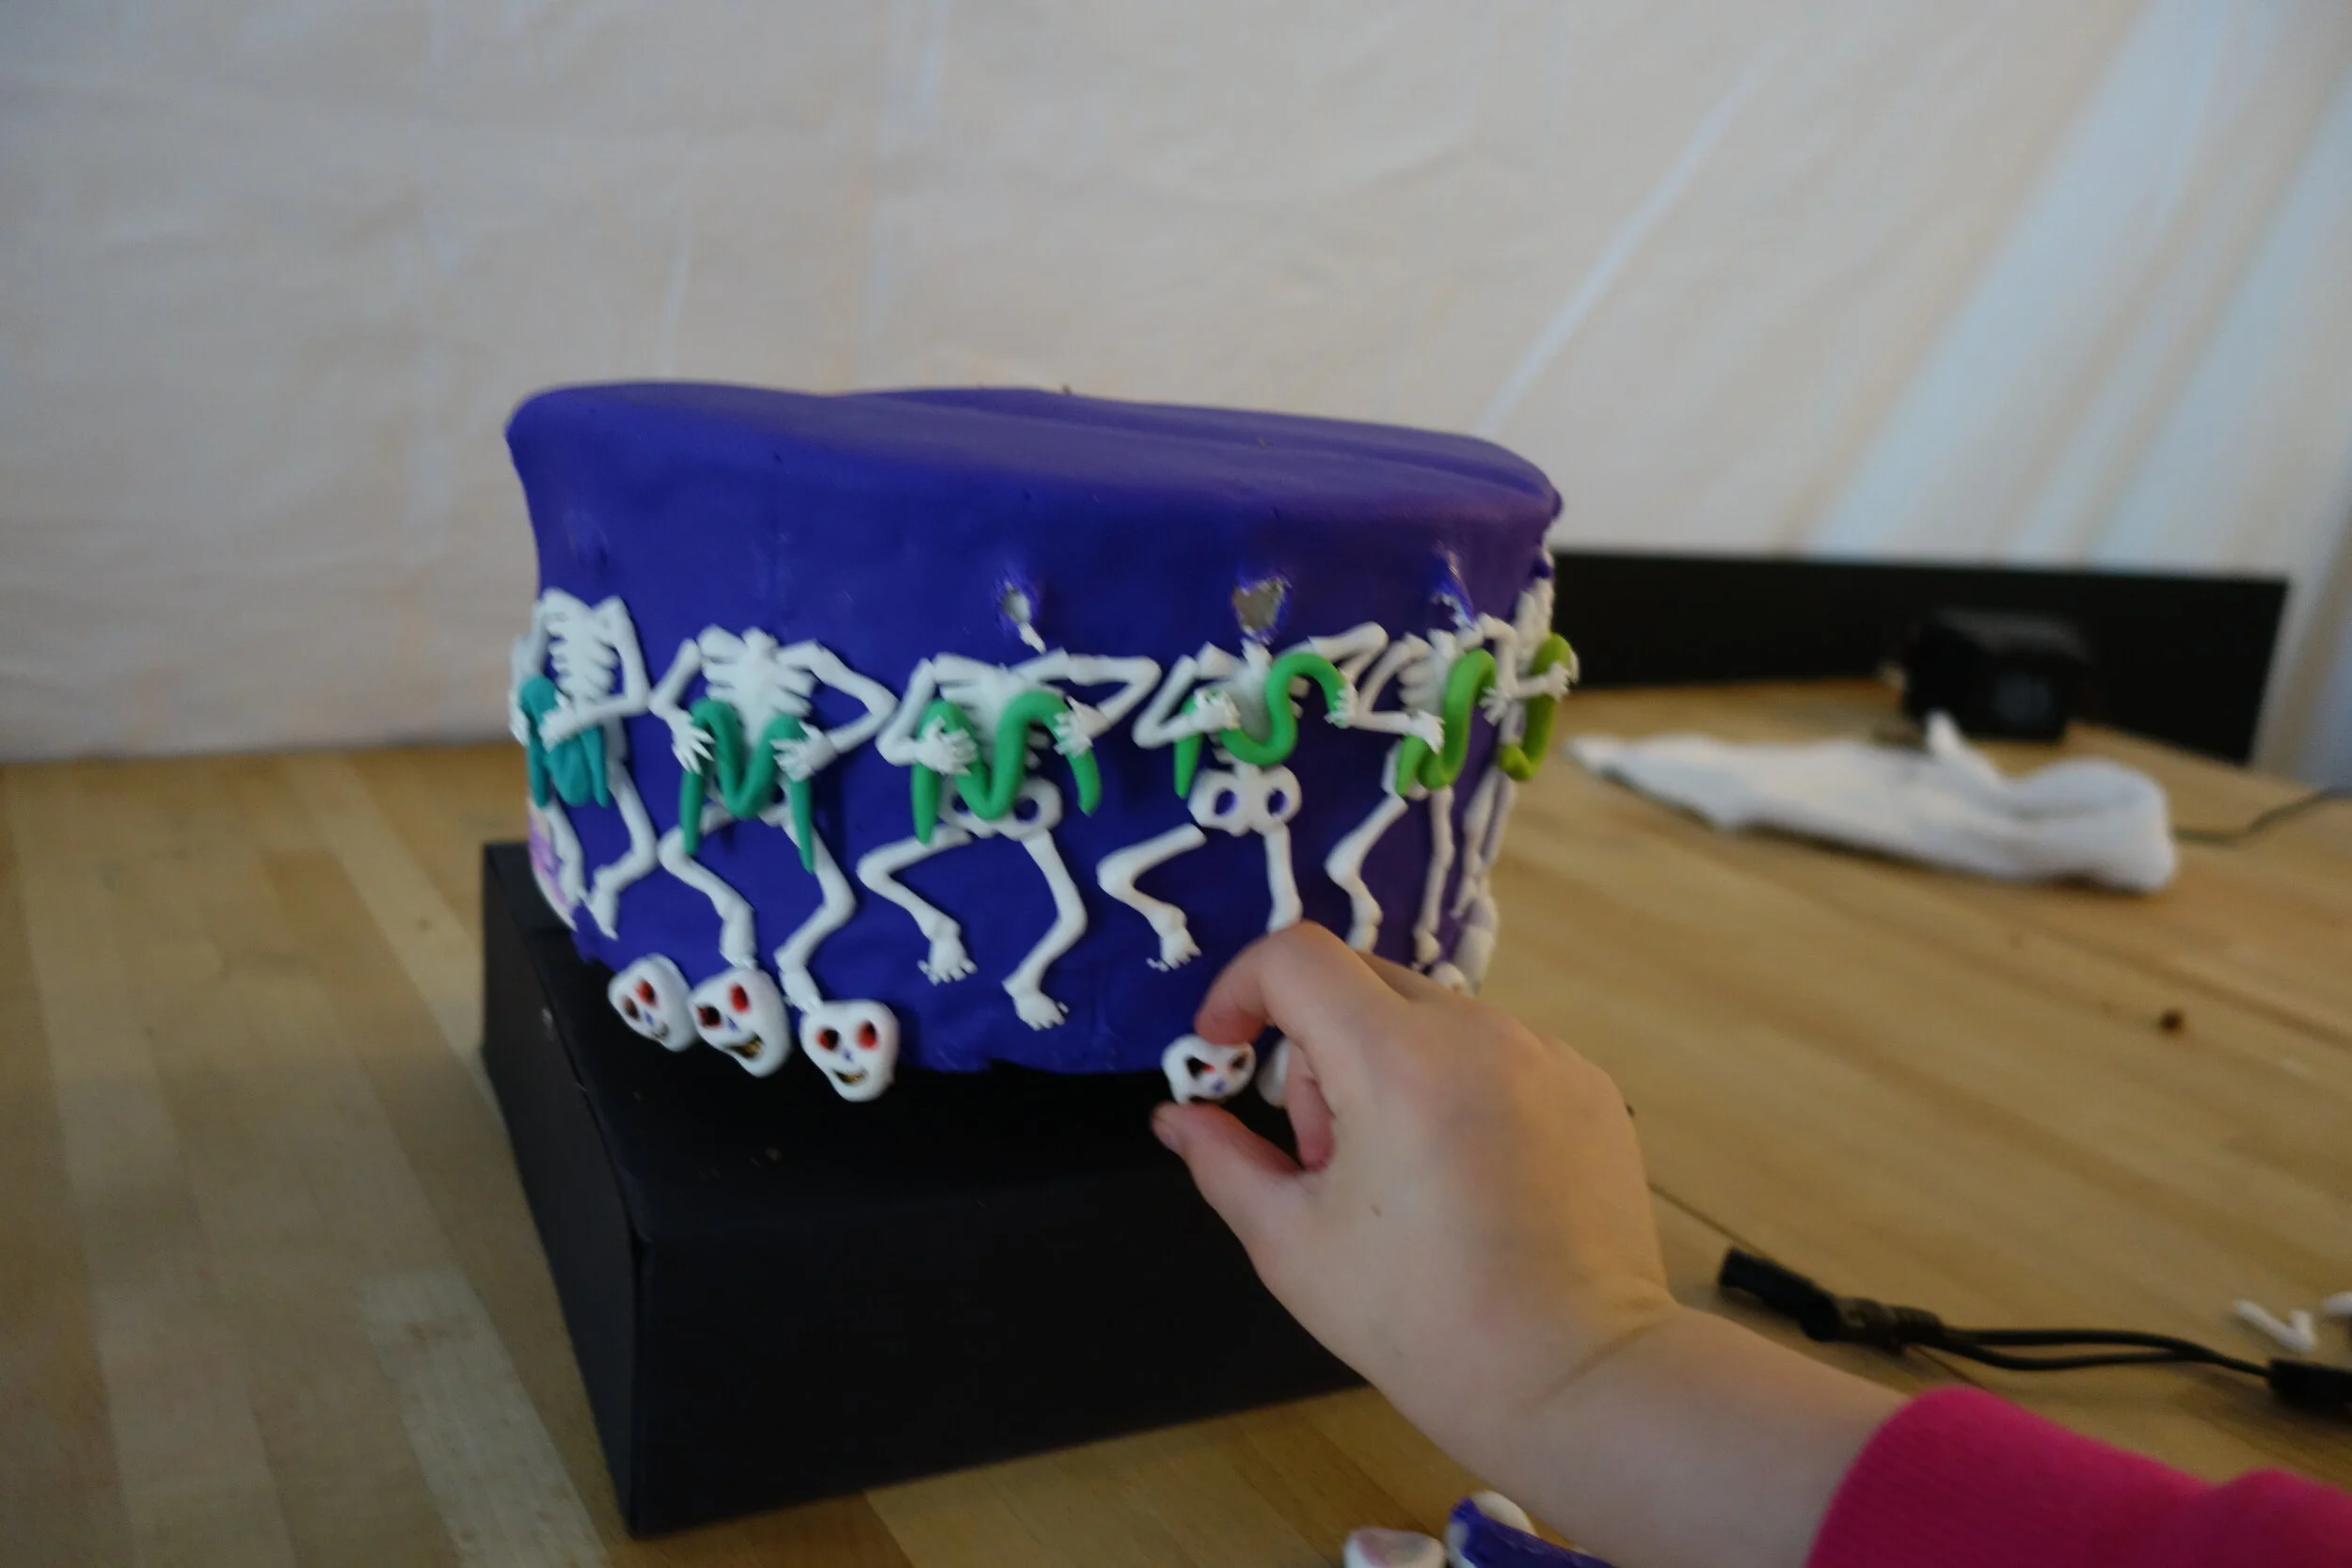
My niece and nephew’s preschool has the delightful tradition of having the pre-K kids perform a little skit based on one of their favorite books as part of the end-of-the-year graduation ceremony. This year, Sam’s class chose Dem Bones as their book so, of course, I made him a Dem Bones cake. Ever since I saw this video, I’ve been wanting to try to make a zoetrope cake, so this seemed like the perfect opportunity.
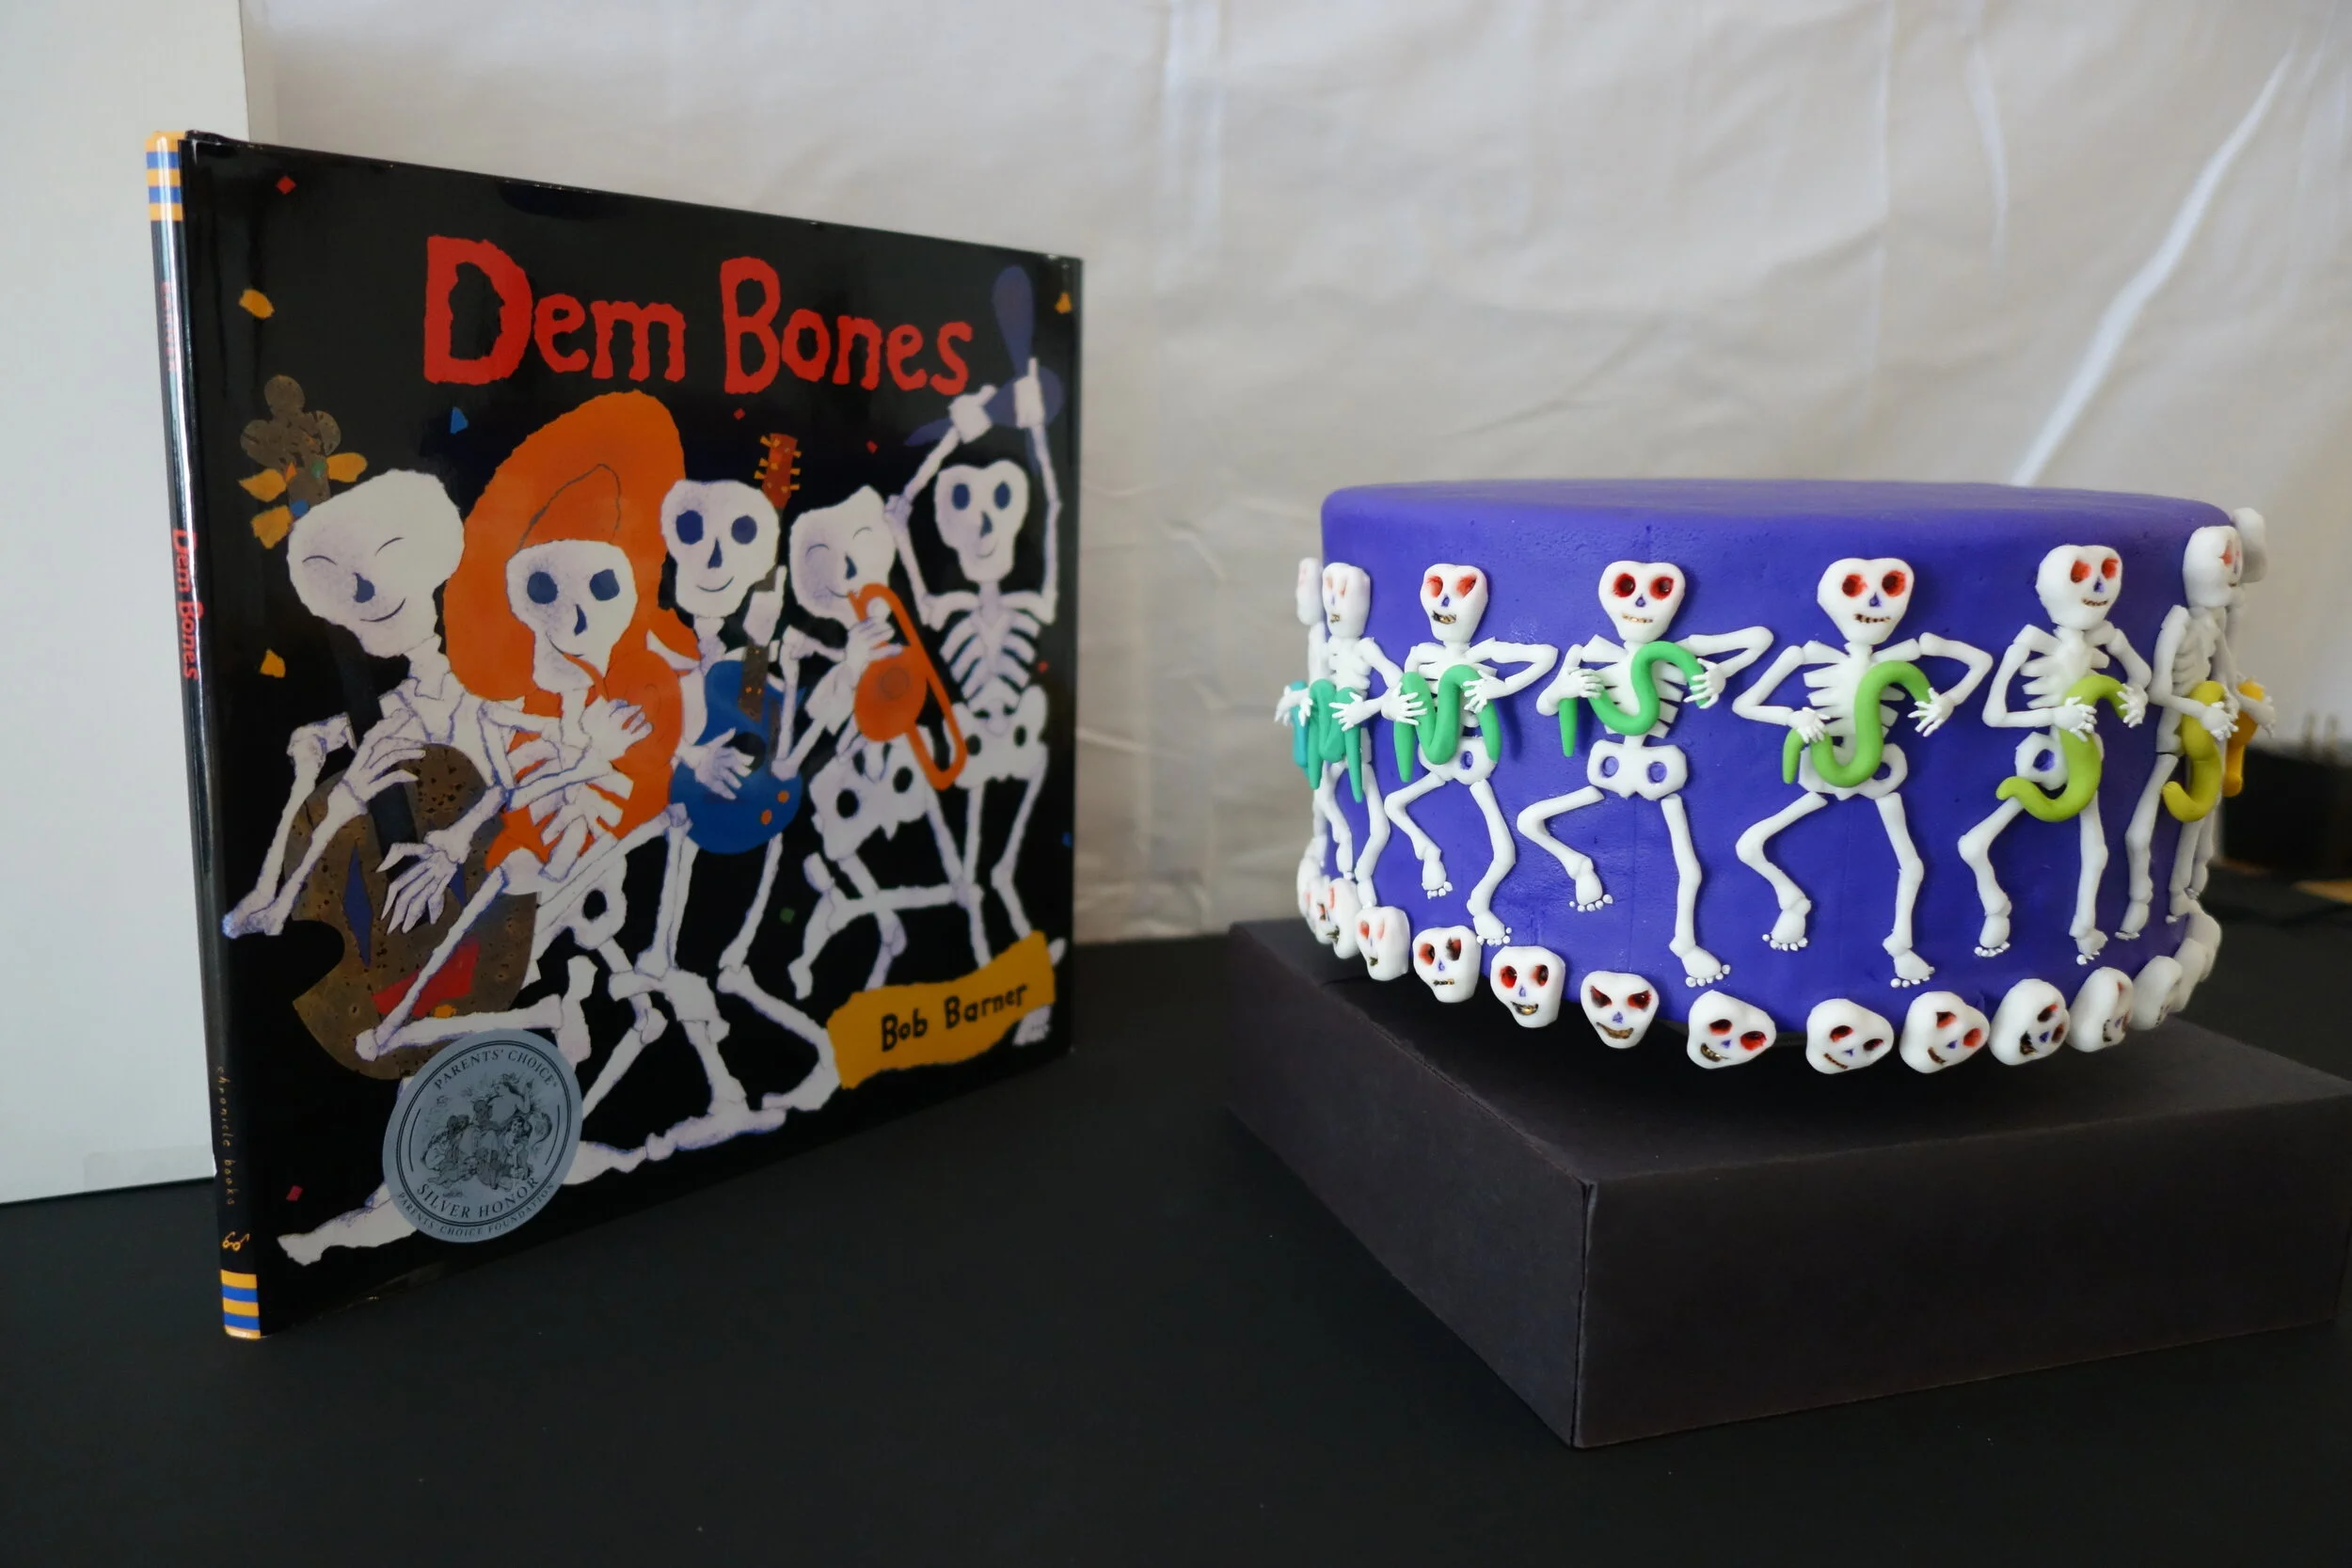
My niece and nephew’s preschool has the delightful tradition of having the pre-K kids perform a little skit based on one of their favorite books as part of the end-of-the-year graduation ceremony. Three years ago, Alex’s class performed Dr. Suess’s The Sneetches, so I made her a Sneetch cake. This year, Sam’s class chose Dem Bones as their book so, of course, I made him a Dem Bones cake.
Ever since I saw this video, I’ve been wanting to try to make a zoetrope cake, so this seemed like the perfect opportunity. Unfortunately, I don’t actually know anything about constructing a zoetrope, so it didn’t totally work. Next time I’ll have to do my research a little better.
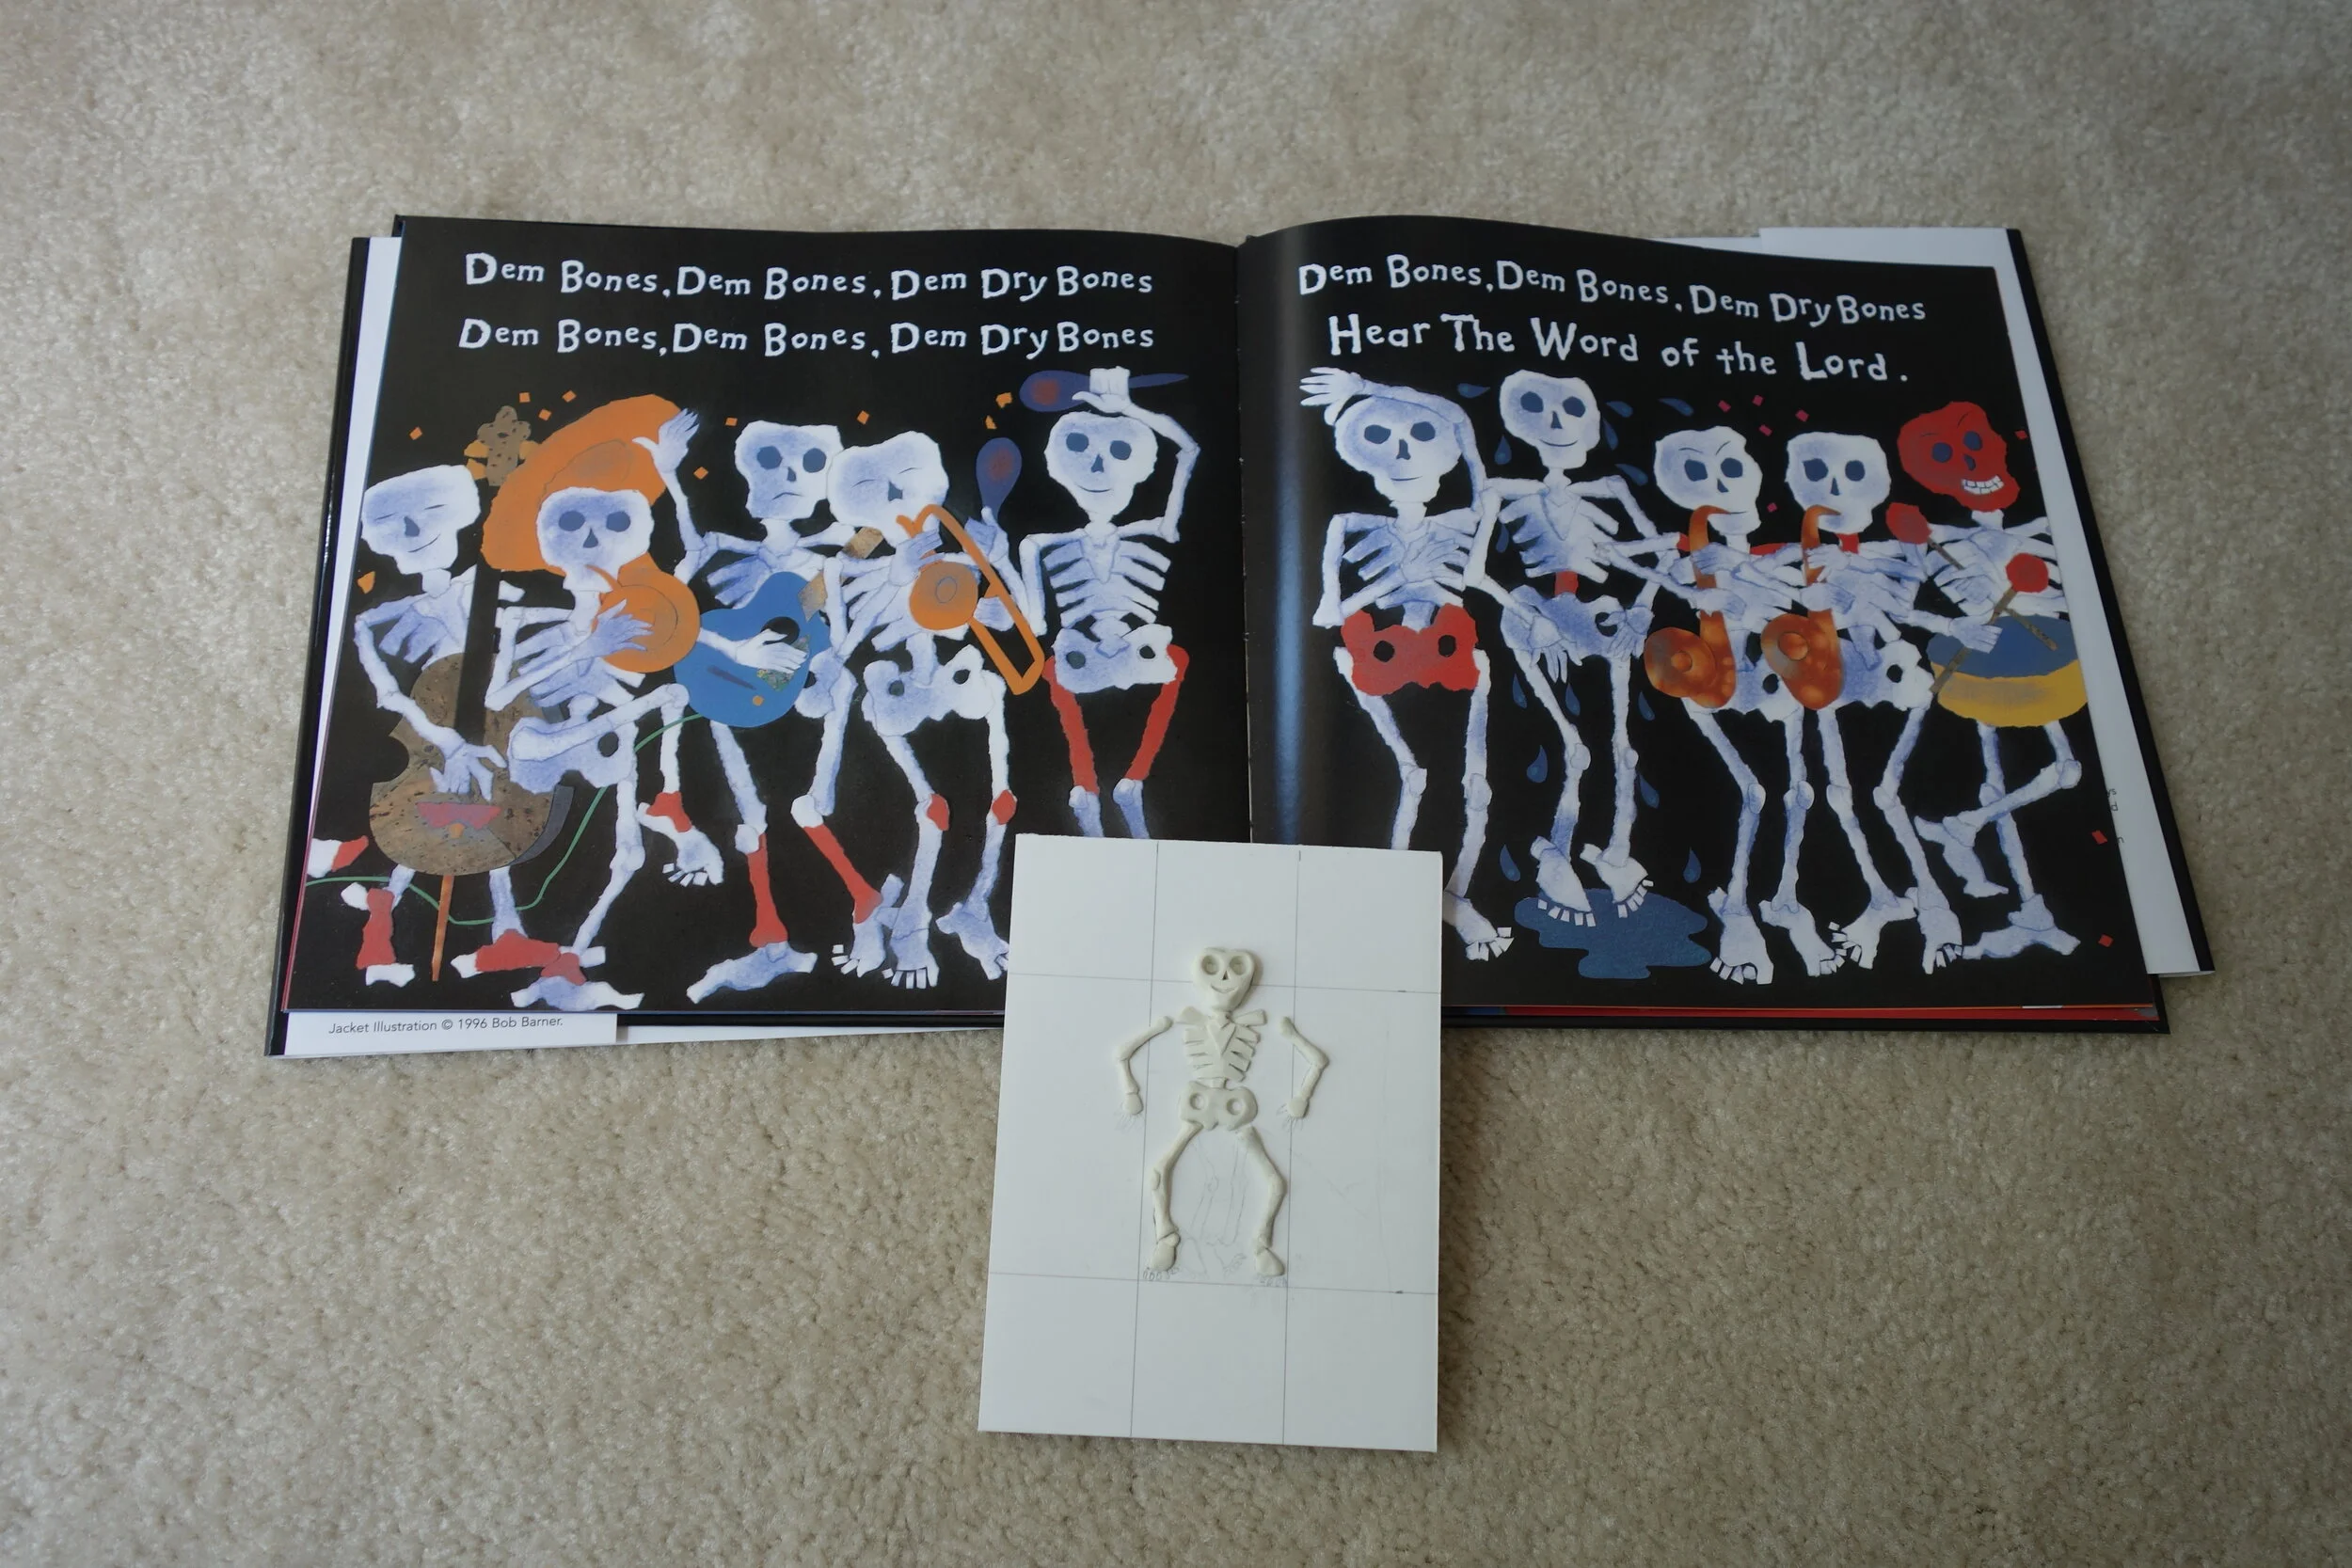
In order to make the sixteen skeletons around the sides of the cake, I sculpted one skeleton and then made a mold using food-safe silicon.

I could then make the skeletons by pushing pieces of white fondant into the mold and sticking them onto the cake. The skeletons are holding letters that morph from the letter “S” to the letter “A” to the letter “M” to spell “Sam.”
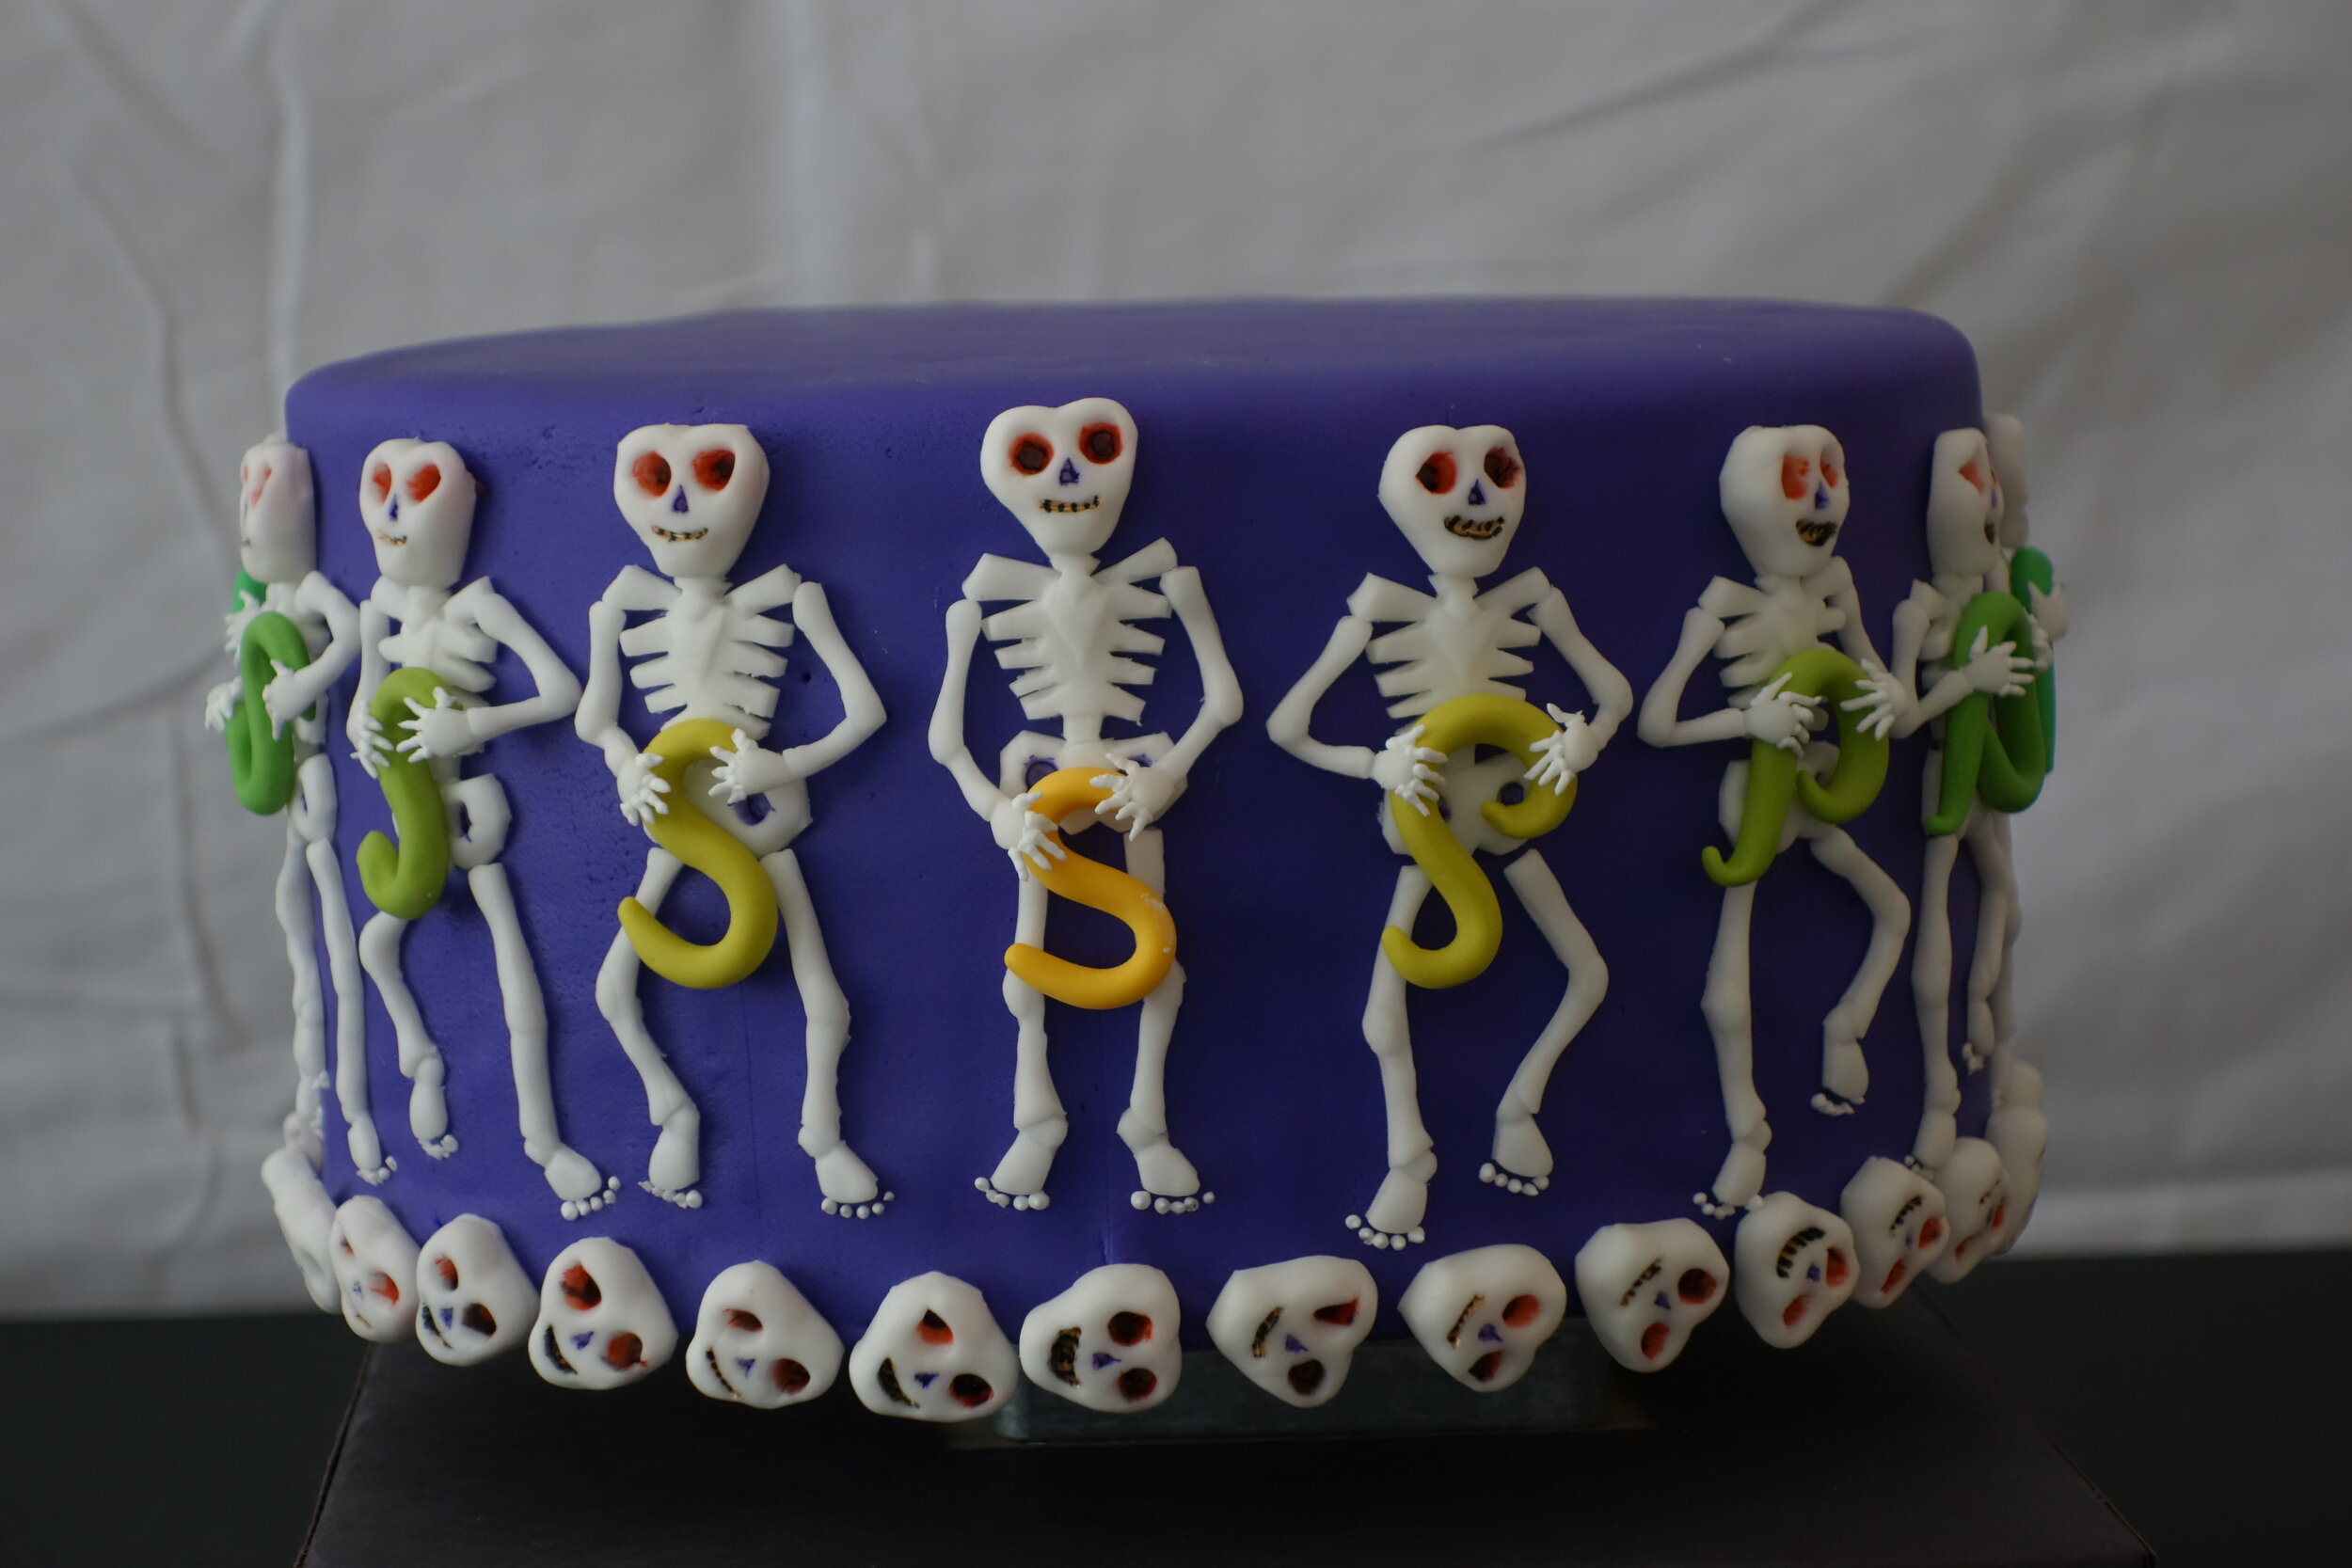
The turntable I built for the cake worked perfectly, but I never got it synchronized with the strobe light or viewing slit well enough for the zoetrope illusion to really work. It sort of works if I animate all these photos together like this, though.
Ultimately, it didn't matter whether or not the zoetrope effect worked, since Sam absolutely loved the cake.

He especially loved the skeleton heads and by the end of the party he had eaten the heads off of all the remaining skeletons on the cake.
Emperor Palpatine Whoopie Cushion Cake
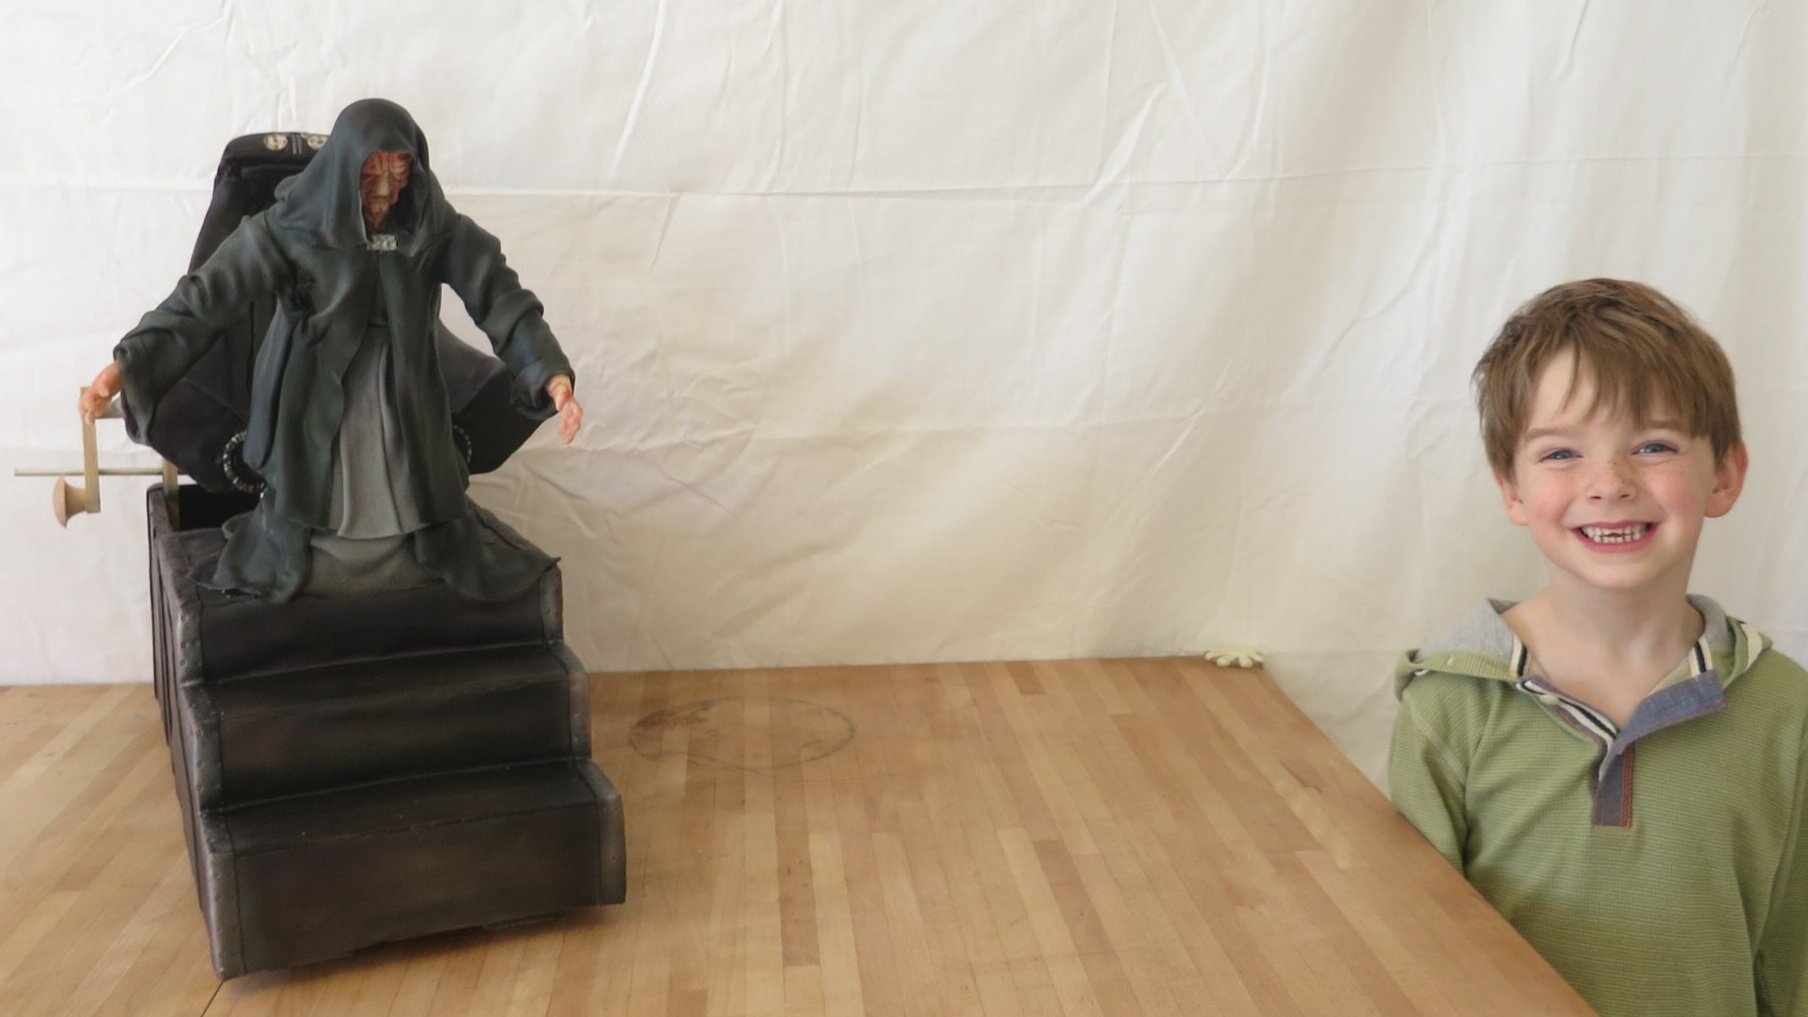
My niece and nephew and I play a game called “Emperor Palpatine Whoopie Cushion.” Essentially, the kids put imaginary whoopee cushions on a chair and then I, as Emperor Palpatine, sit on the chair, make a farting noise, and chase them around the room shouting about how I’m going to destroy them. So, for his fifth birthday, Sam requested an Emperor Palpatine whoopie cushion cake. Here is what I came up with.

My niece and nephew and I play a game called “Emperor Palpatine Whoopie Cushion.” I don’t remember the genesis of the game. Essentially, the kids put imaginary whoopee cushions on a chair and then I, as Emperor Palpatine, sit on the chair, make a farting noise, and chase them around the room shouting about how I’m going to destroy them.

So, for his fifth birthday, Sam requested an Emperor Palpatine whoopie cushion cake. Here is what I came up with. The steps, the chair, and the lower portion of Palpatine’s body are cake. The upper half of Palpatine is rice krispie treats. I used a little recording module from Radio Shack to record the sound, triggered by a button under the seat that was depressed when Palpatine sat down.
This may be the silliest cake I’ve ever made (which is a pretty high bar), but it was also perhaps the most entertaining.
Fruit Ninja Cake
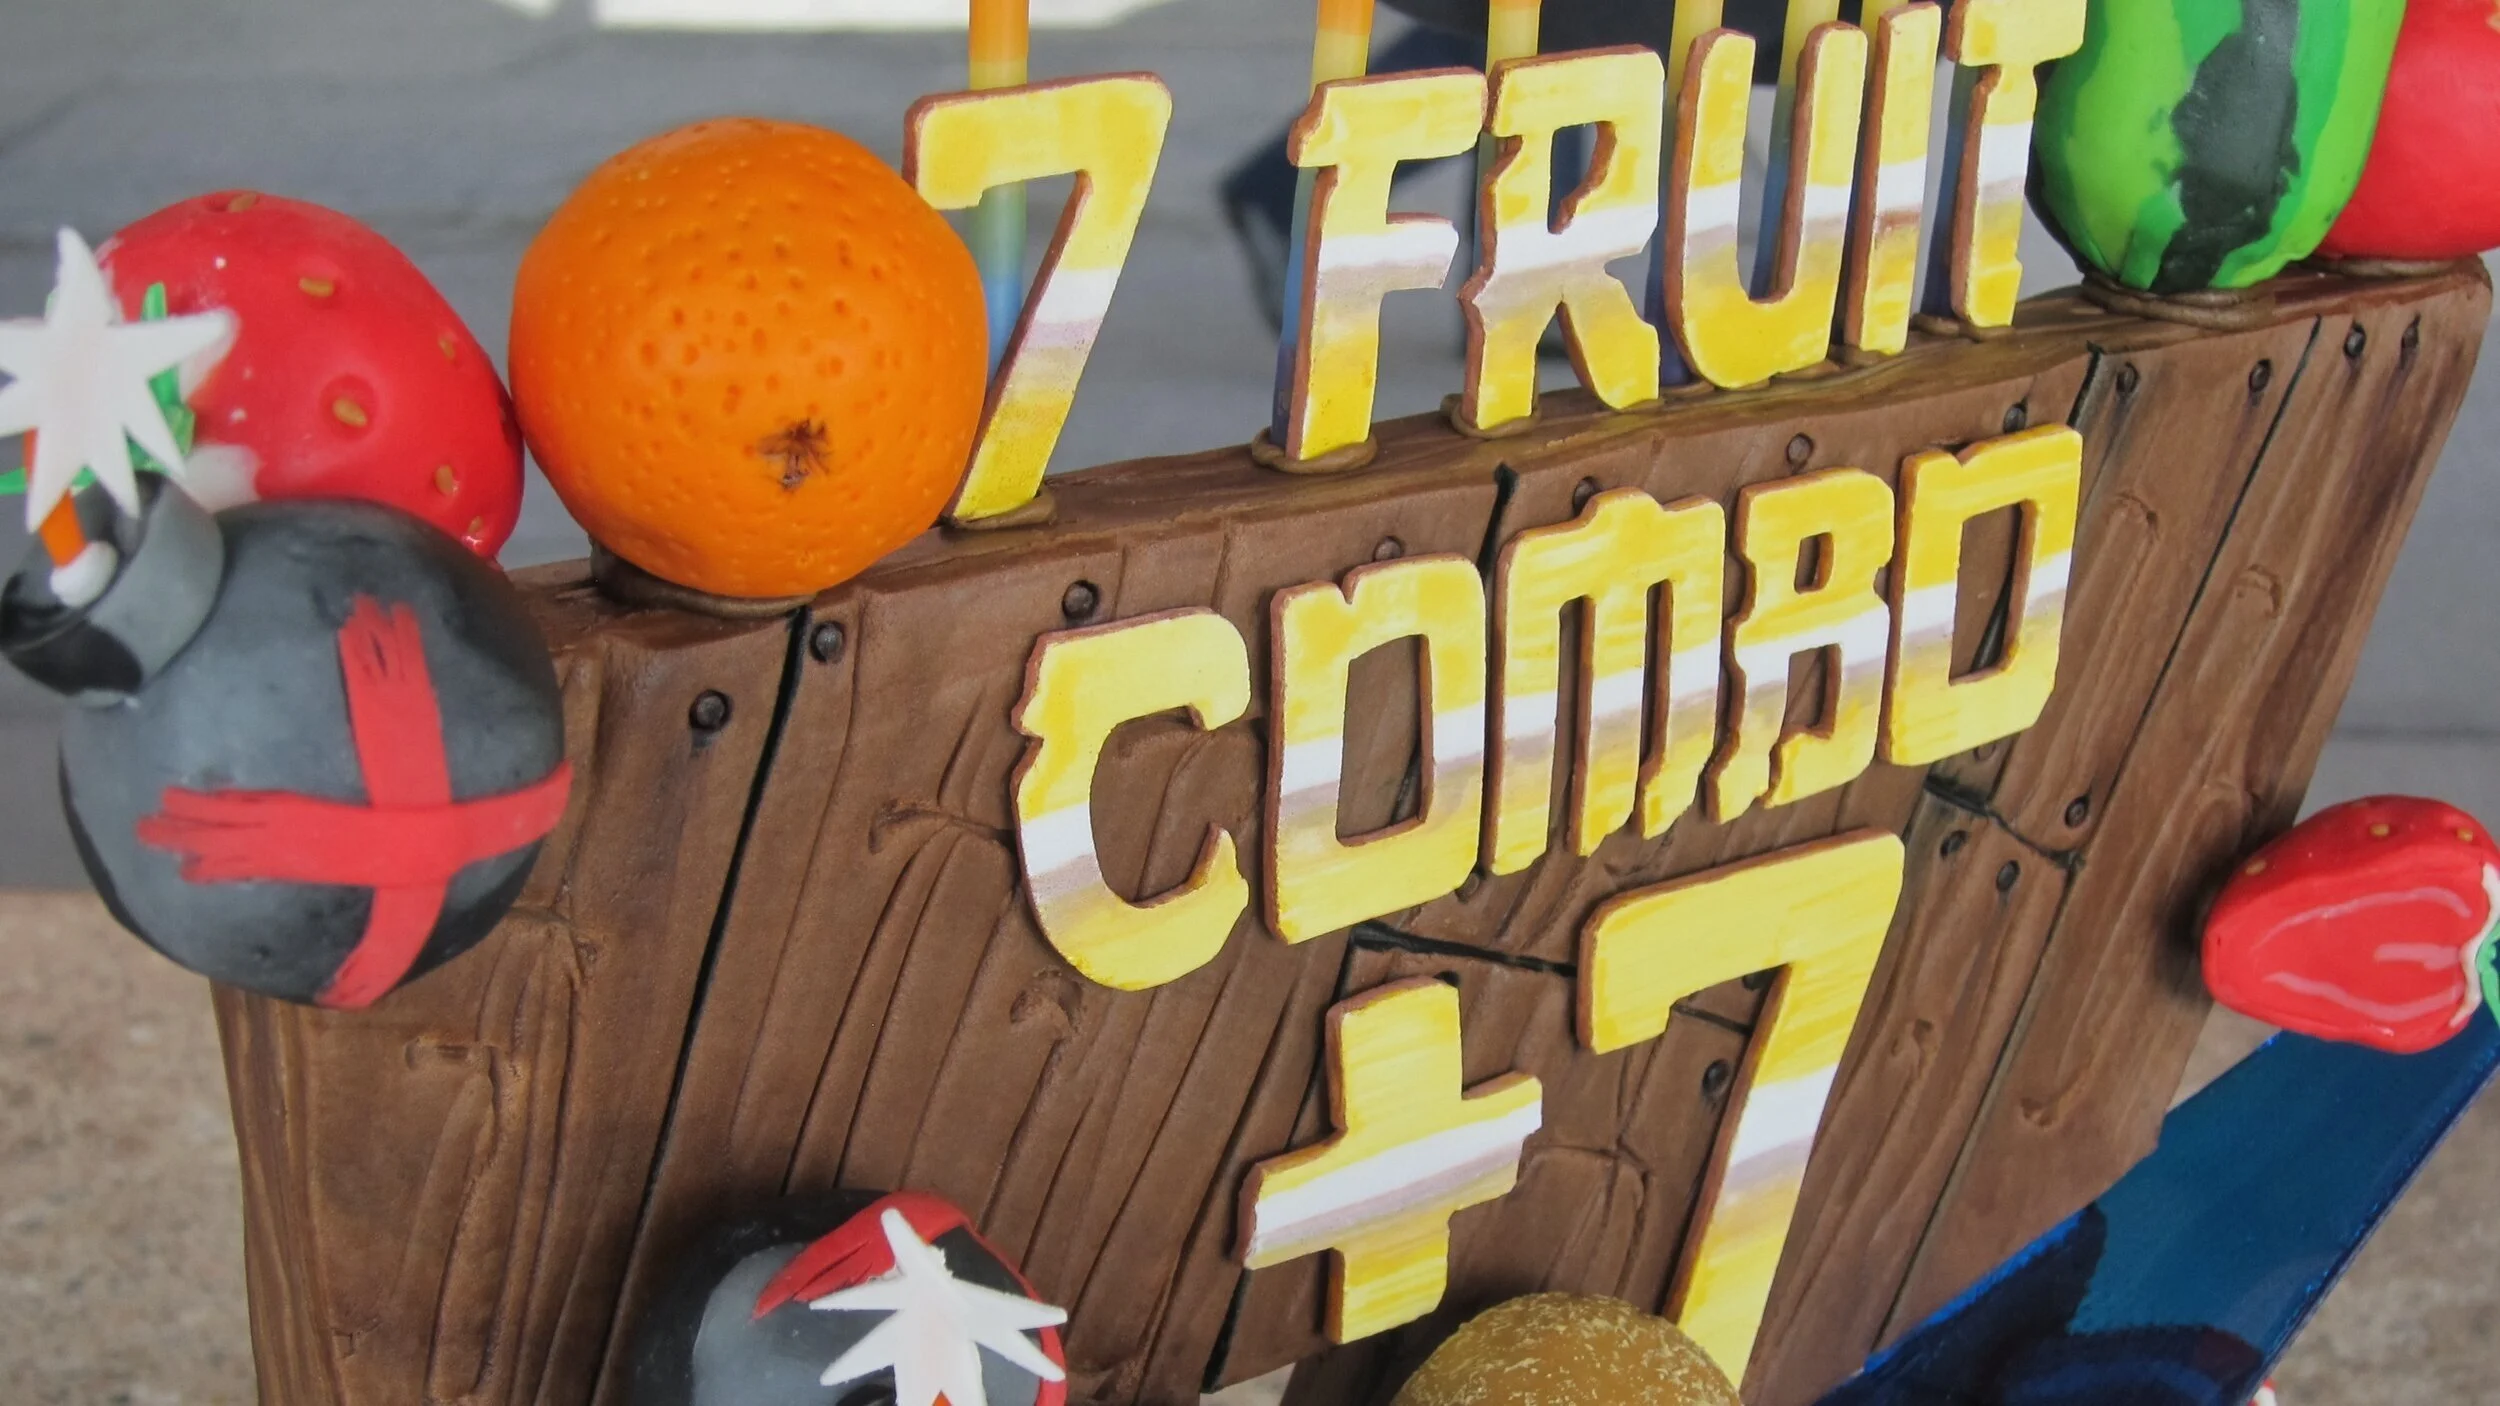
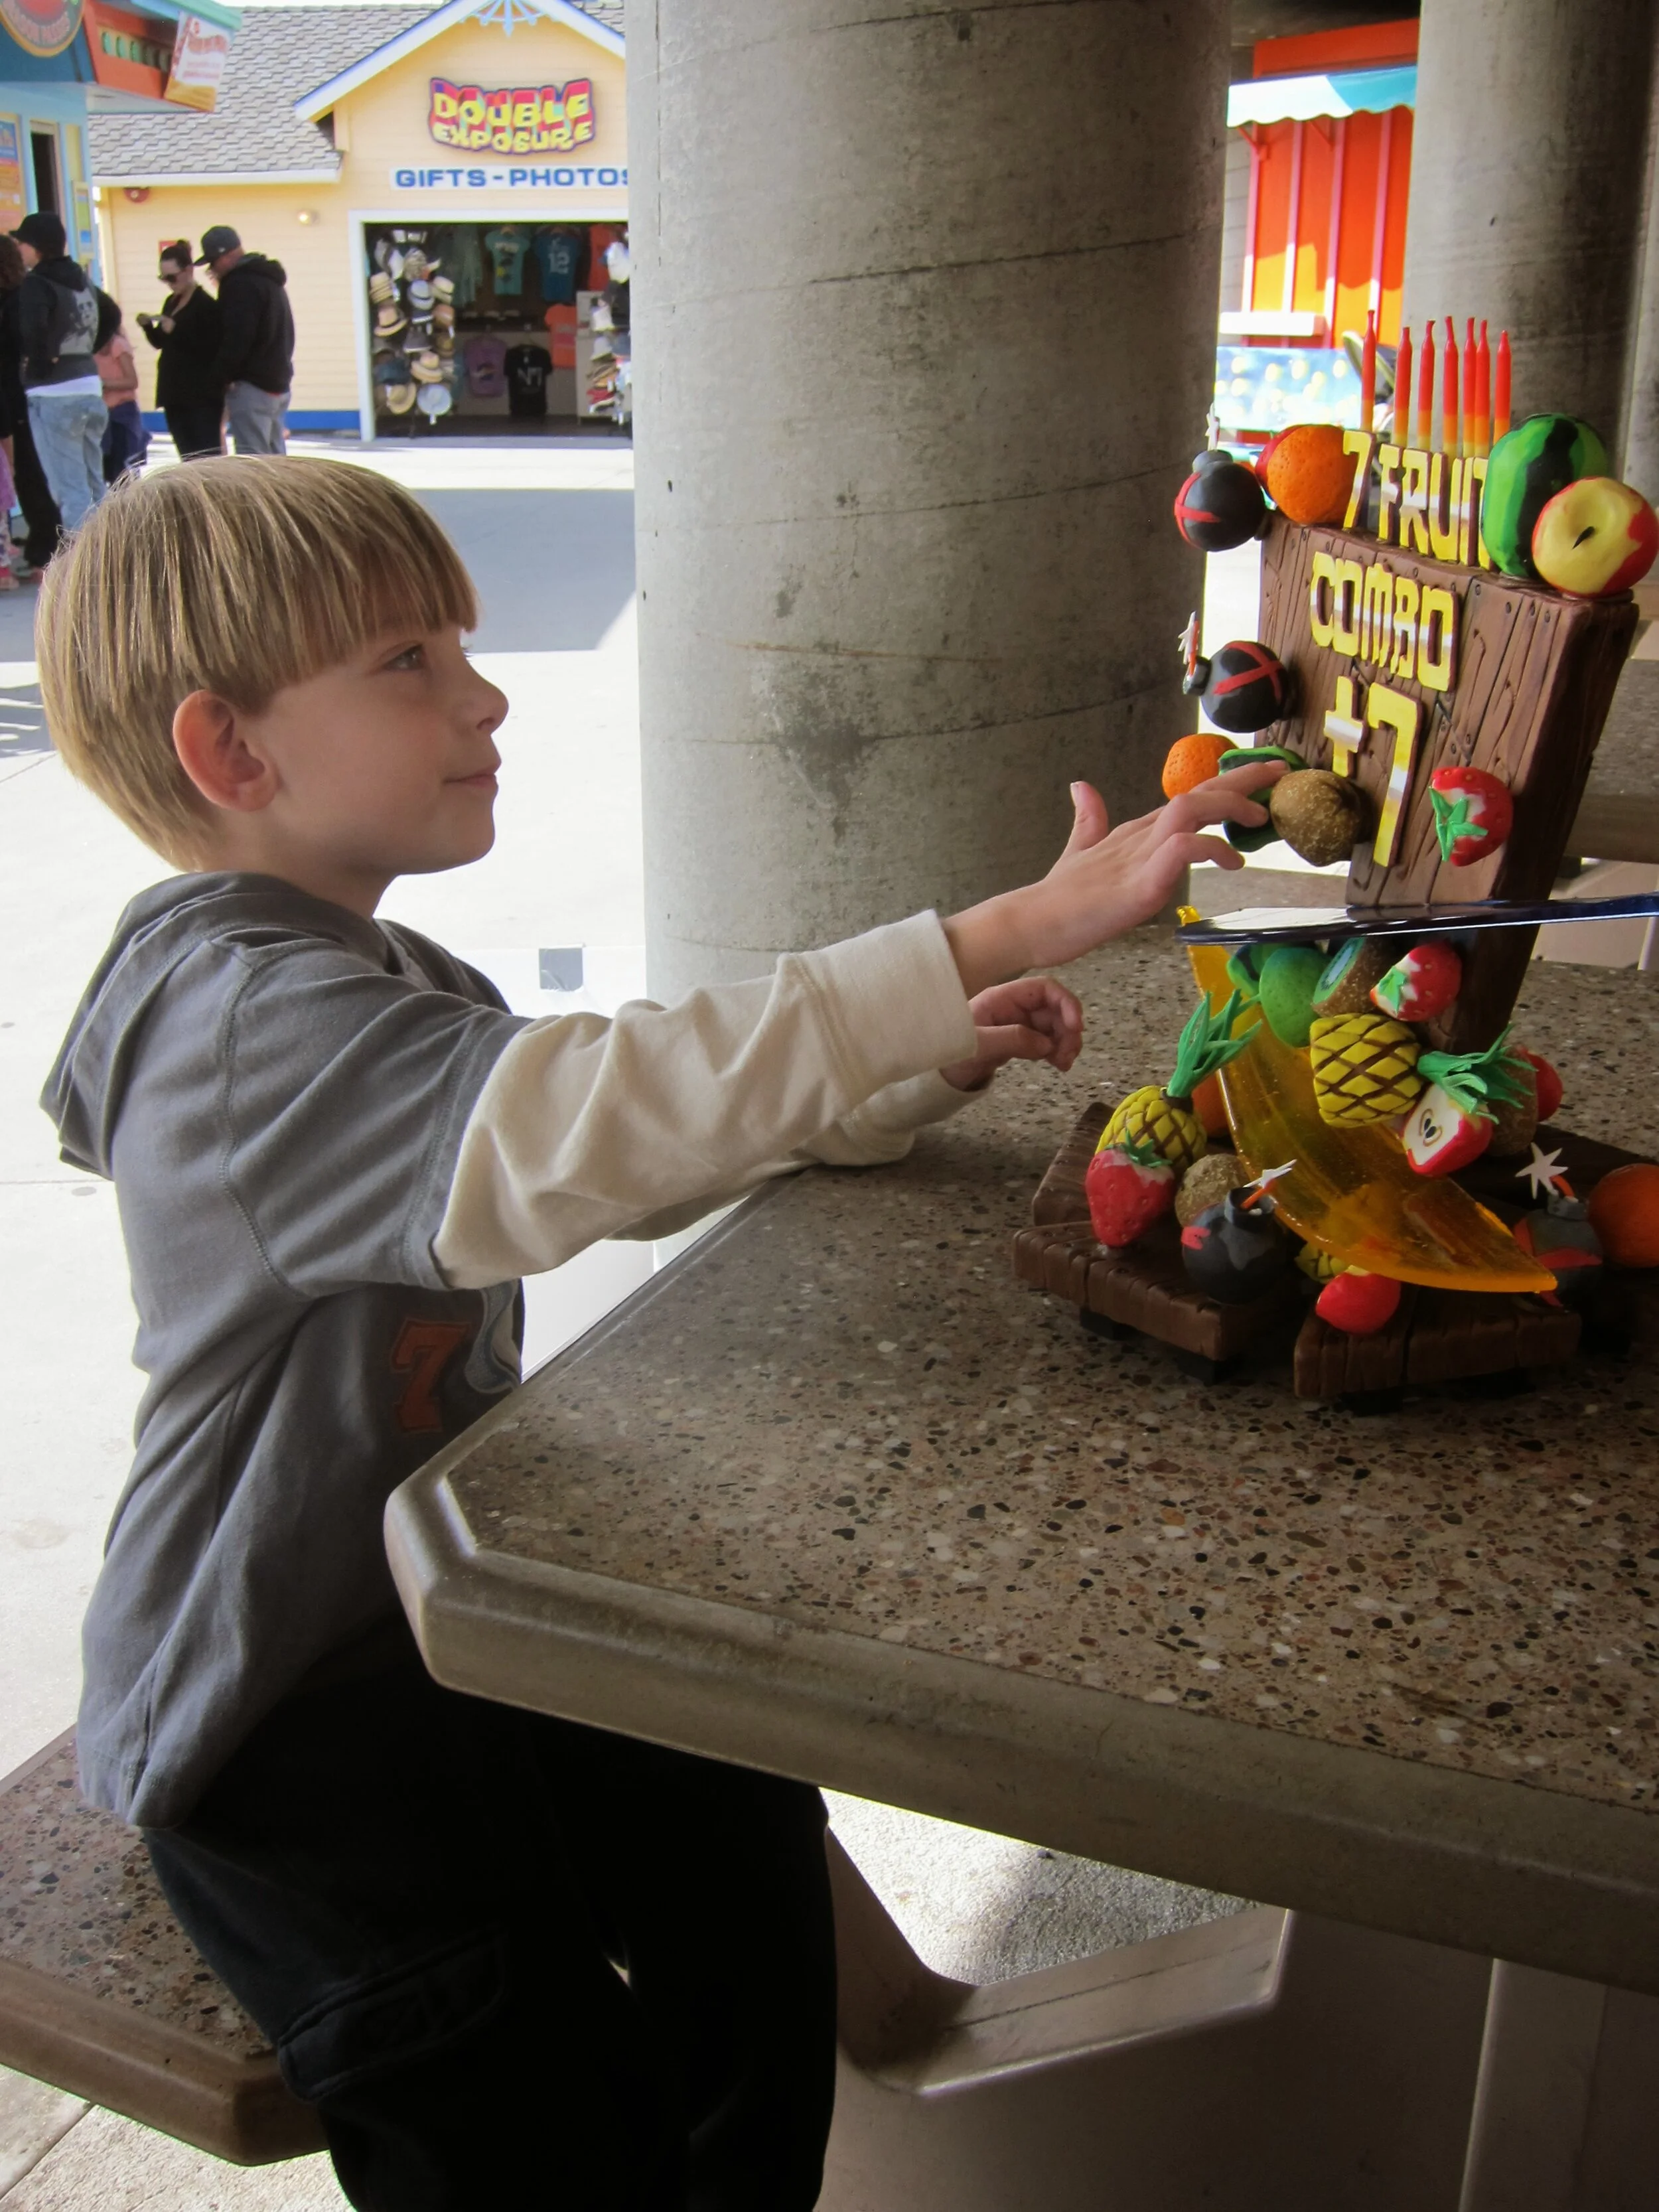
My friend Isaac is turning seven. He really loves the game Fruit Ninja and he really loves numbers, so I went for a Fruit Ninja cake that prominently featured the number seven.
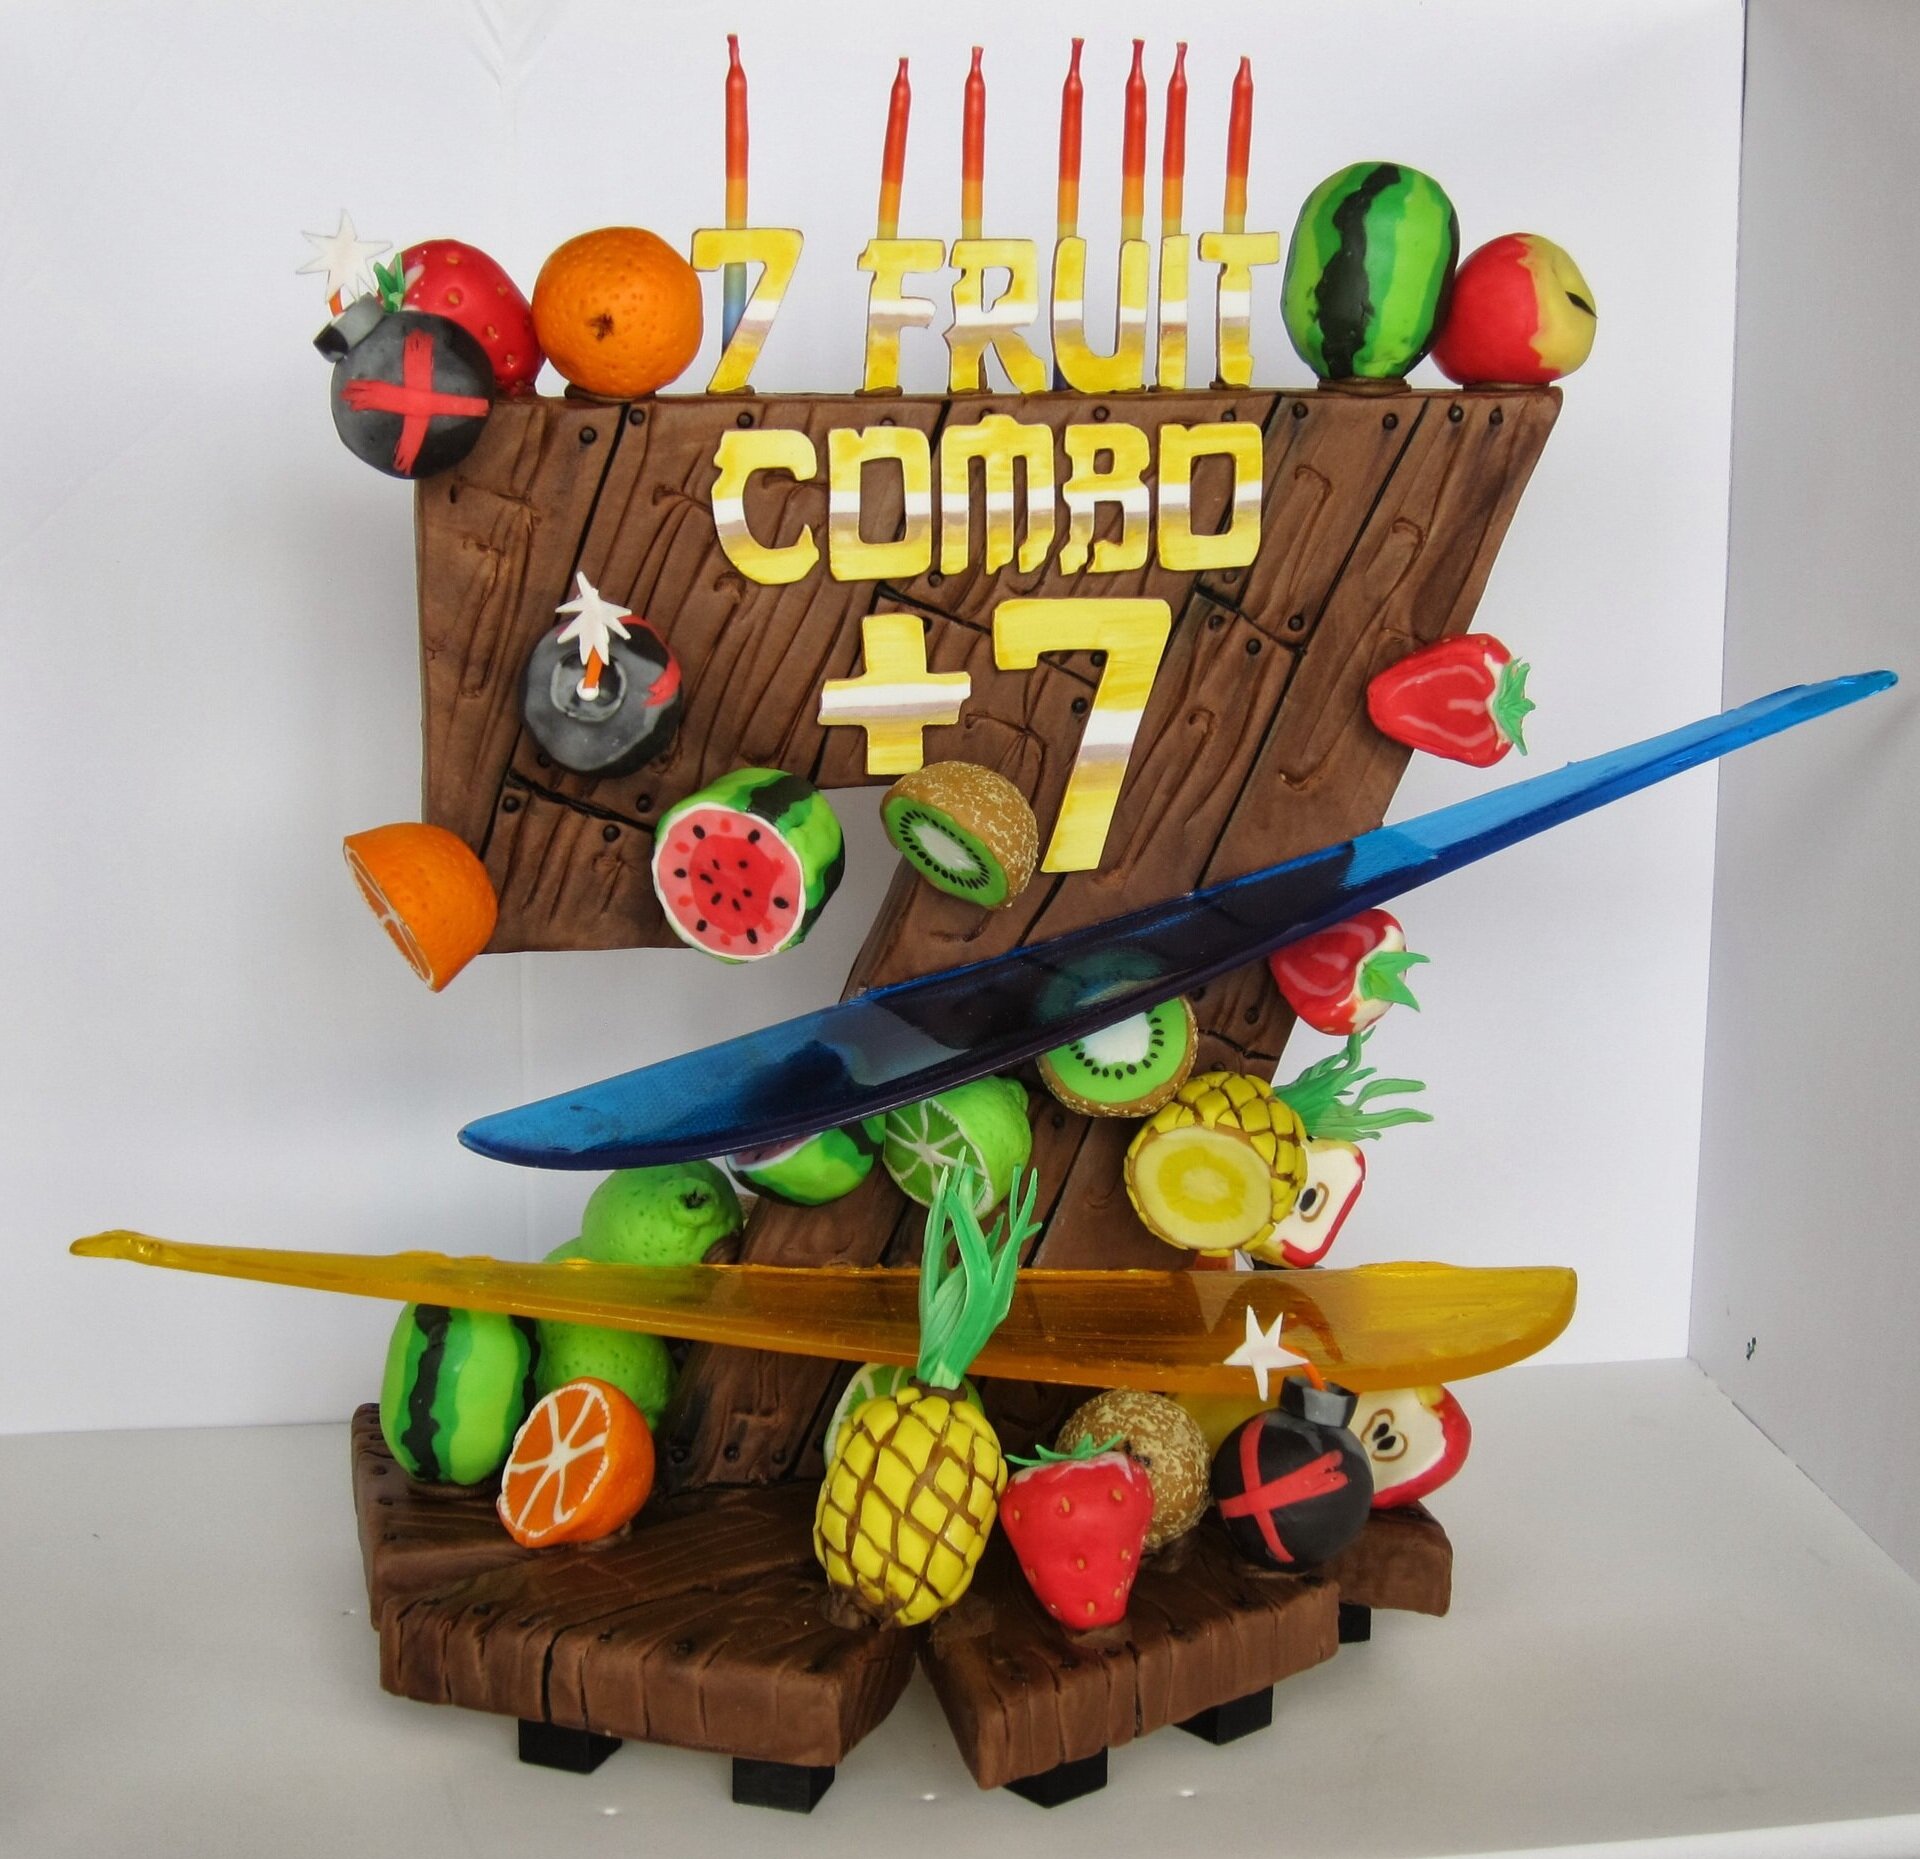
I’m so happy that now that I’m back in California I can make birthday cakes for my little friend Isaac again! He really loves the game Fruit Ninja and he really loves numbers, so I went for a Fruit Ninja cake that prominently featured the number seven. At one point I had planned to make the base shaped like four number sevens, but fortunately Isaac’s mom pointed out that my sketch looked disturbingly like a swastika, so I shaped it like six number sevens instead. Cakewreck narrowly avoided!

Isaac was celebrating at the Santa Cruz Beach Boardwalk, so I had to make a cake small and portable enough that it could survive the hour drive over windy roads and conveniently be served in the middle of a busy amusement park. By my standards, then, this cake was remarkably practical. The only problem was that it was too windy to light the candles.

Basically, the number seven is a wooden cut-out covered with fondant to look like the background of Fruit Ninja. The slashes that are cutting the fruit are poured isomalt. All the little fruits are cake covered with modeling chocolate. I started with a basic white cake recipe and then added fresh squeezed fruit juices and zests so that each cake is flavored like the appropriate fruit. The lime, orange, and pineapple worked especially well. It turns out to be pretty hard to get kiwi flavor and watermelon flavor to translate into cake. For the bombs, I added a little bit of Tabasco sauce. I think they had a little bite at the end, but I didn’t want them to be too powerful since kids would be eating them.


Minion Chicken Coop Cake
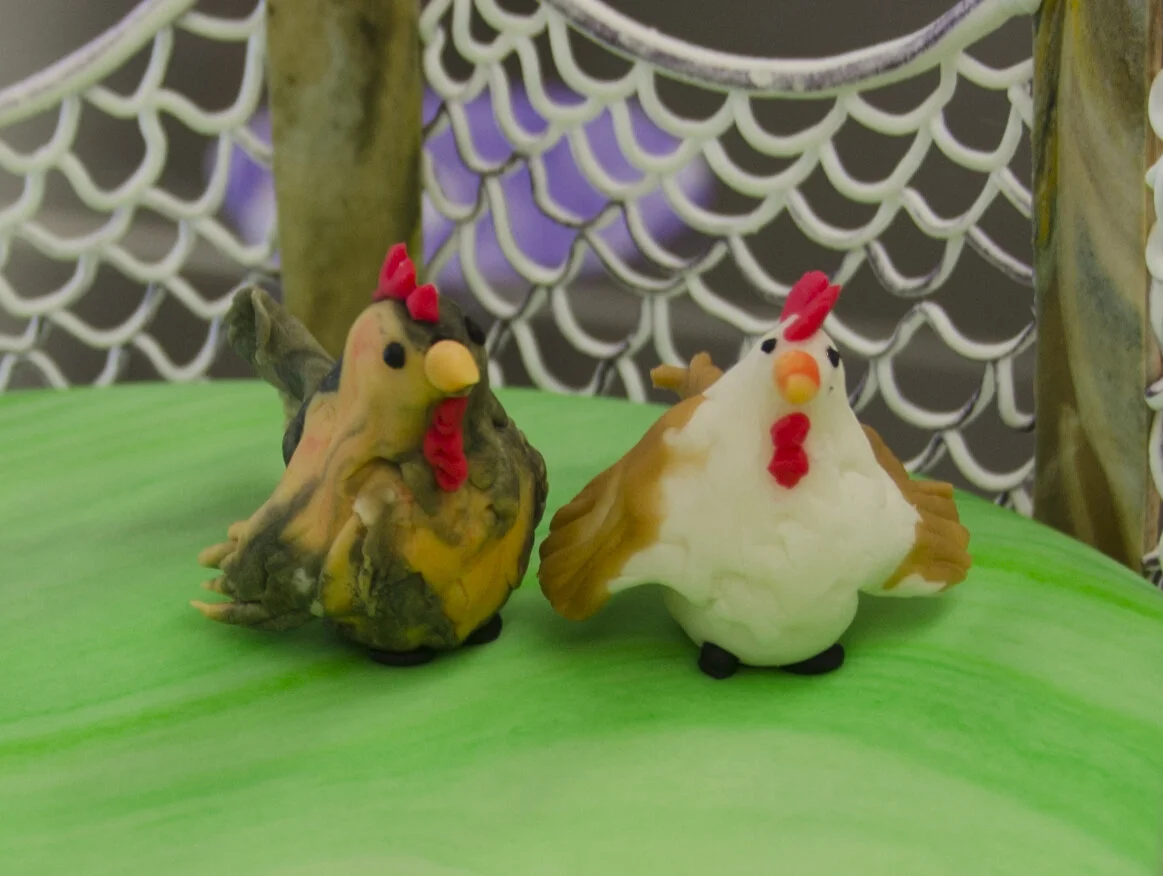
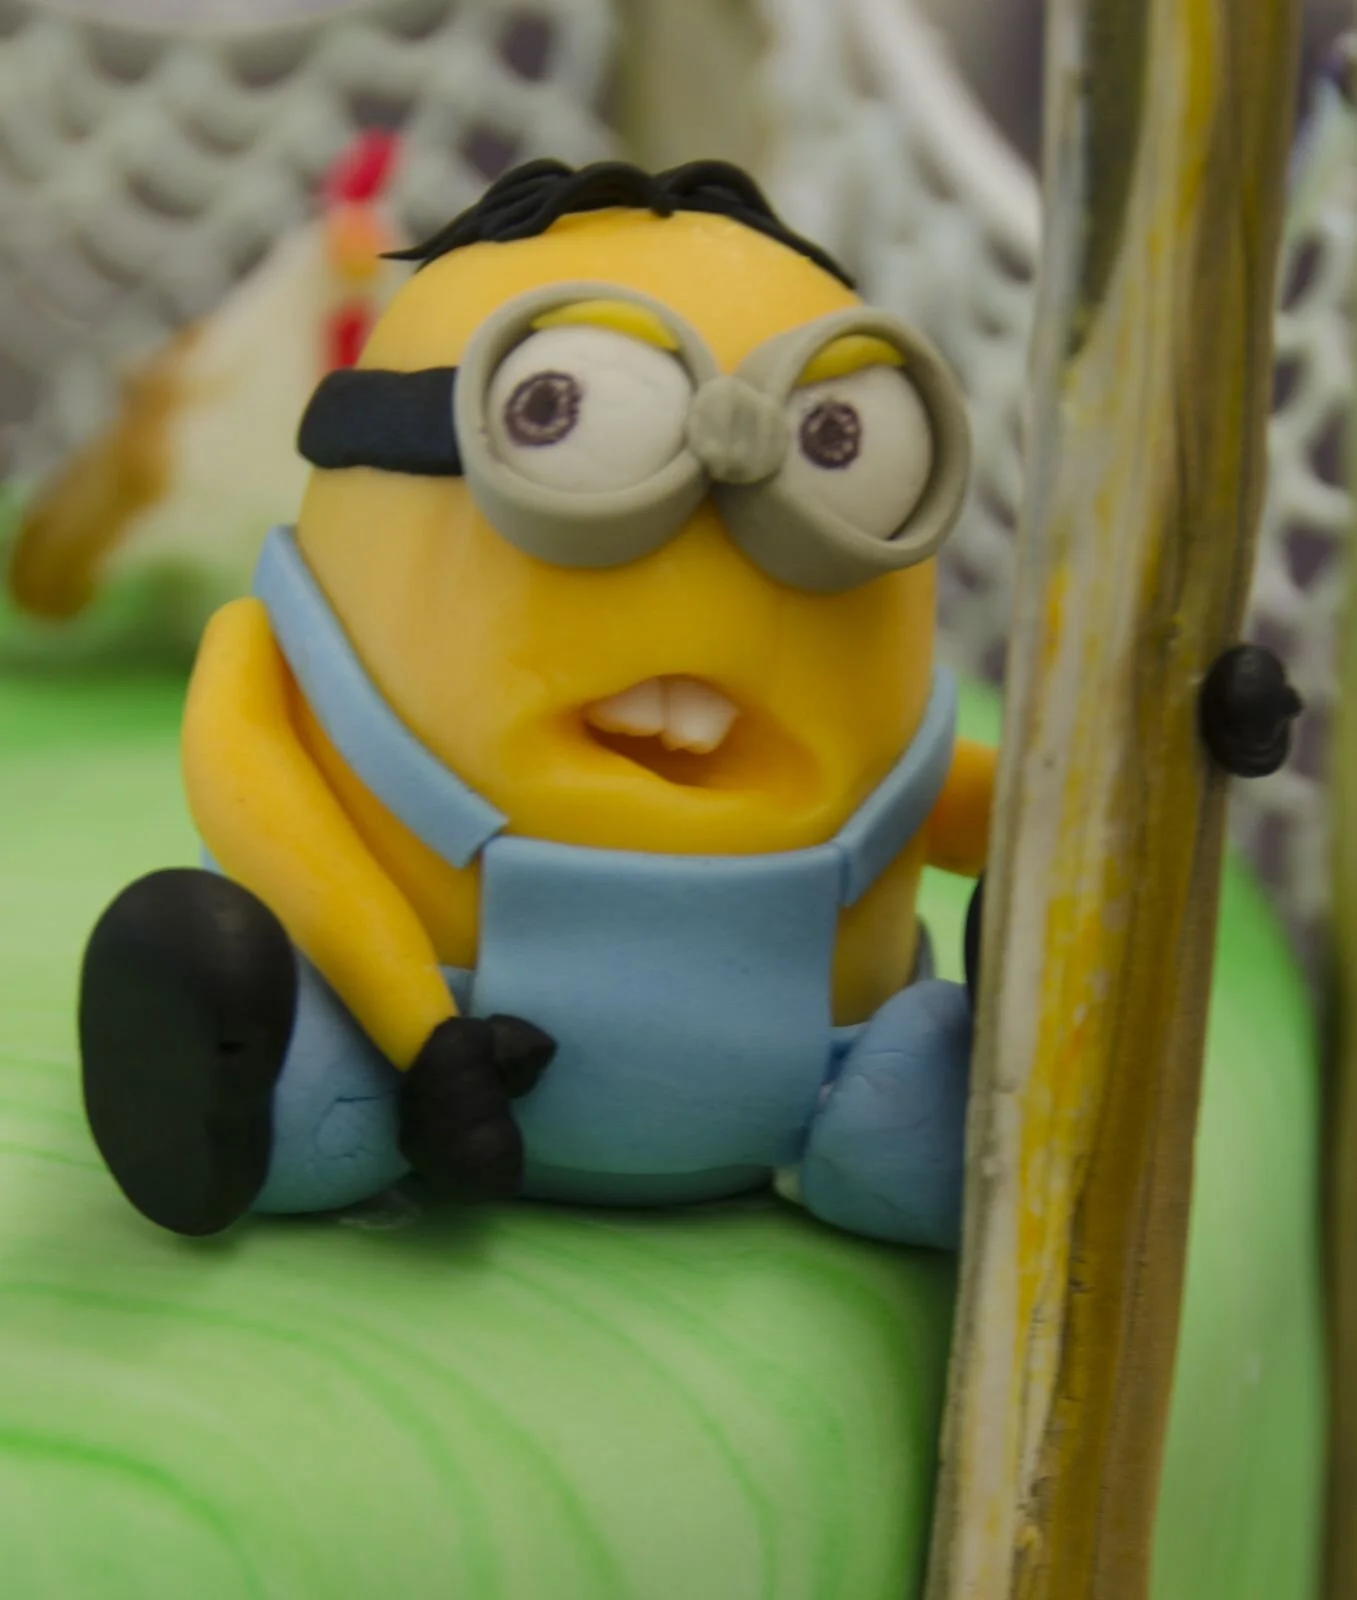
While my mom and I were taking a cake class at the Wilton School, we had a very nice Skype call with my niece and nephew. They told us that they were planning to be minions from Despicable Me for Halloween. We also had a very entertaining conversation about whether or not they were building me a chicken coop. So I made the cake I was making for class a minion / chicken coop cake.
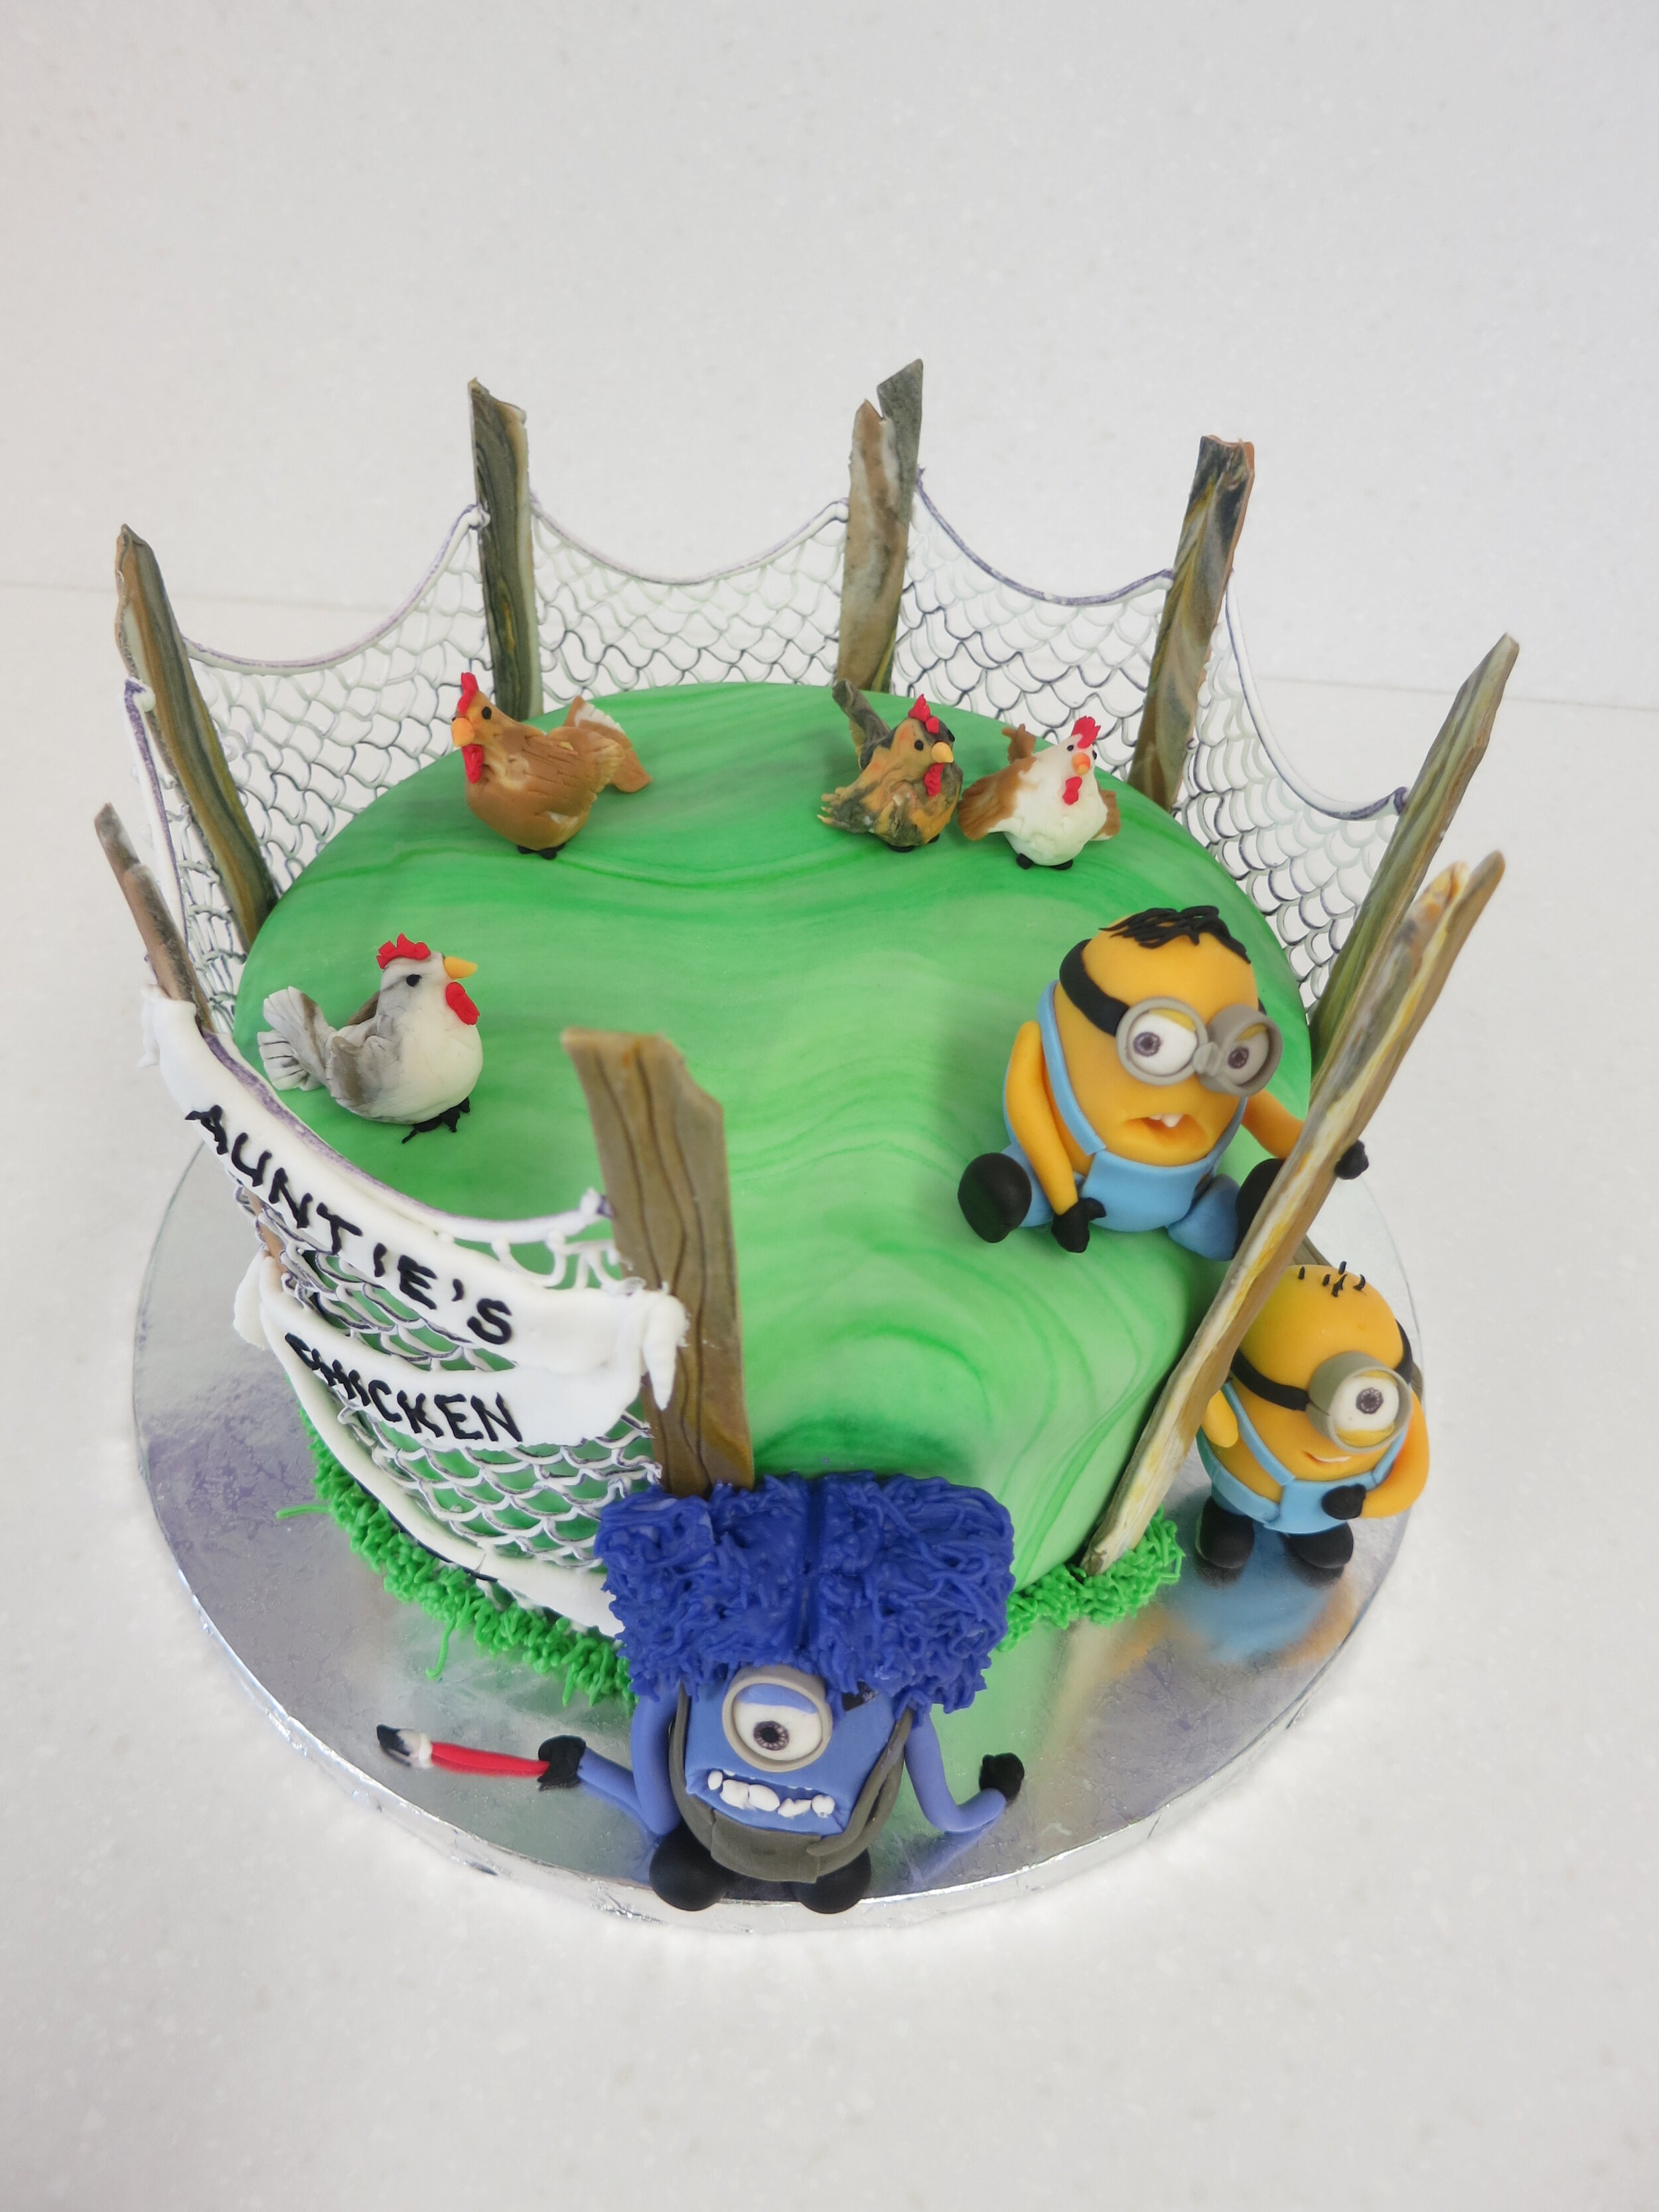
While my mom and I were taking a cake class at the Wilton School, we had a very nice Skype call with my niece and nephew. They told us that they were planning to be minions from Despicable Me for Halloween. We also had a very entertaining conversation about whether or not they were building me a chicken coop. The details of the chicken coop joke are kind of hard to explain, but basically I decided to take the joke to the next level.
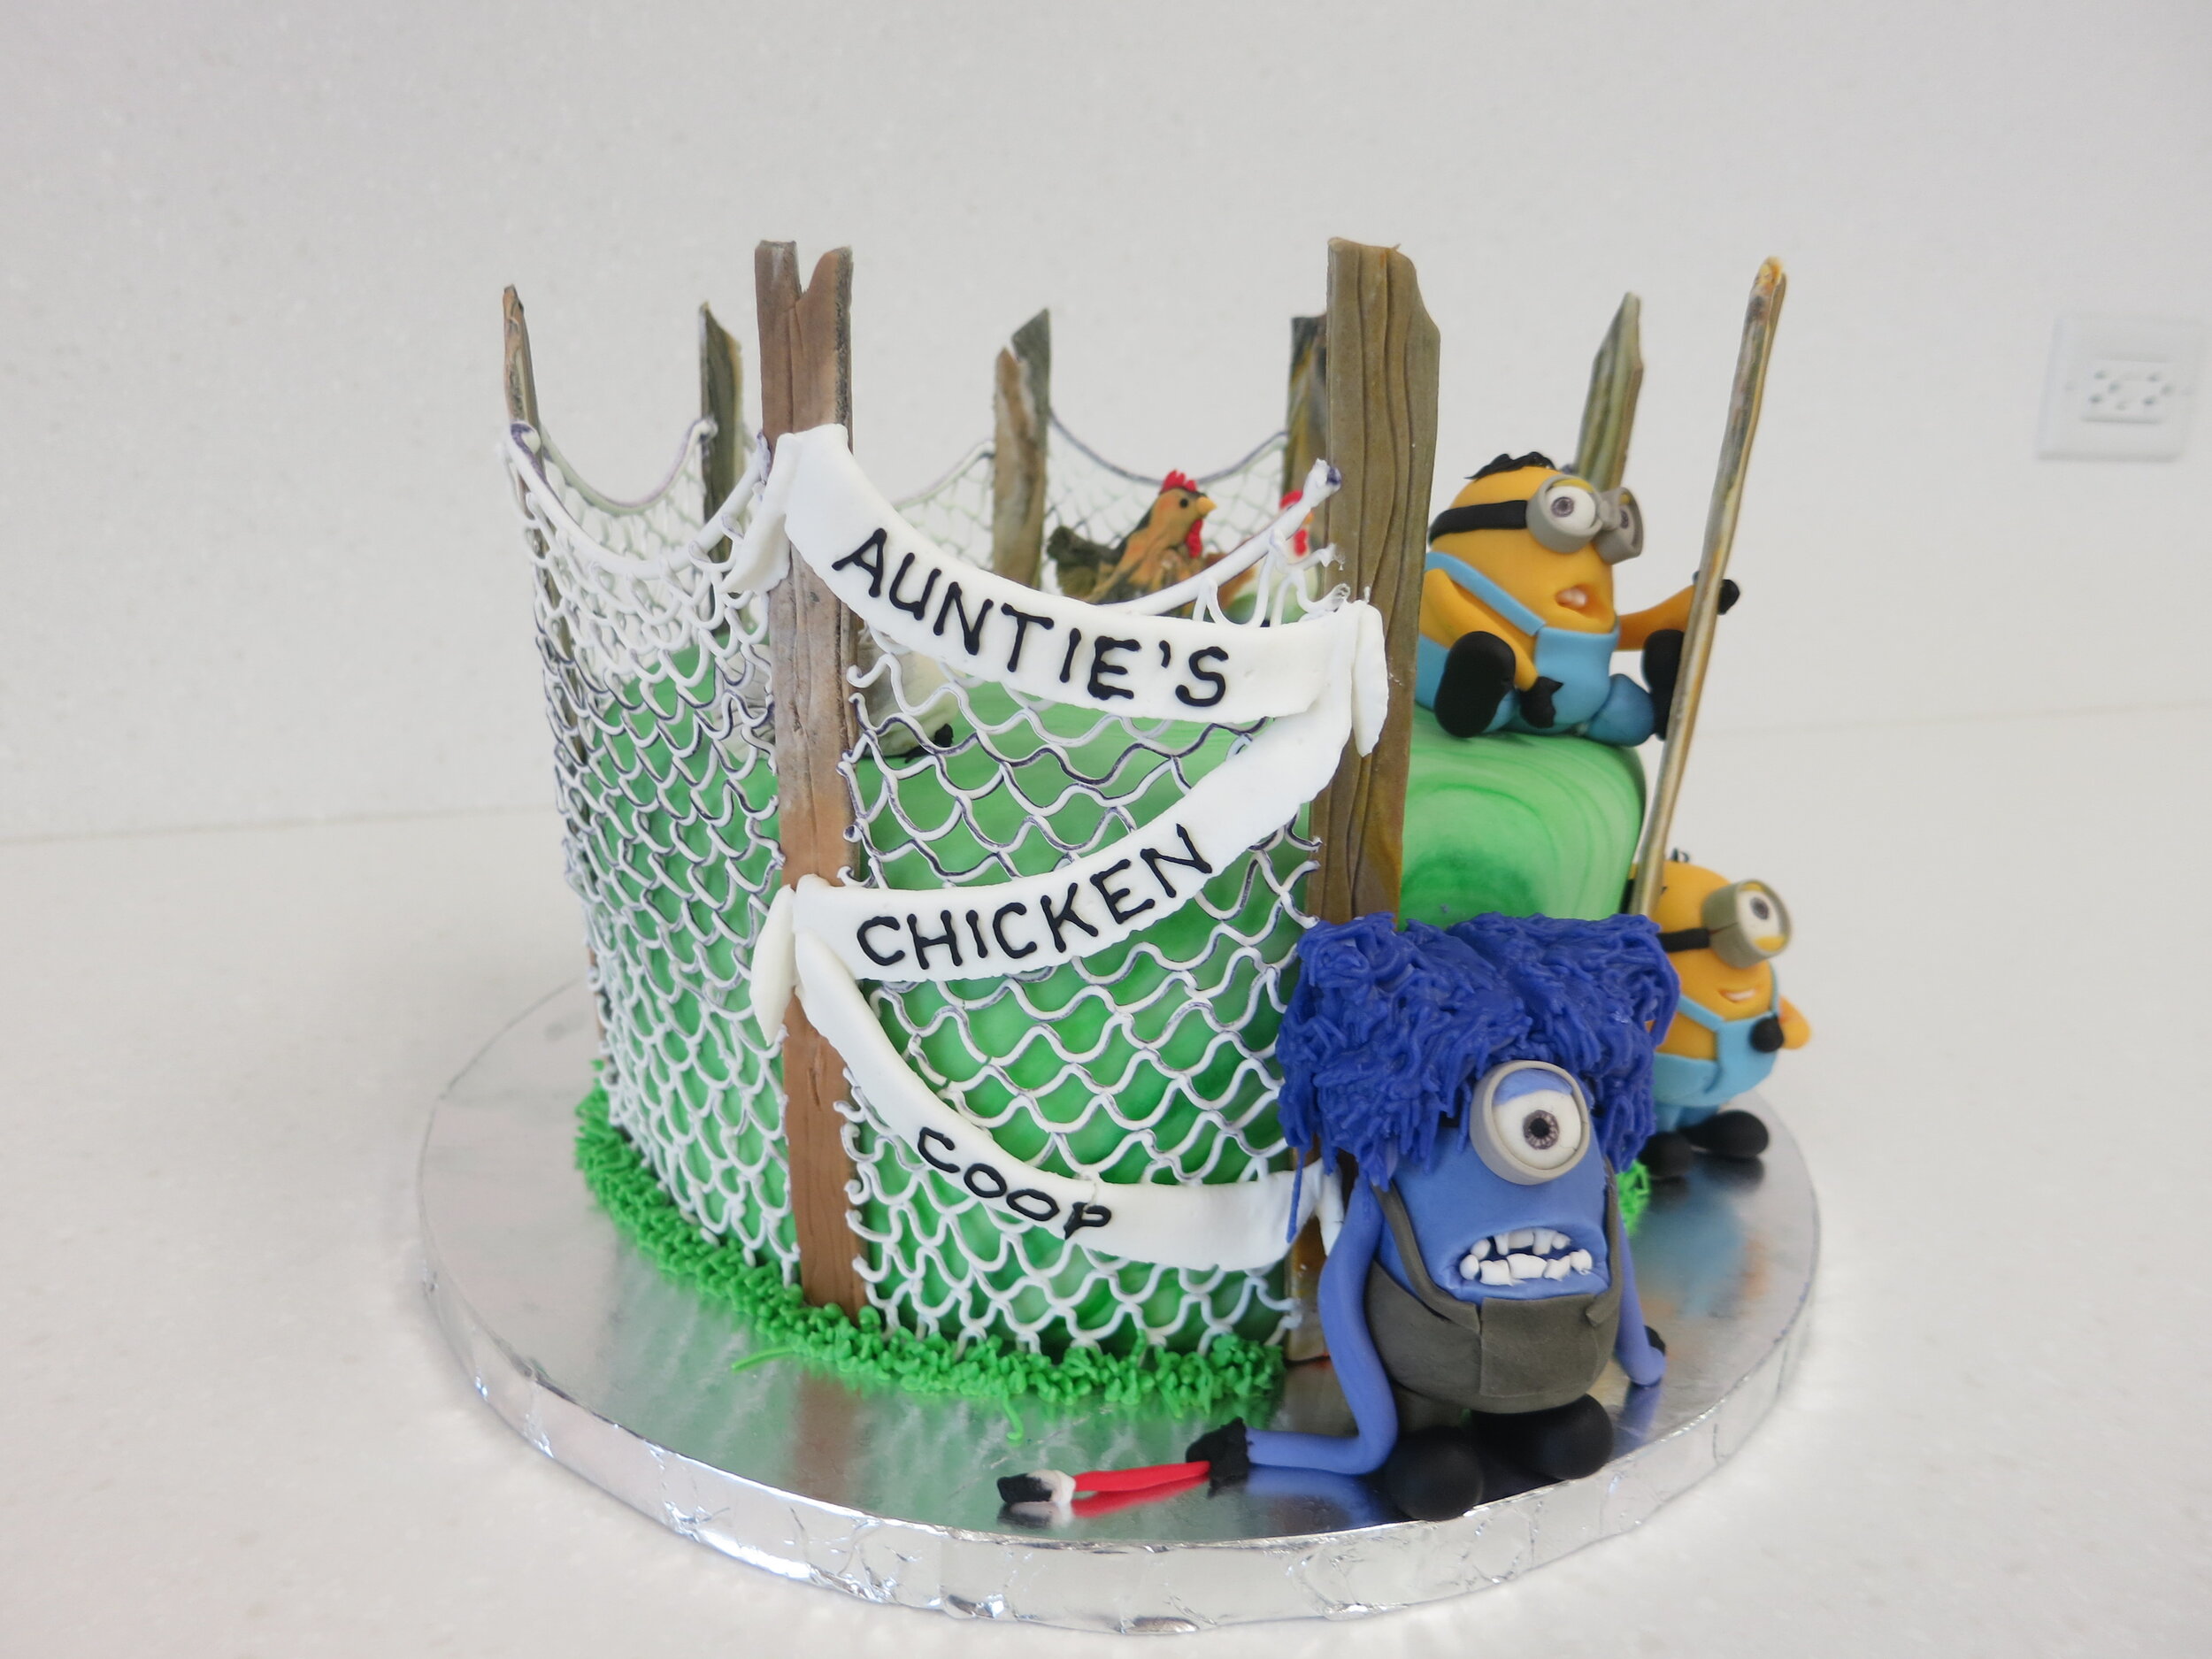
So I made the cake I was making for class a minion / chicken coop cake. Then I carried it back home on the plane. It was greeted with shrieks of joy.

Woyzeck
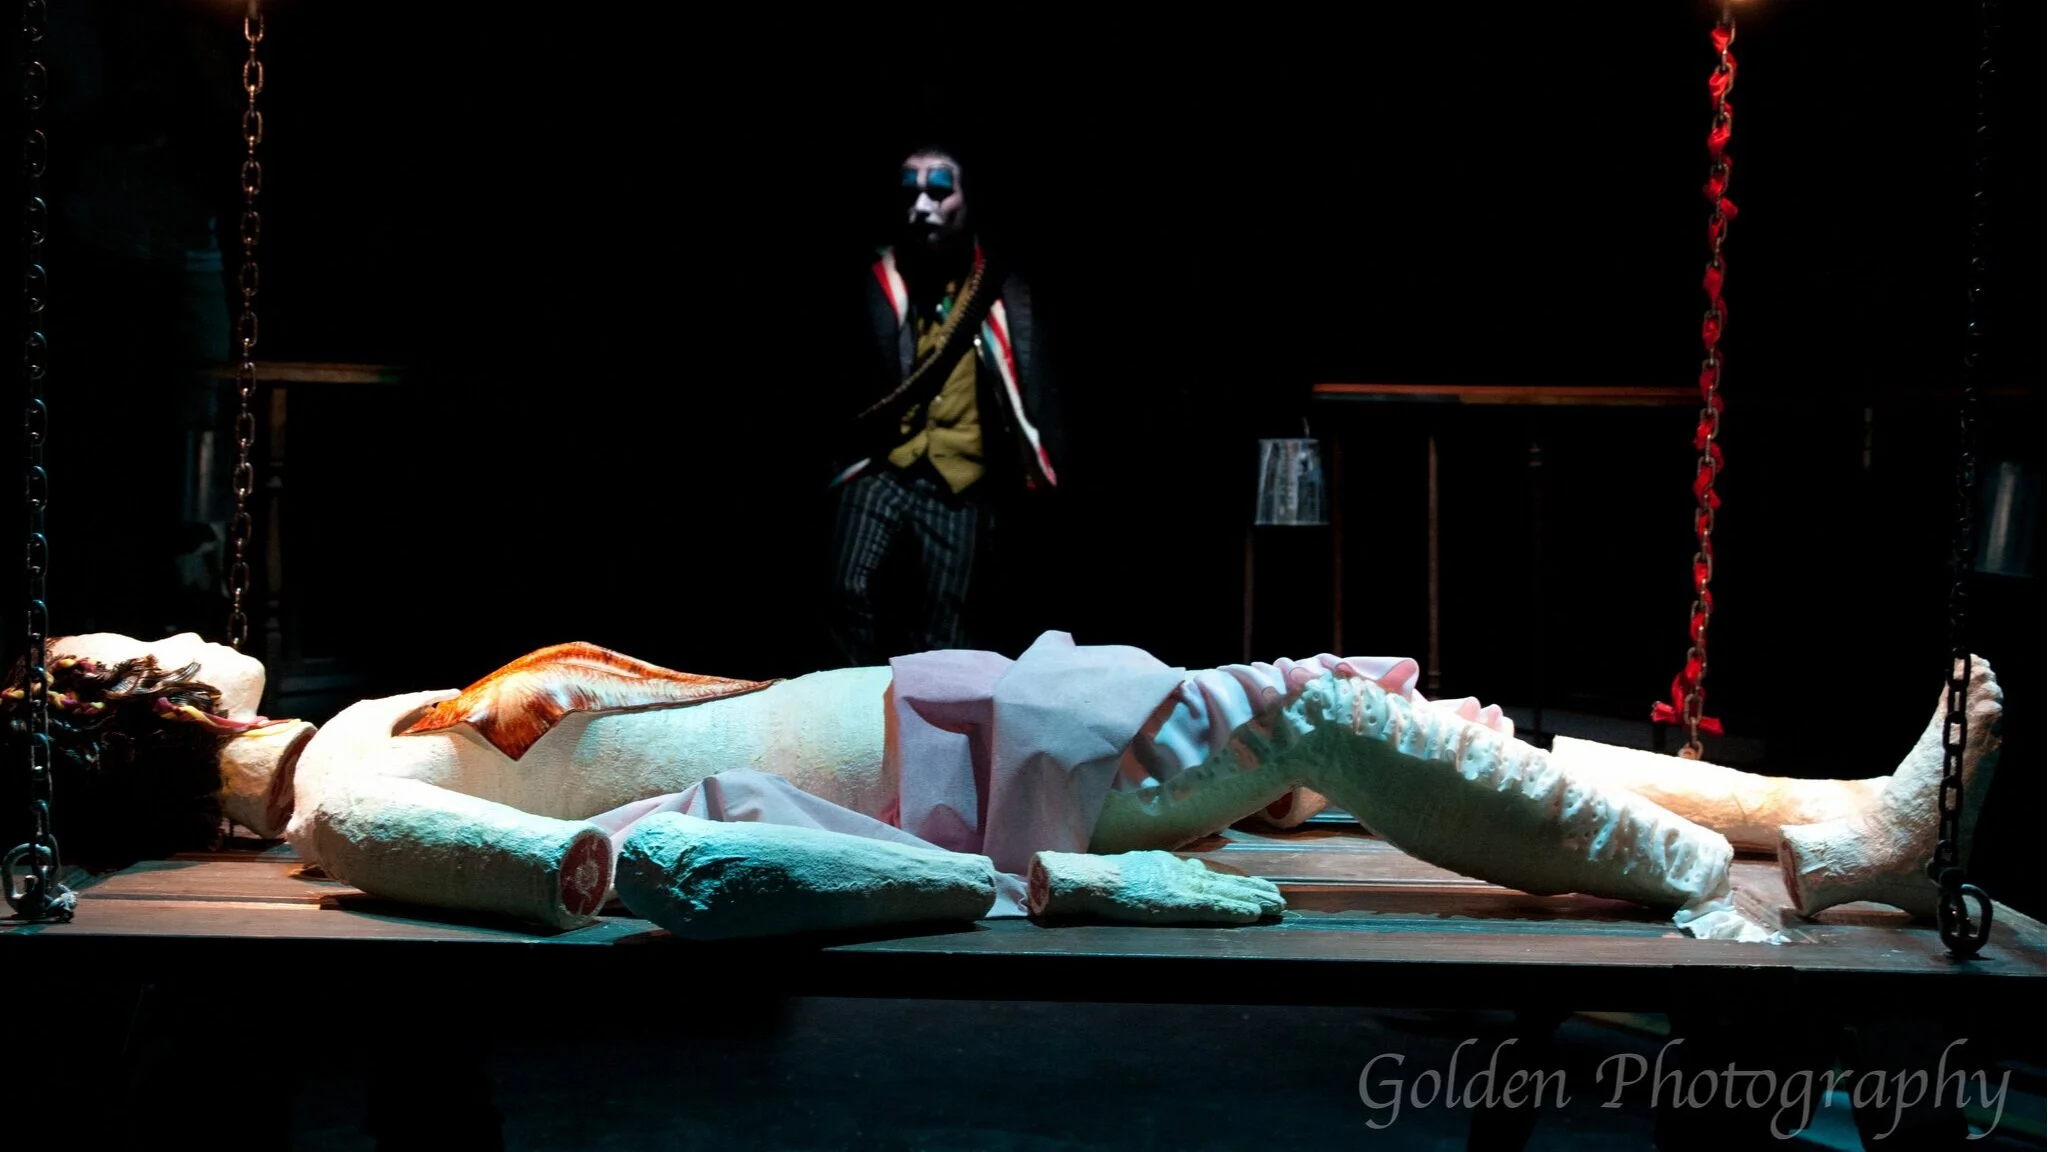
I was the production designer for a production of Woyzeck at the University of Wisconsin - Madison’s University Theatre. At the end of the play, the corpse of Woyzeck’s murdered lover Marie was lowered from the ceiling. The corpse was made of styrofoam, but I used fondant to decorate it as I would a cake. The open chest cavity was full of pea-flavored cake balls.
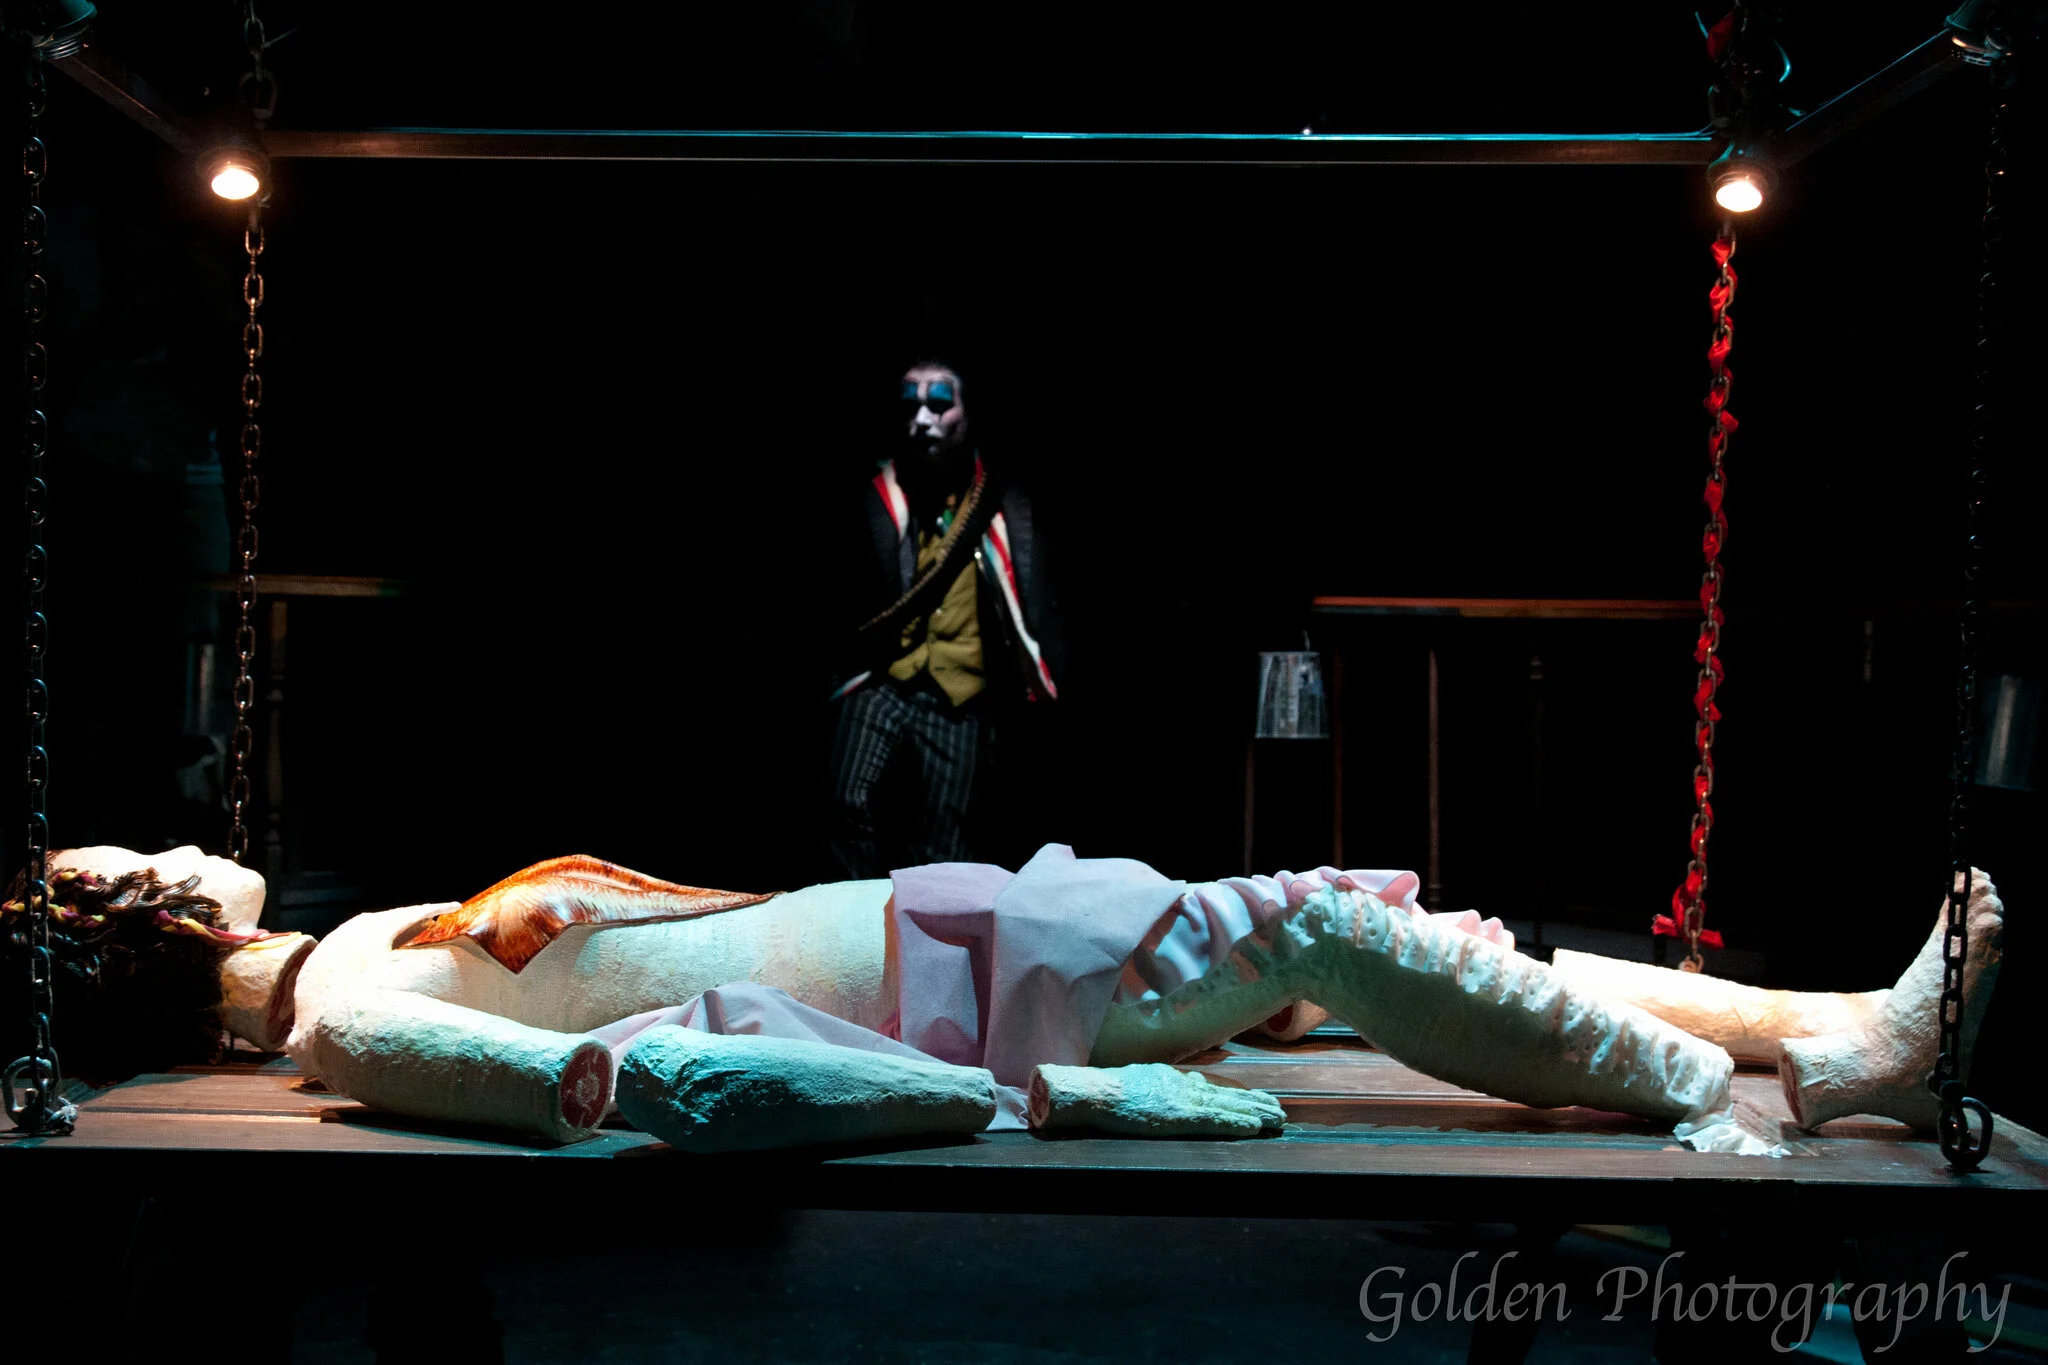
I was the production designer for a production of Woyzeck at the University of Wisconsin - Madison’s University Theatre. The title characters eats nothing but peas, so the director, Kristin Hunt, and I created a pea-flavored tasting menu that we served to the audience over the course of the play.
The tasting menu began with a single pea and included pea flavored gum, pea flavored soda, and pea flavored jello. At the end of the play, the corpse of Woyzeck’s murdered lover Marie was lowered from the ceiling. The corpse was made of styrofoam, but I used fondant to decorate it as I would a cake. The open chest cavity was full of pea-flavored cake balls. As the audience filed out of the theater, they were invited to take a cake ball from the corpse.
Star Wars cake
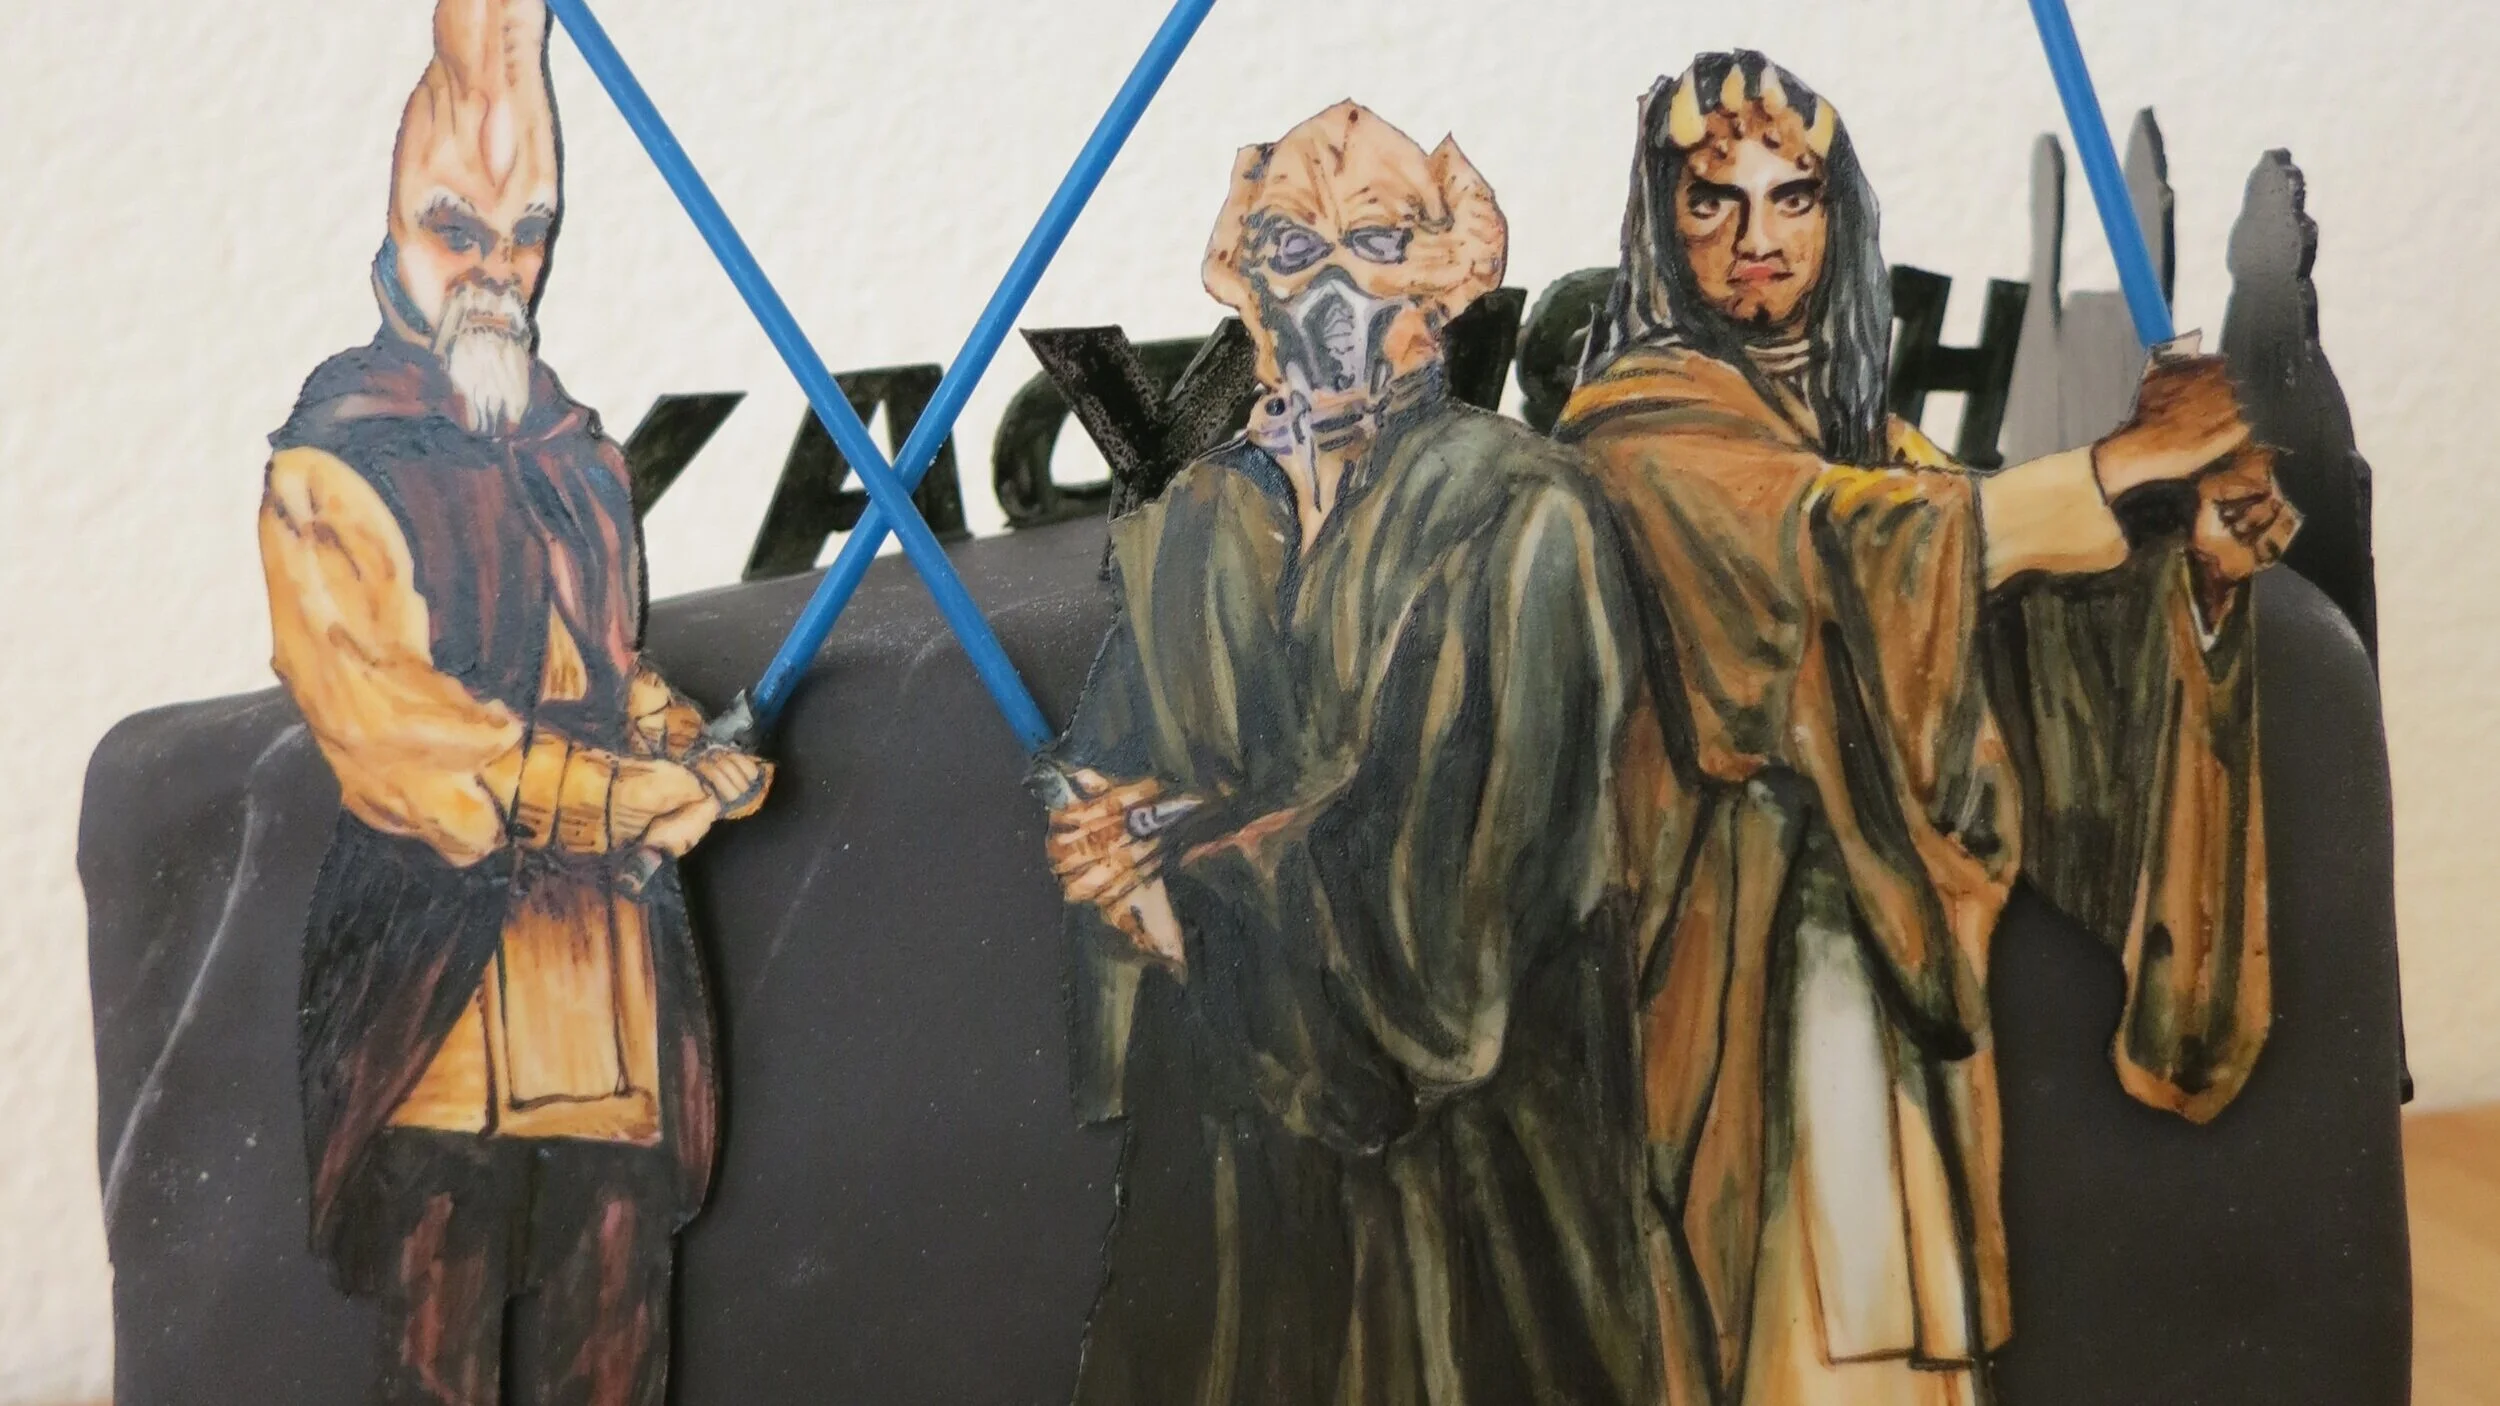
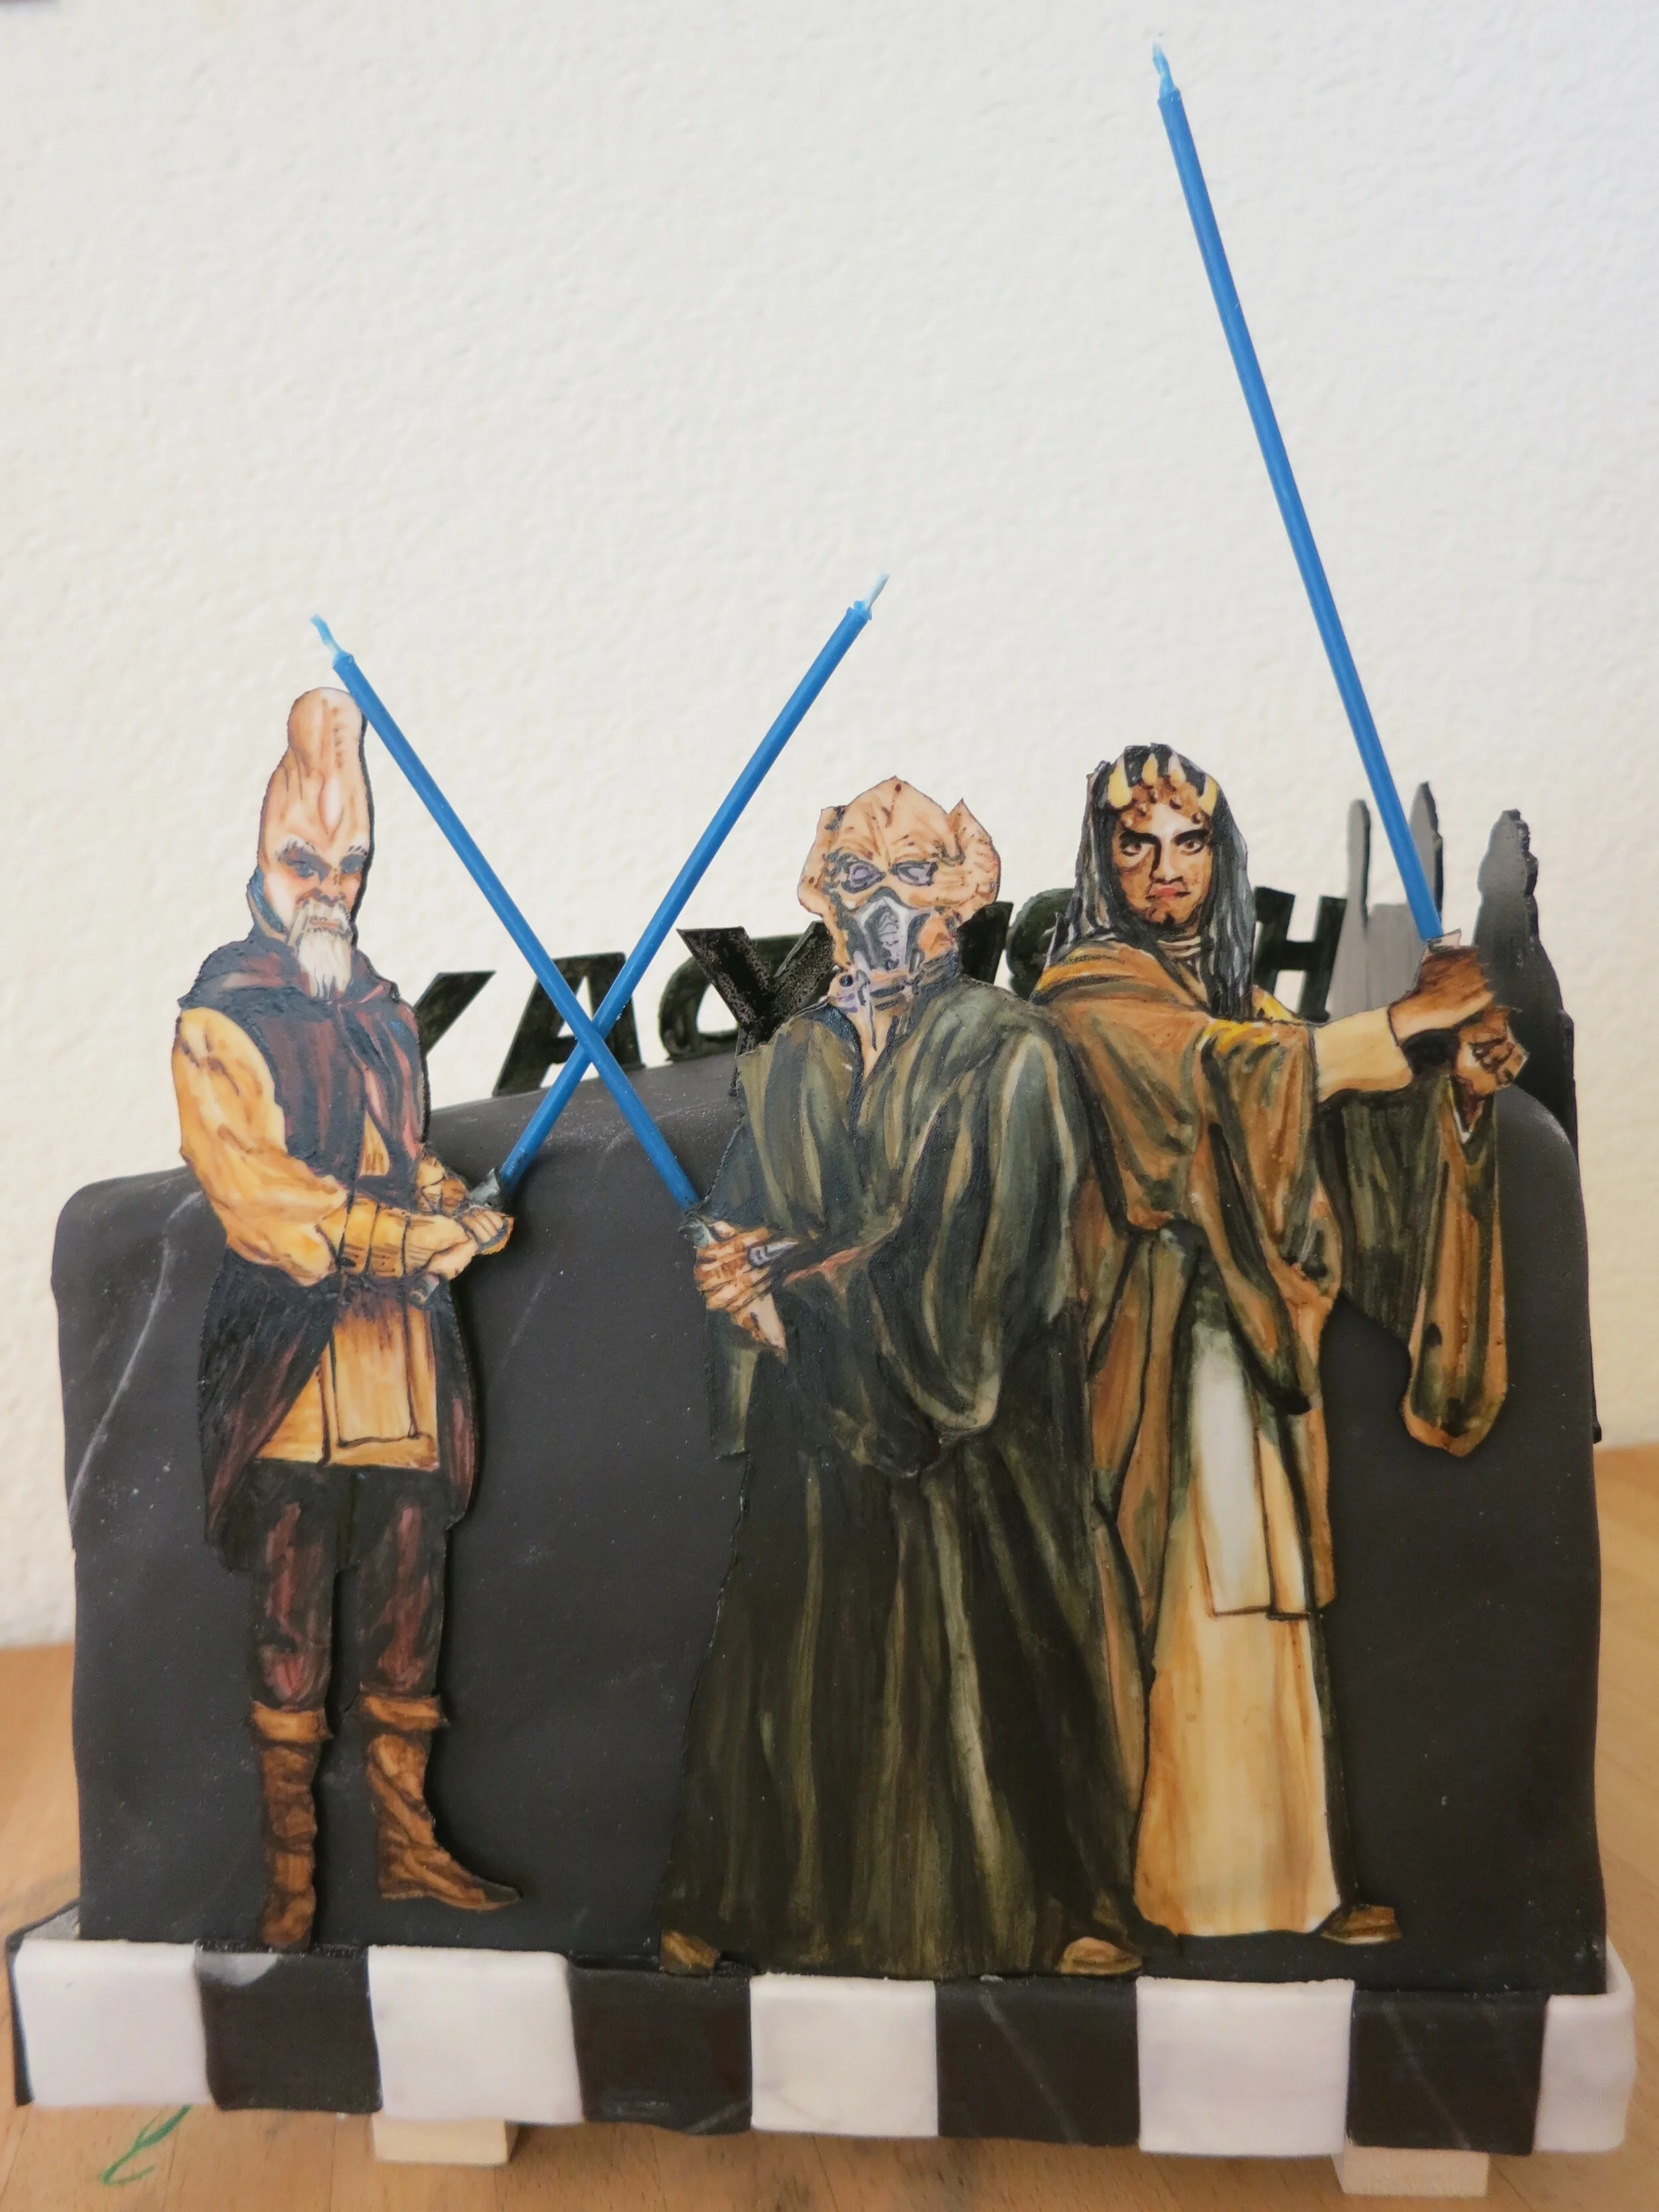
For her seventh birthday, Alex had very specific cake specifications. She wanted a cake being cut in half by a light saber with “Jedi trainers” around the sides.
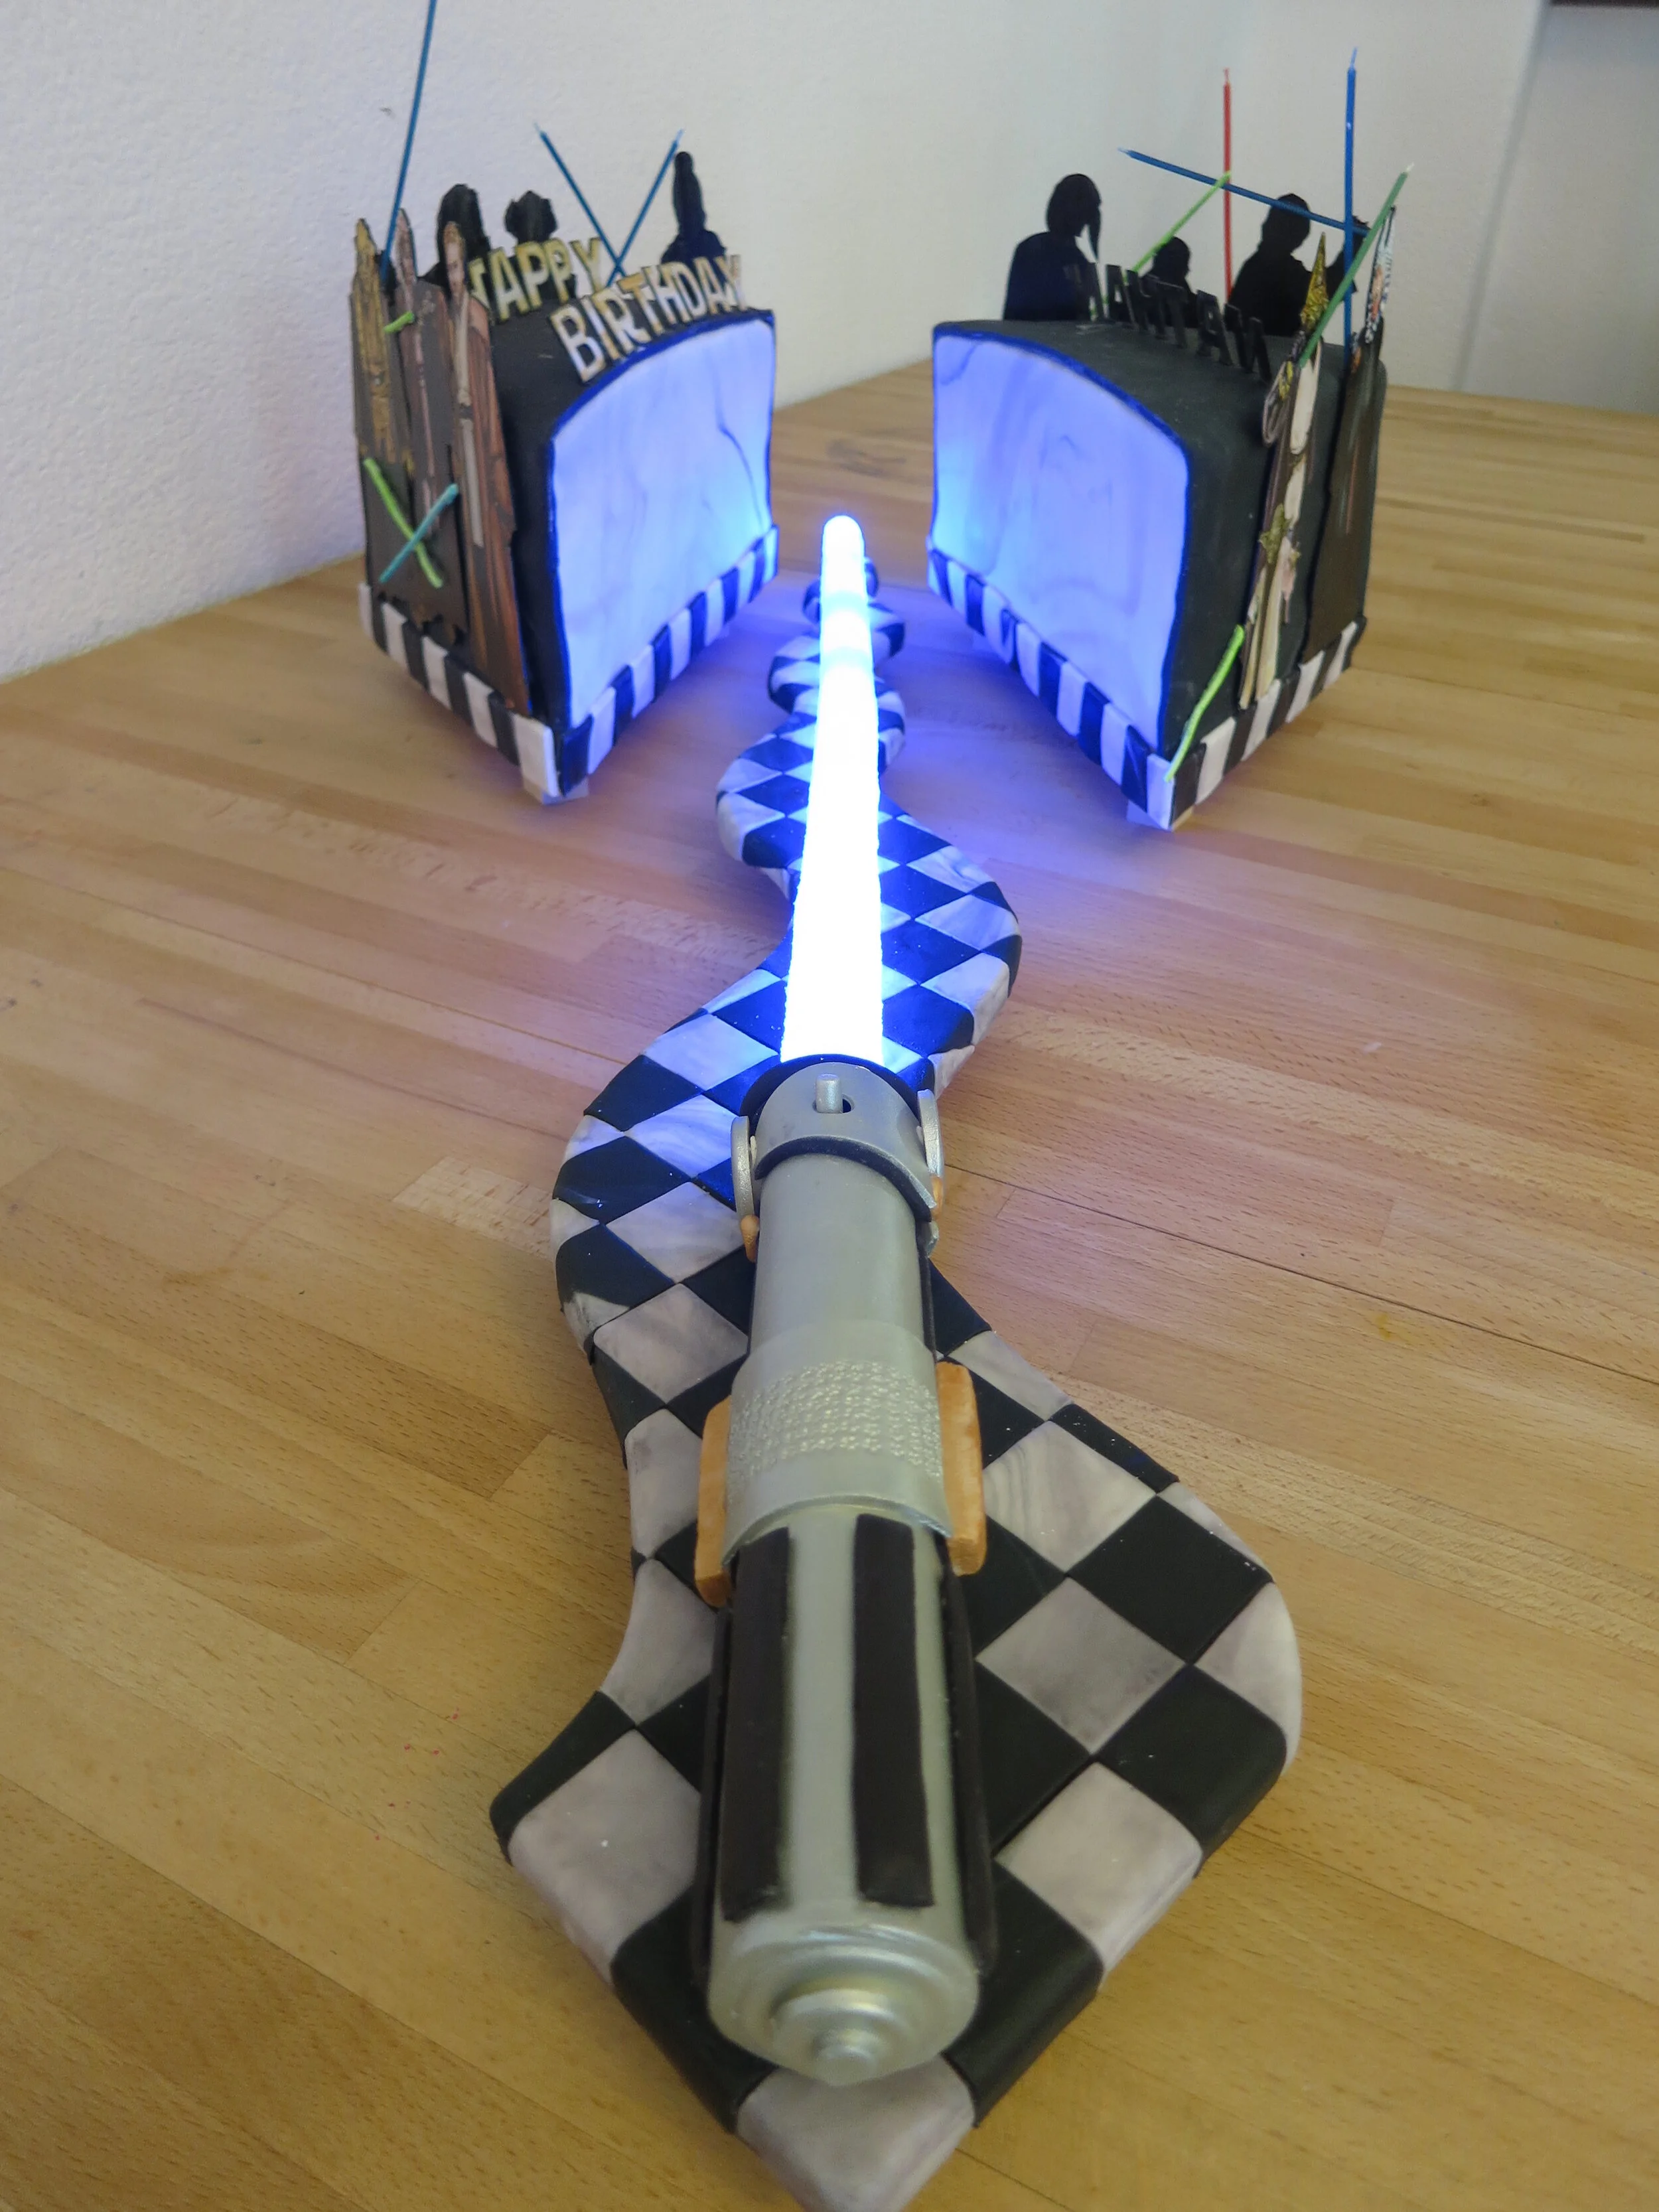
For her seventh birthday, Alex had very specific cake specifications. She wanted a cake being cut in half by a light saber with “Jedi trainers” around the sides. The only Jedi trainers she could specifically name were Yoda and Obi-Wan, which isn’t surprising, because she’s only seen Episodes IV, V, and VI. So I found a picture of the Jedi Council and went with that.
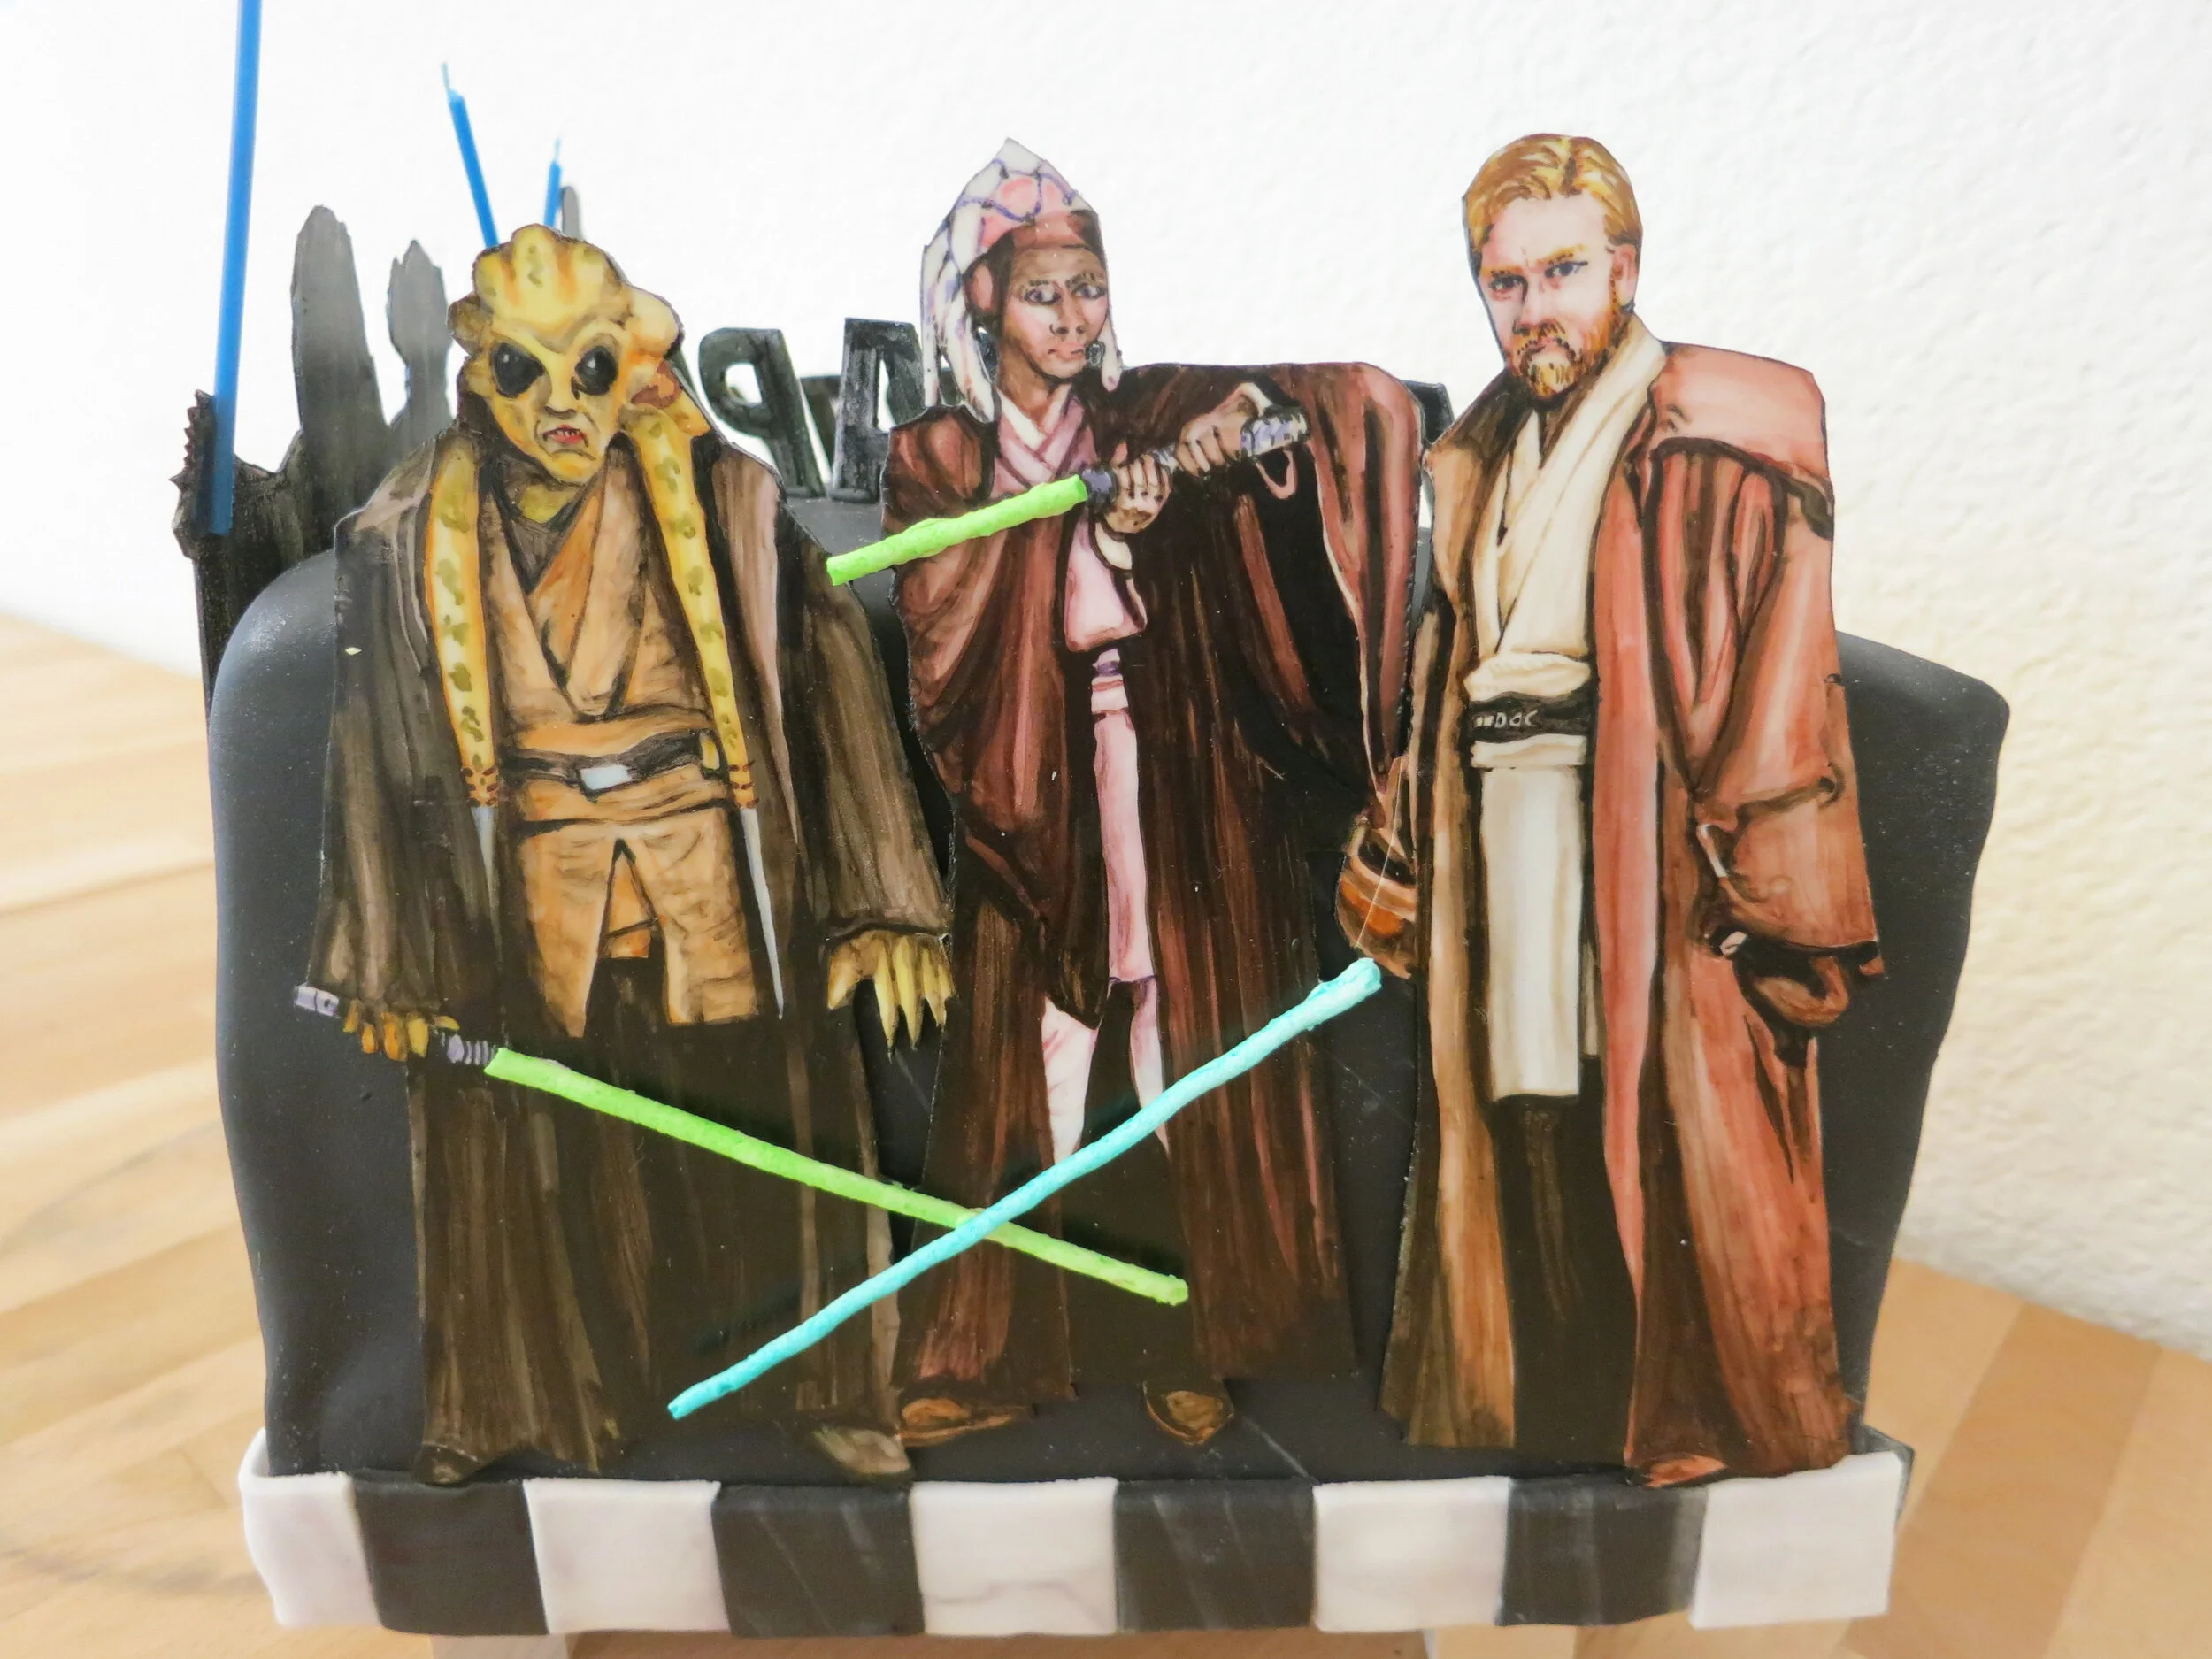
The light saber is a combination of poured sugar and pressed sugar with a string of LEDs embedded in it. The handle of the light saber is gum paste. The Jedi trainers are also gum paste, hand painted with food coloring. I’m particularly pleased with the candle light sabers.

Head Chopping Cake
When I asked Sam what cake he wanted for his fourth birthday, of course he wanted an Axe Cop cake like his sister had.


When I asked Sam what cake he wanted for his fourth birthday, of course he wanted an Axe Cop cake like his sister had. I didn’t have time to make Sam quite as large a cake as I made for Alex, so I just went with a simple 8” round cake with a row of bad guys around the perimeter.
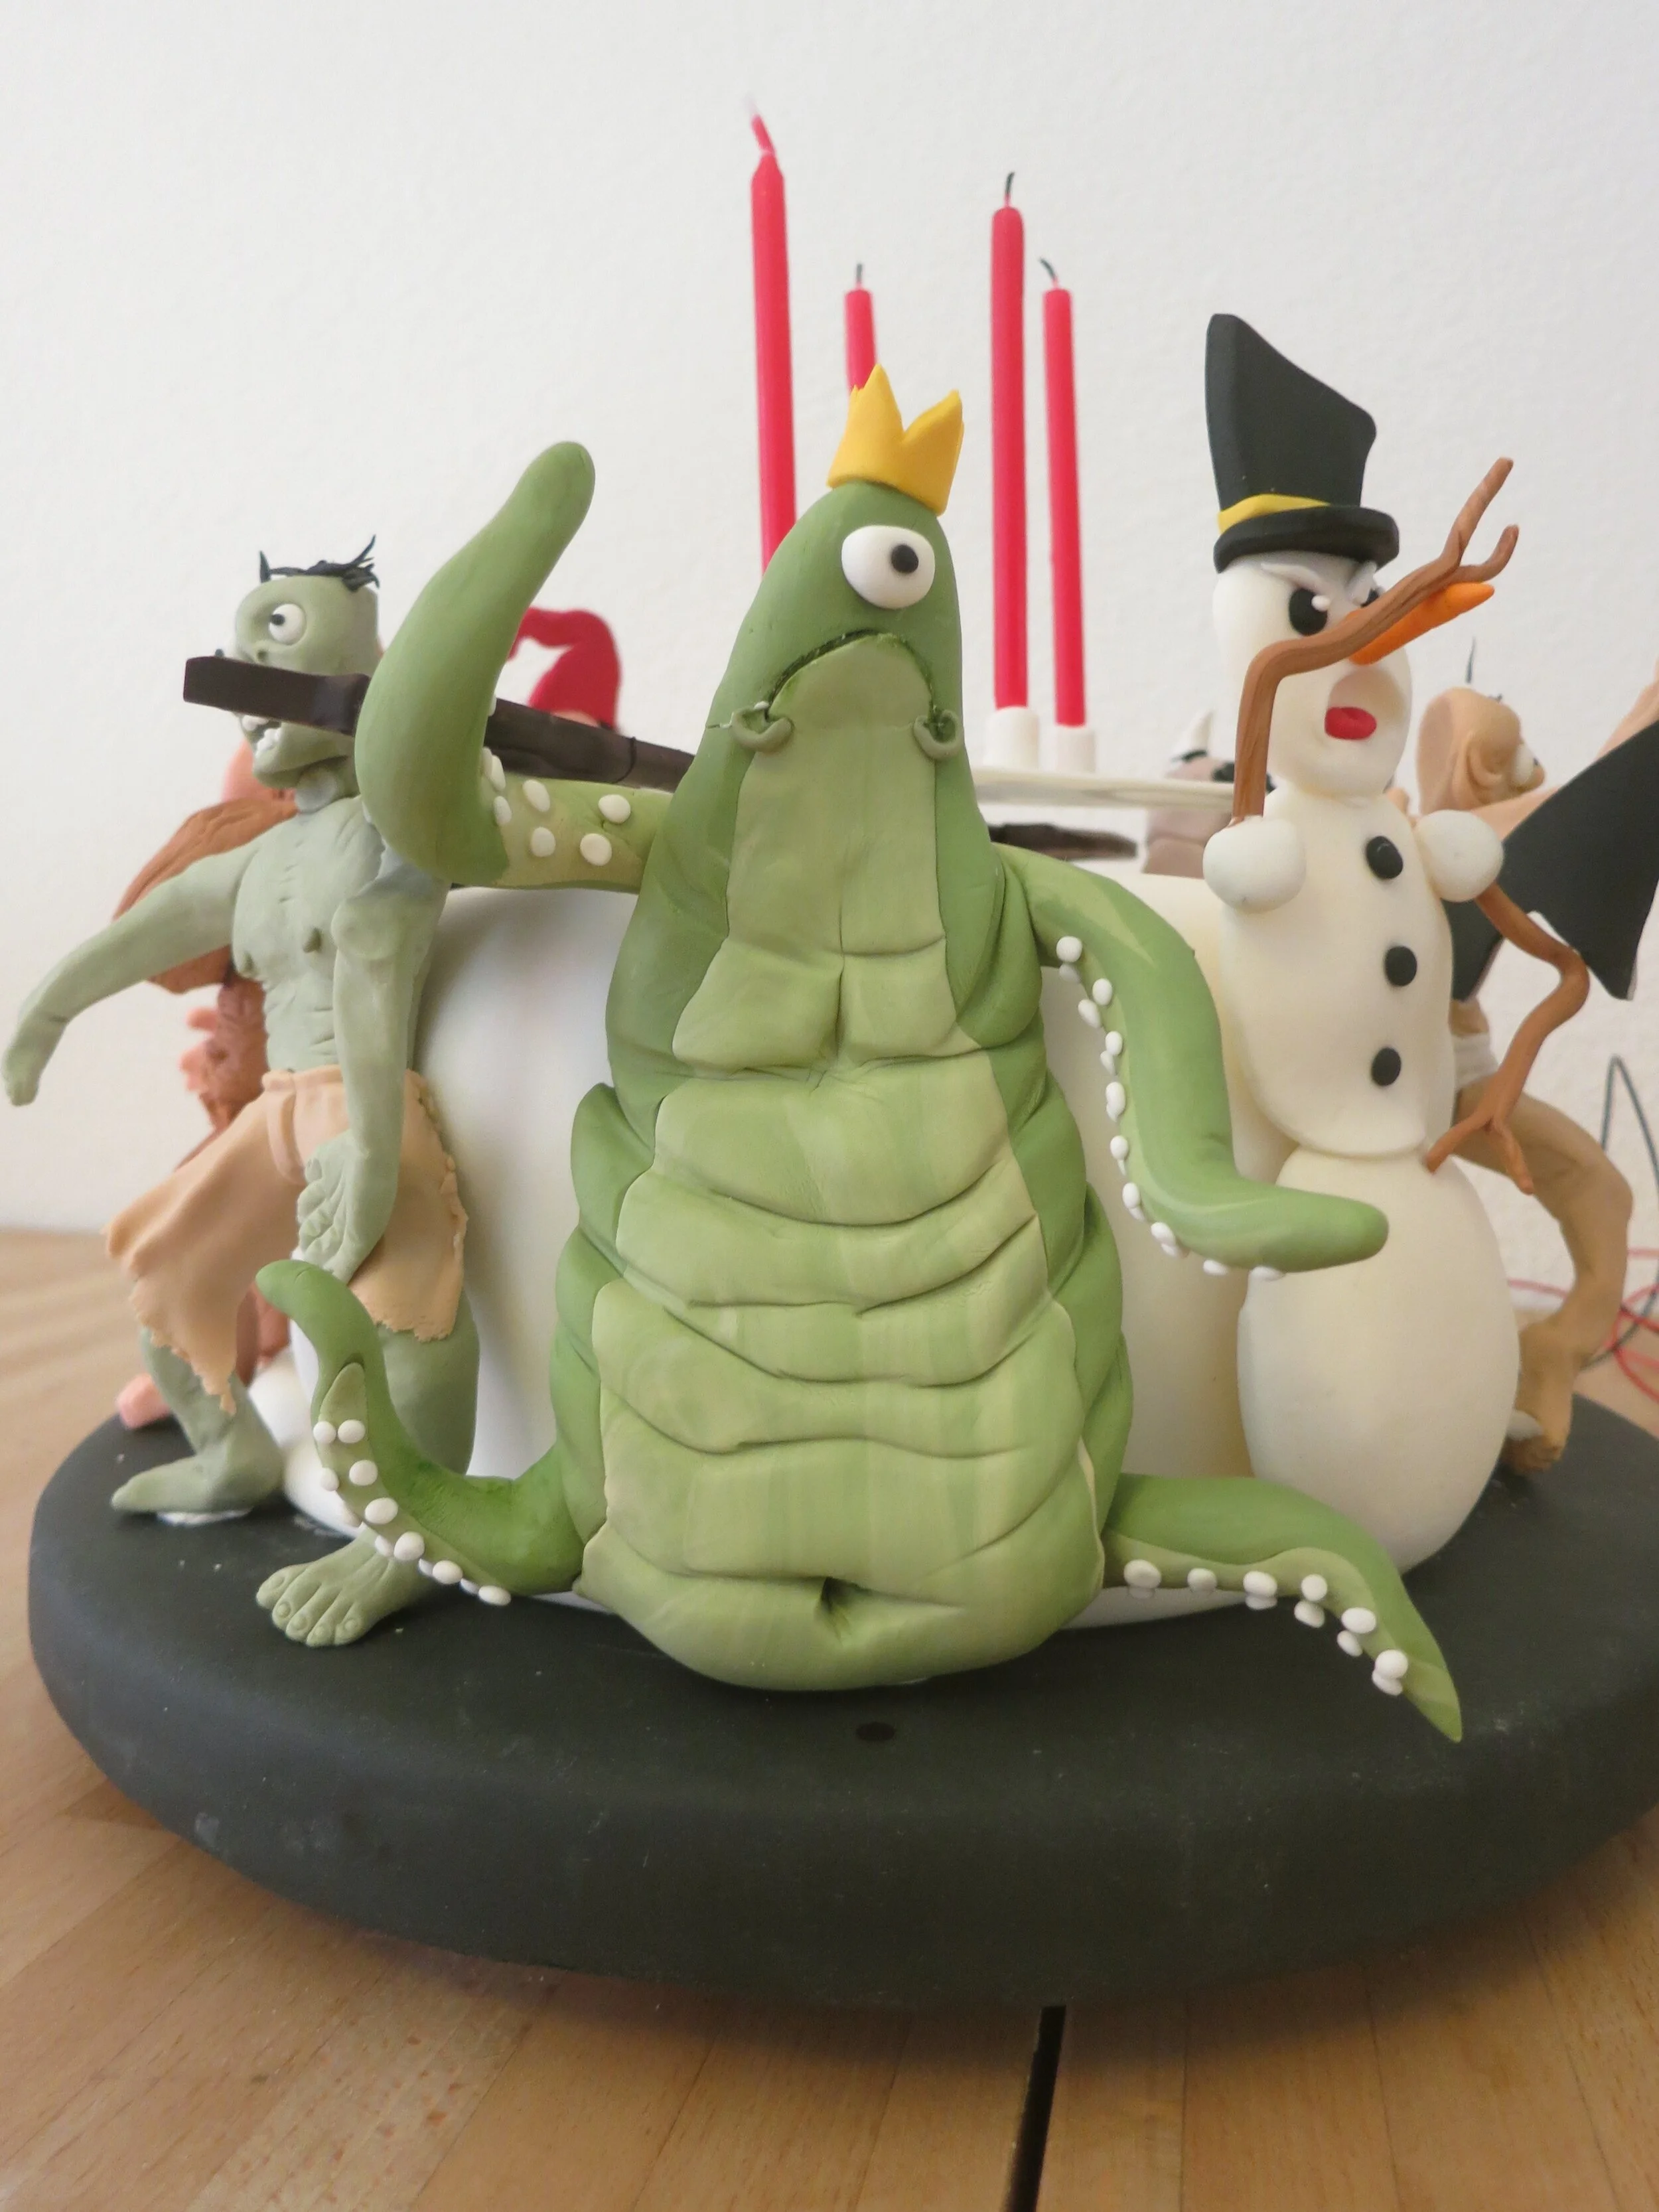
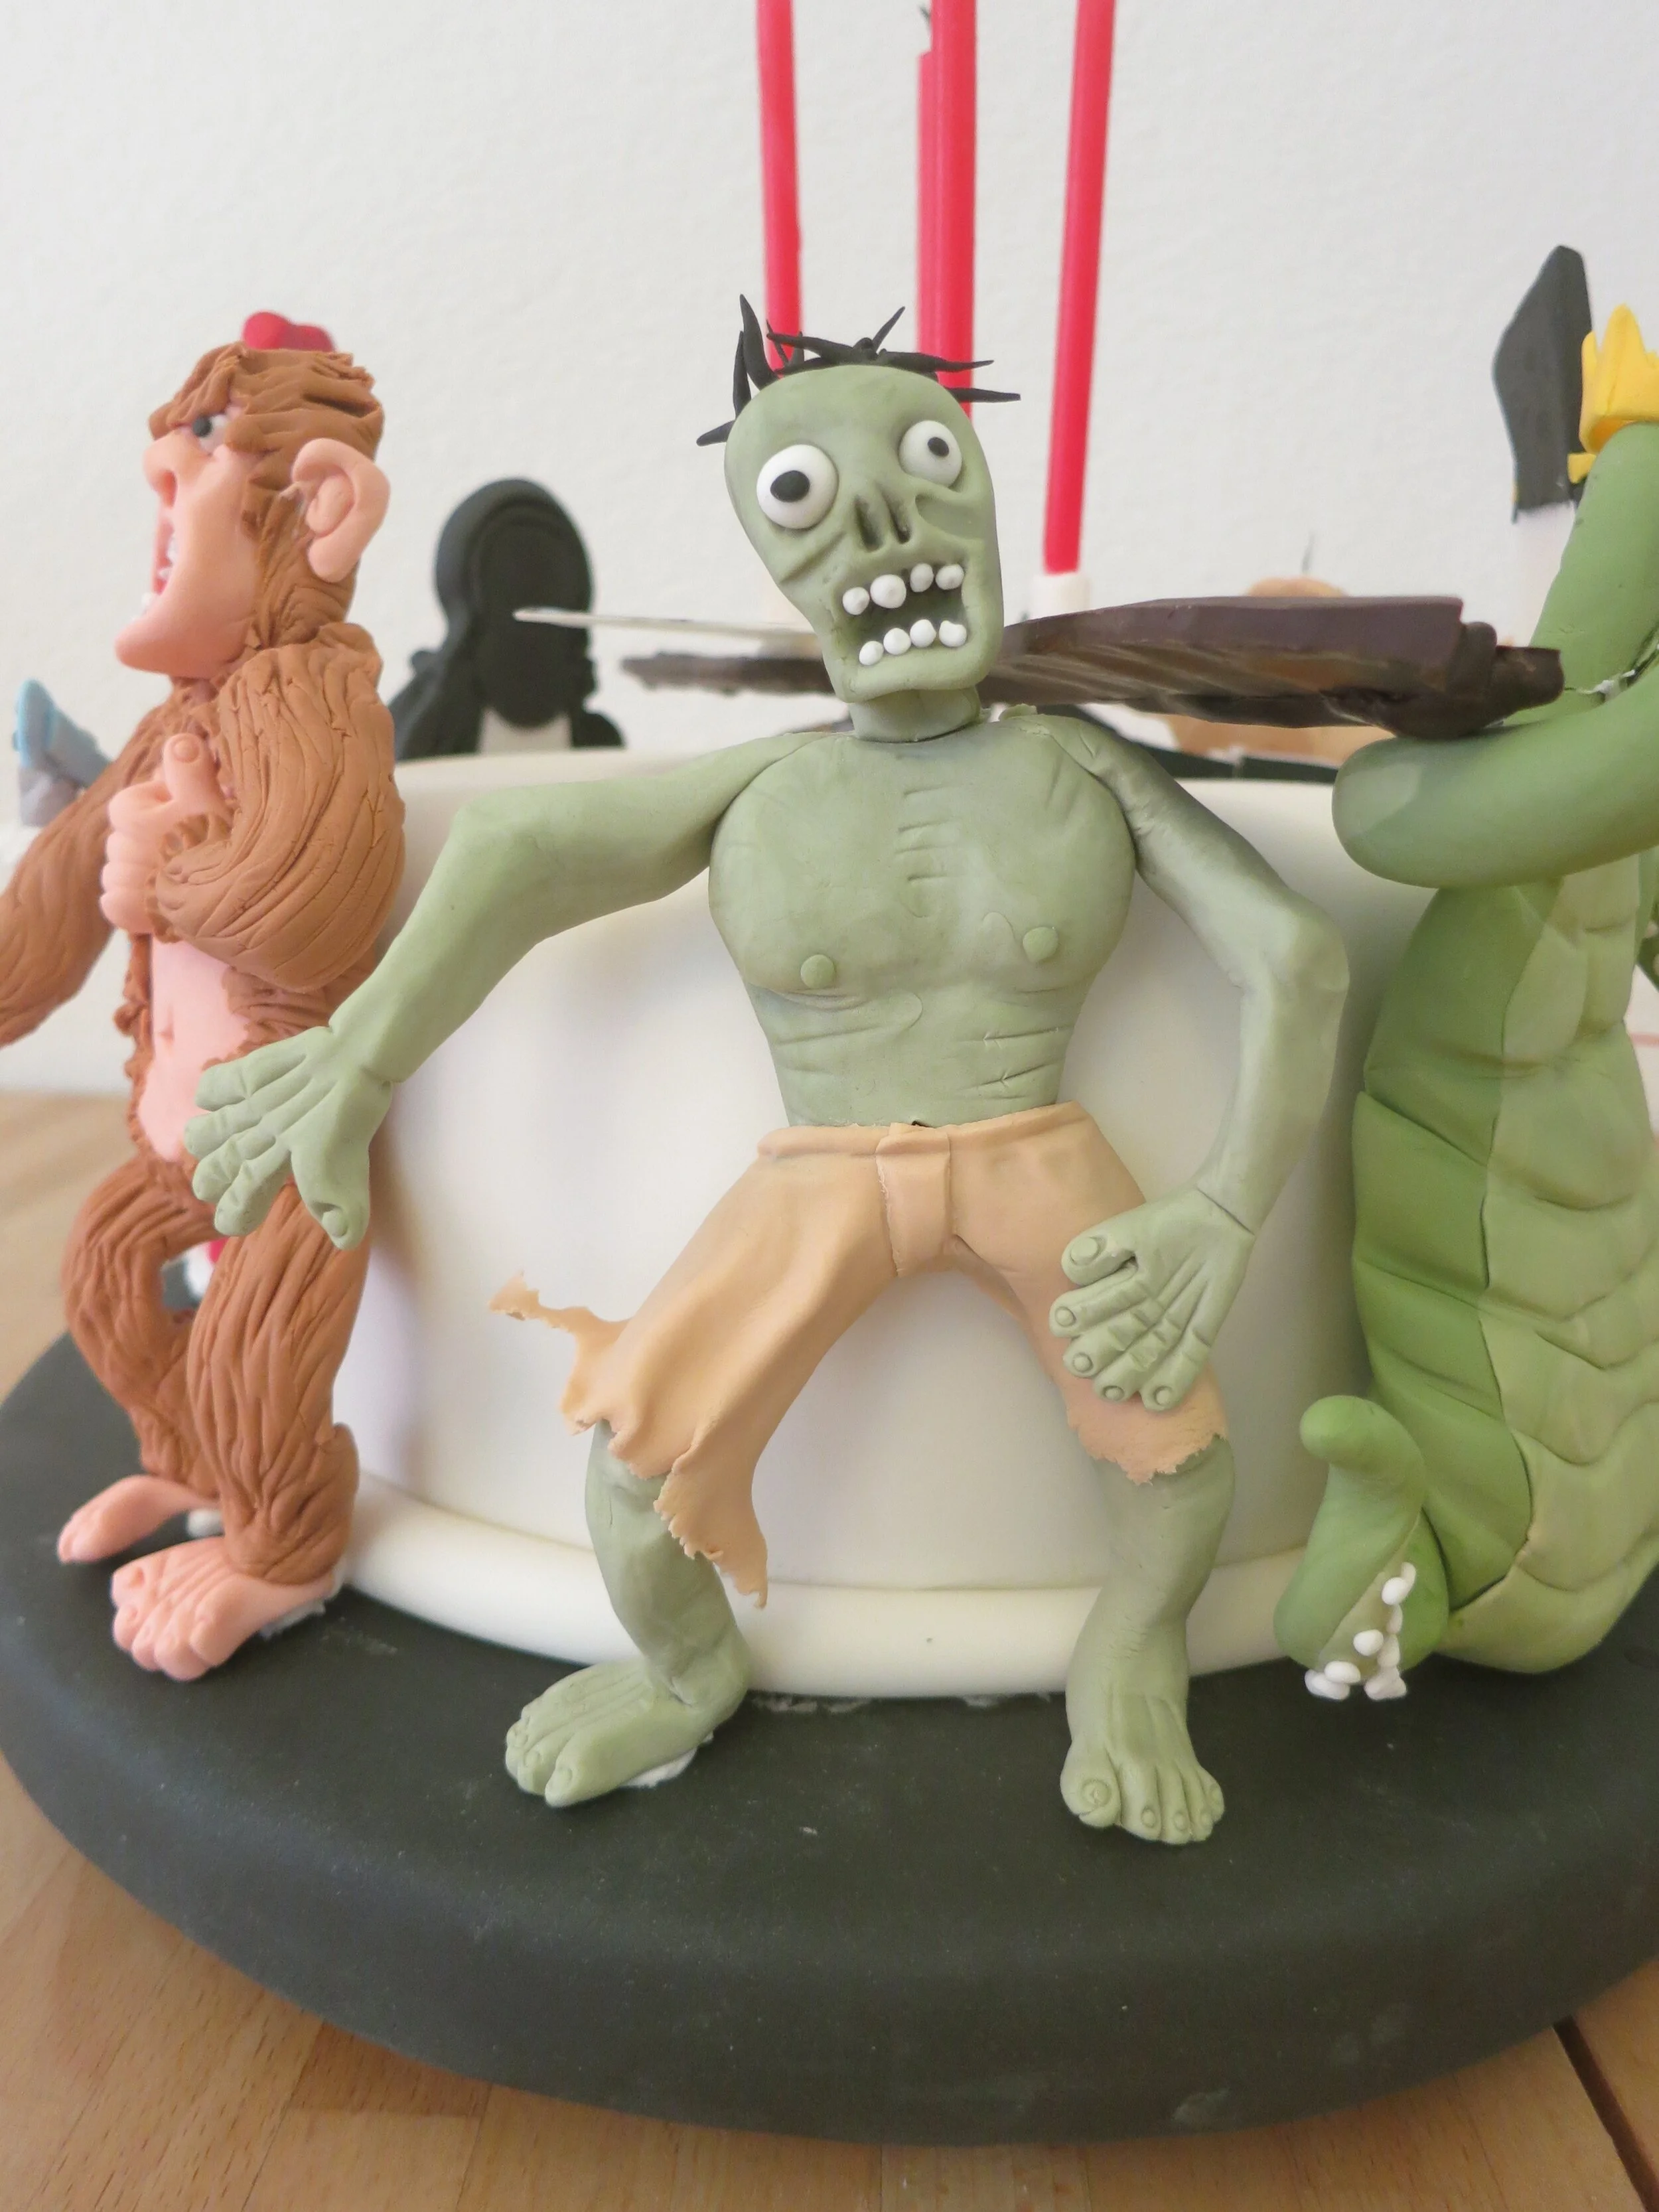
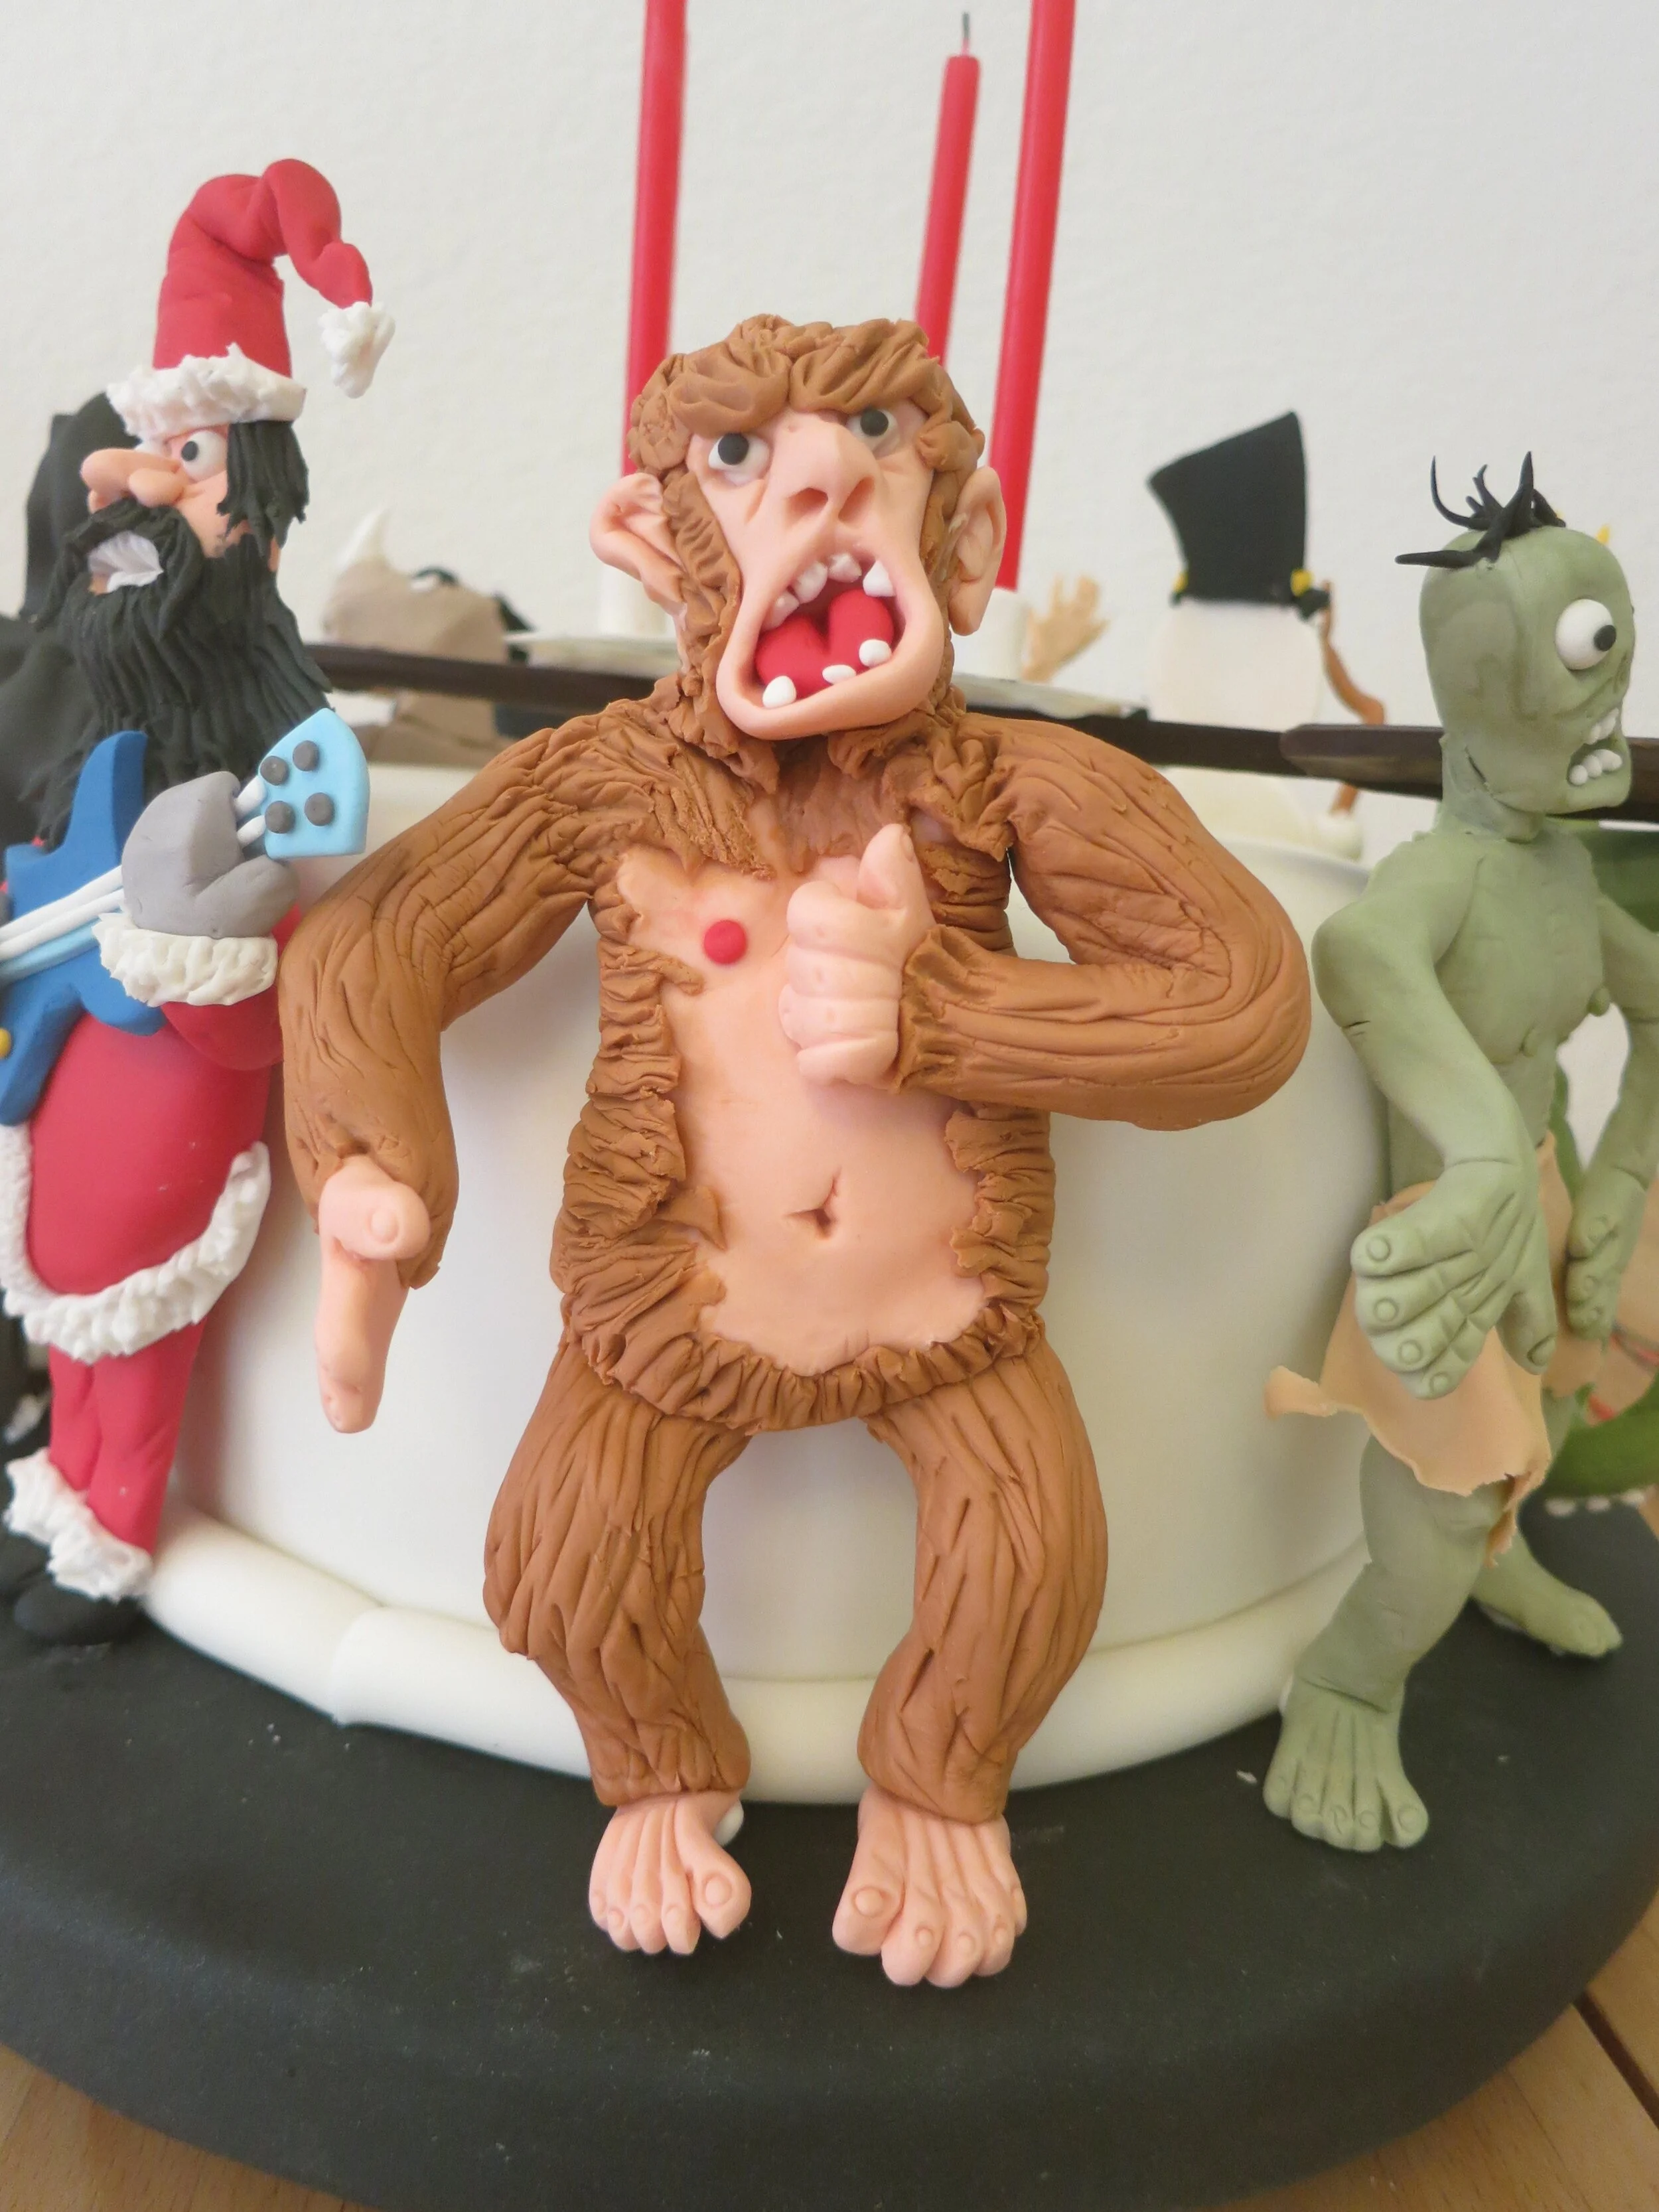

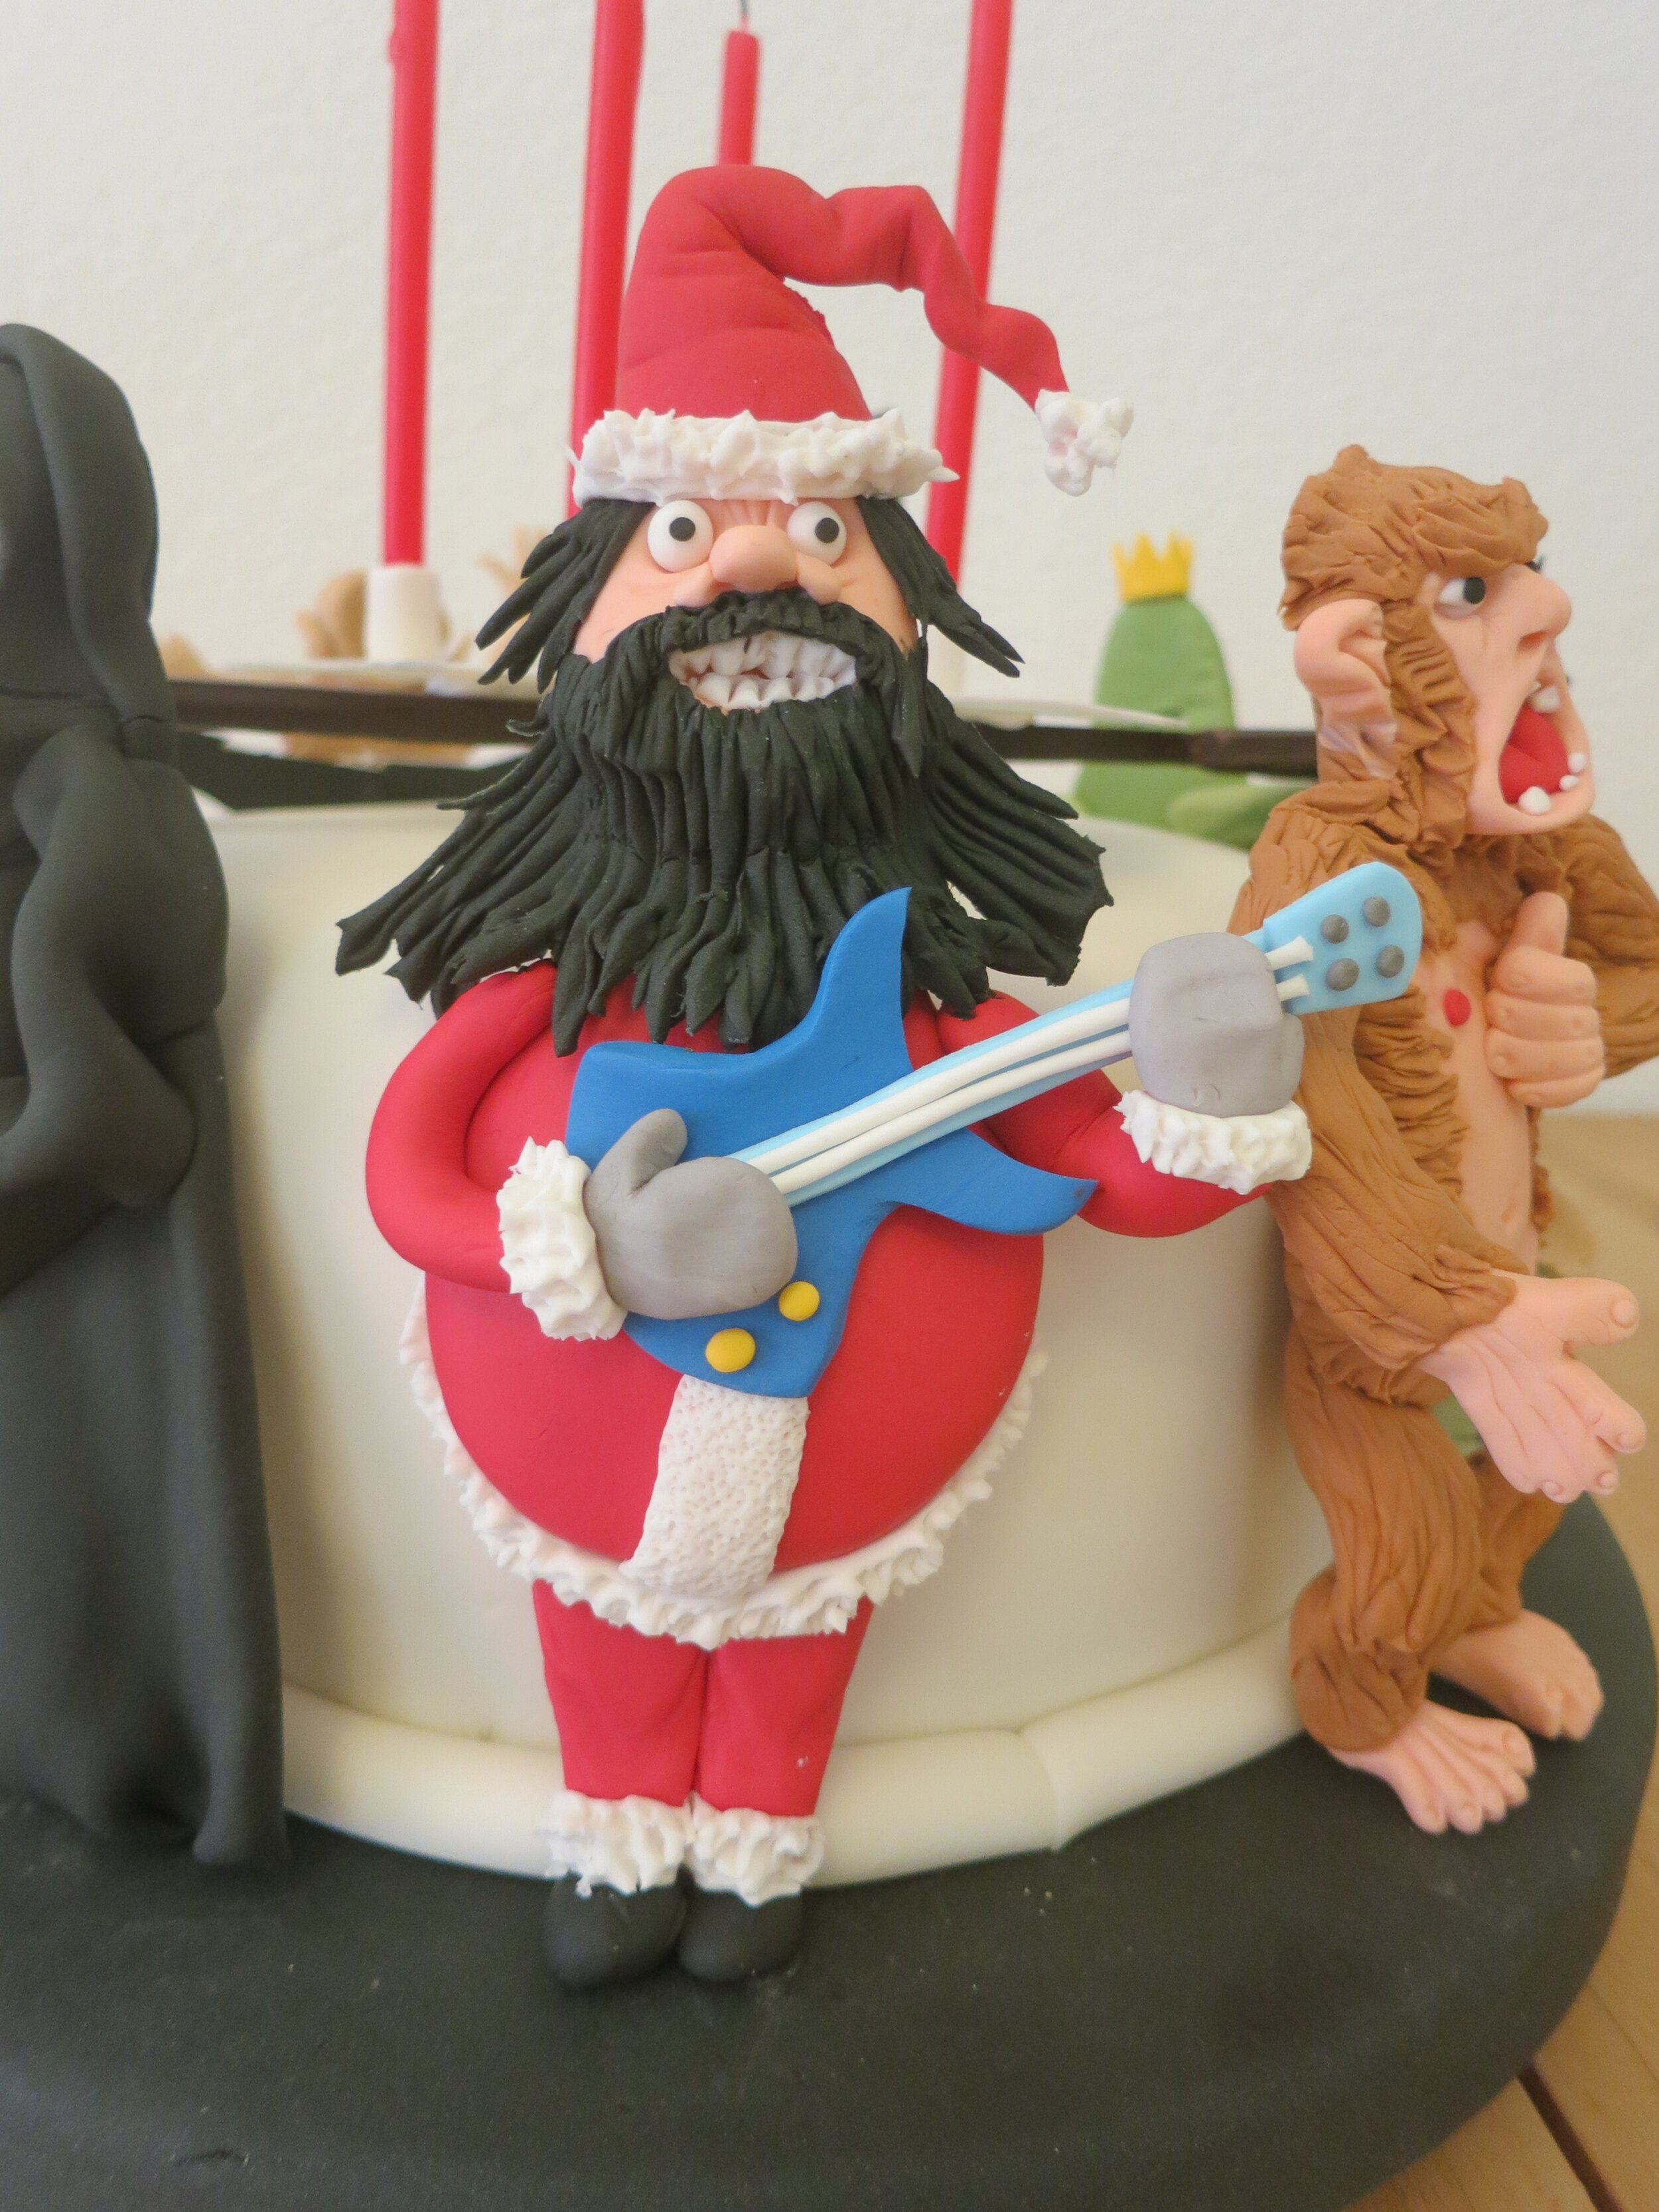
I stuck a motor in the middle, so that I could attach chocolate axes to chop the bad guys’ heads off. I really needed a stronger motor and a better way to attach the chocolate axes, but we did eventually manage to decapitate and/or knock over all the gum paste bad guys.
Sugar Dome
I’m back on Food Network, on the Sugar Dome episode “When Toy Stores Come to Life at Night!”


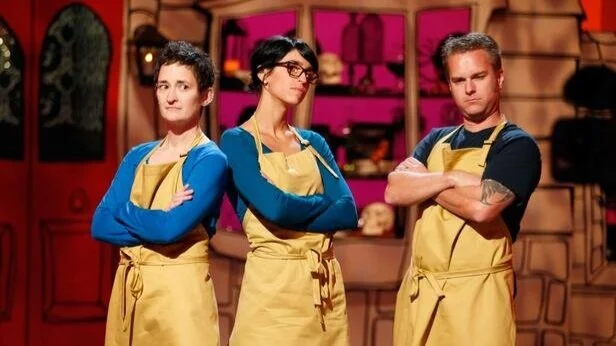
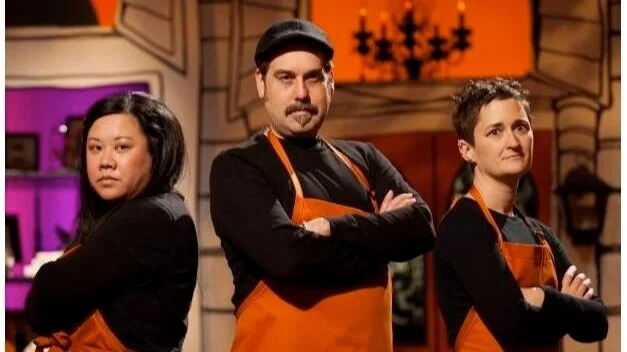
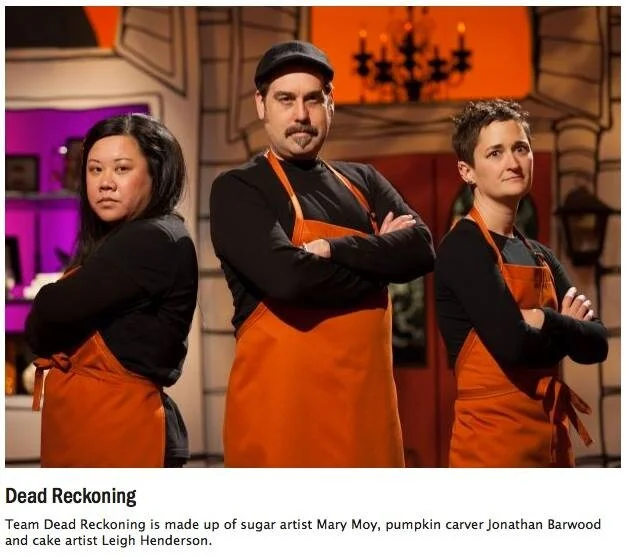
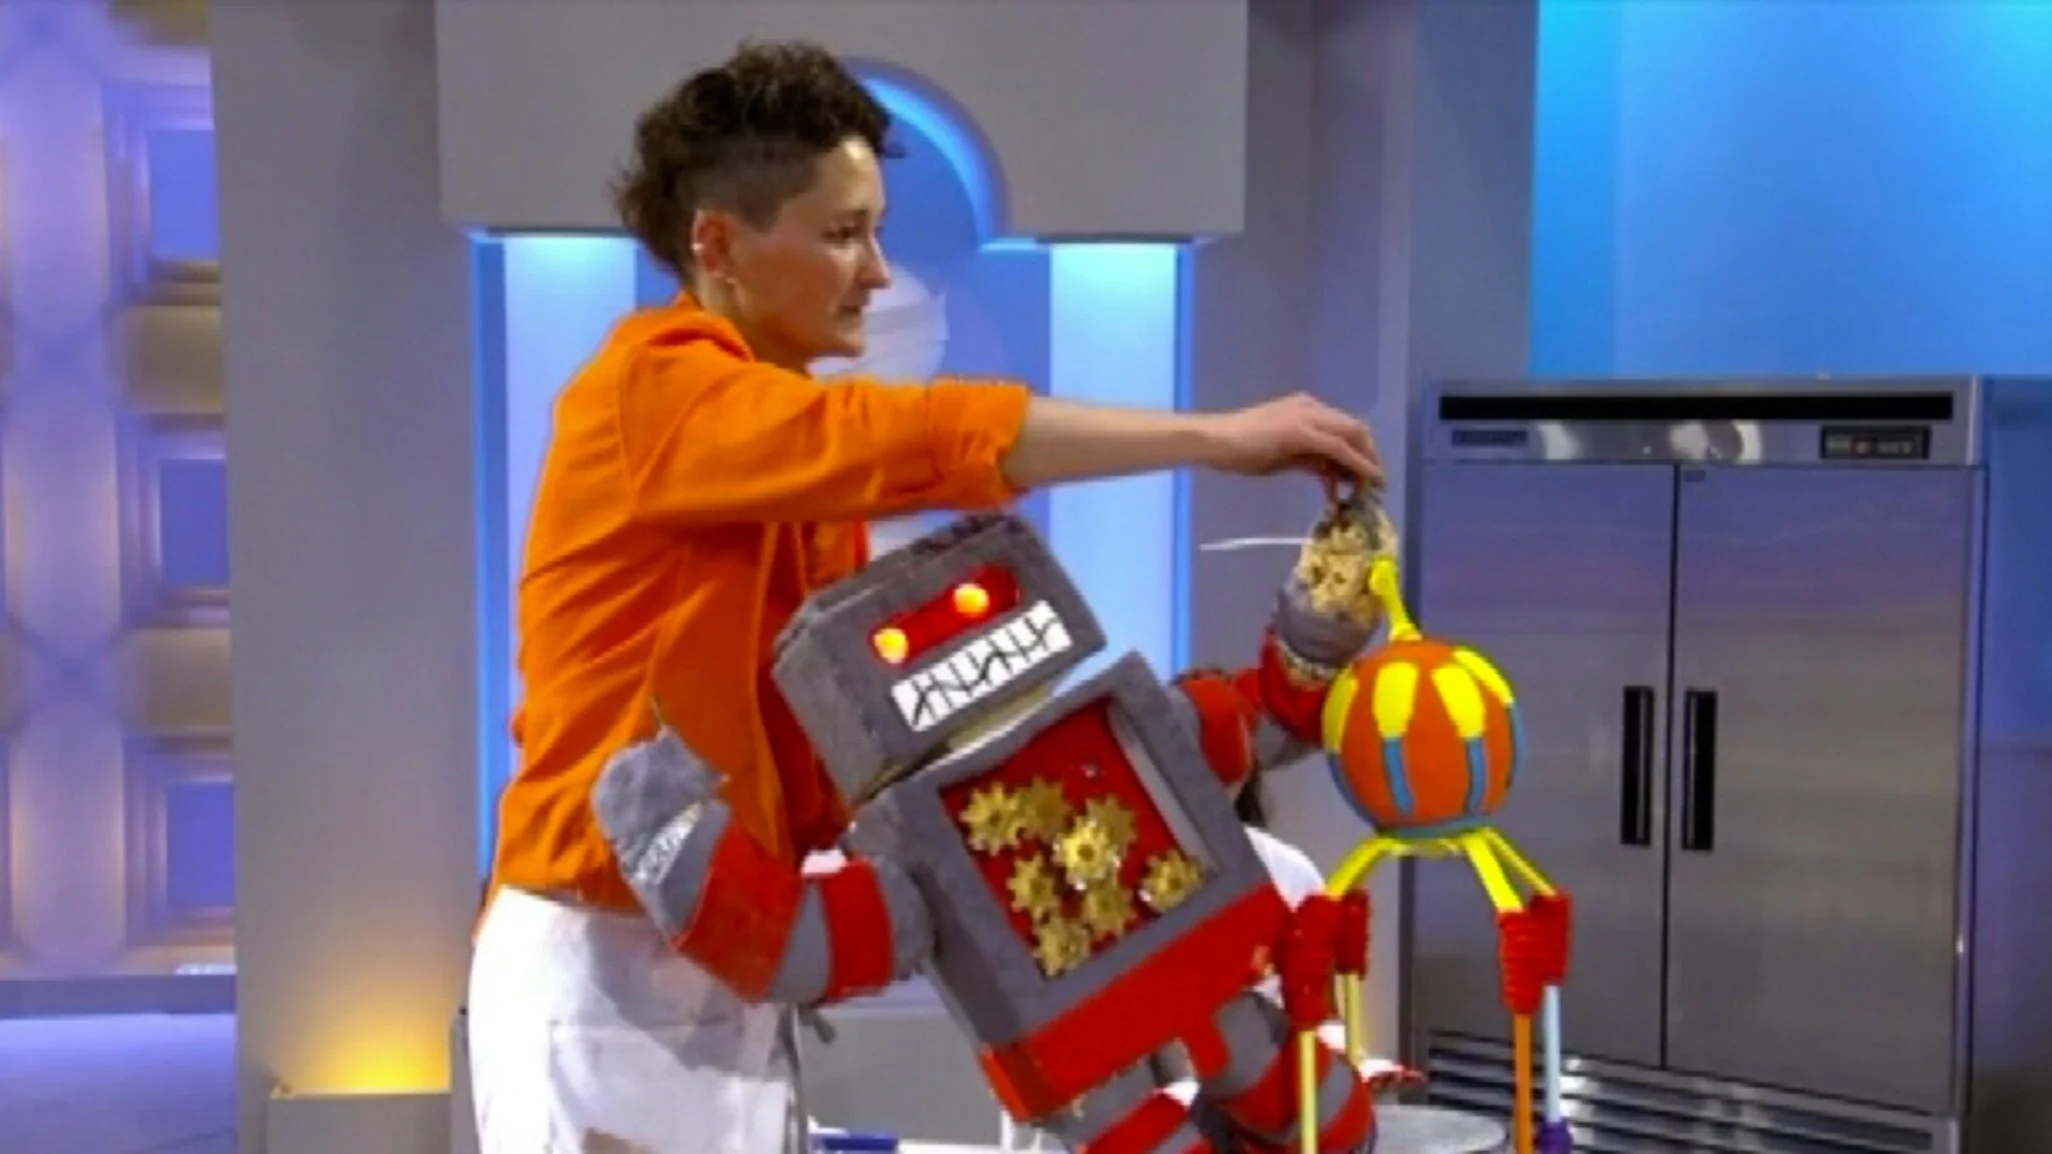
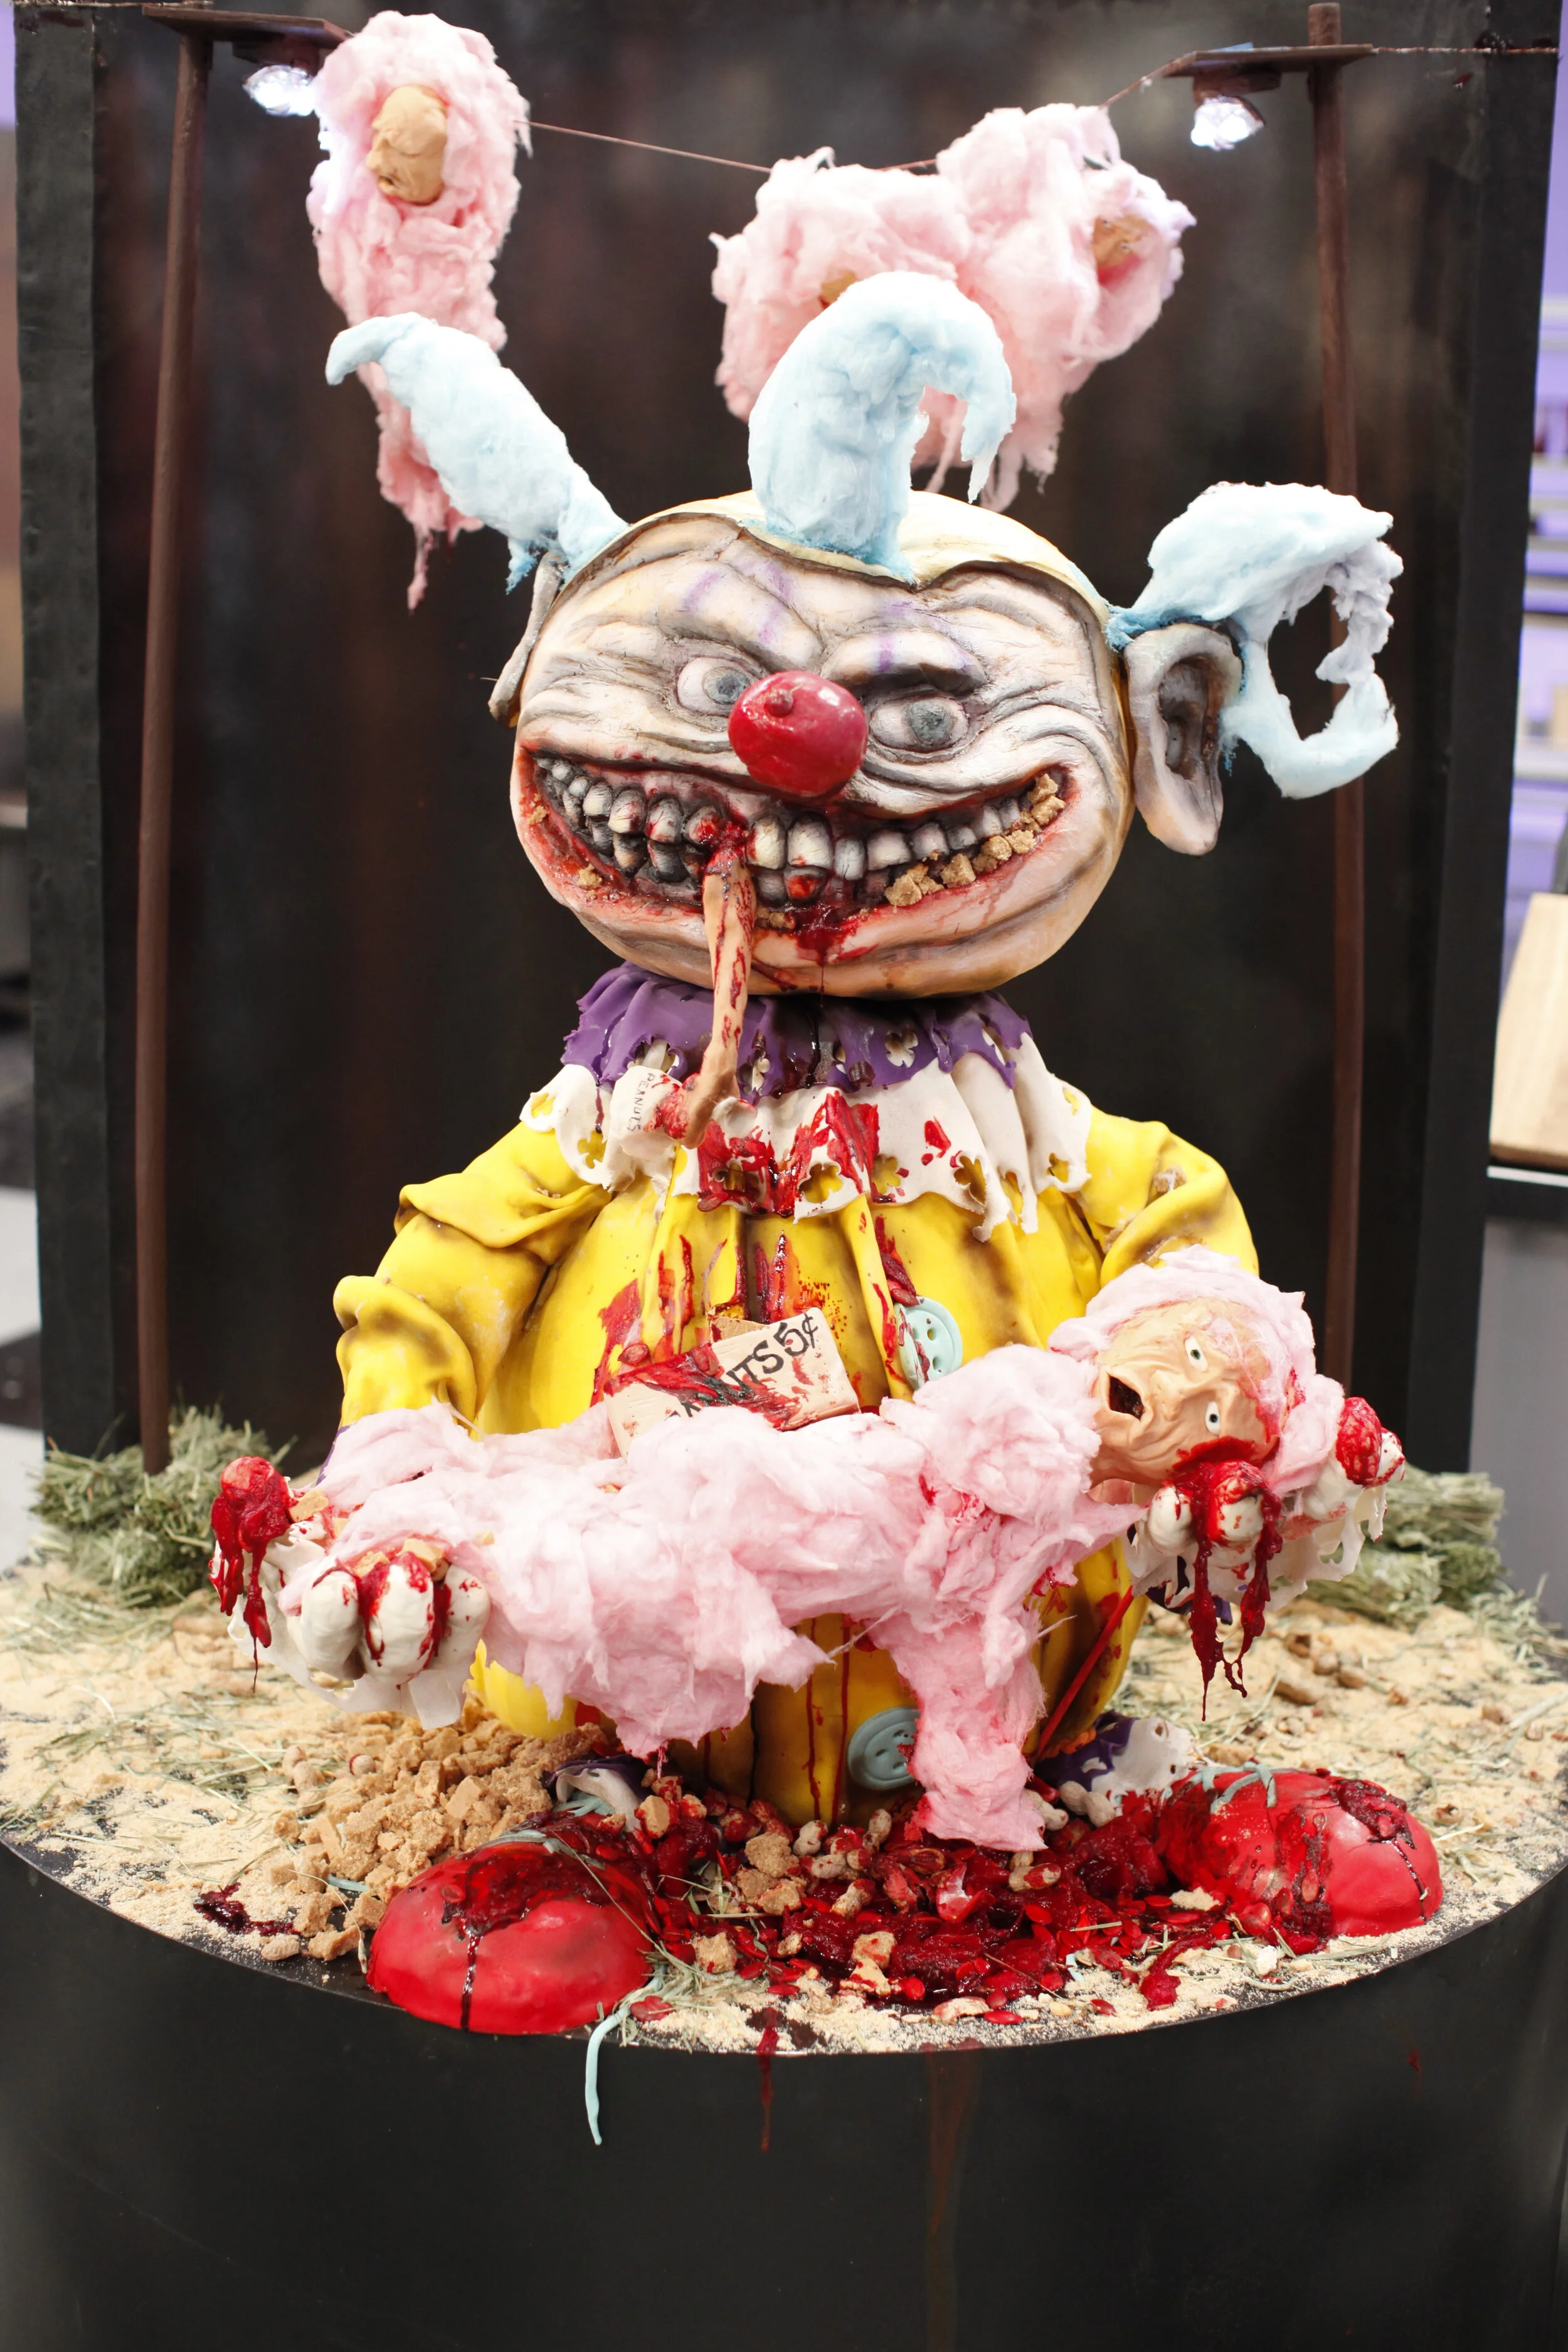
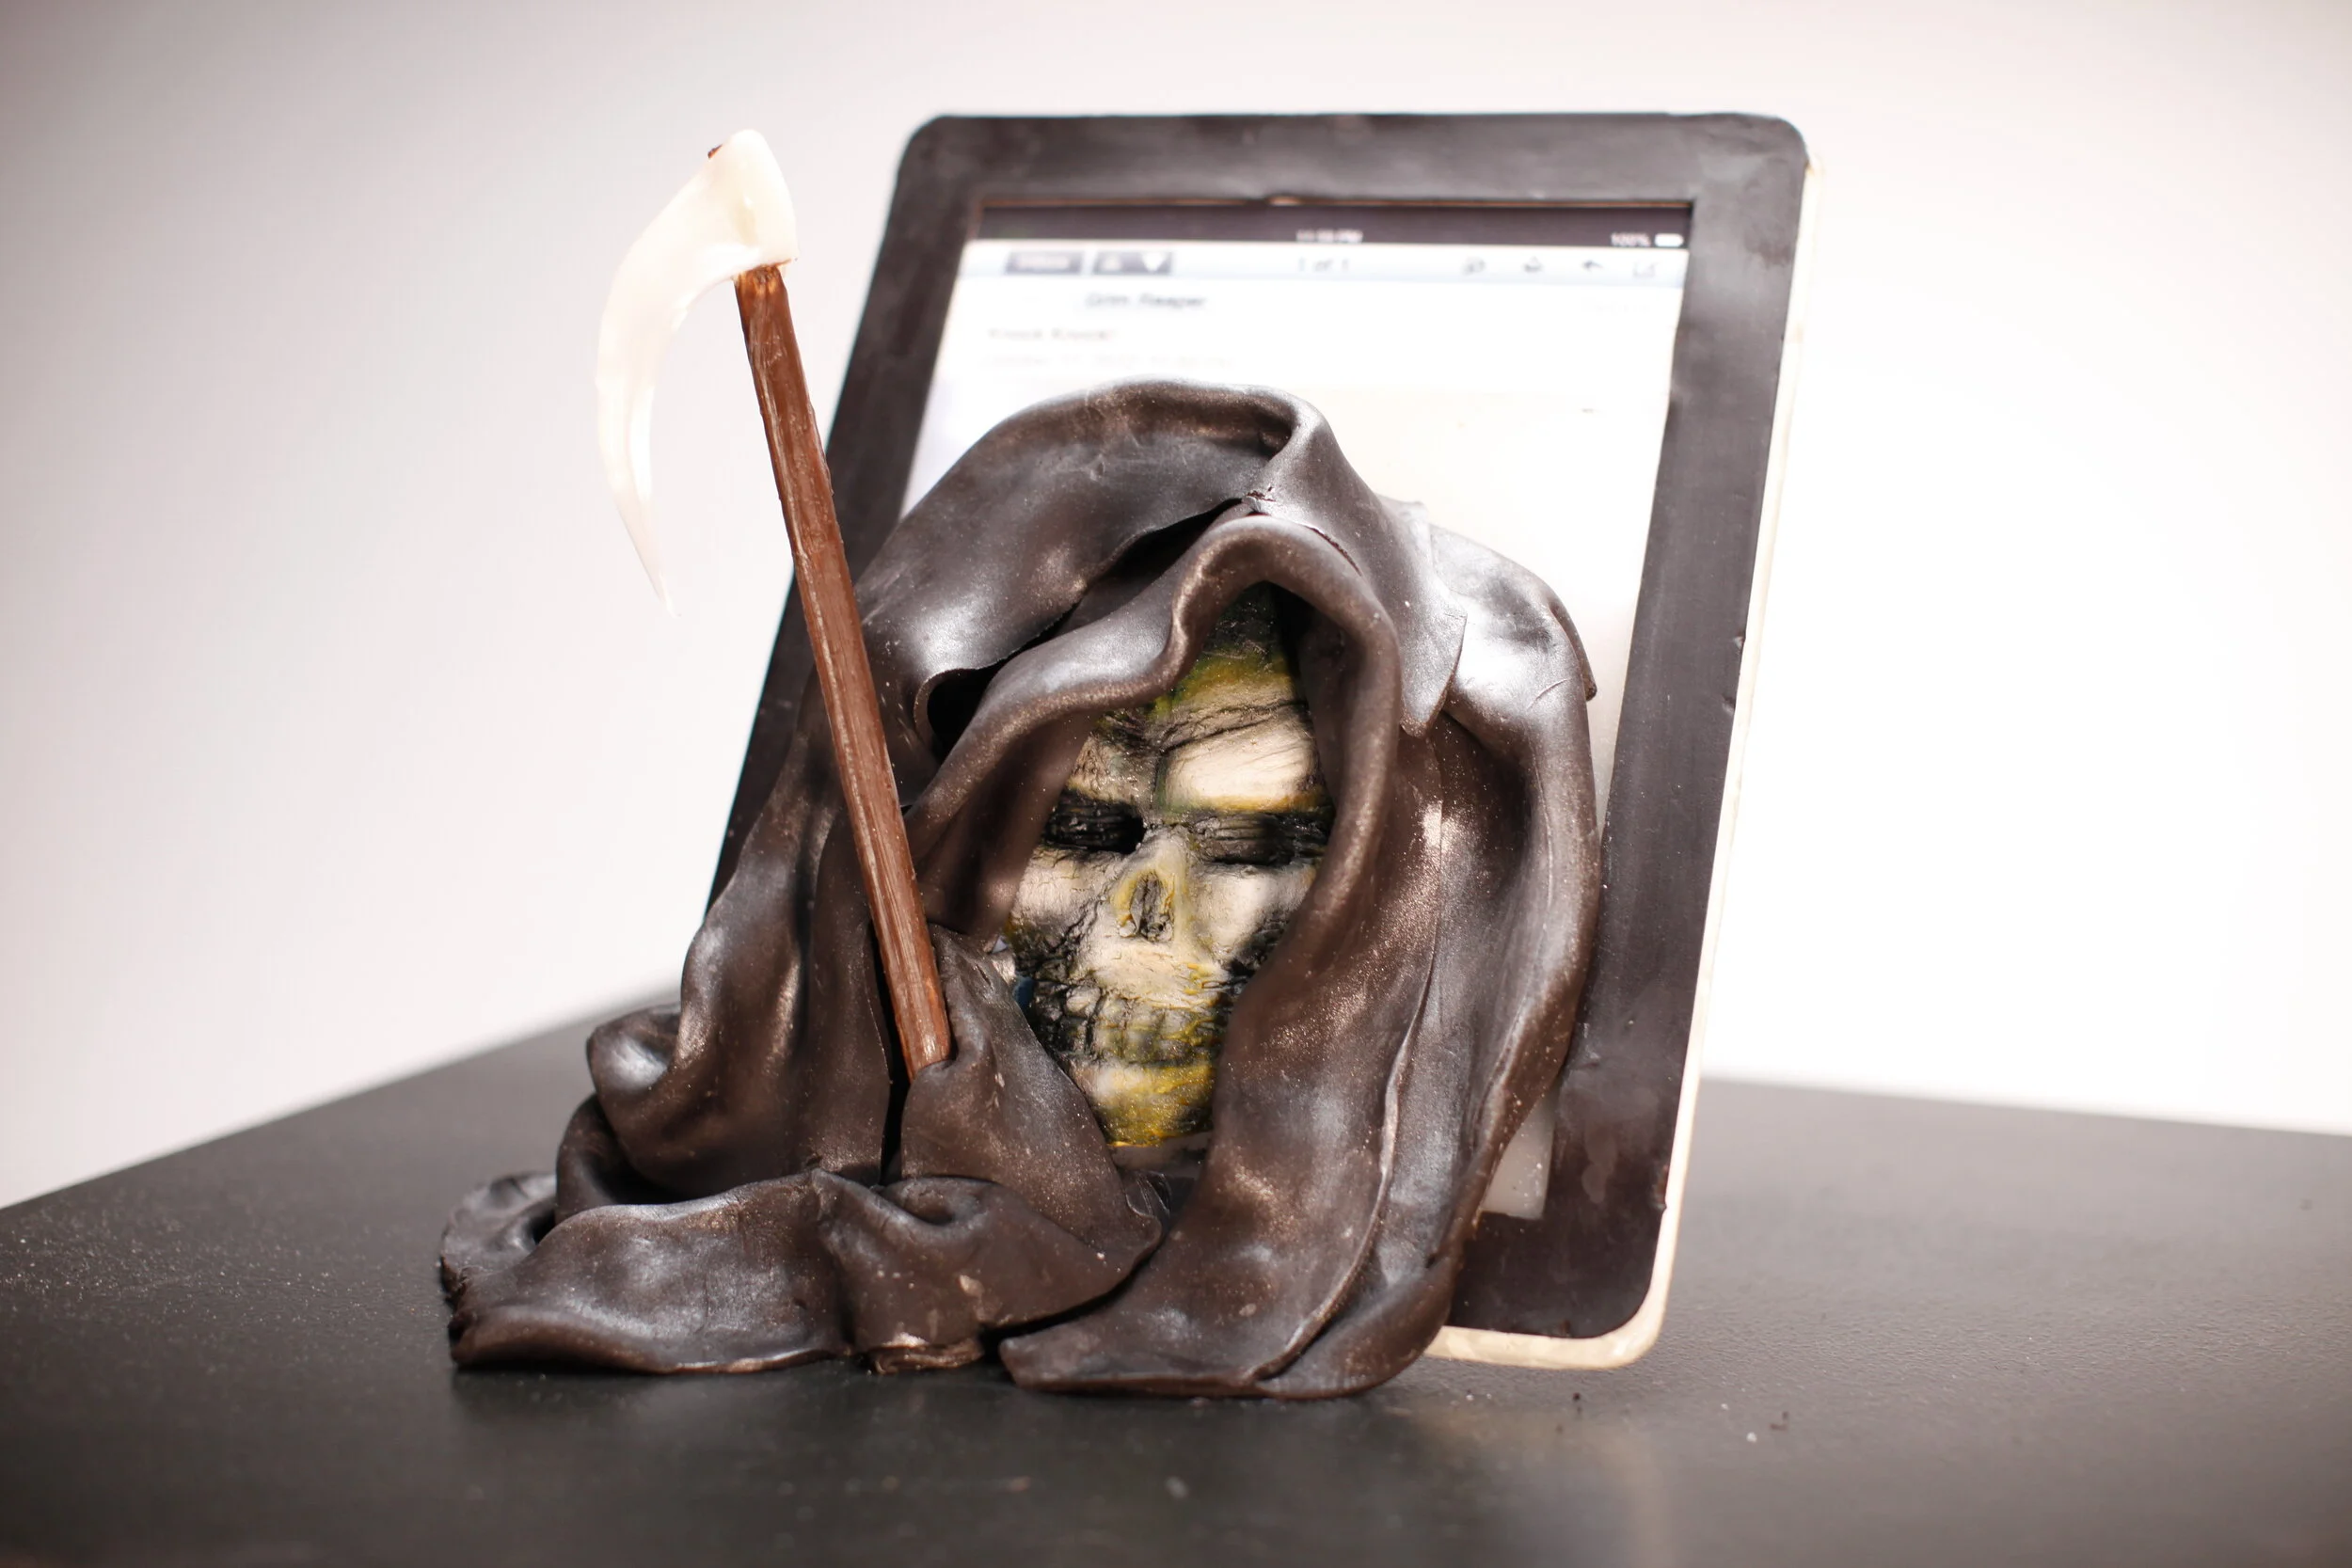
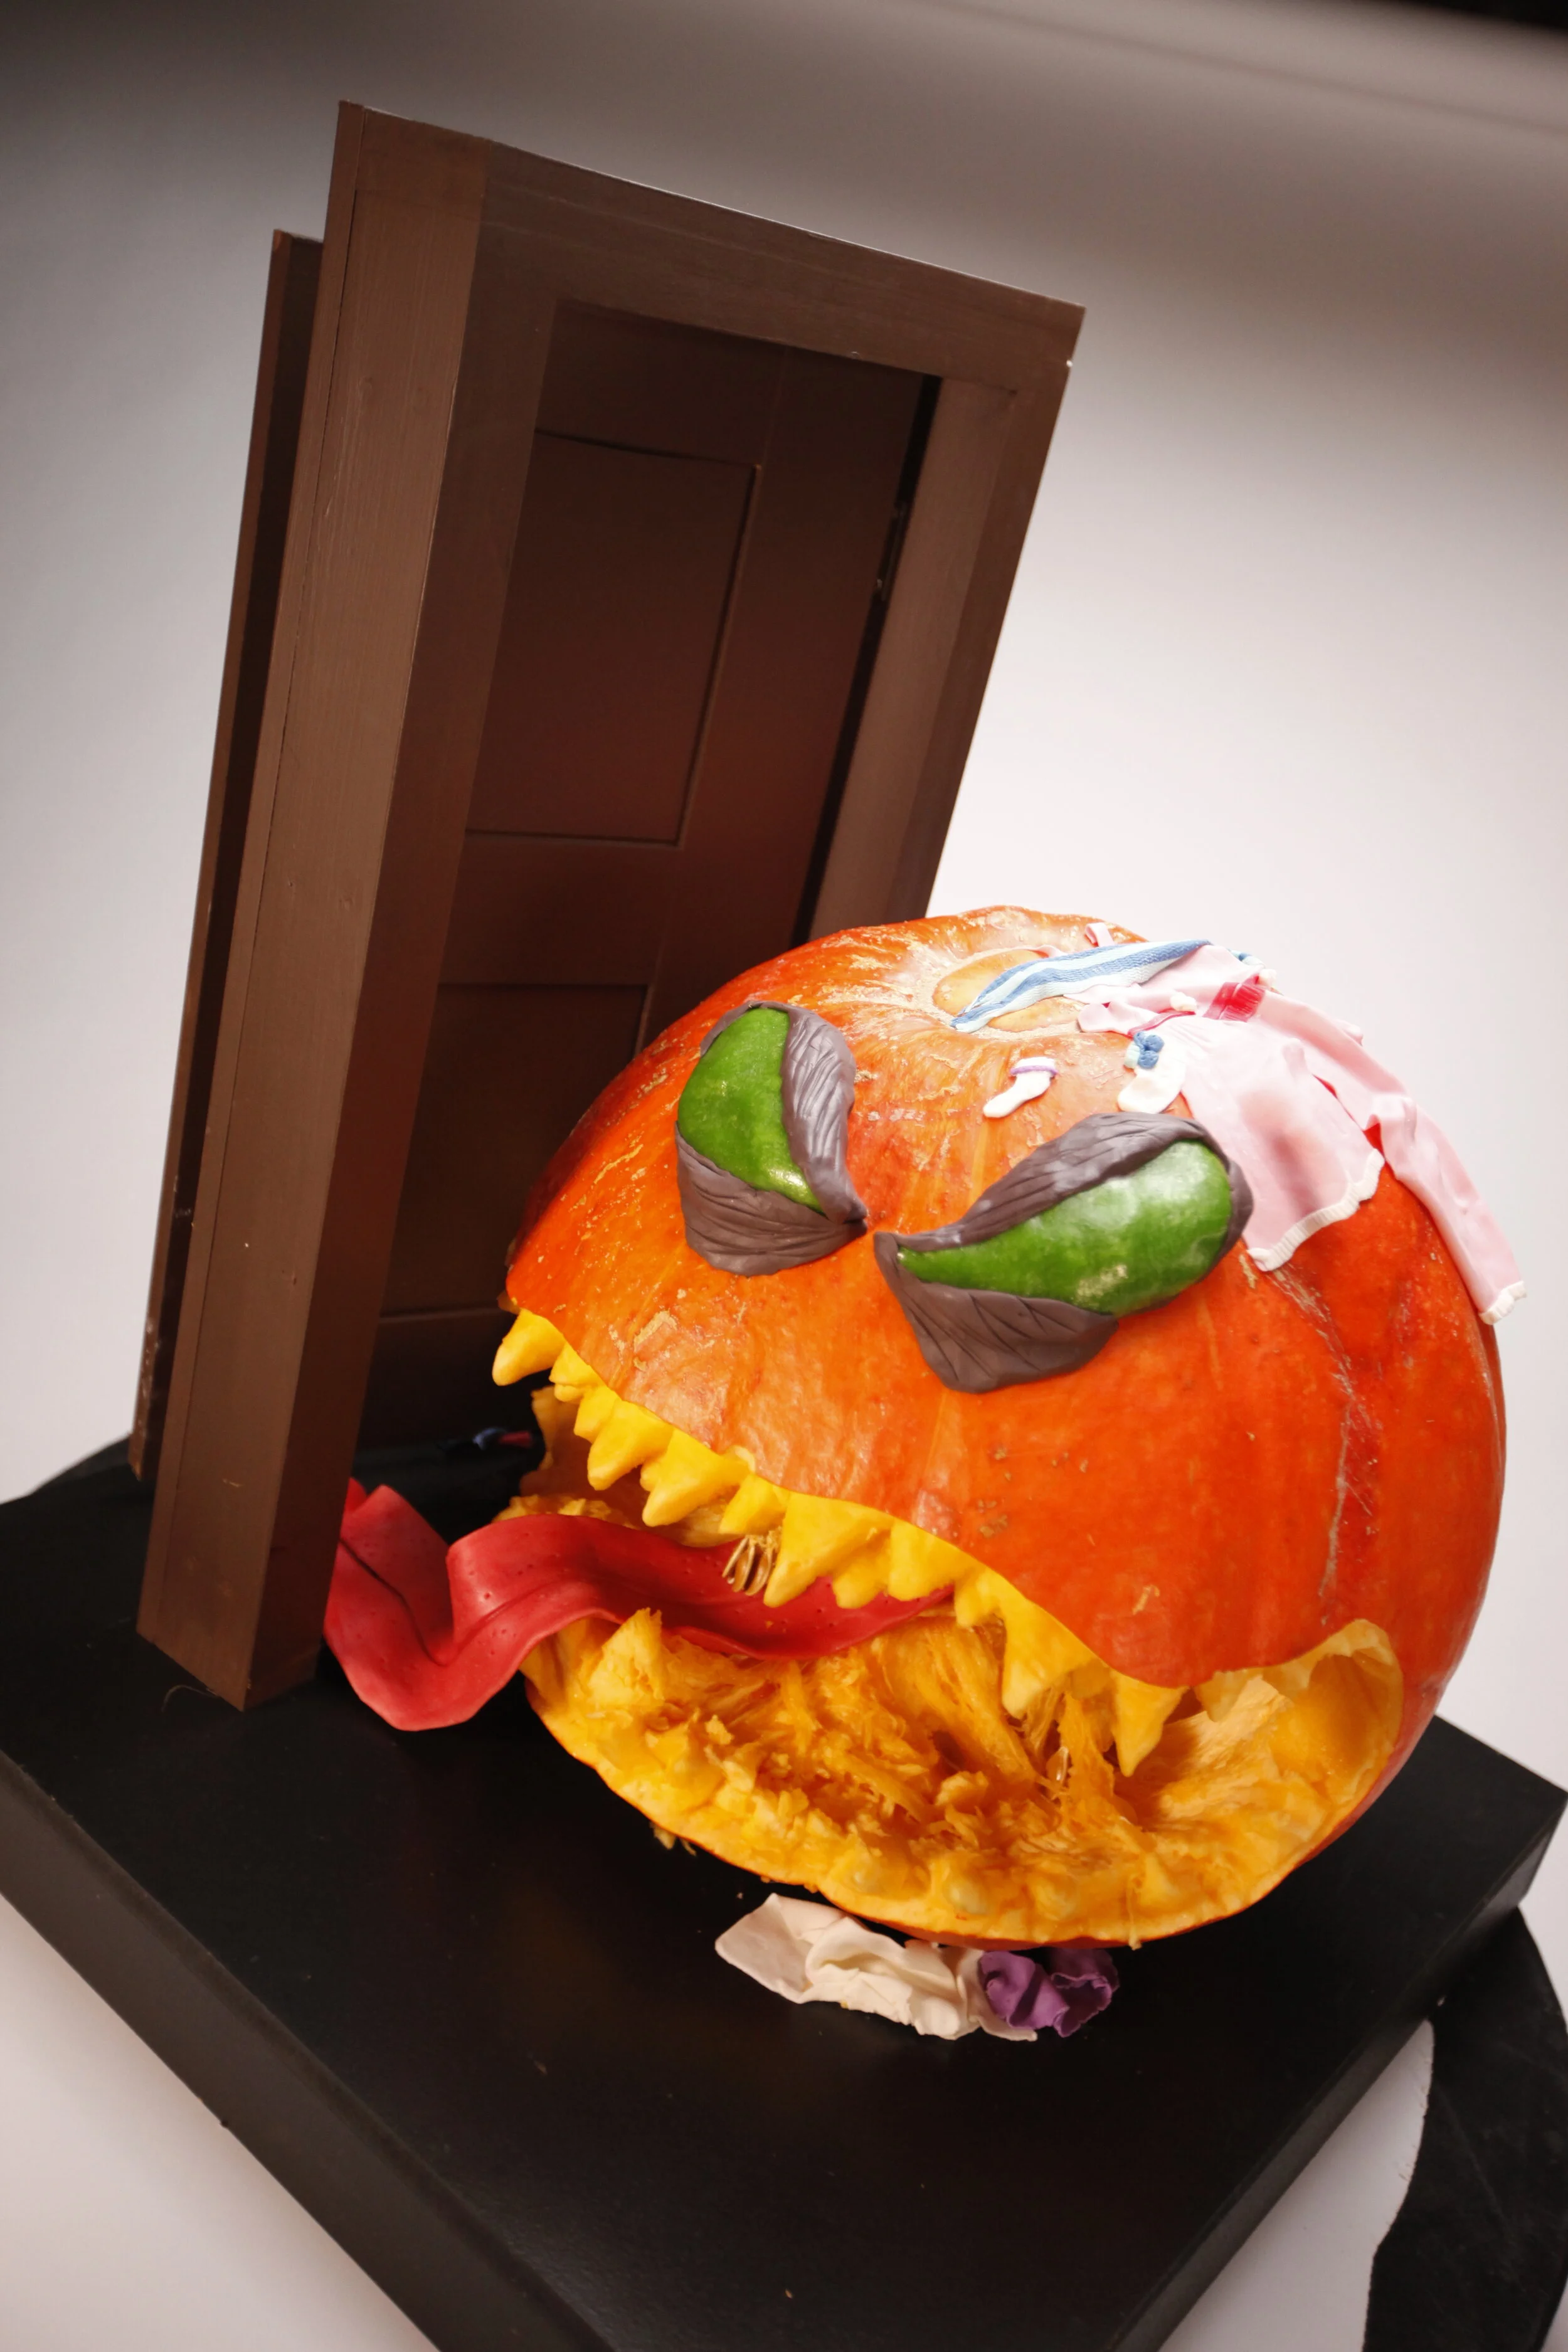
Halloween Wars!
Check it out – I’m a warrior of Halloween Wars! You can watch my TV debut on Food Network, October 7th at 9:00 Eastern and Pacific.

Check it out - I'm a warrior of Halloween Wars! You can watch my TV debut on Food Network, October 7th at 9:00 Eastern and Pacific.
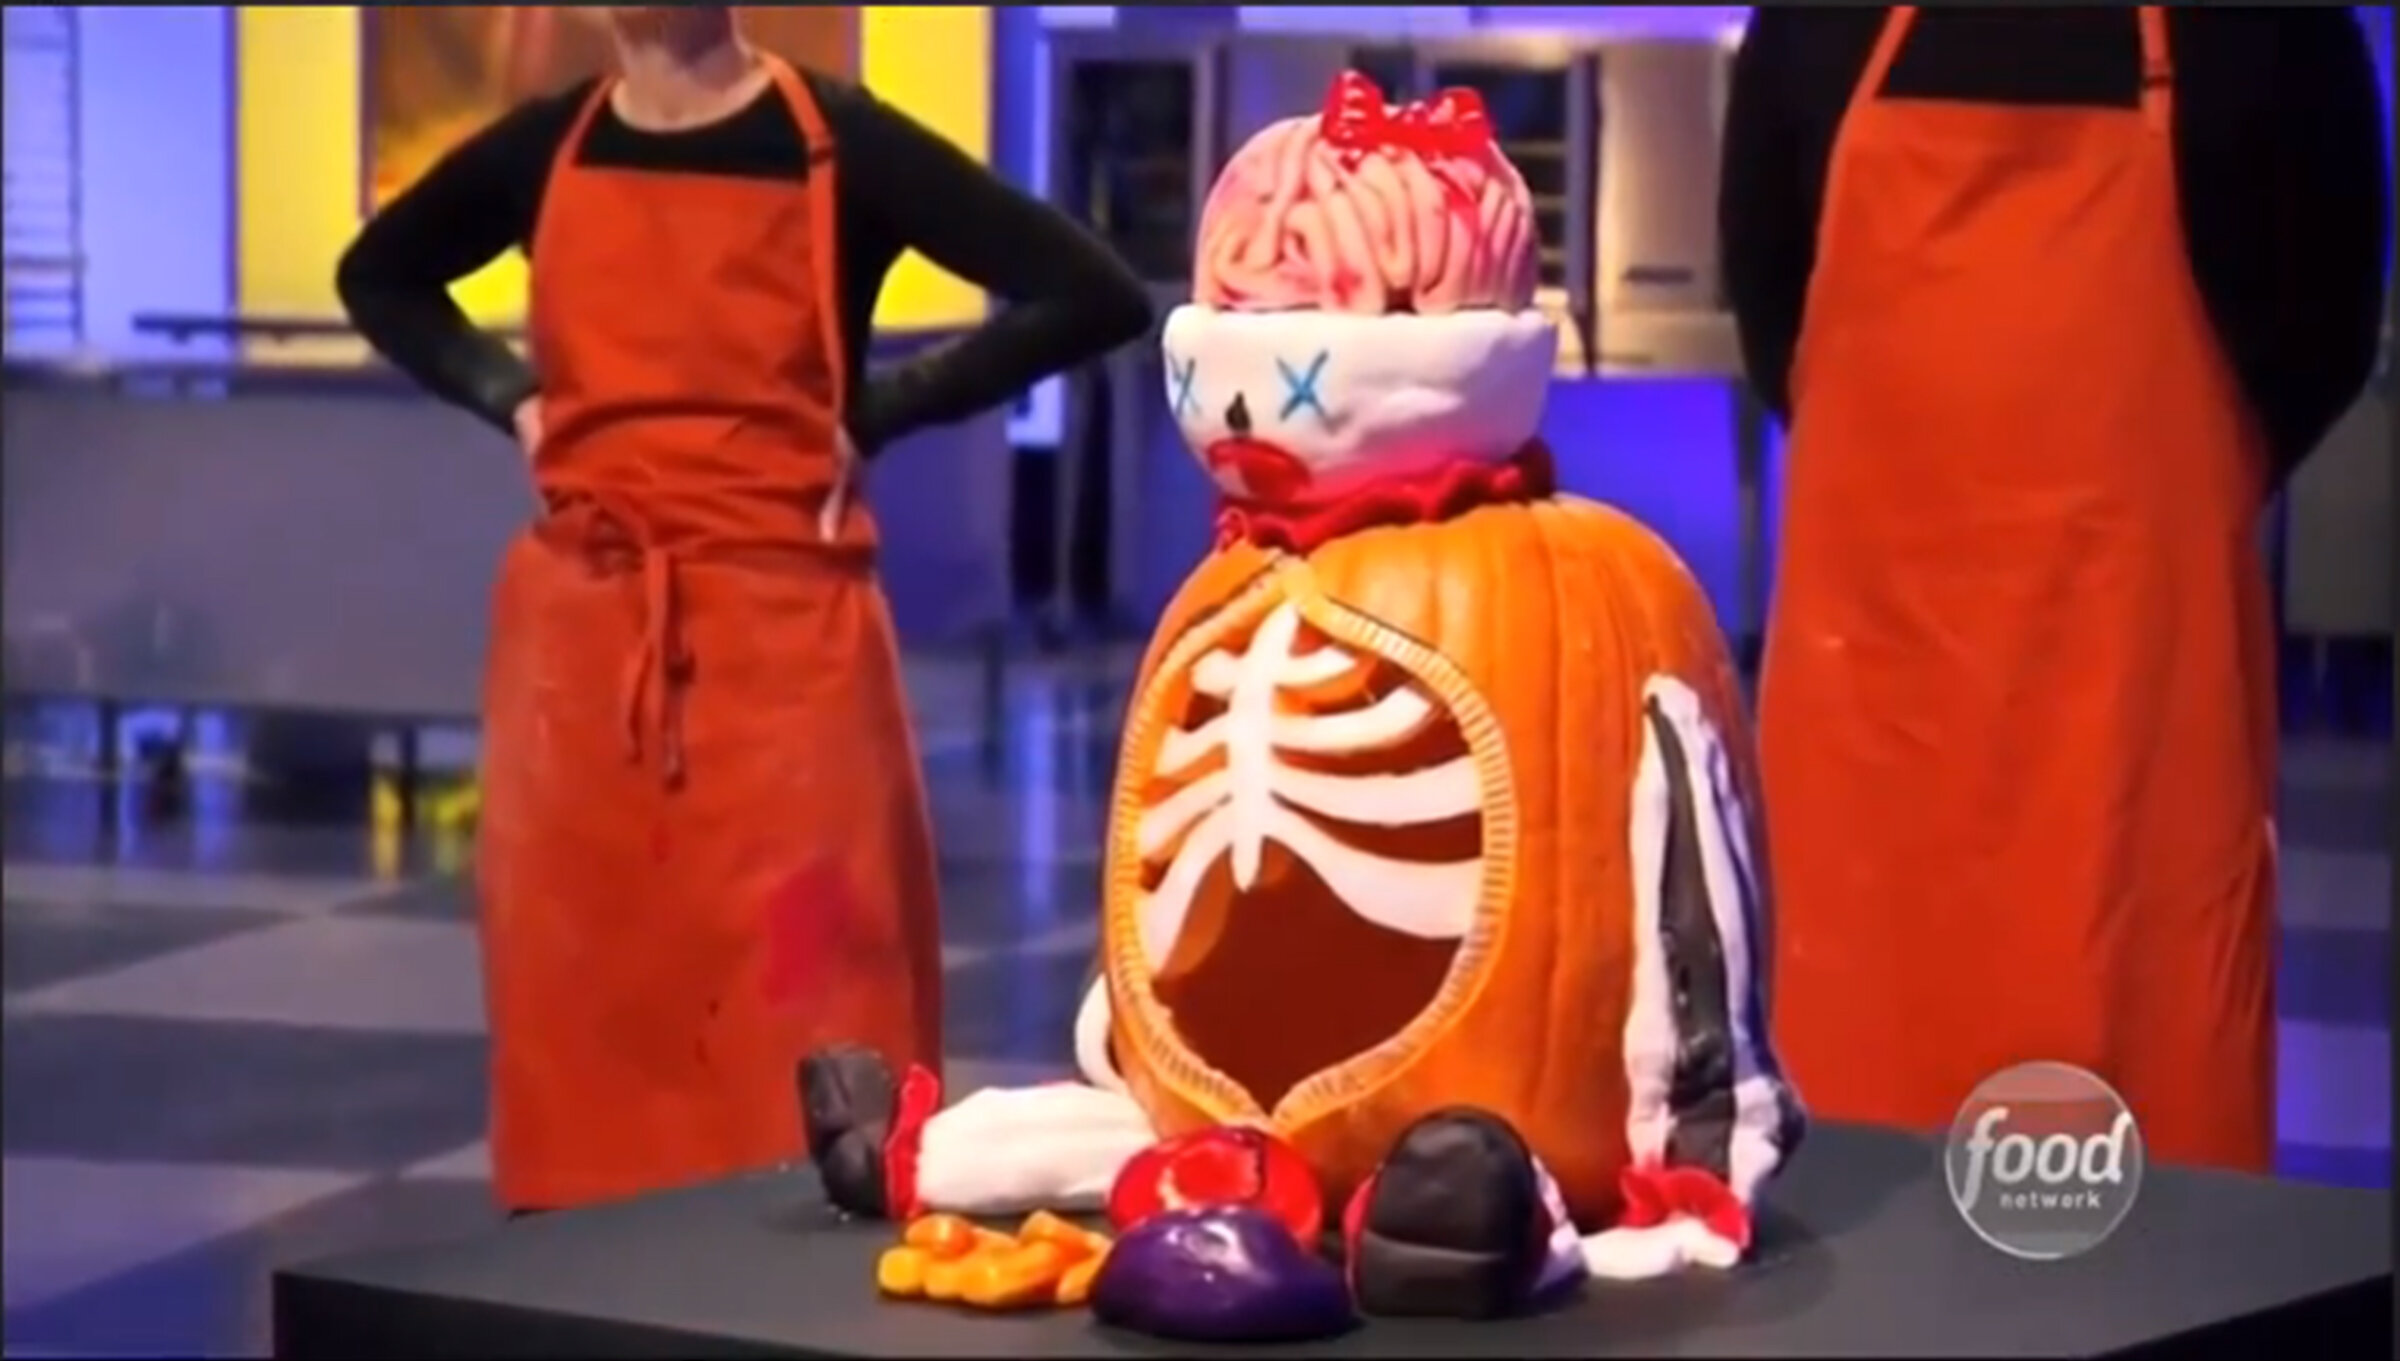
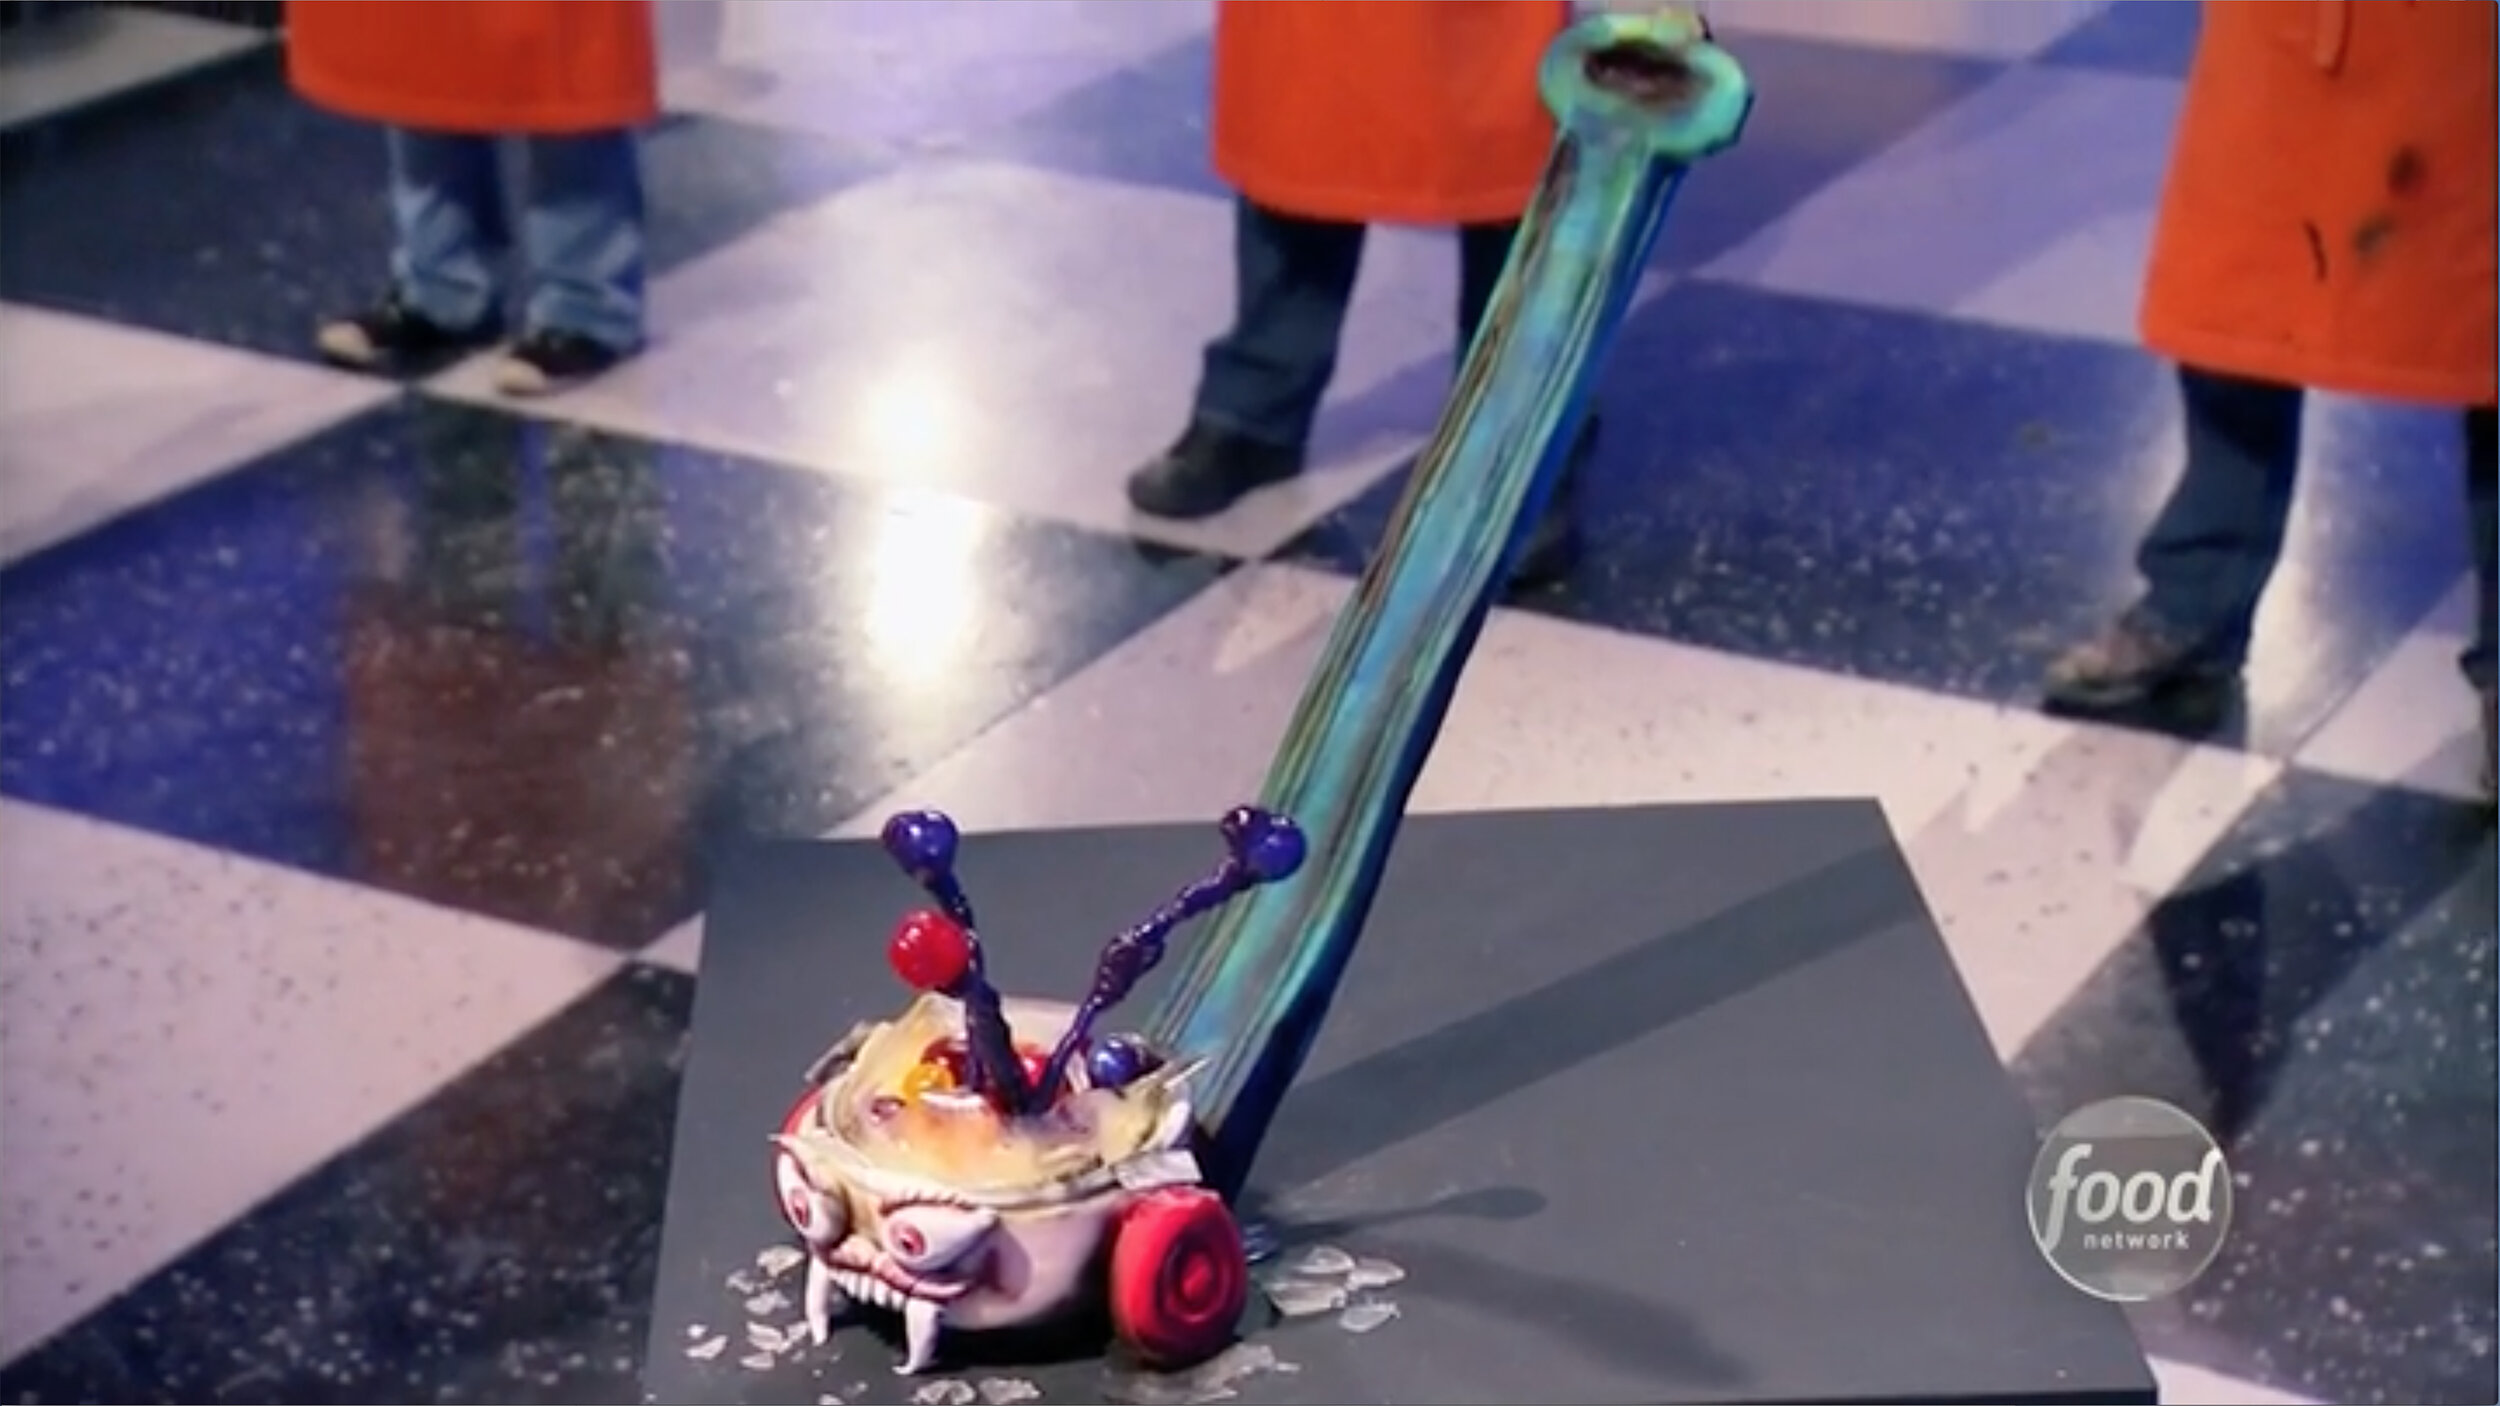
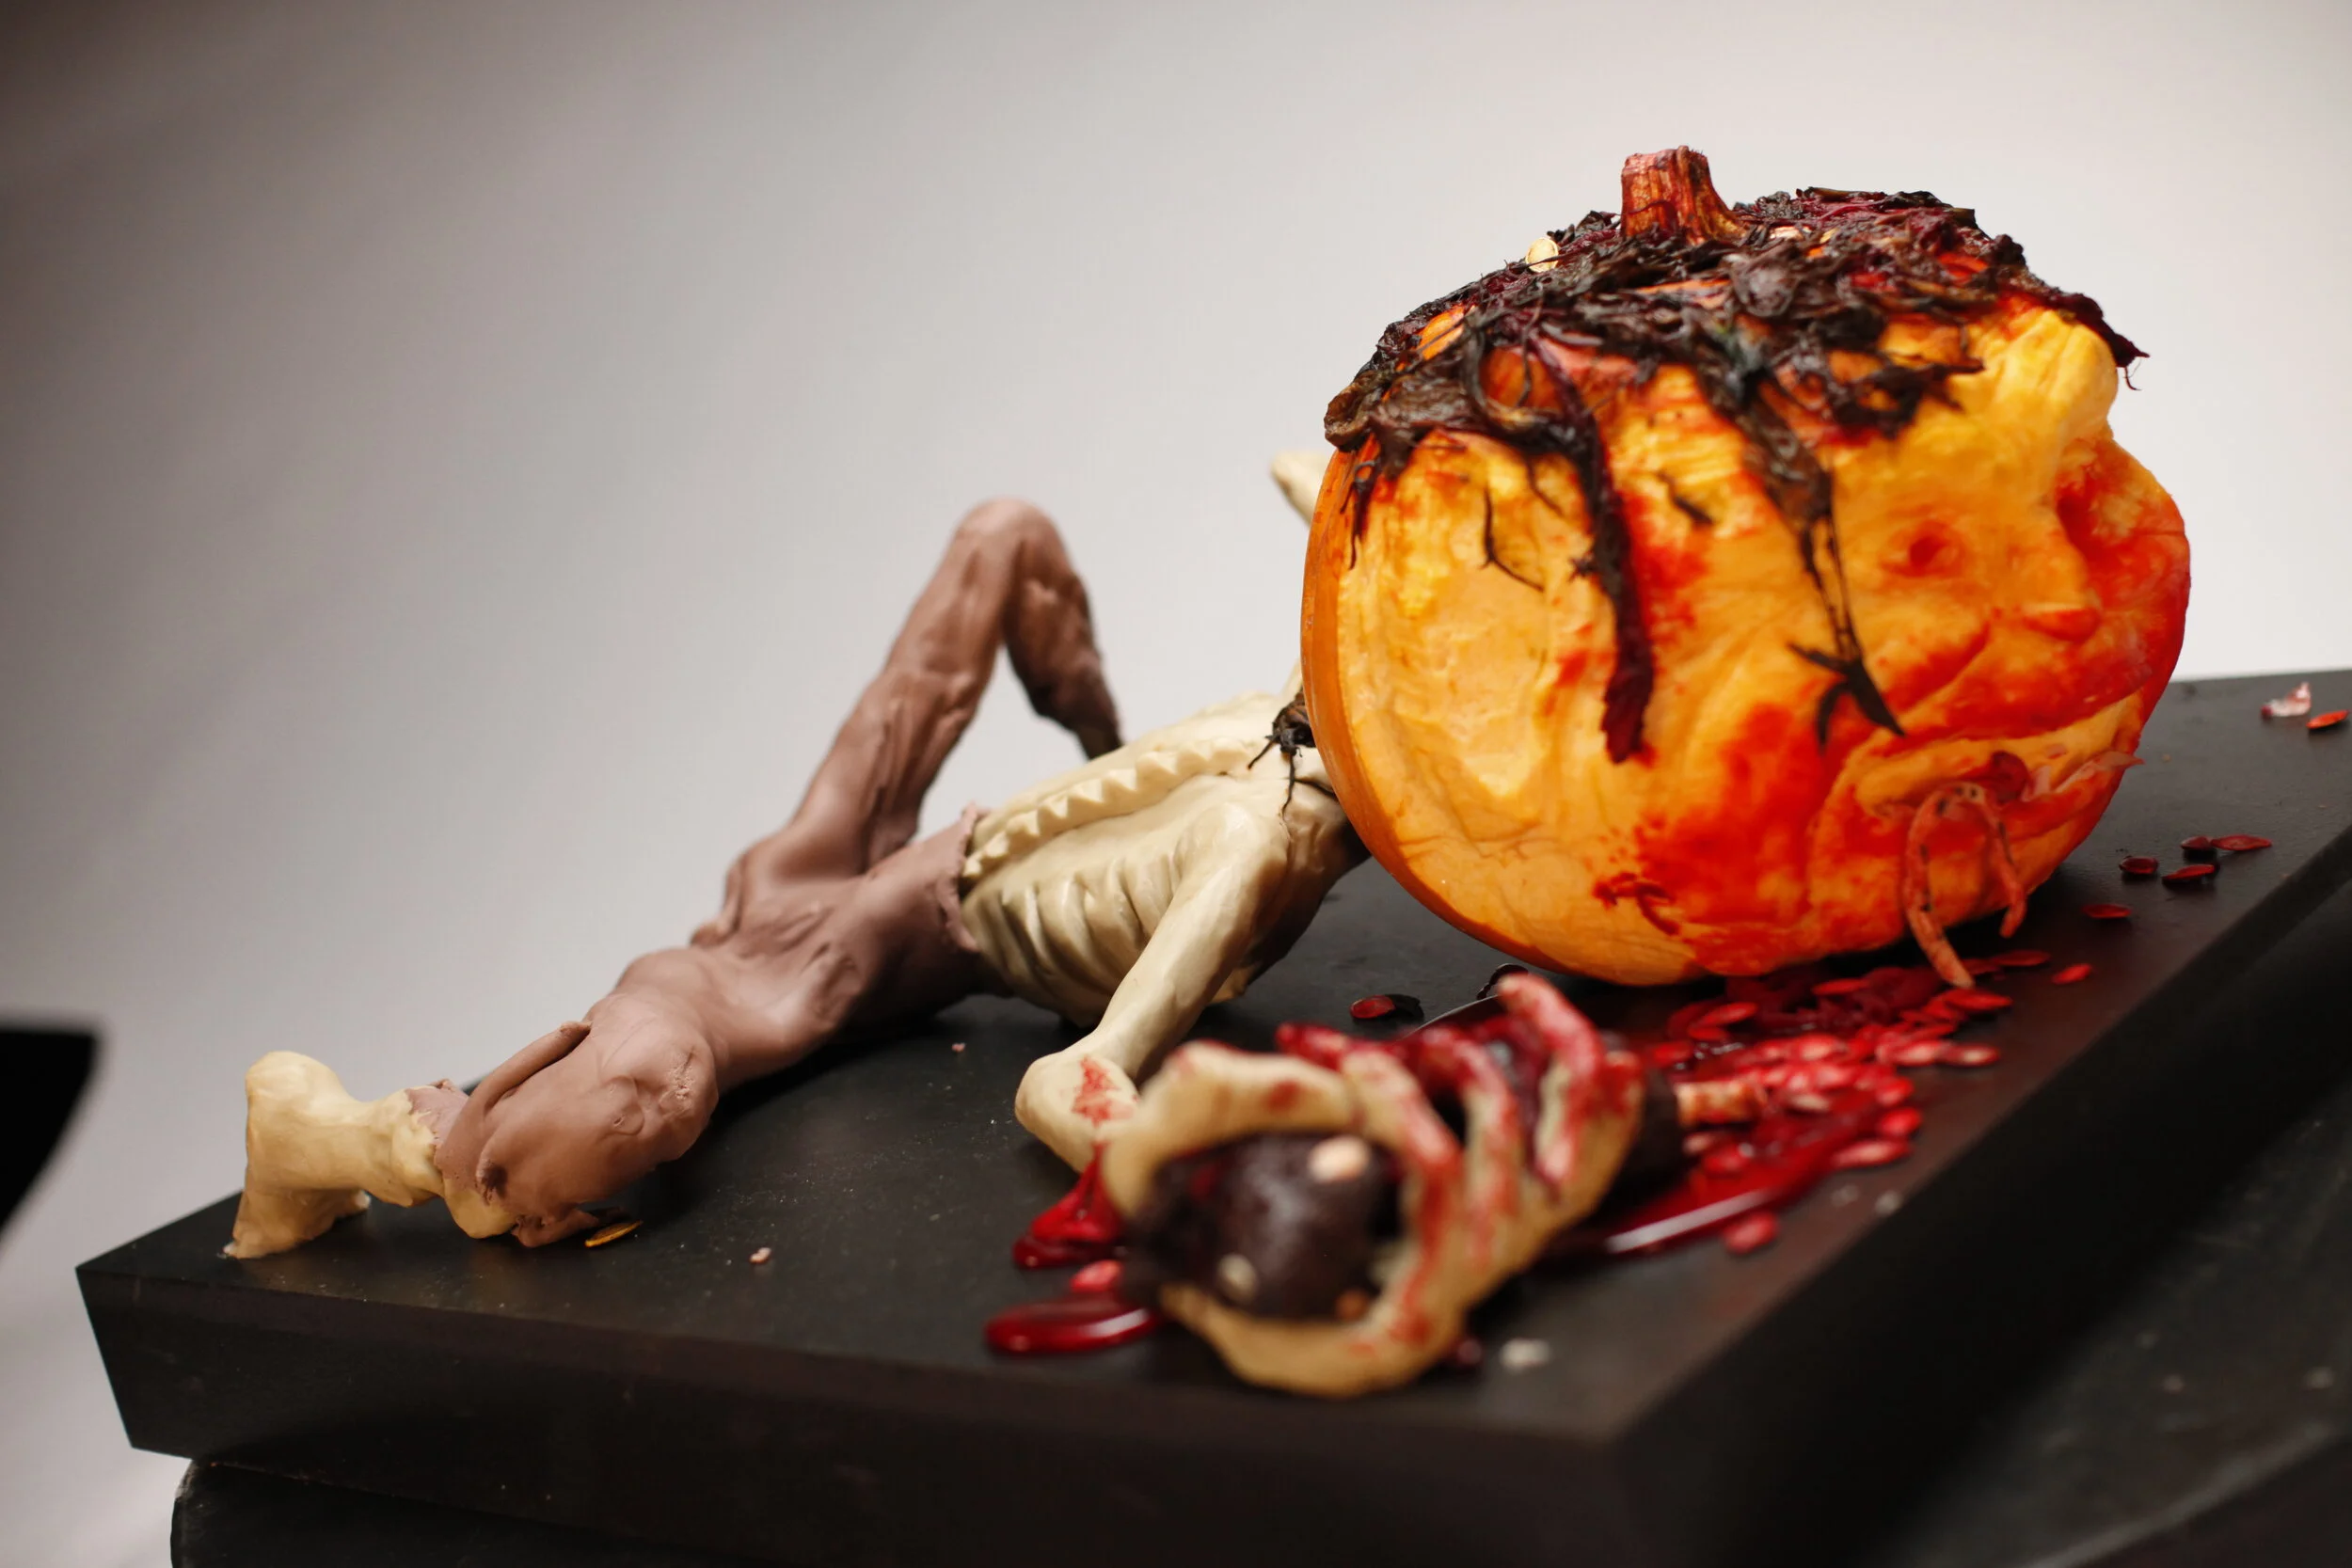
UPDATE: Here are the pieces we made.


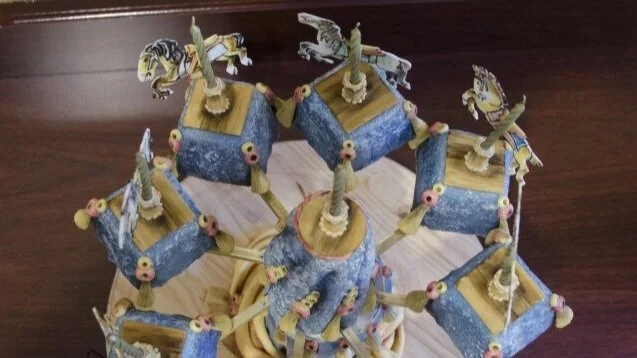
Carousel Cake
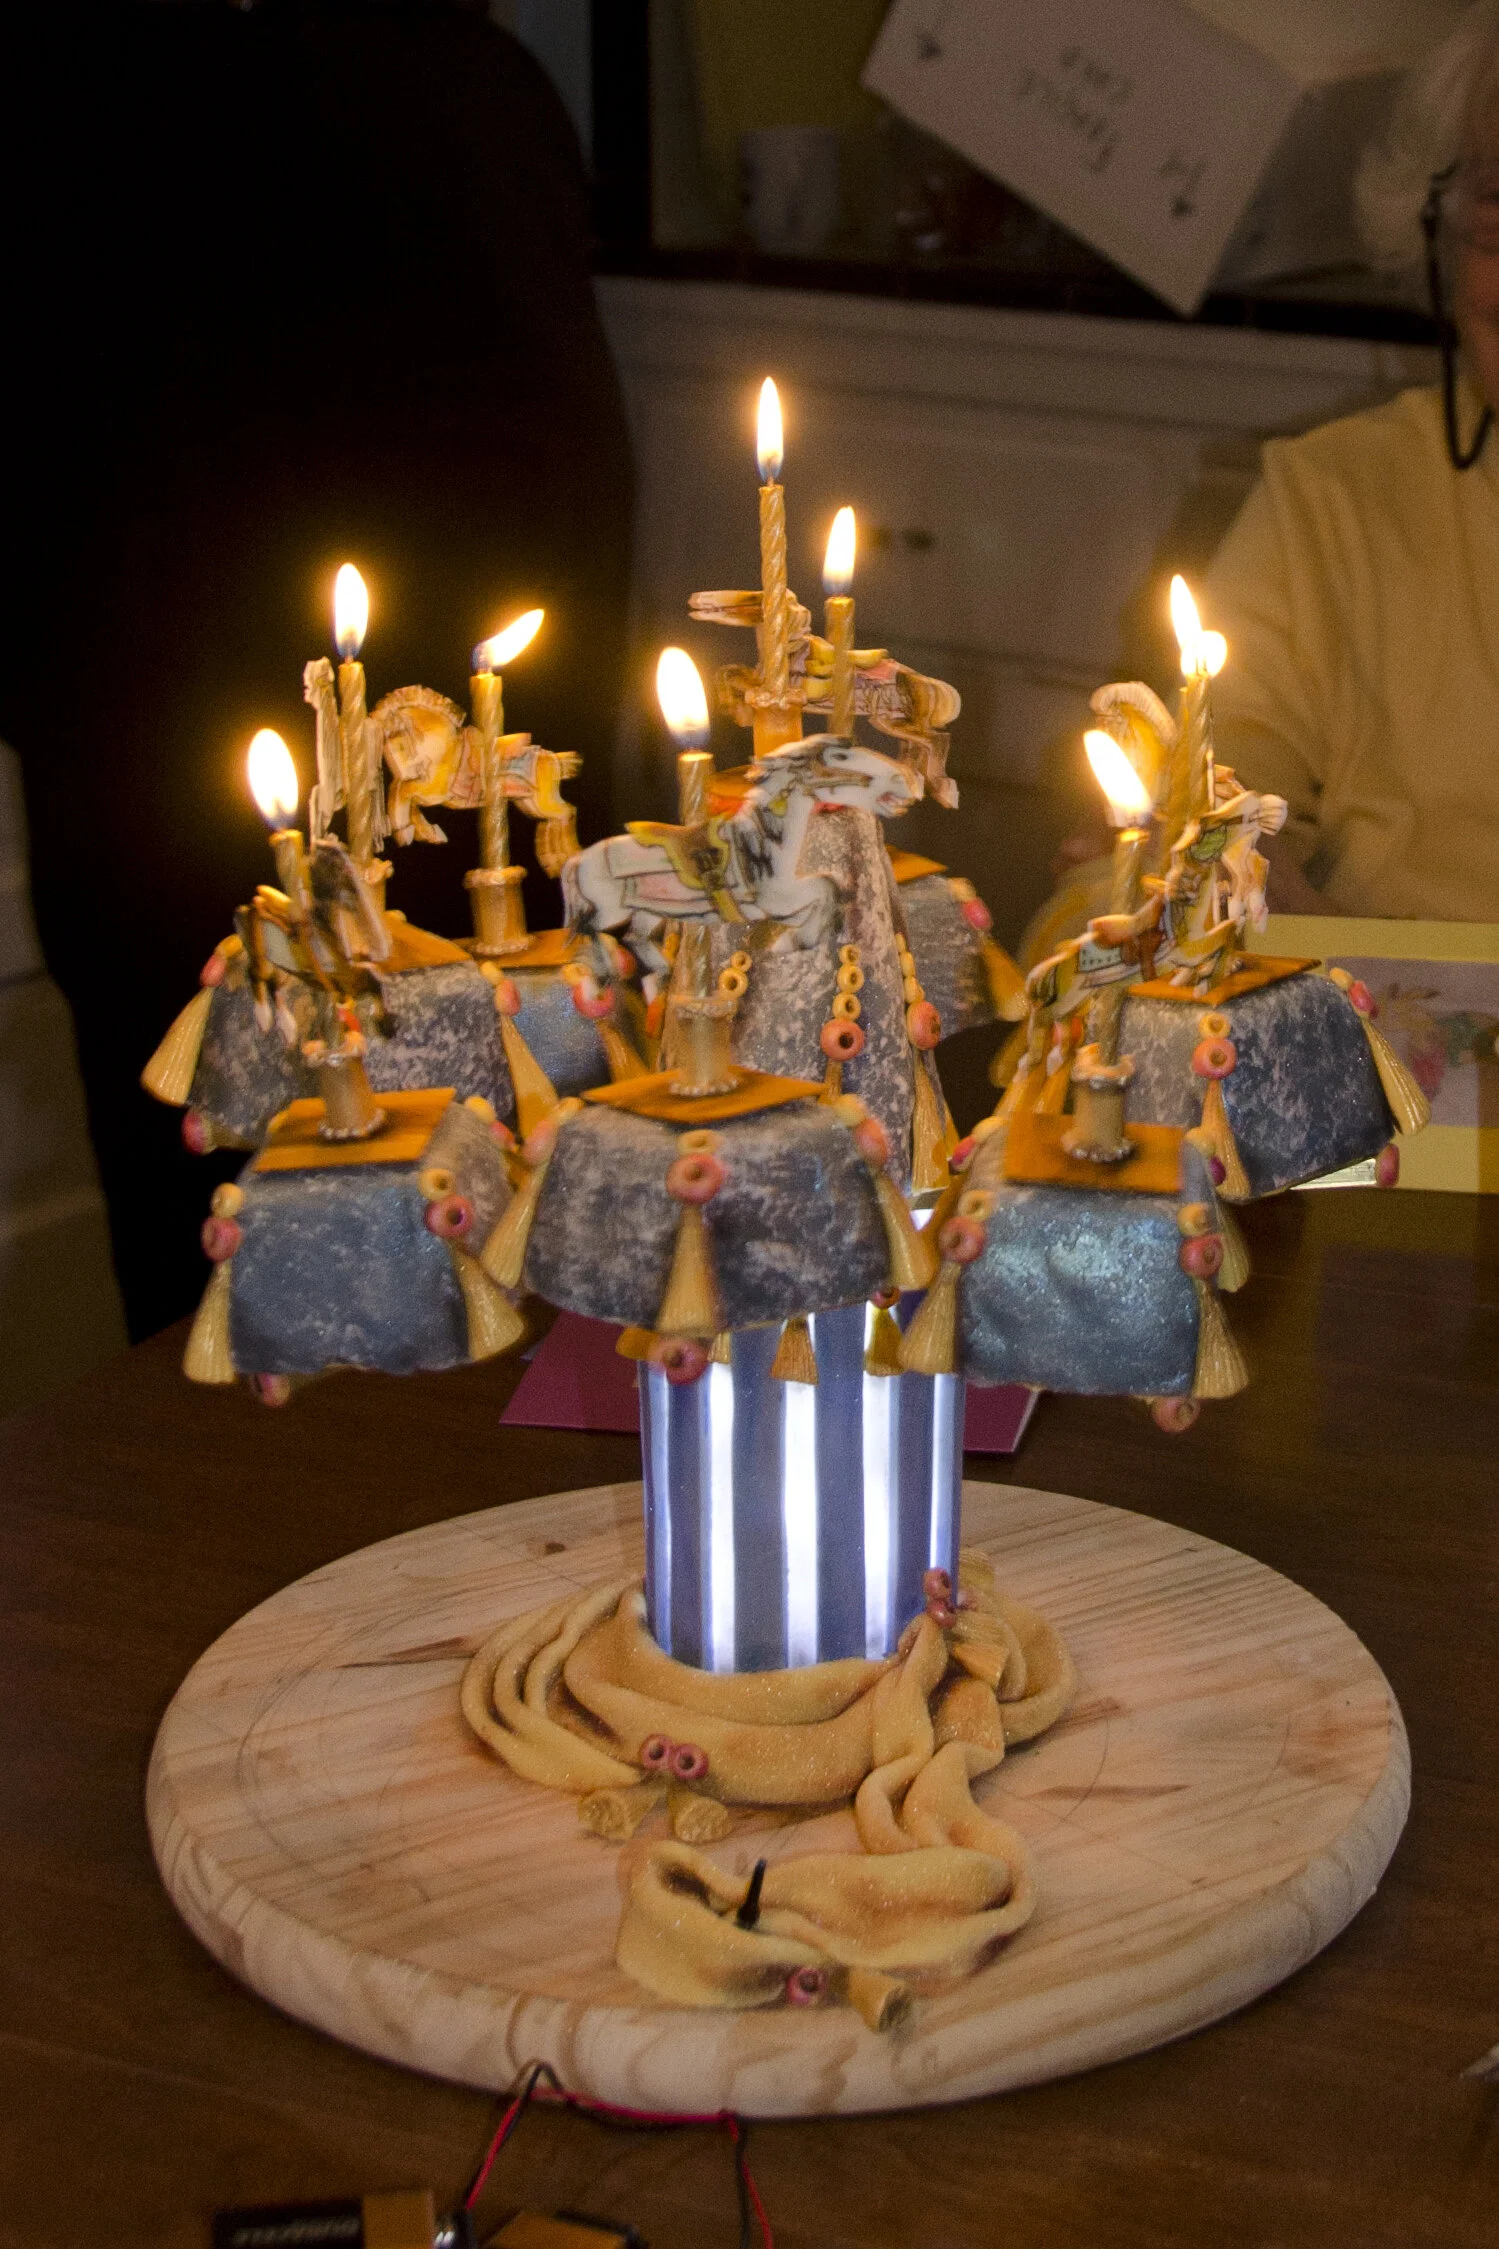
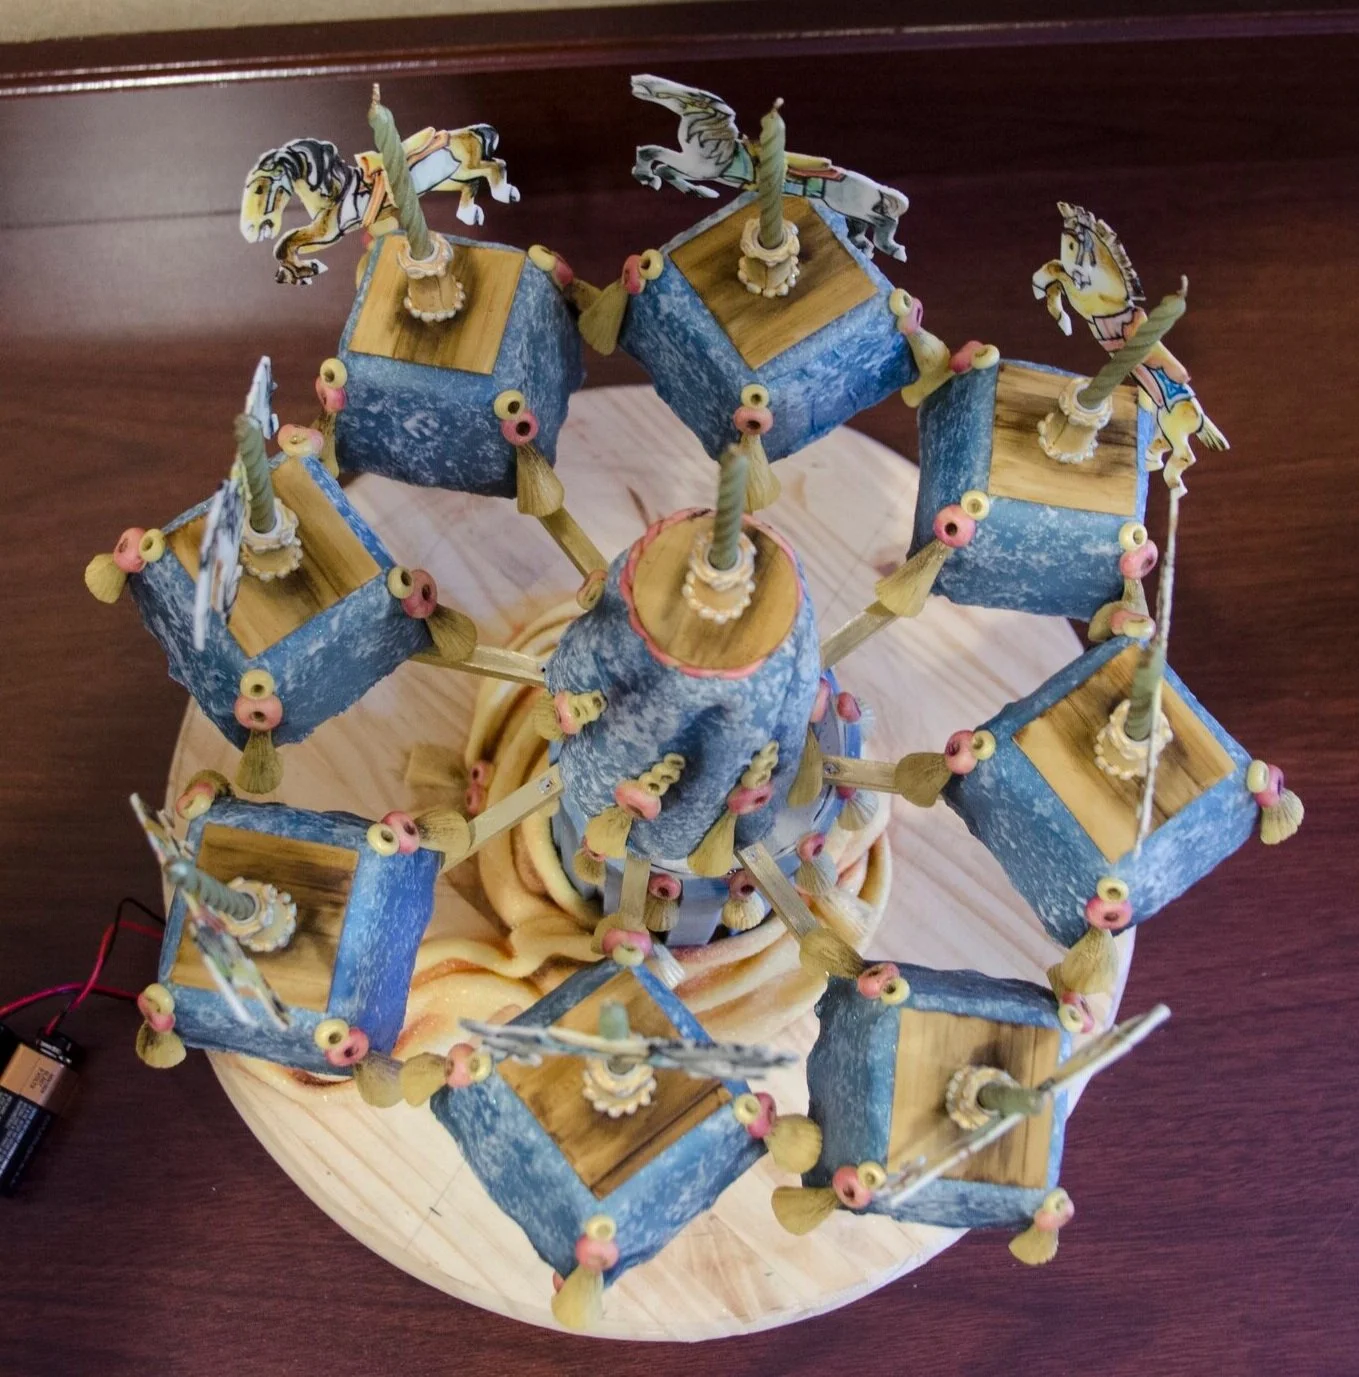
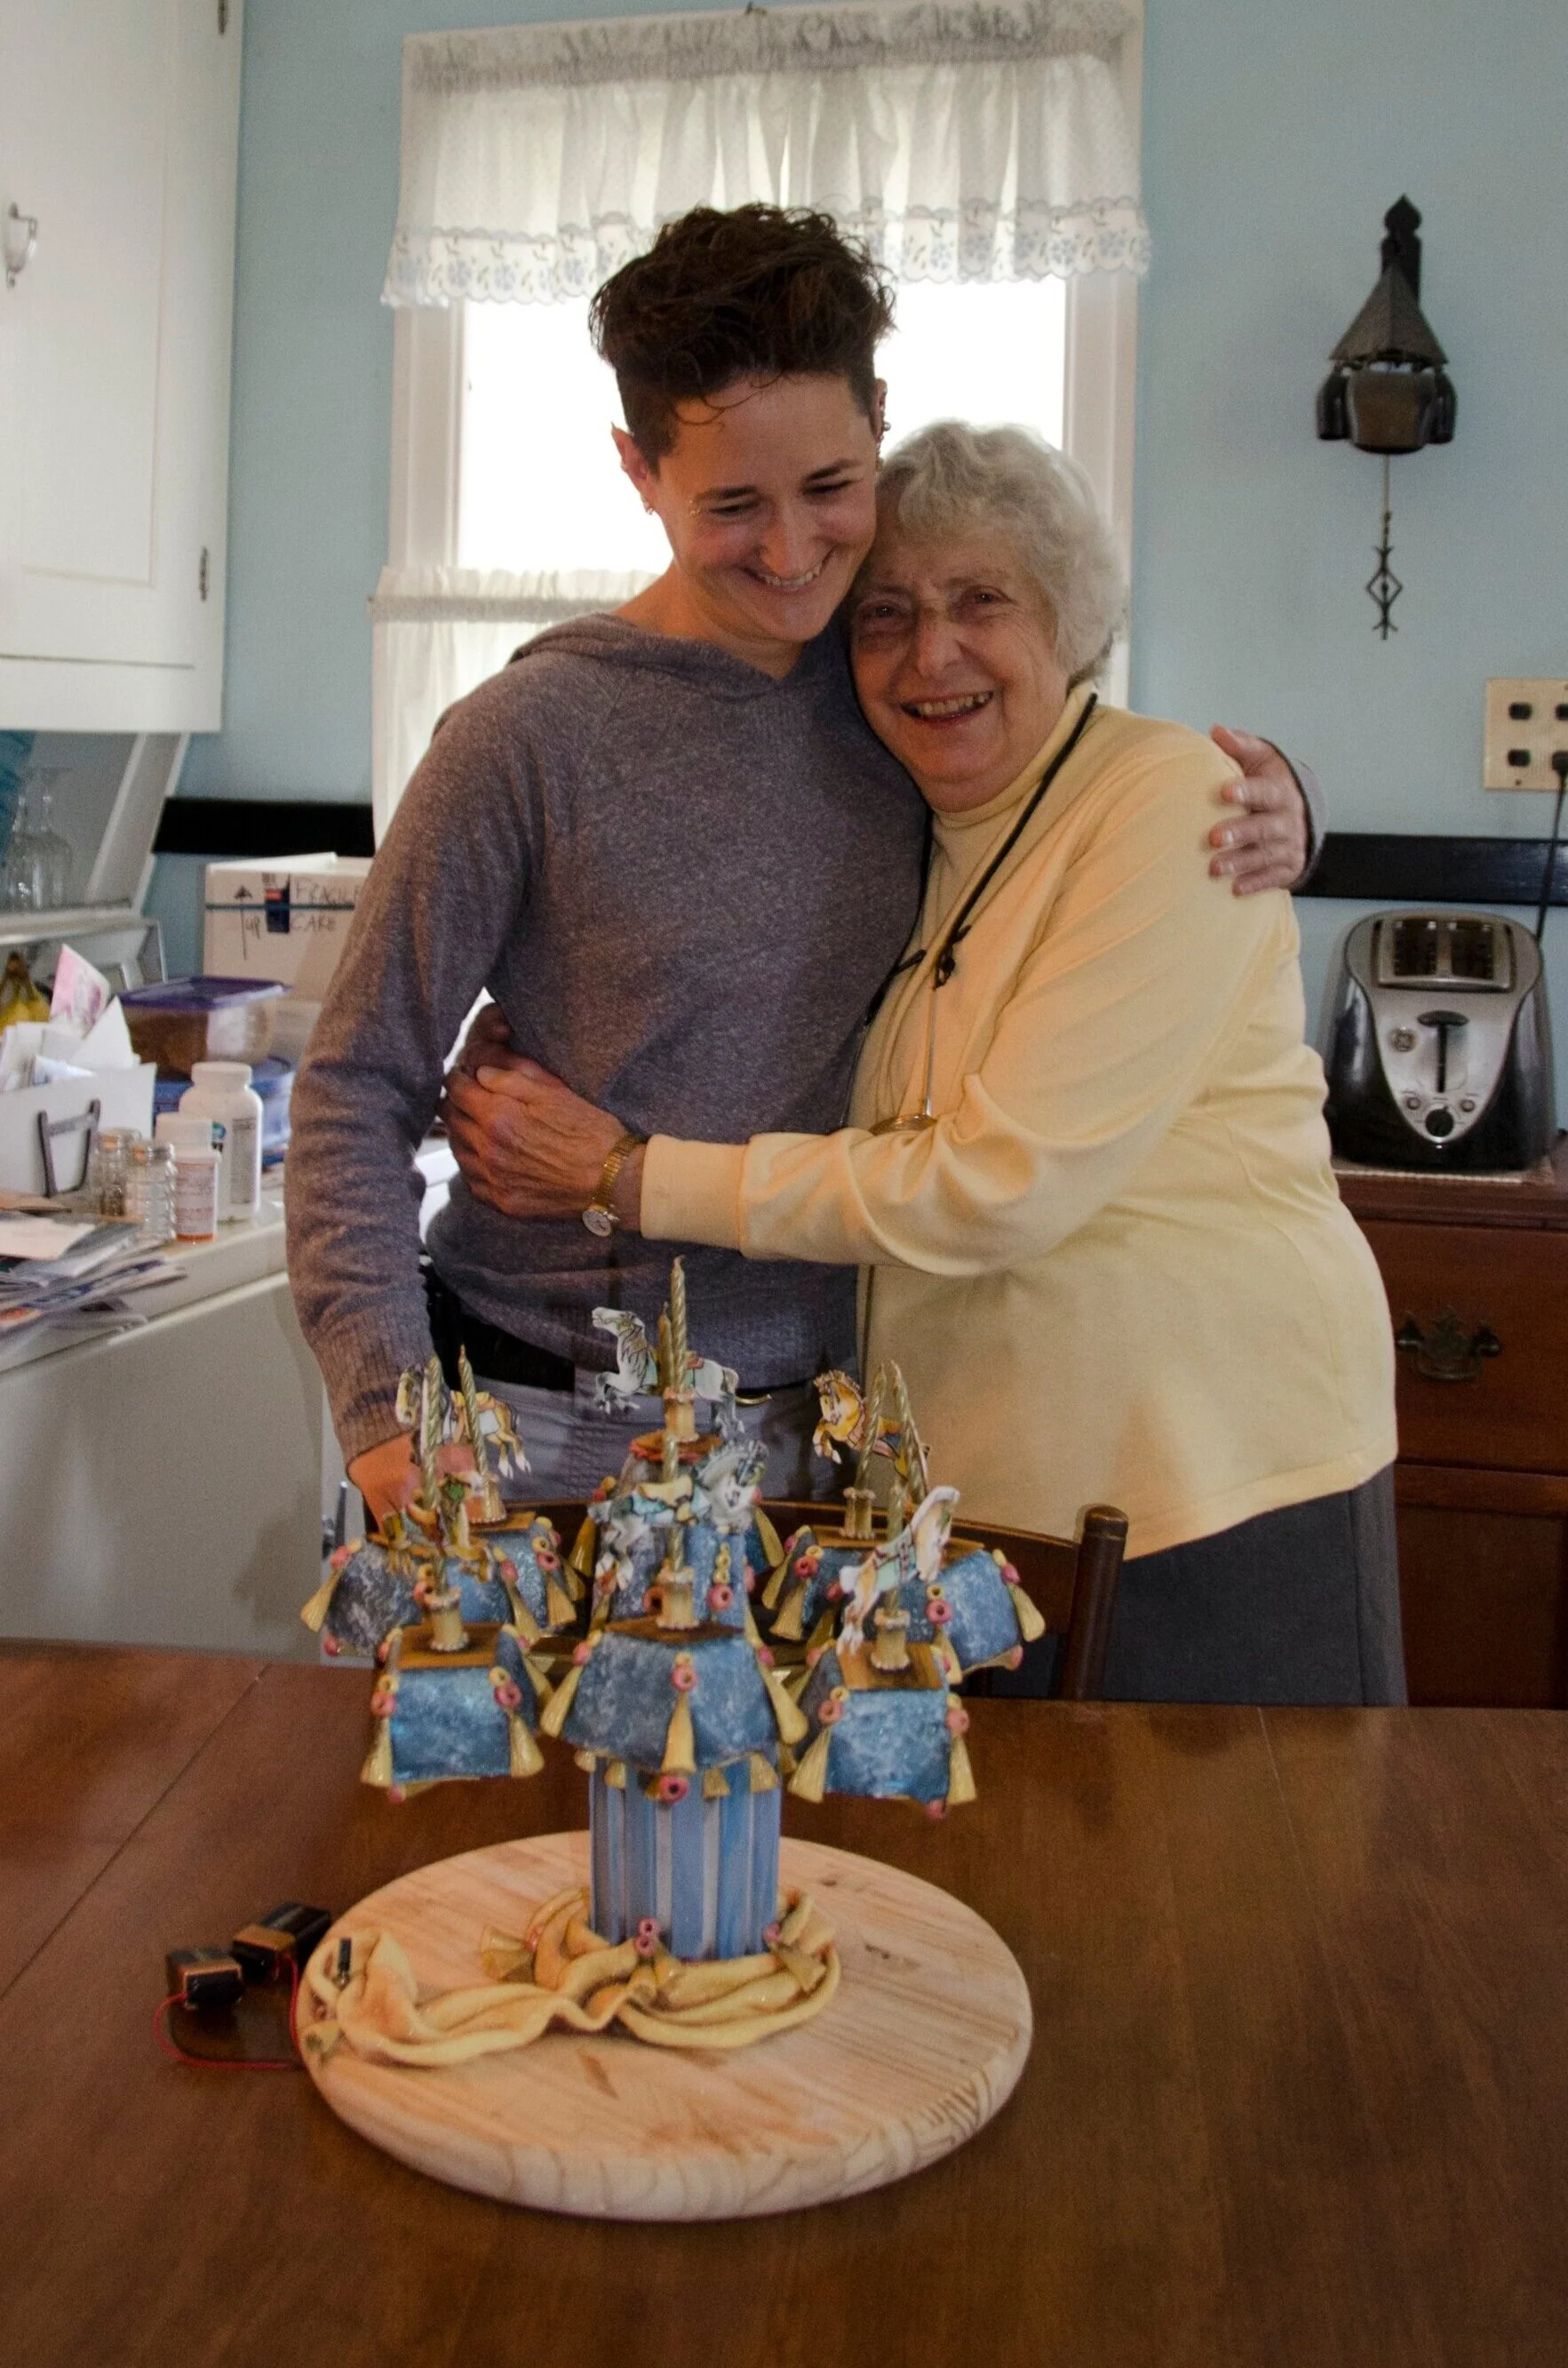
My grandmother lives near a beautiful old carousel from the 1920s. When we visited her when we little, she would always take us to ride it. When I was designing her 90th birthday cake, I got to thinking about riding the carousel with her, and this is the result.
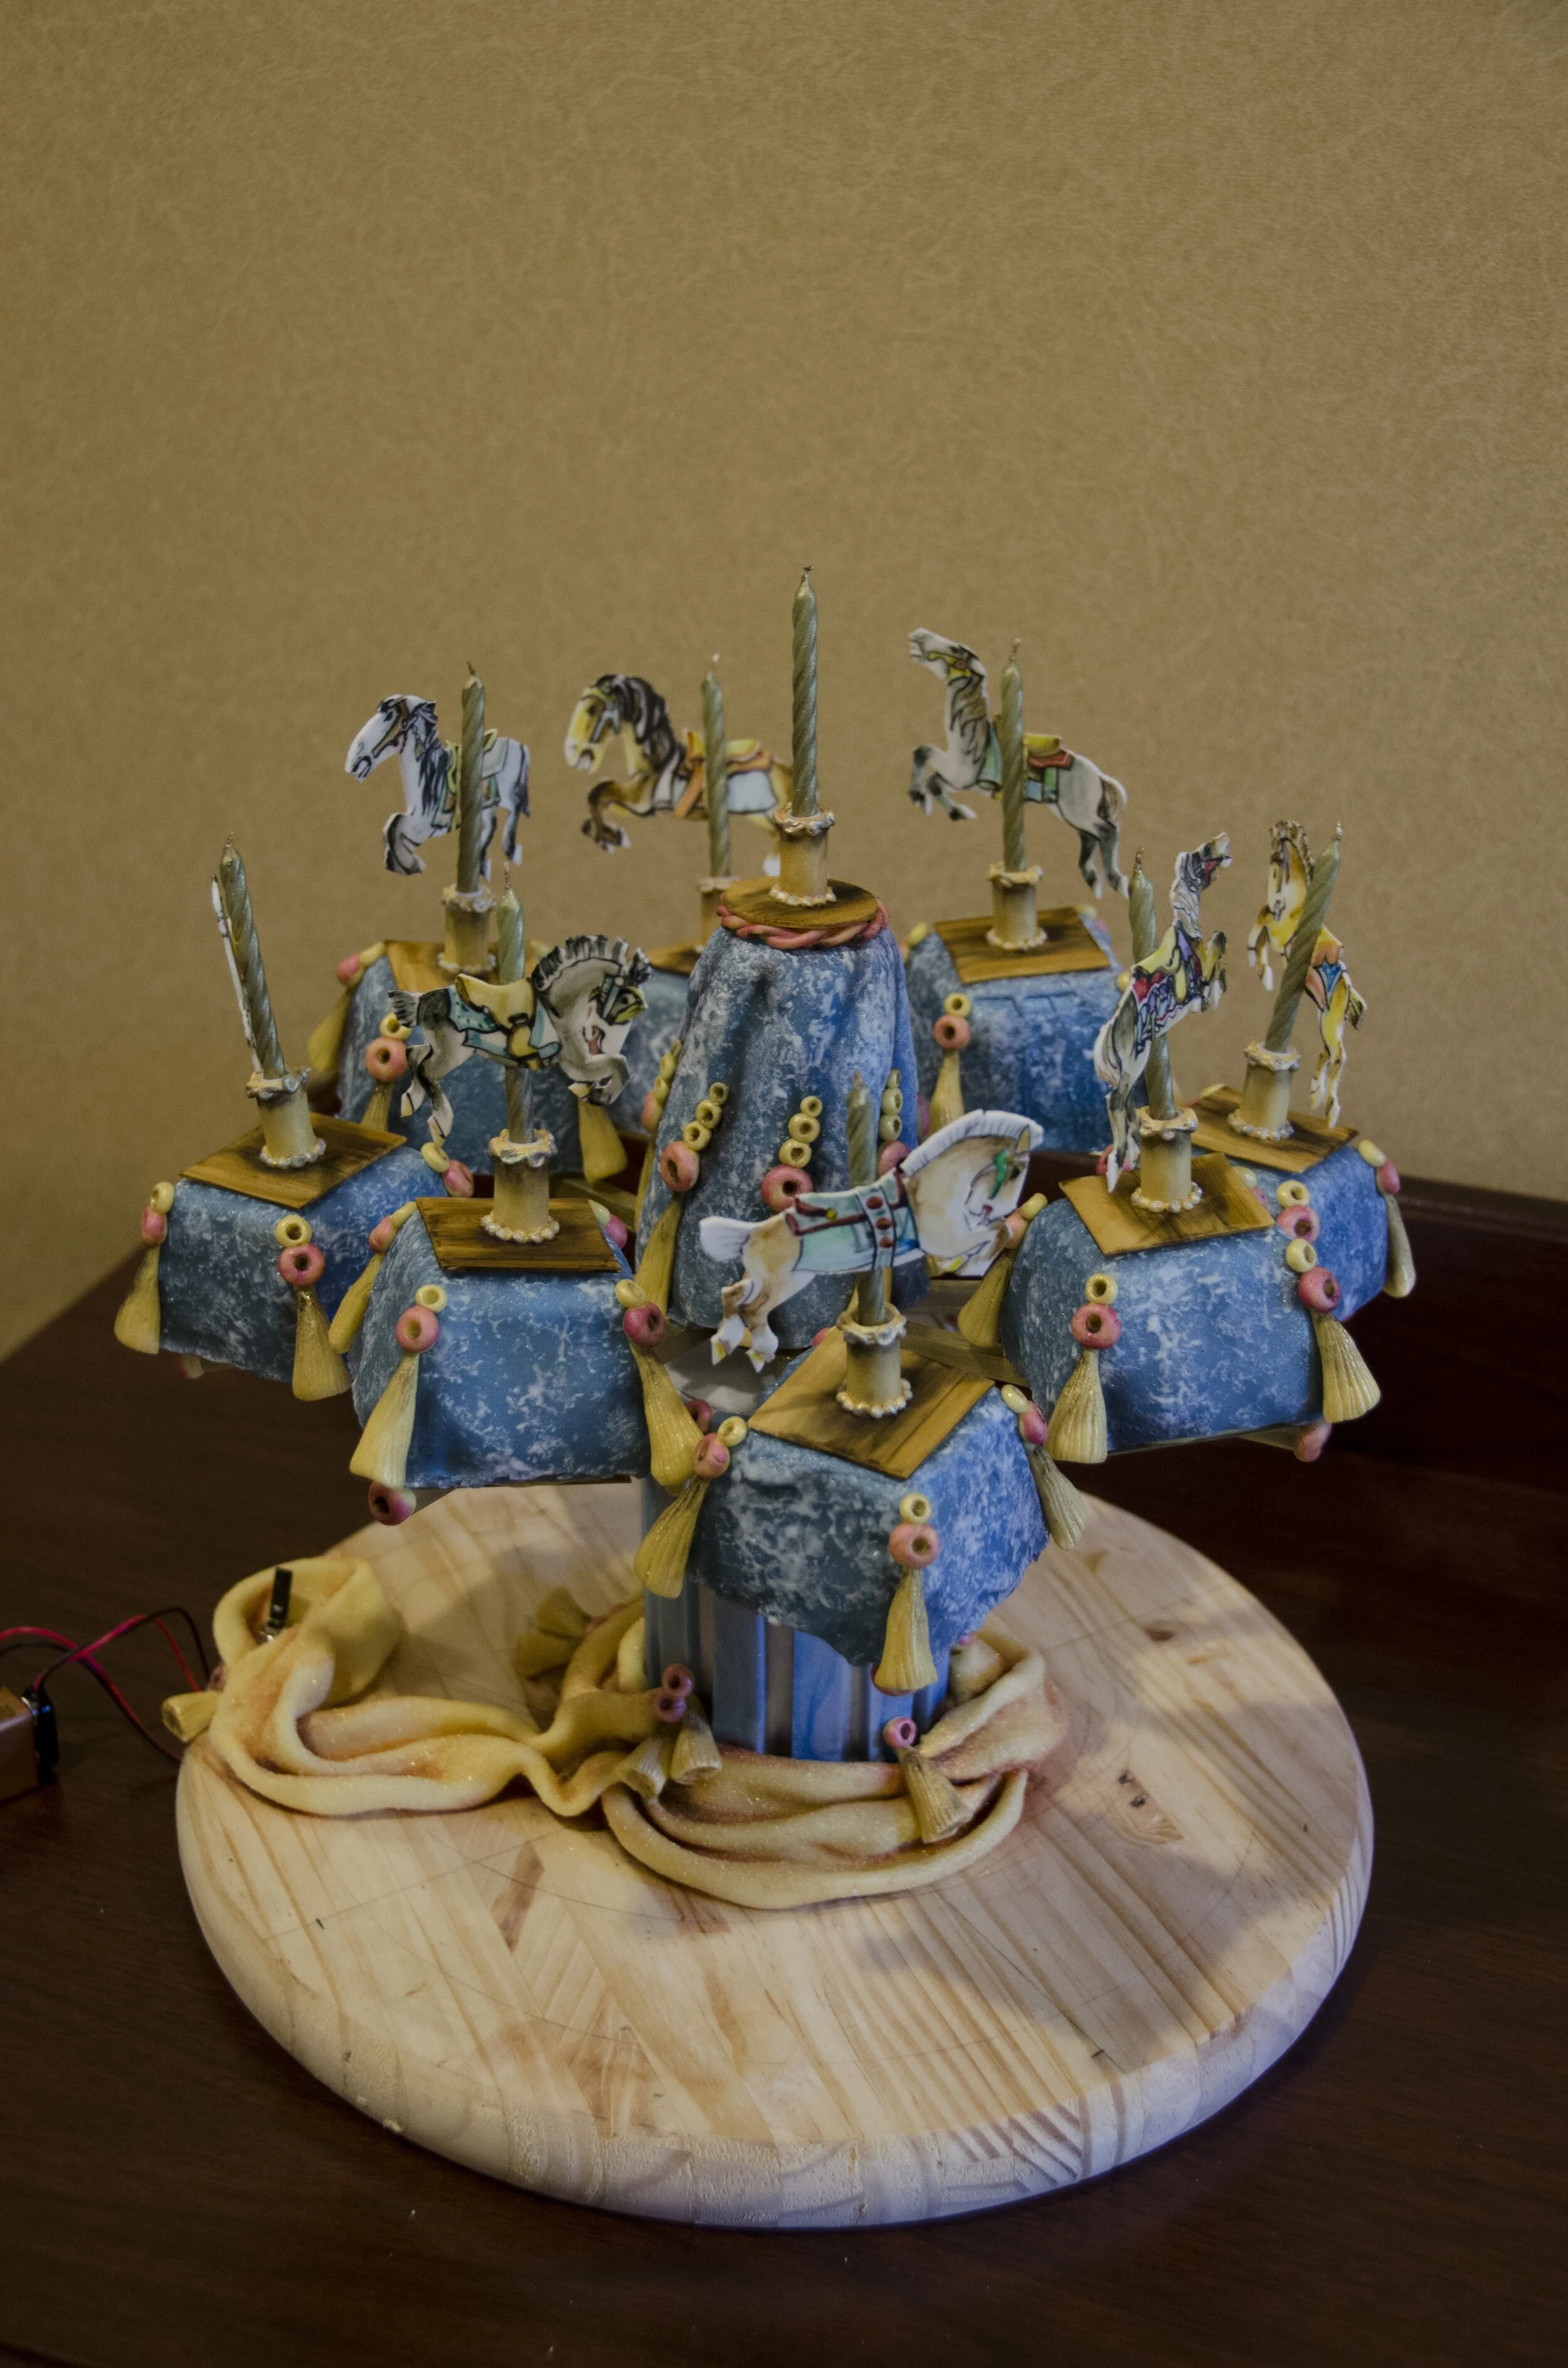
My grandmother lives near a beautiful old carousel from the 1920s. When we visited her when were little, she would always take us to ride it. When I was designing her 90th birthday cake, I got to thinking about riding the carousel with her, and this is the result.
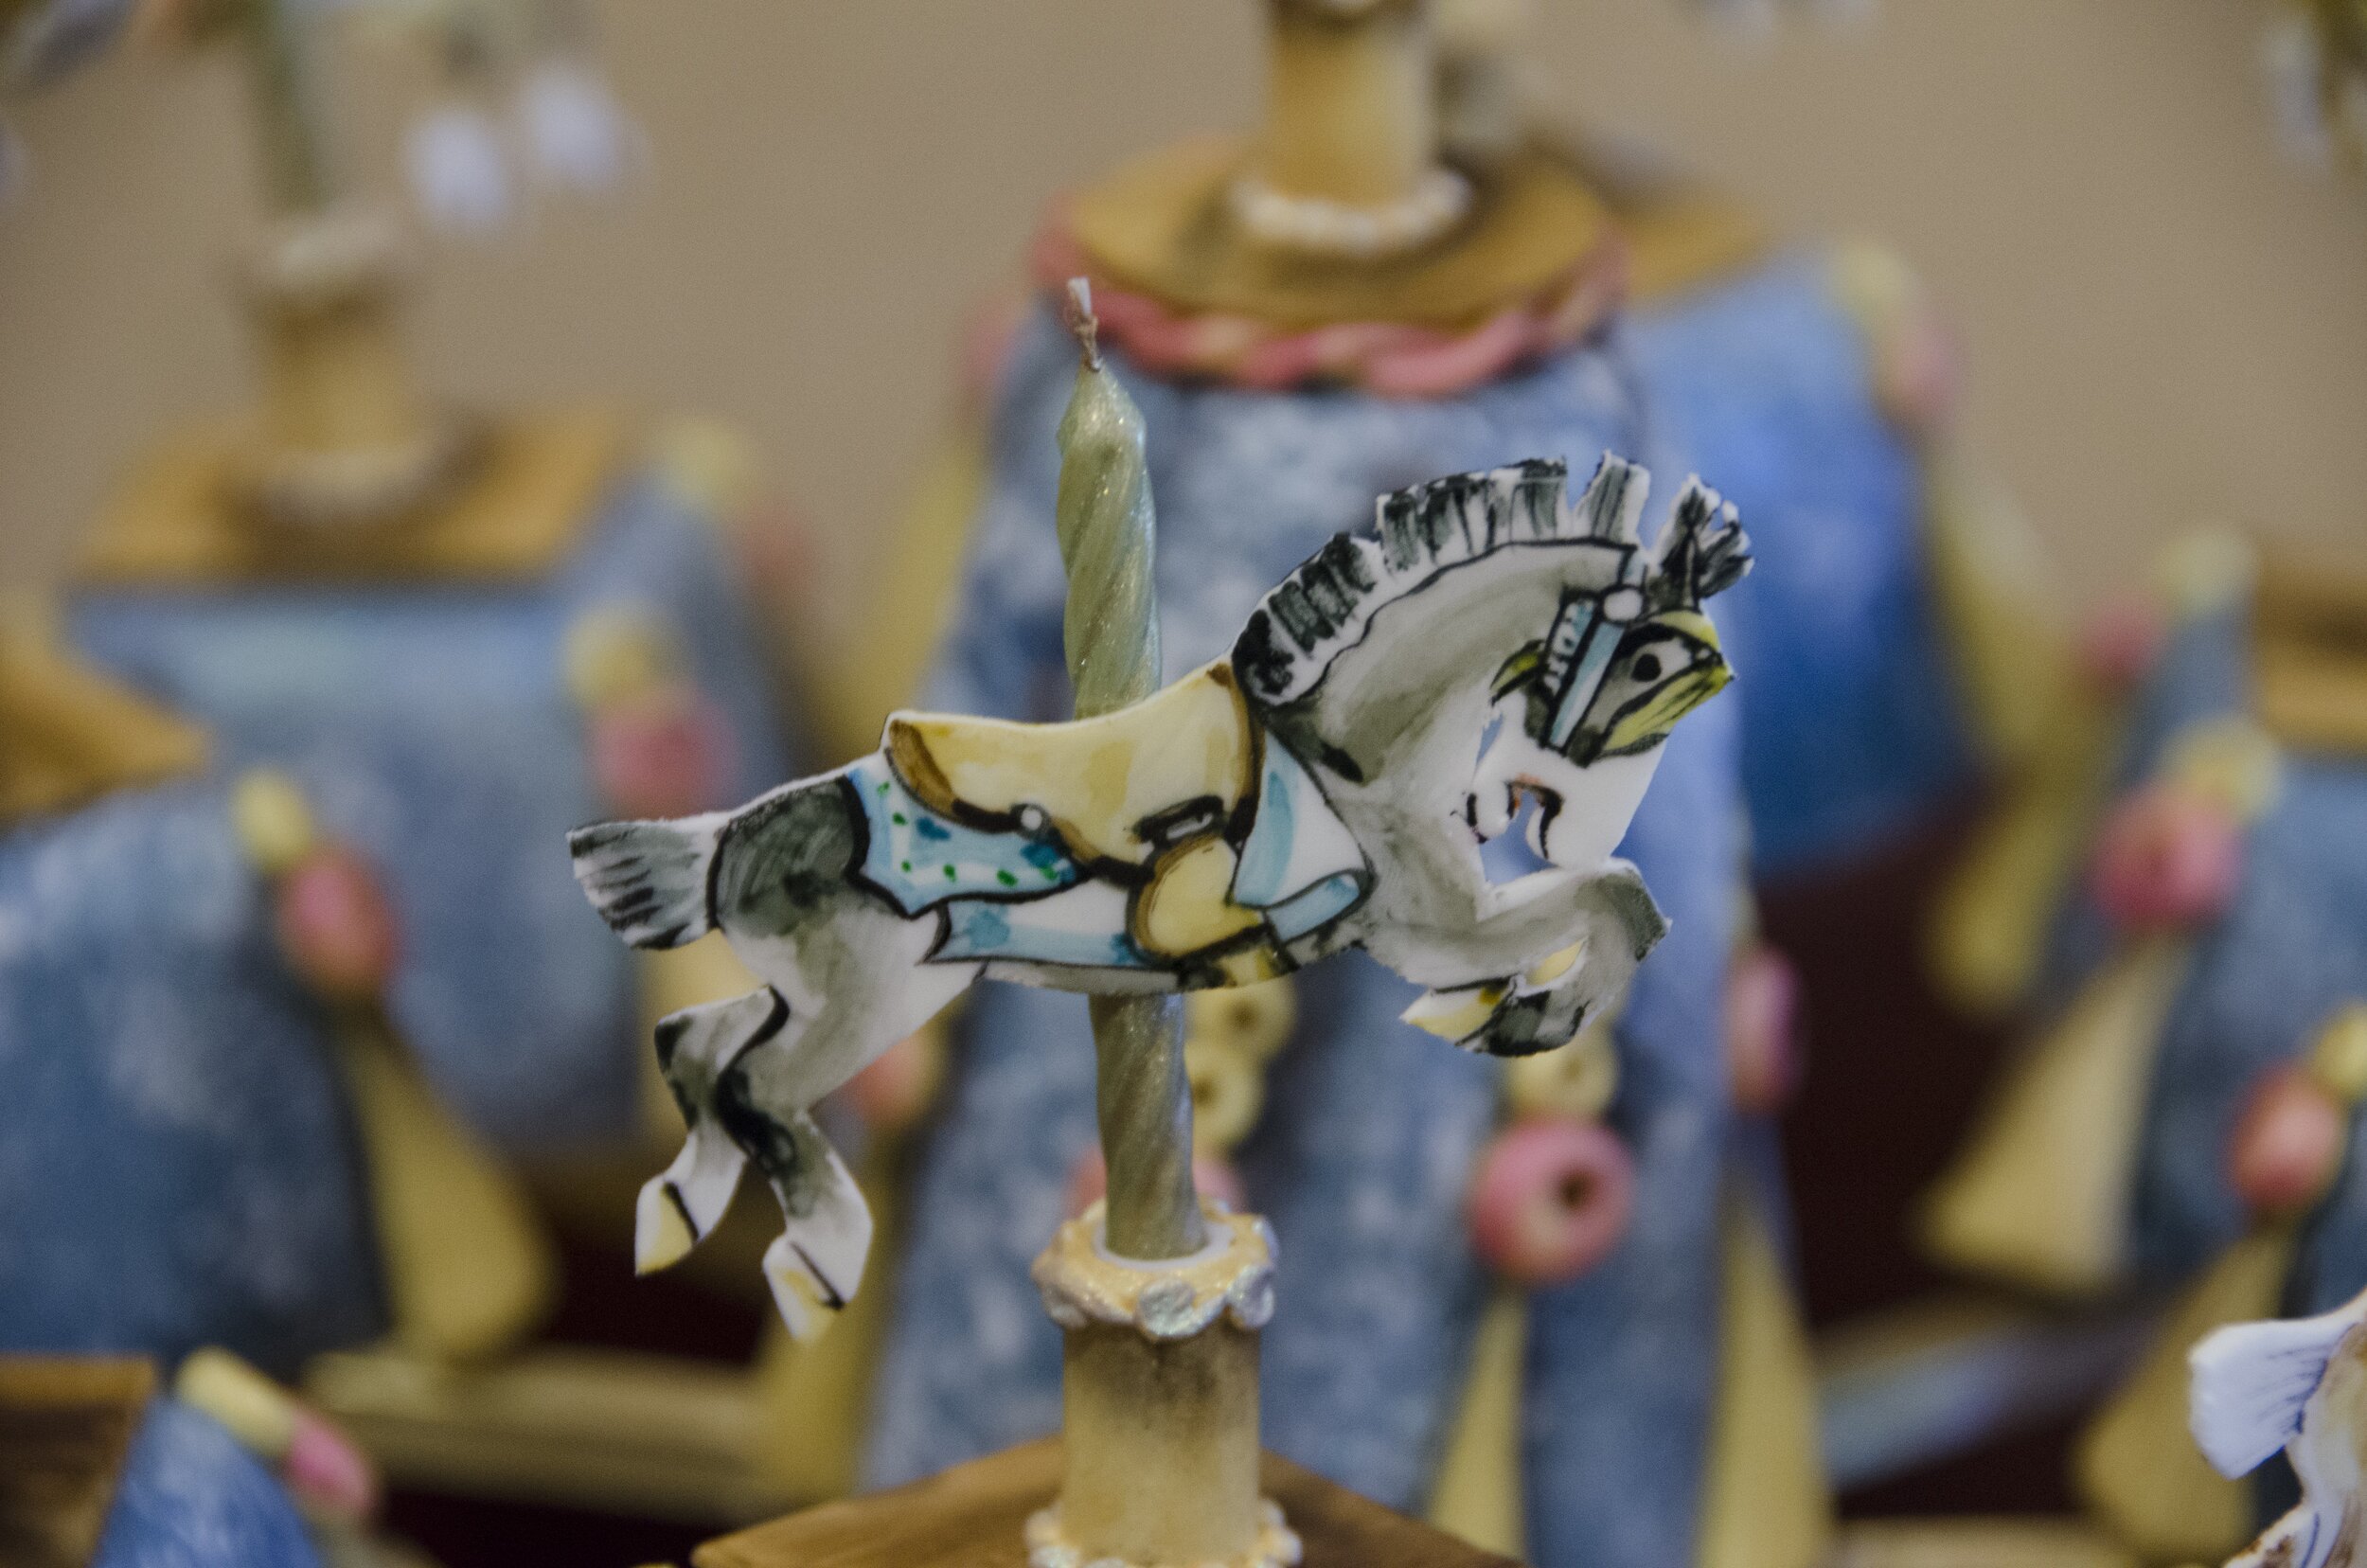
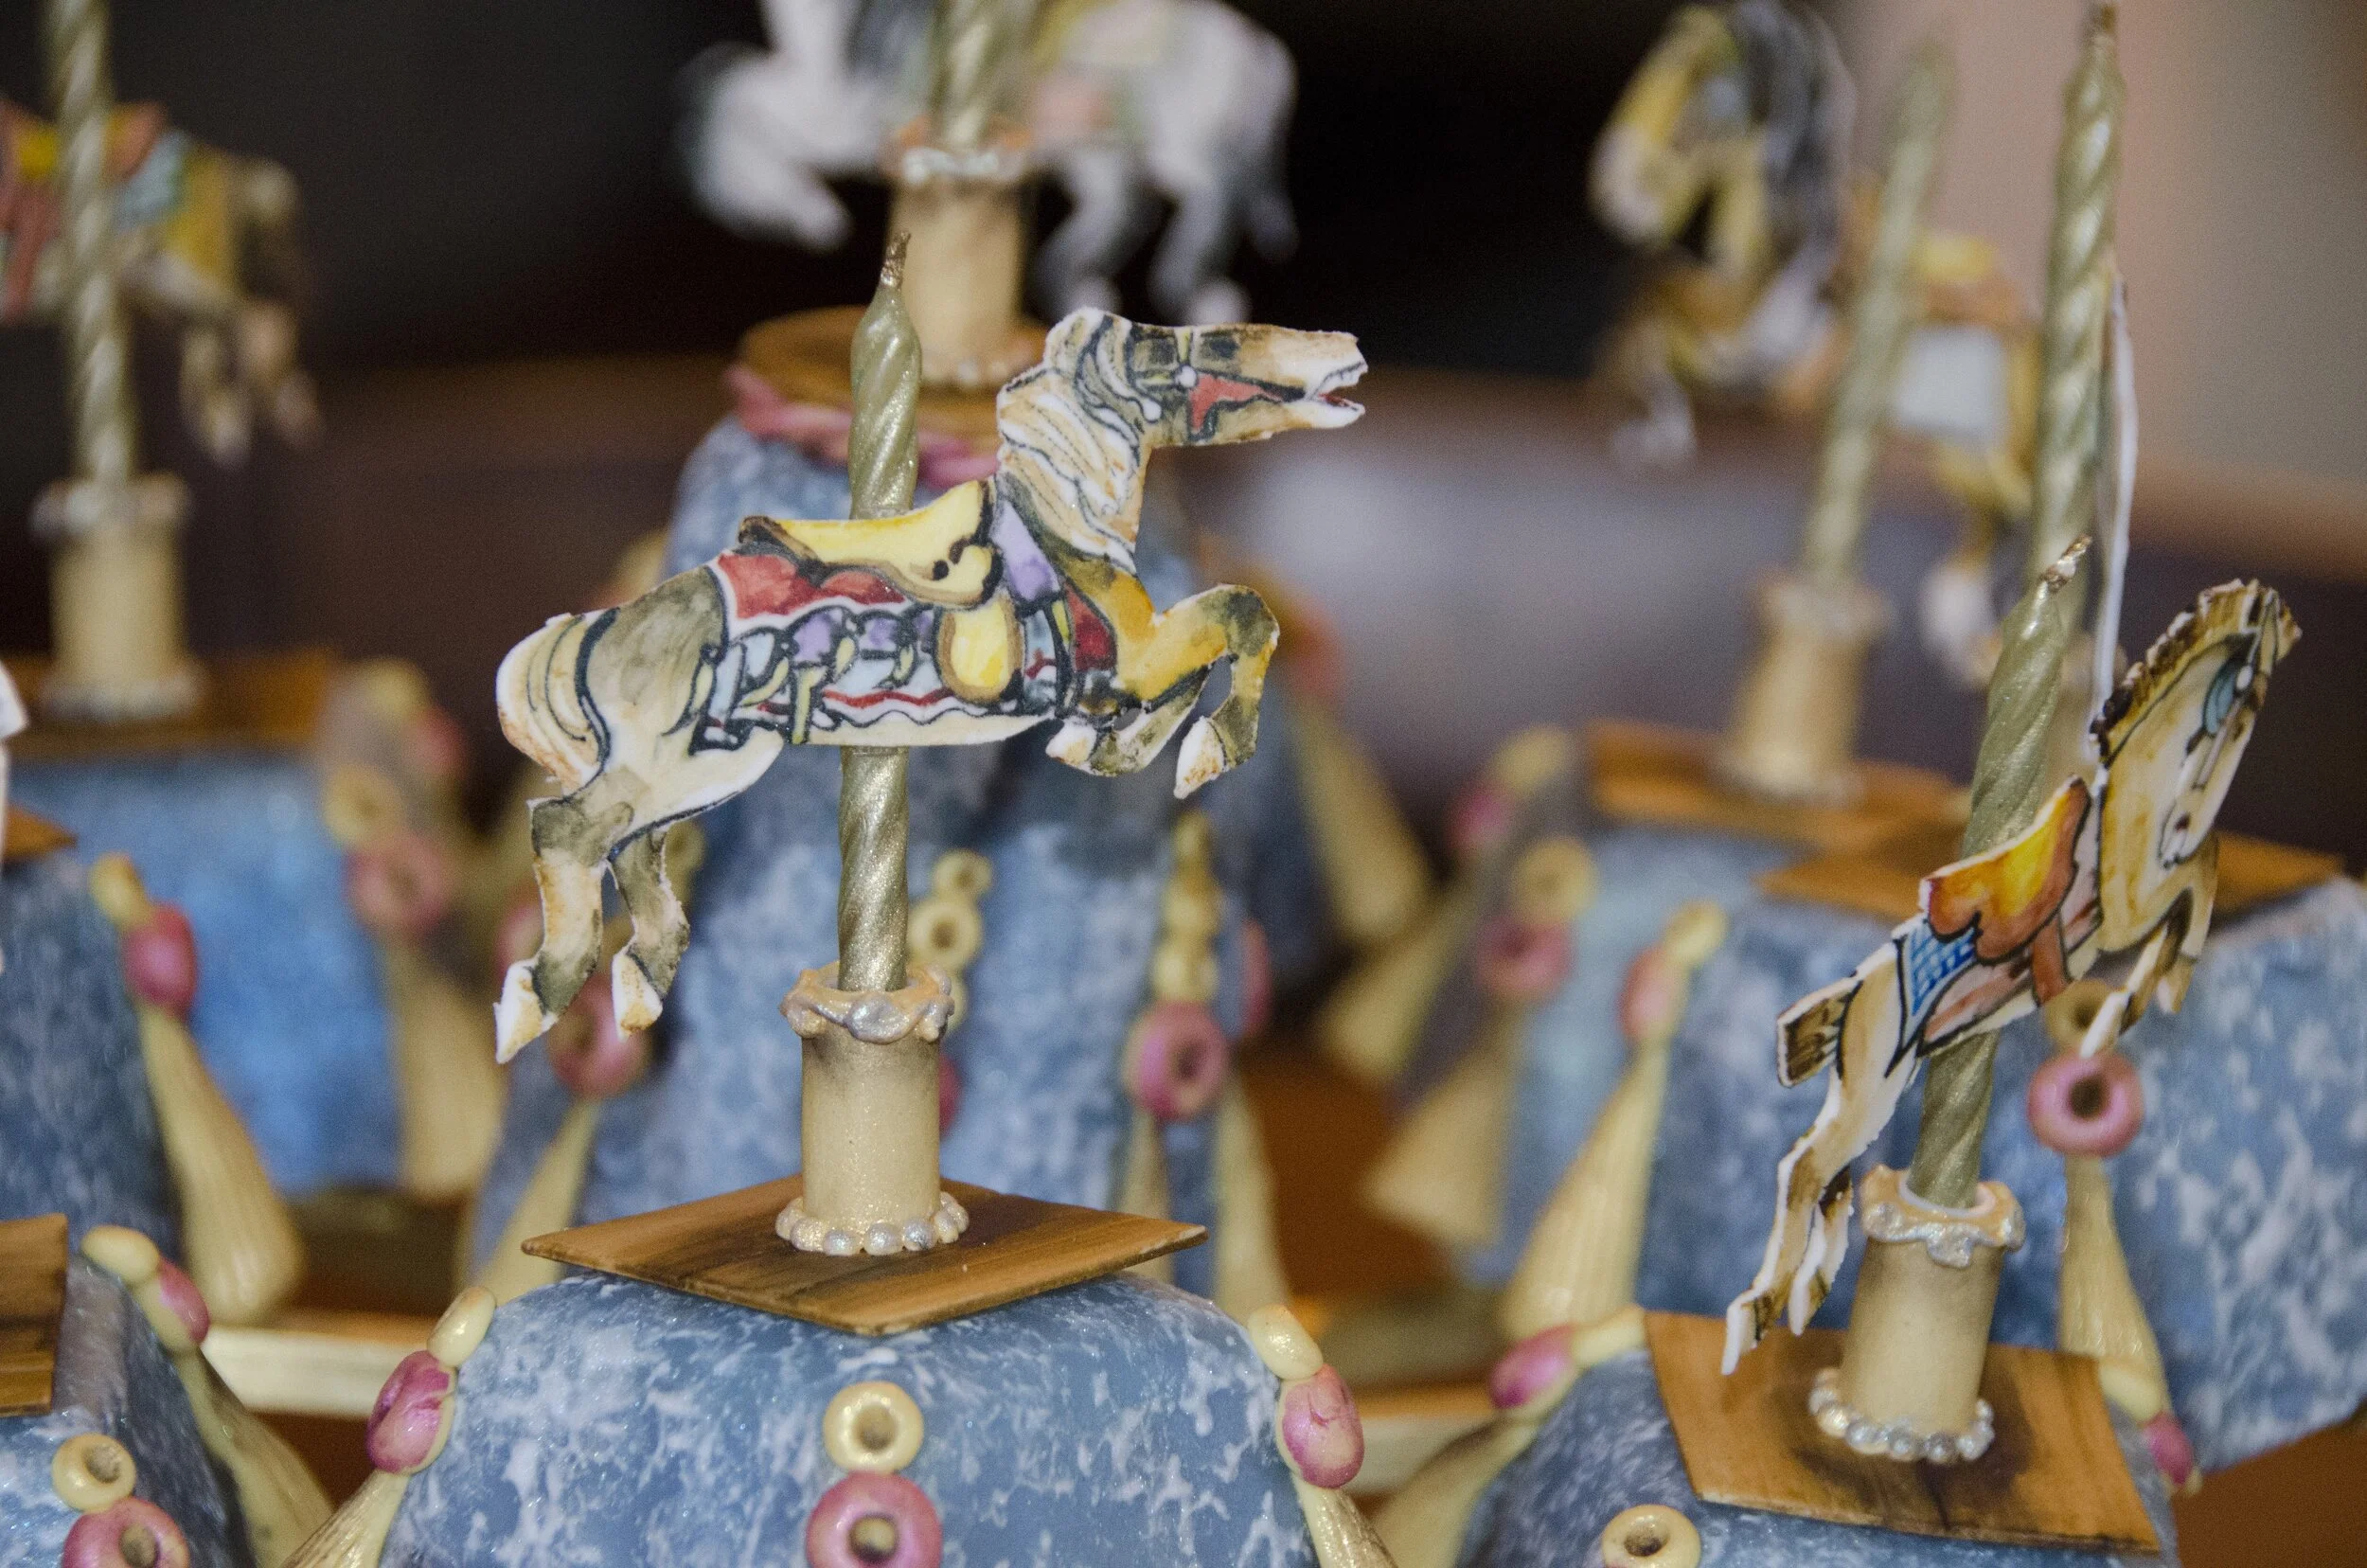
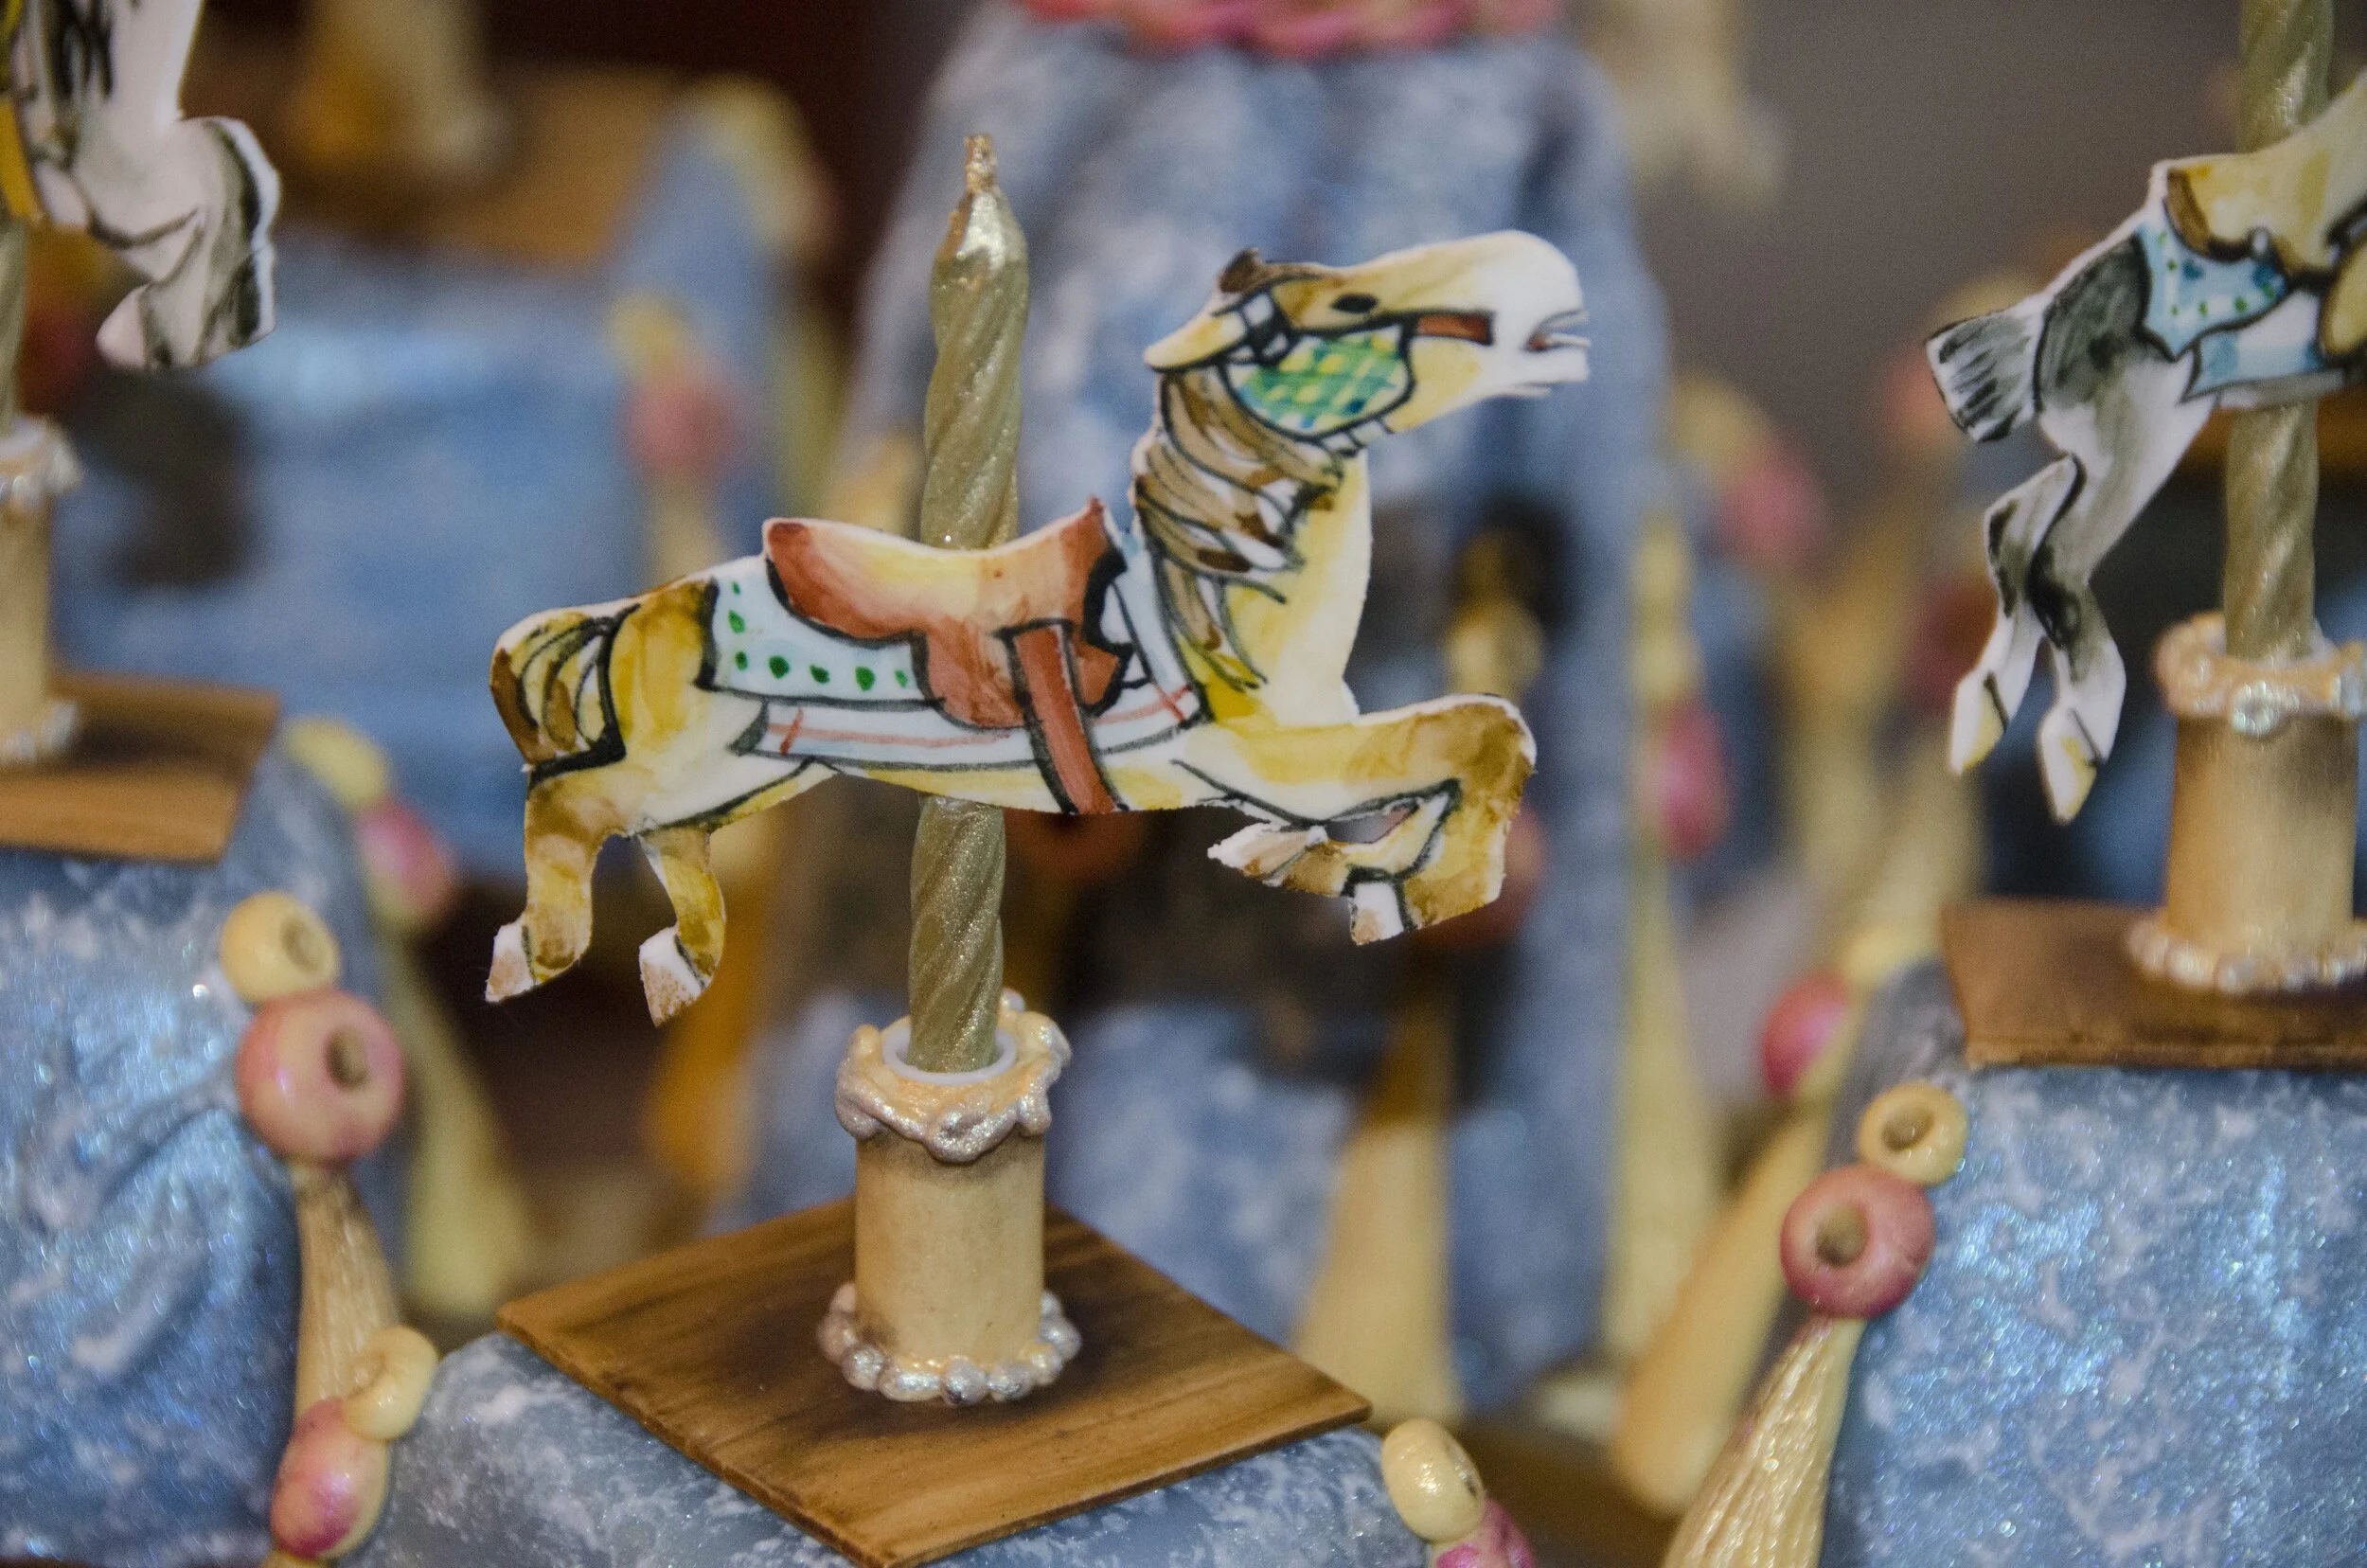
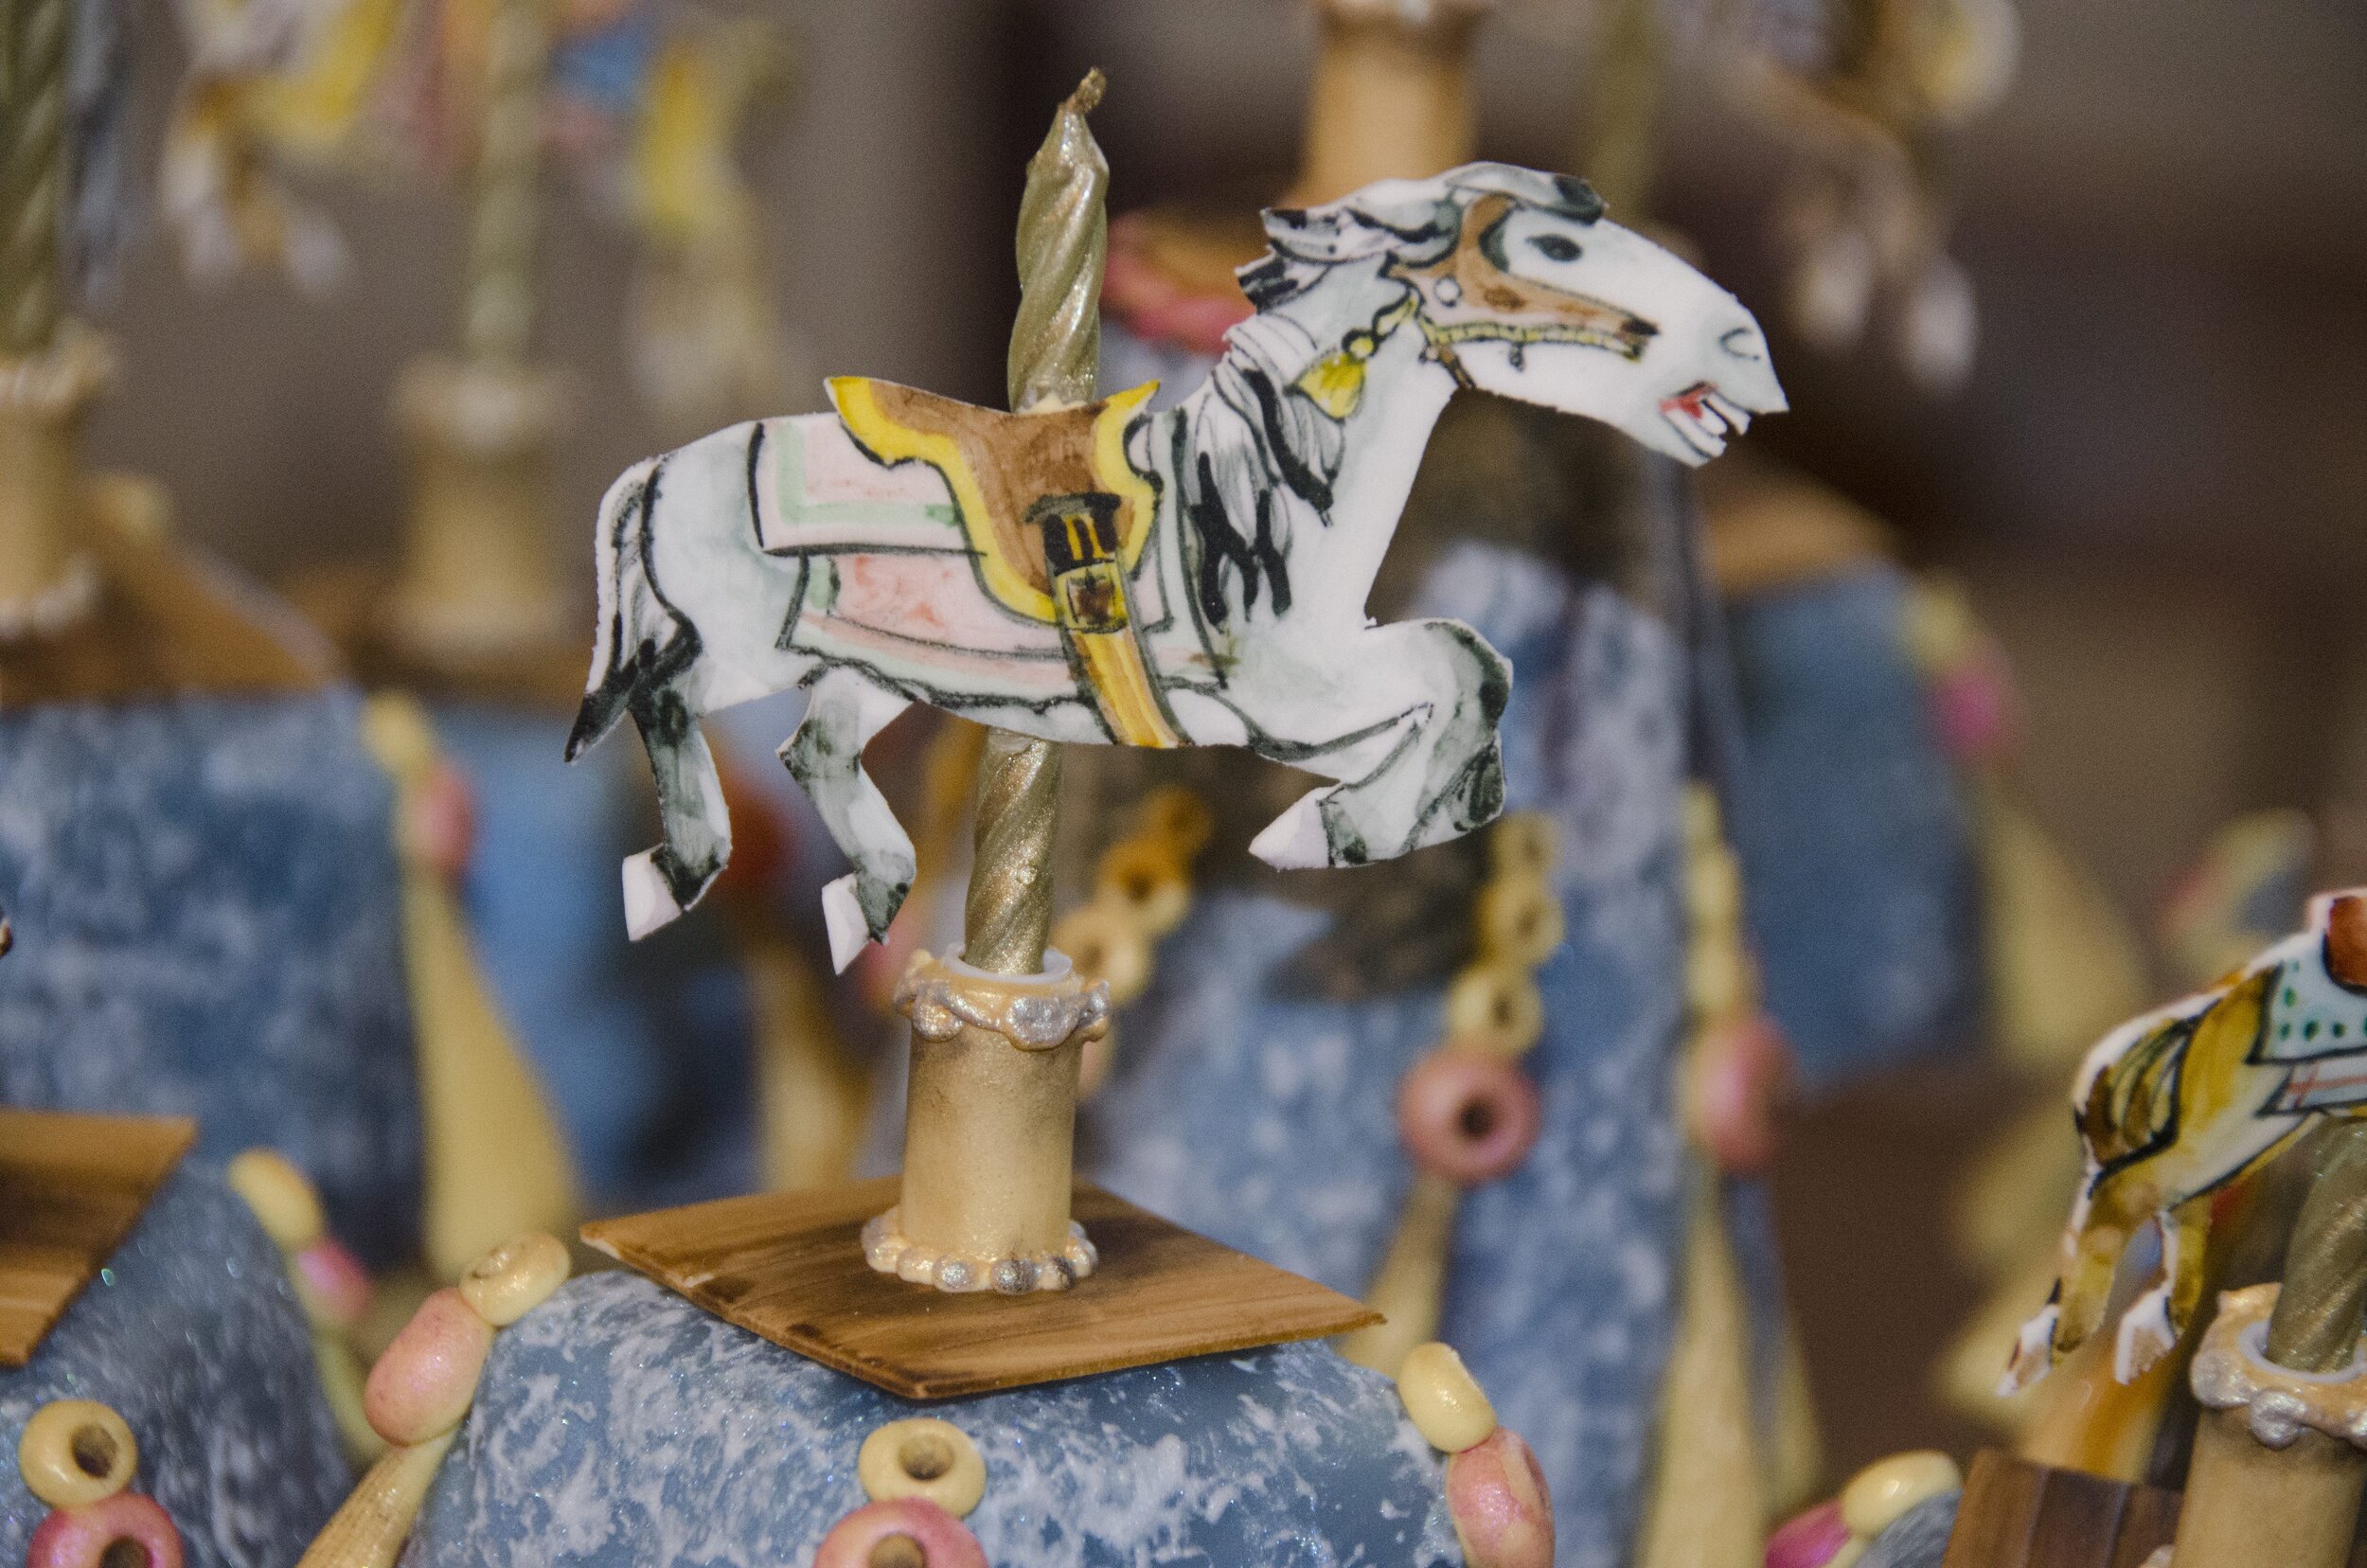
Obviously, it rotated and lit up. The little gum paste horses on the candles are modeled after horses on the real carousel.
Mater and Lightning McQueen Cake
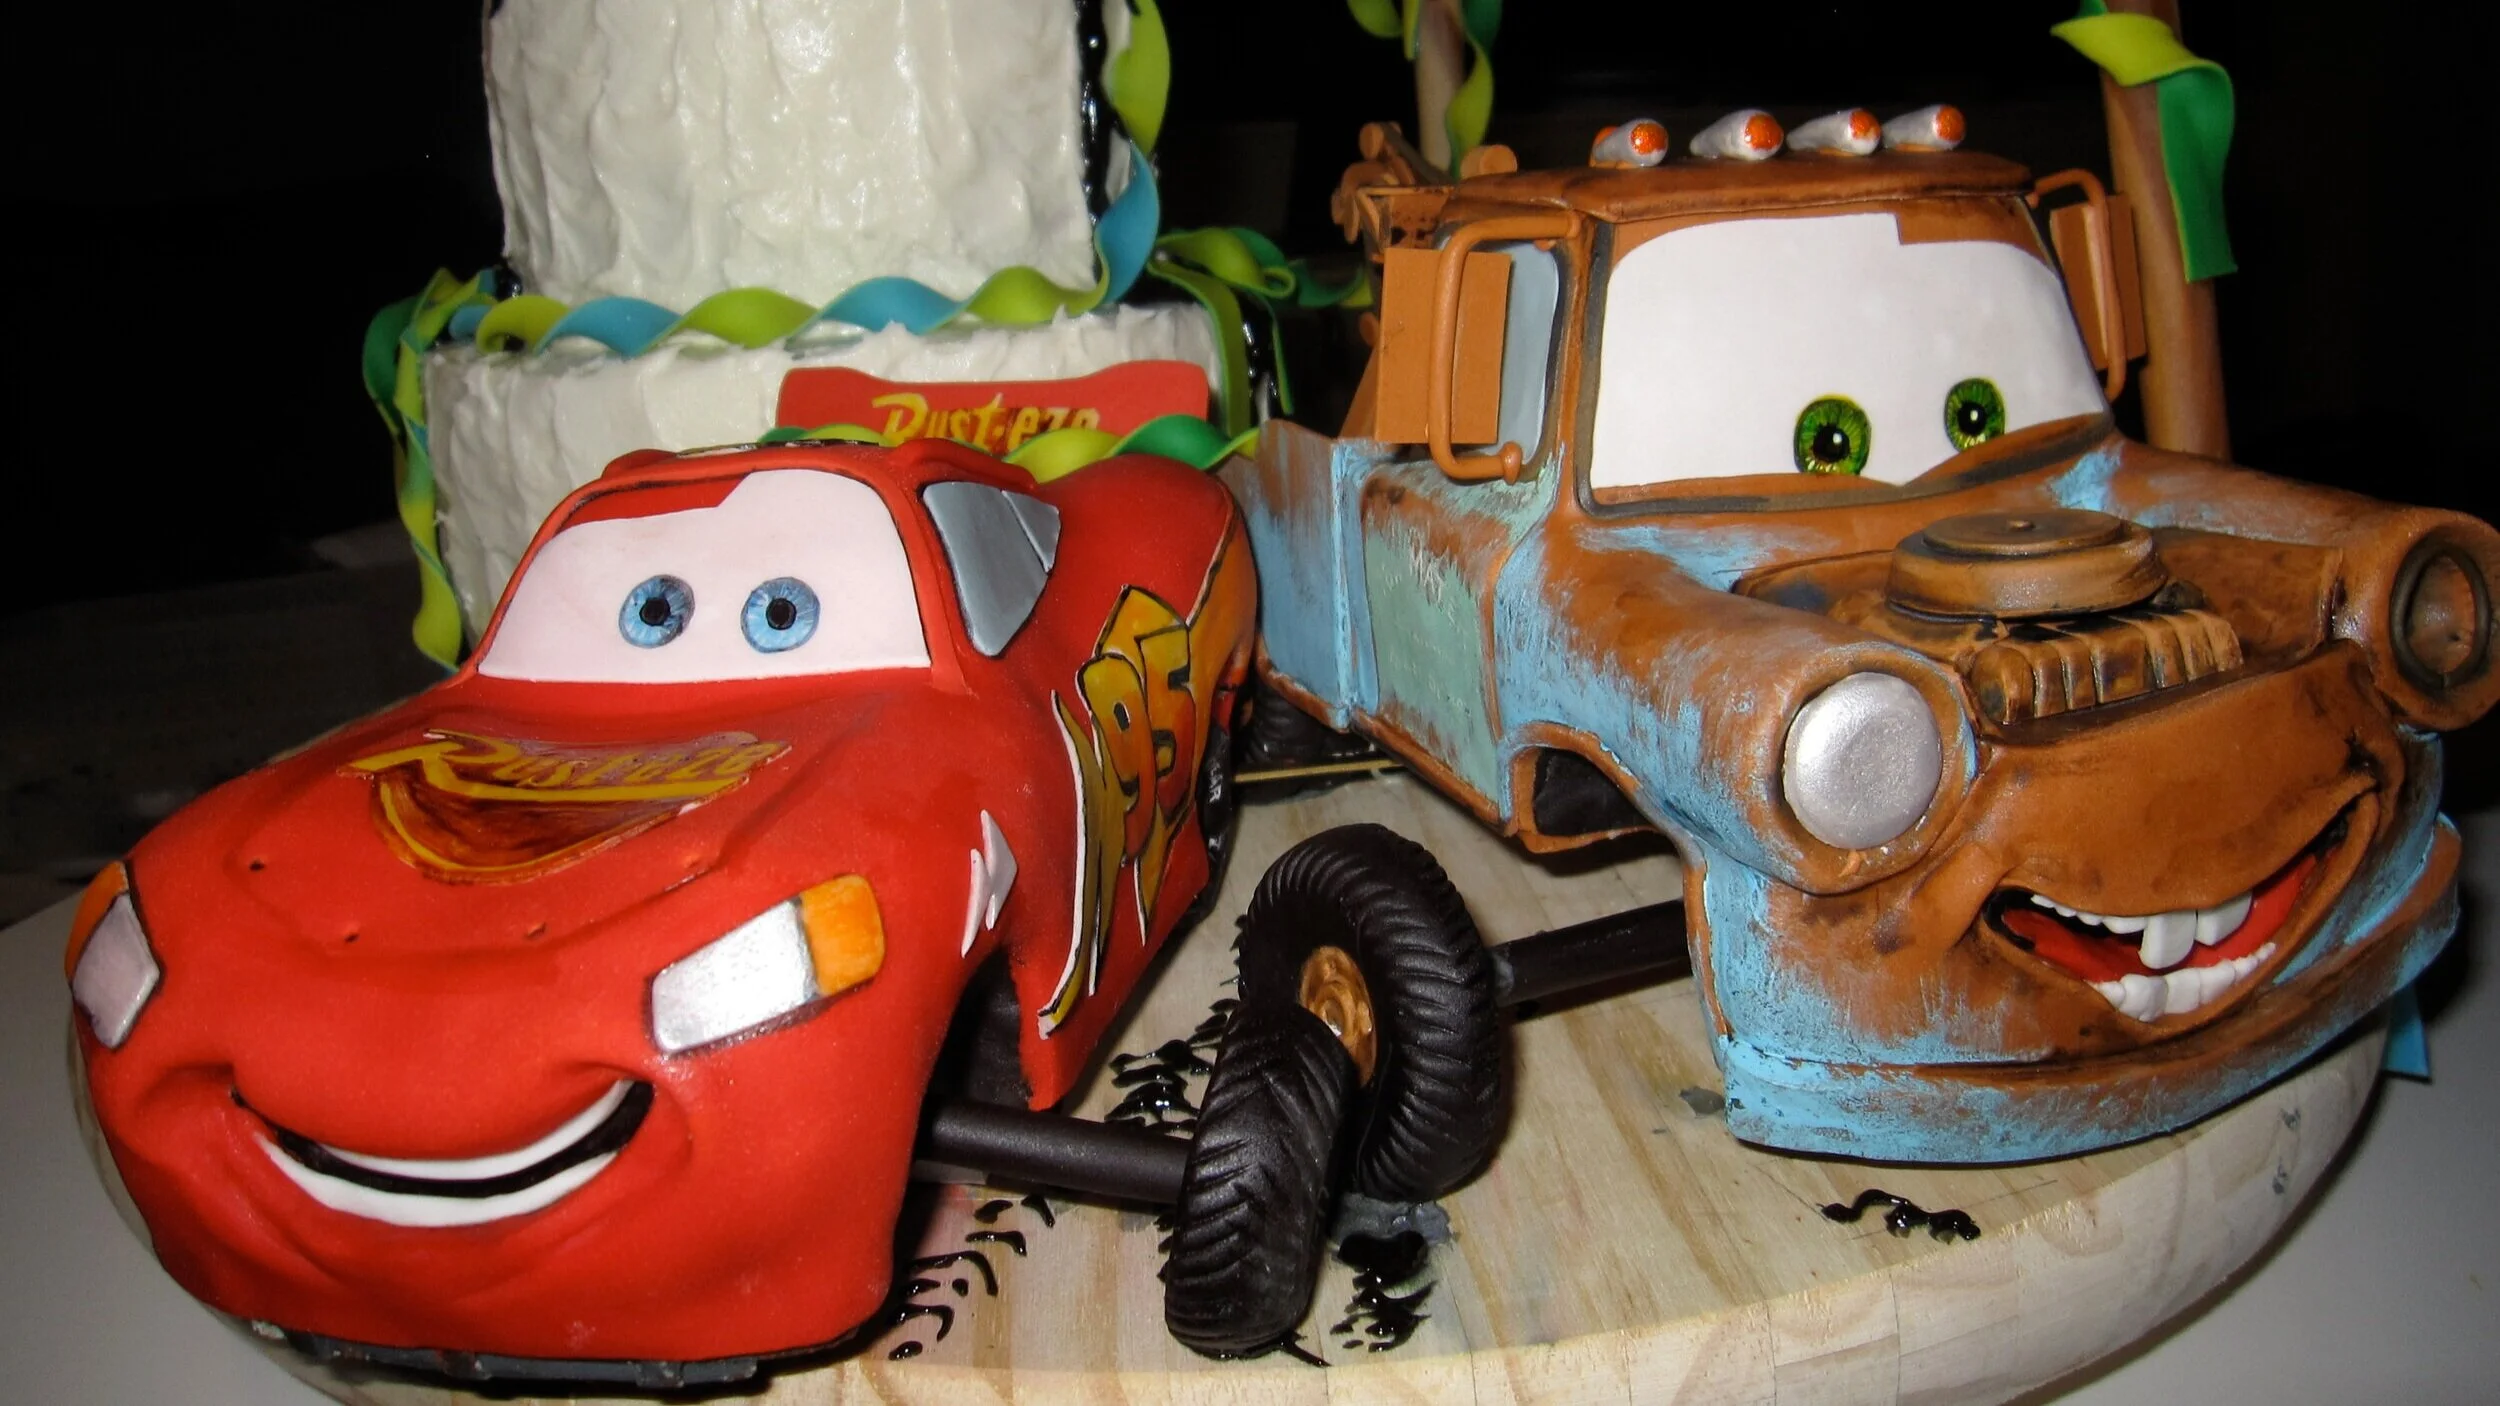
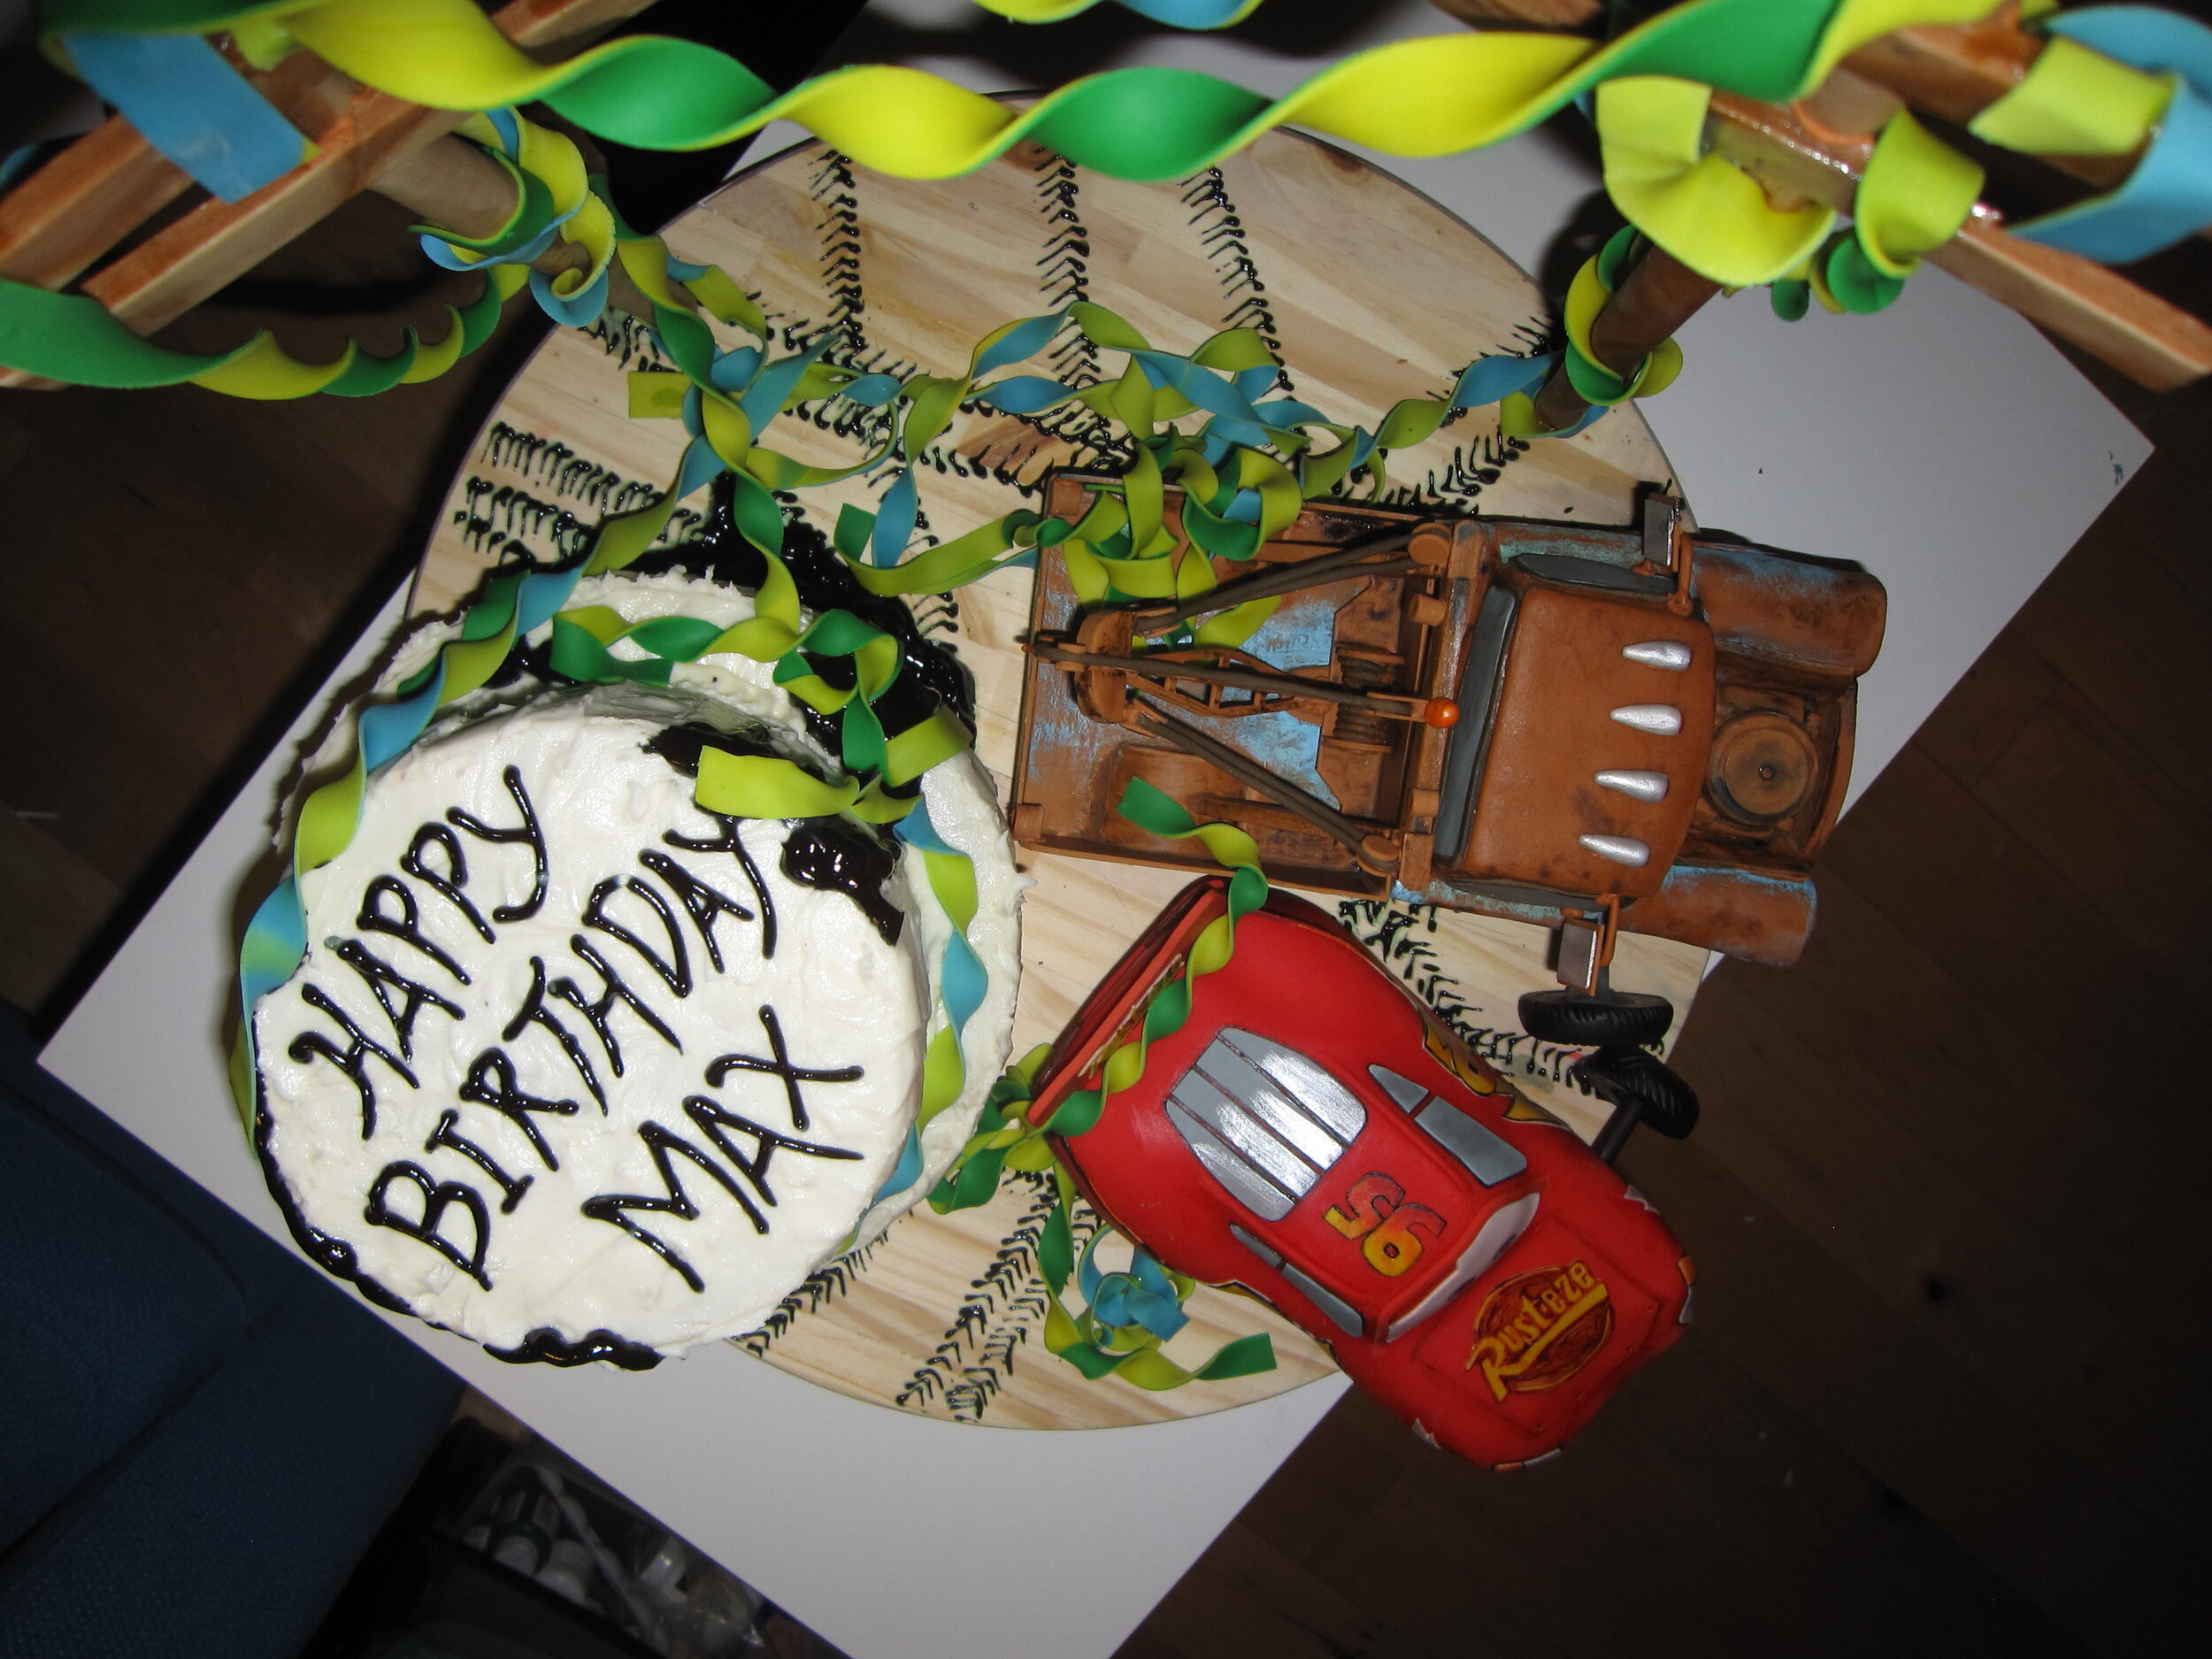
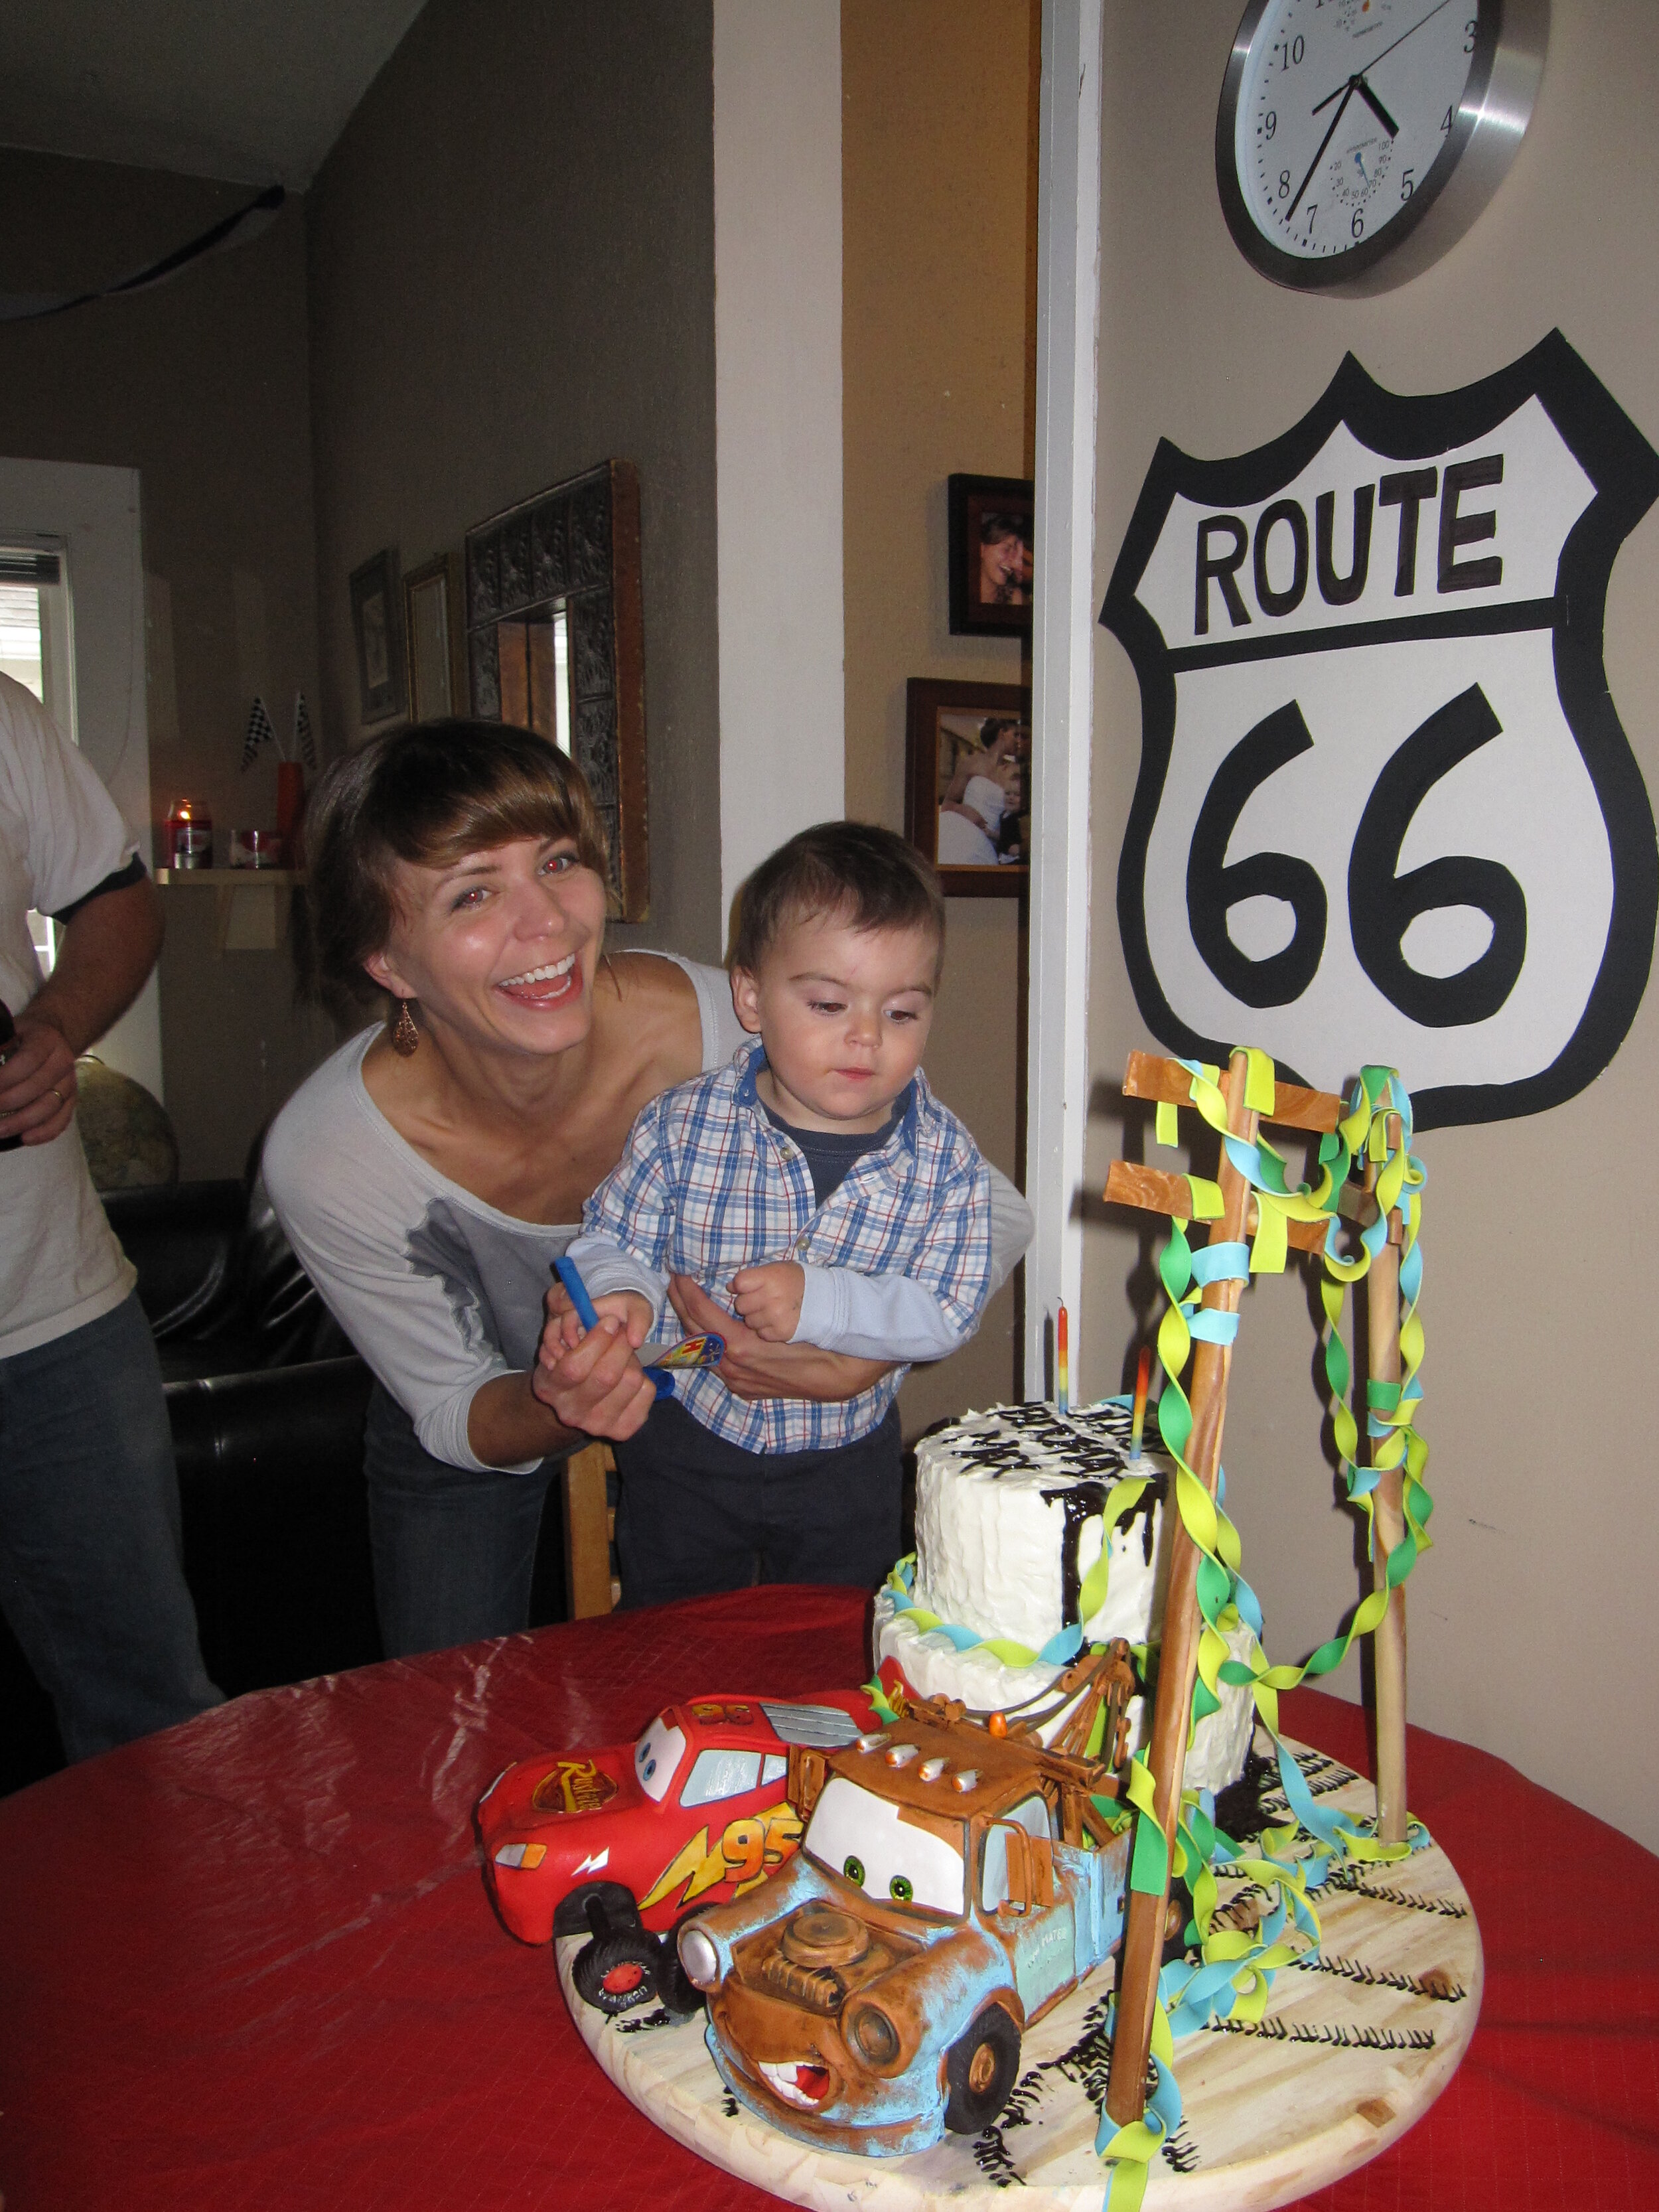
For my little friend Max’s second birthday cake, the only guideline that his parents gave me was that the party was Cars themed. So I asked my five-year-old niece for her expert advice on designing a Cars cake. She suggested that I make Mater and Lighting bumping tires.
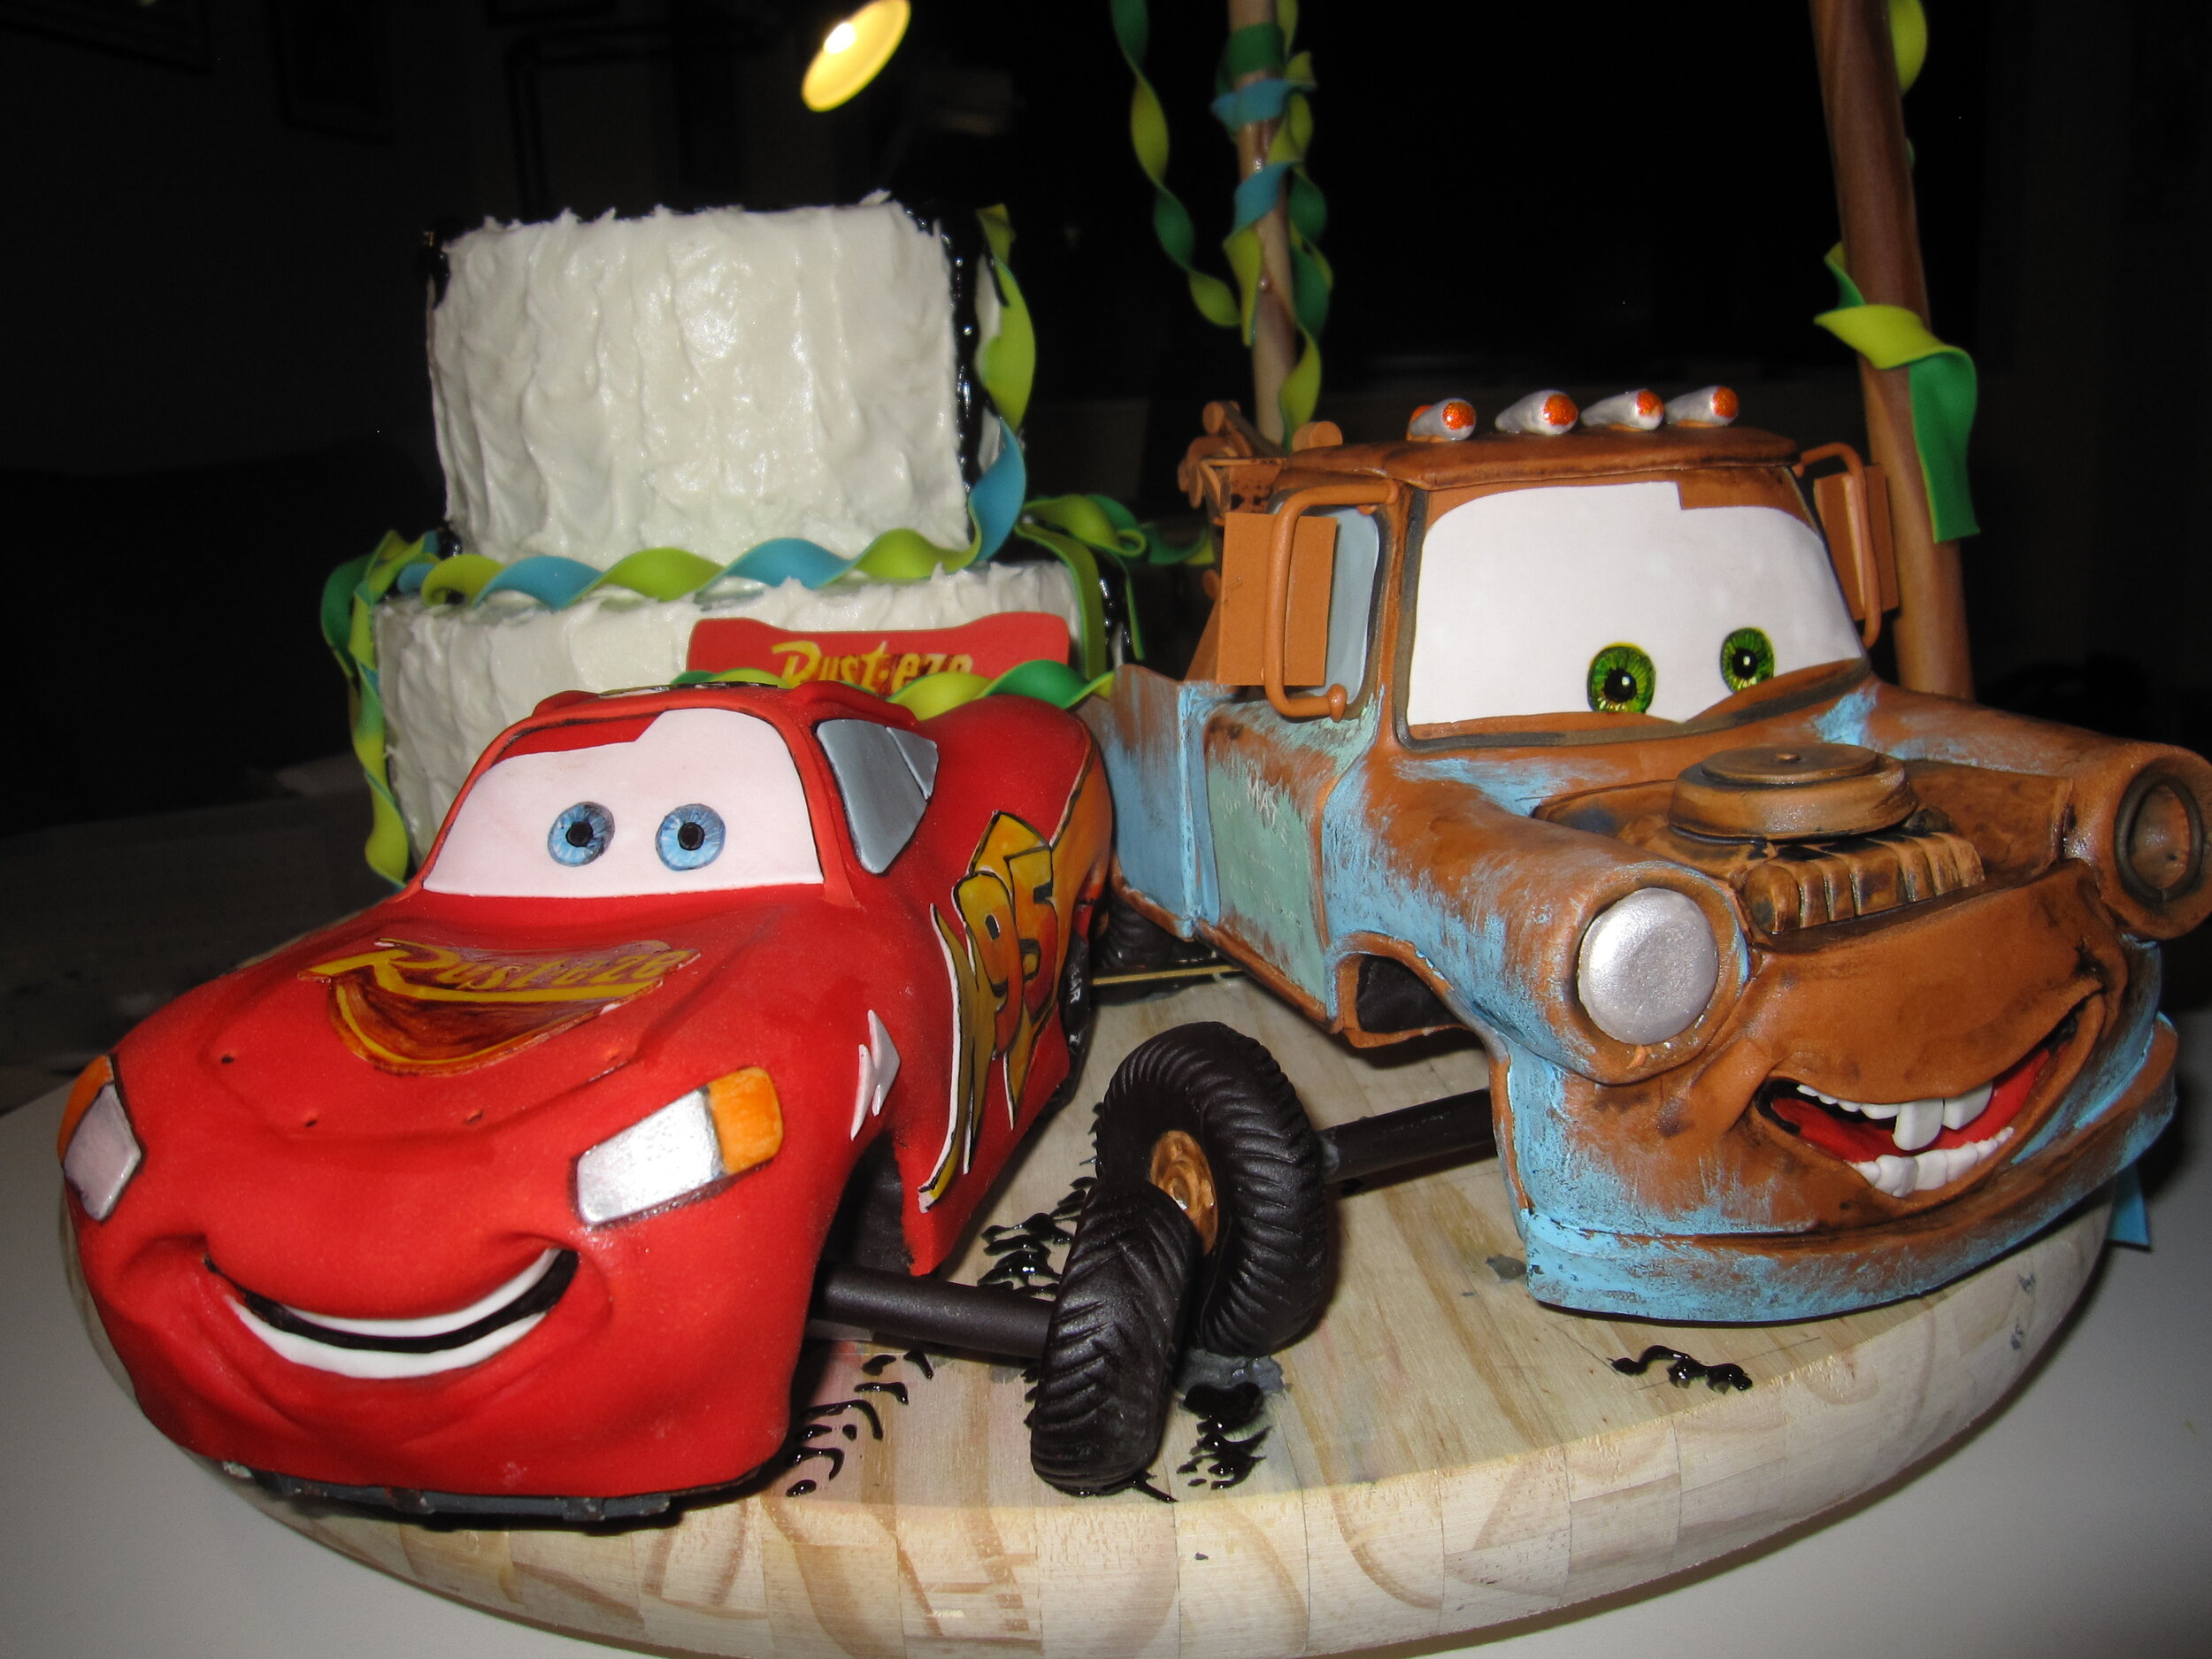
For my little friend Max’s second birthday cake, the only guideline that his parents gave me was that the party was Cars themed. So I asked my five-year-old niece for her expert advice on designing a Cars cake. She suggested that I make Mater and Lighting bumping tires. What she meant by this was the Cars equivalent of the fist-bump. So the idea that I came up with was a scene wherein Lightning and Mater had just made a cake for Max and decorated it with oil (because that would be delicious to a car). Of course, Mater and Lightning probably haven’t had much experience with making cakes and decorating for parties, so they’ve made a bit of a mess of things, with oil spills and torn streamers. My plan was to have Lightning hanging from birthday streamers wrapped around telephone poles, as if he’d gotten himself tangled while hanging them. This was, of course, meant to be reminiscent of the scene in Cars where Lightning gets tangled in the telephone wires. In the end, this didn’t work out, but I still think the cake overall was a success (and that, next time, I could make the hanging effect actually work).
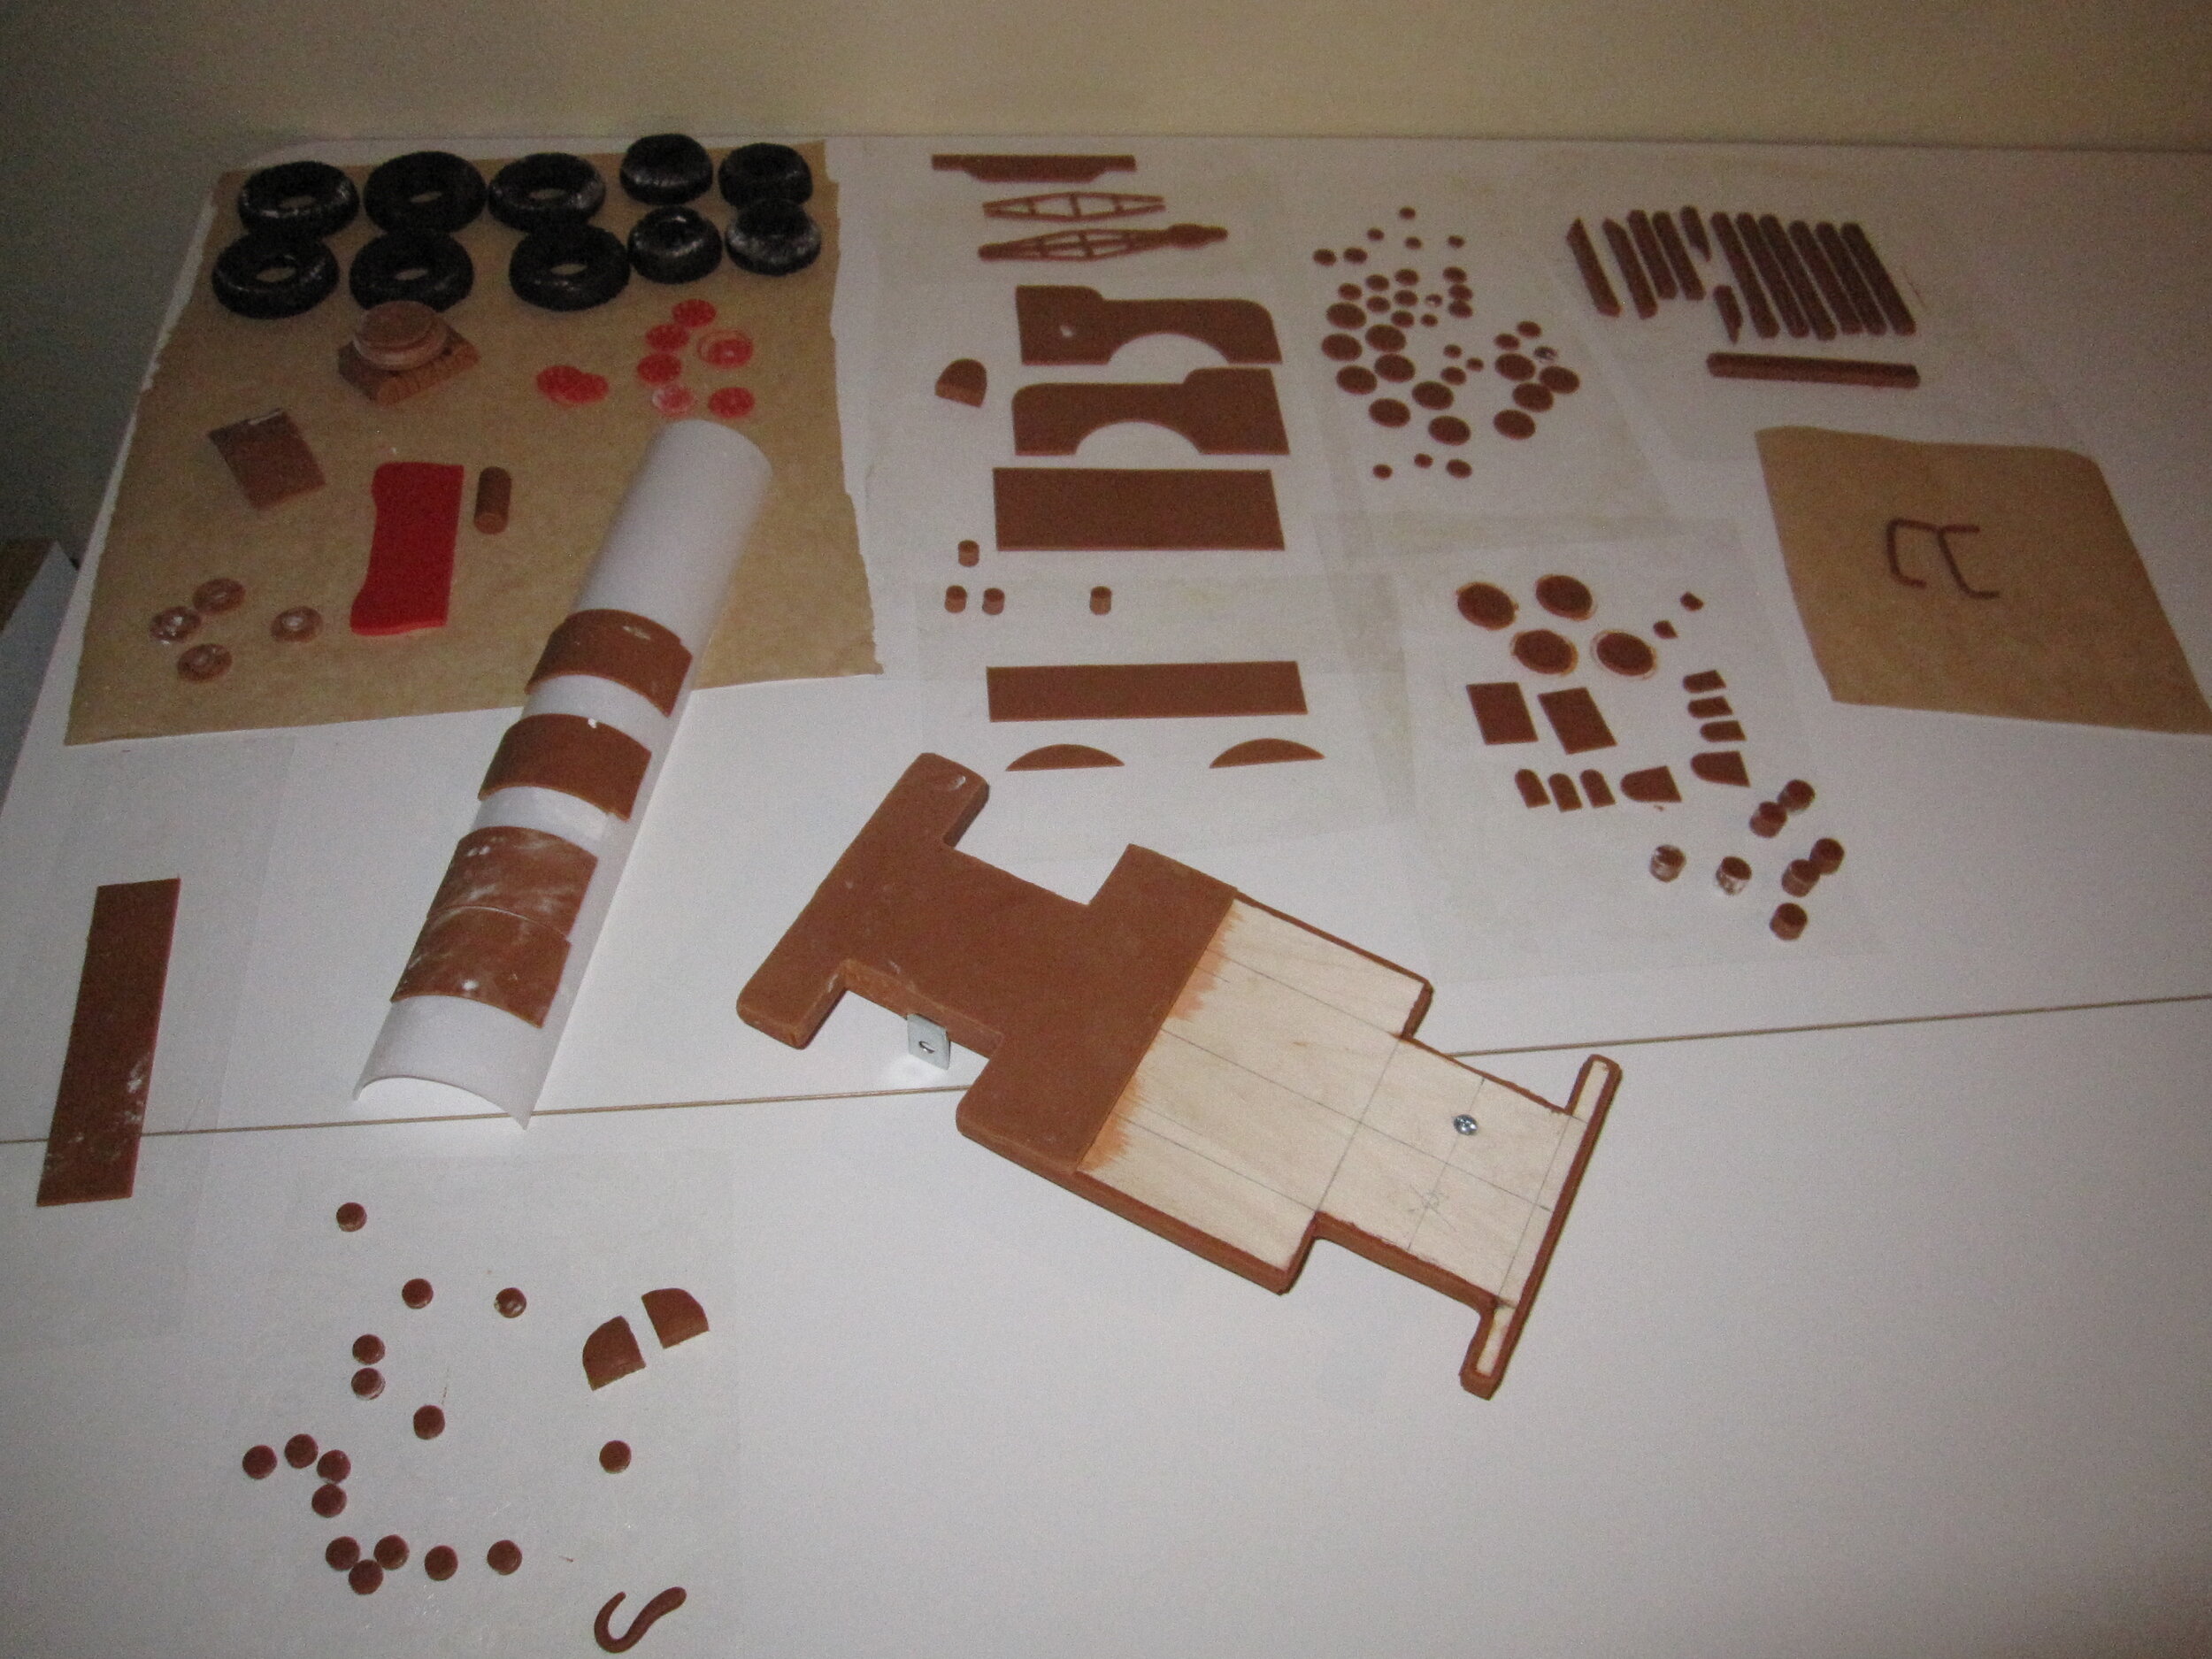
As with many of my cakes, I made a lot of gum paste pieces in advance, especially for Mater’s bed and tow hook. And, of course, I made fondant tires, which are coming to be quite a specialty of mine. I was especially pleased with Lightning’s tires, once I painted “Lightyear” on them.
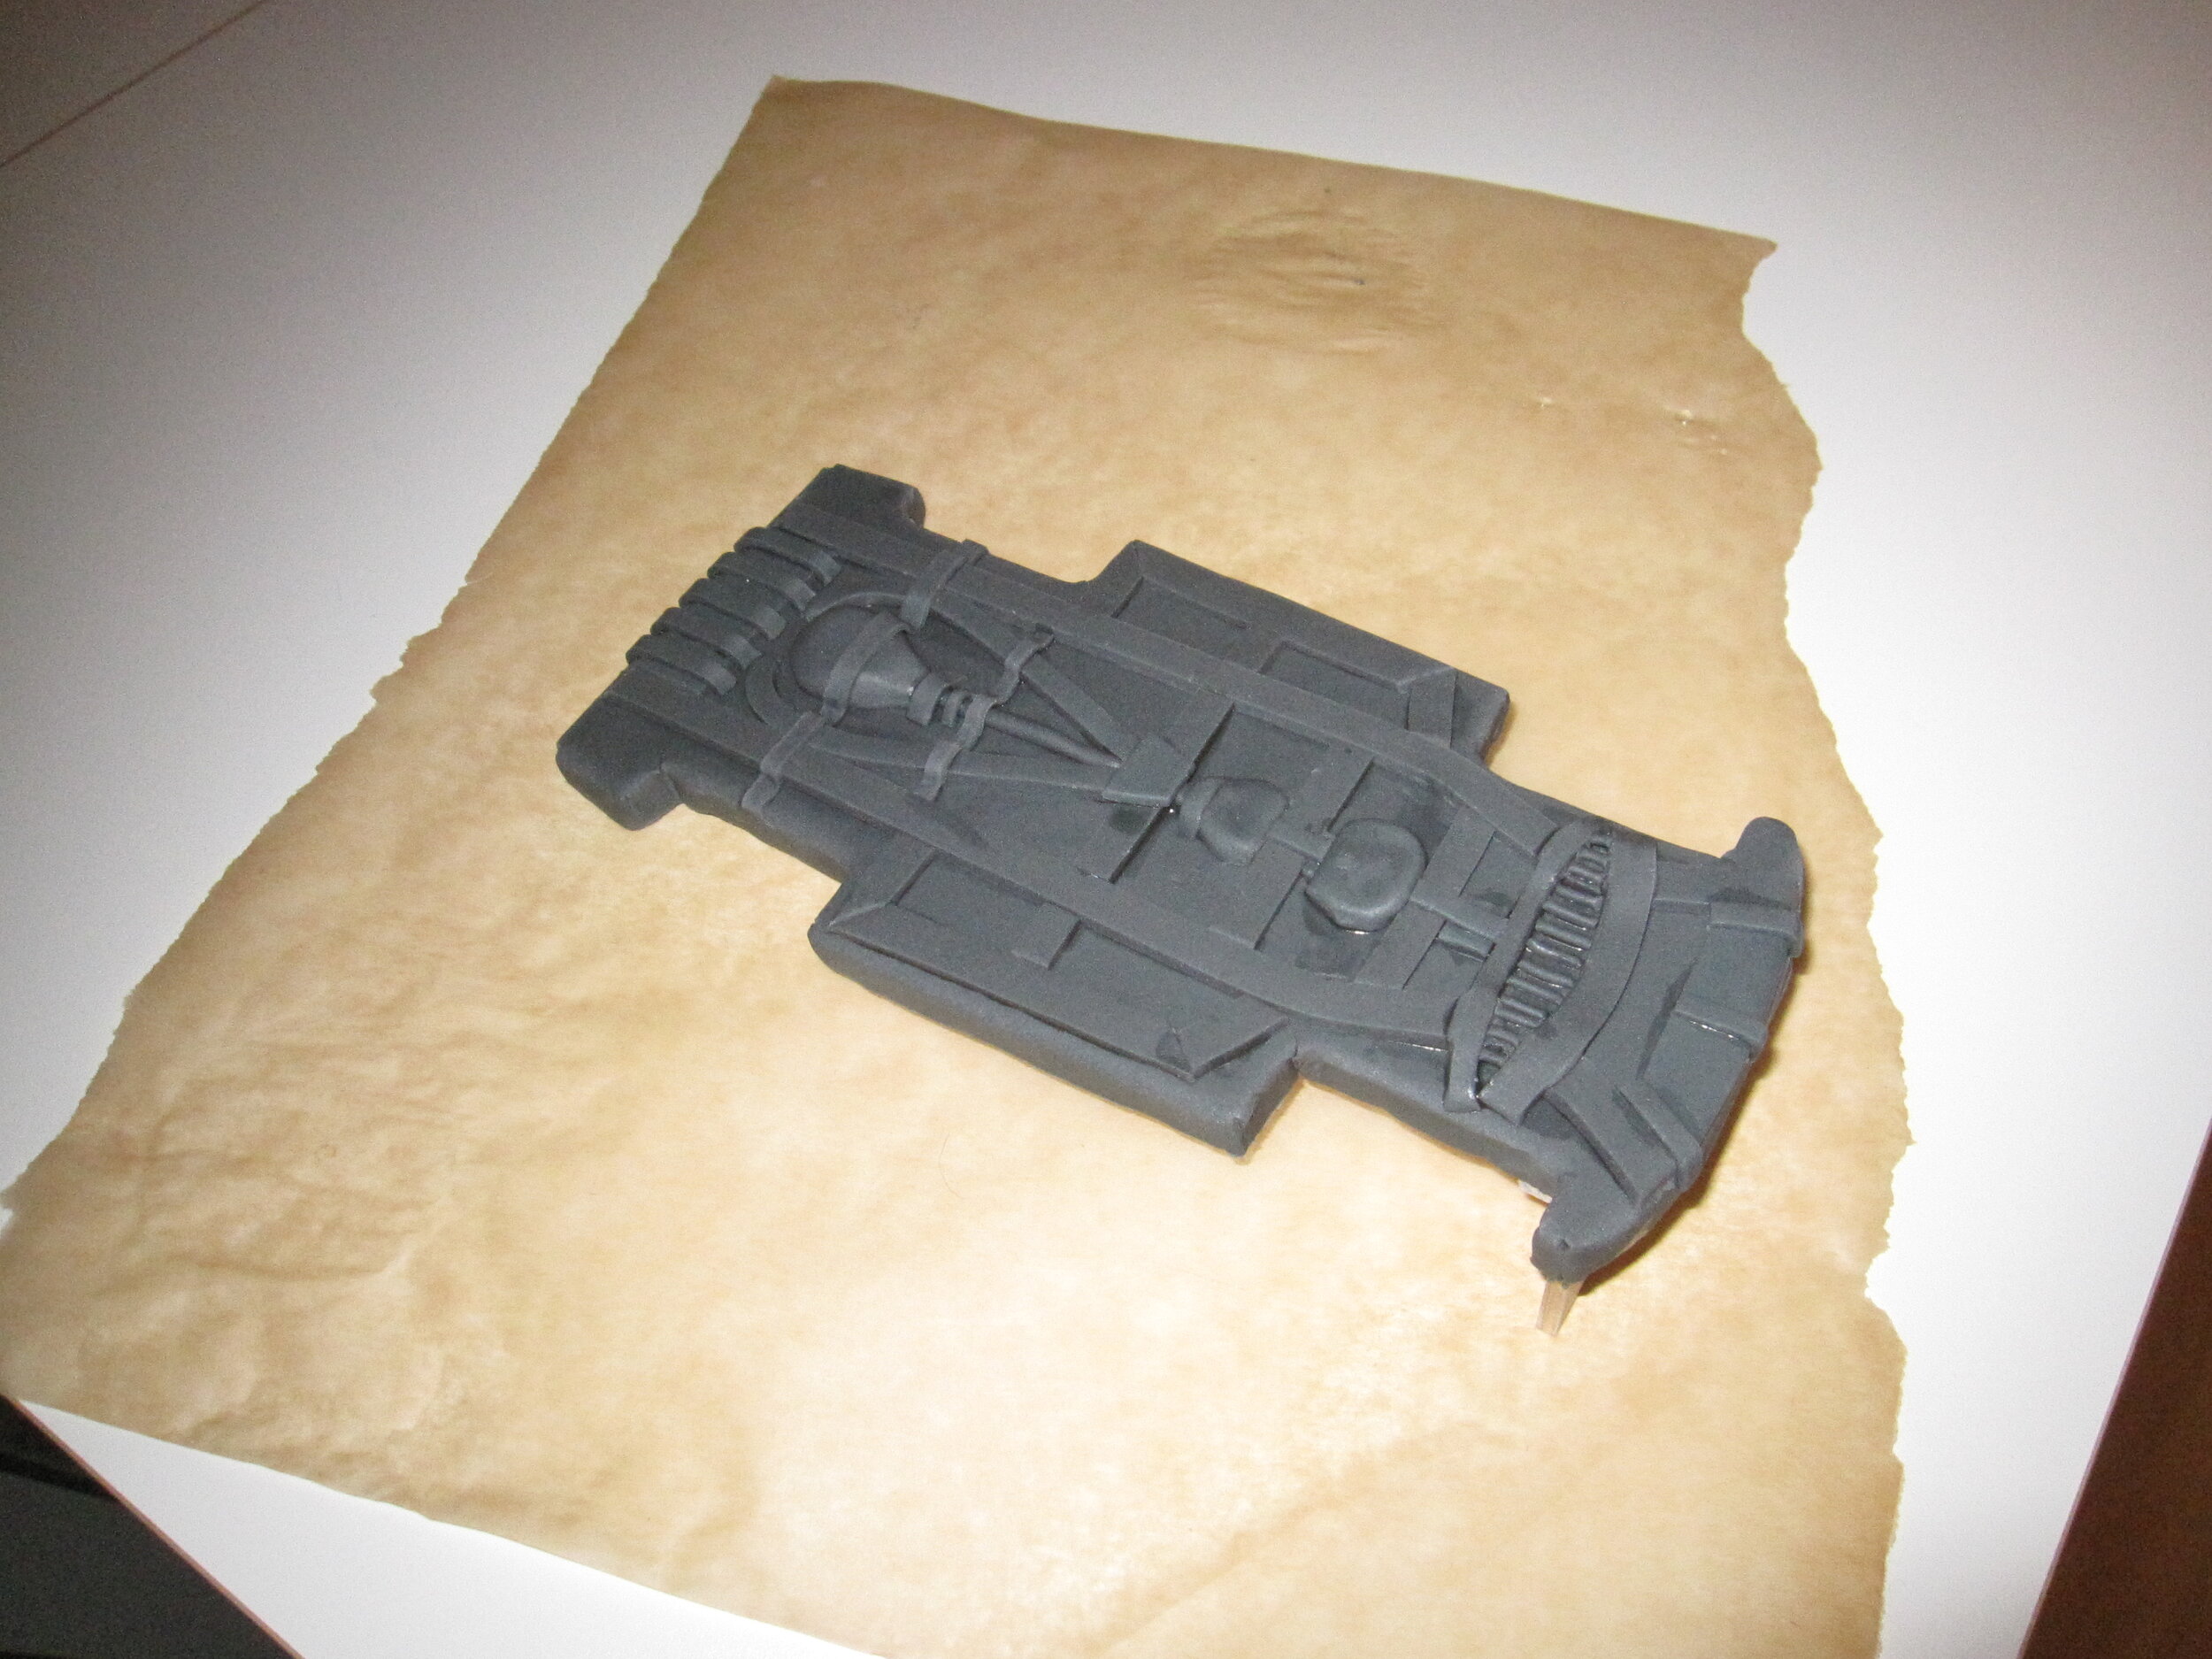
I made the telephone poles out of aluminum rod covered with fondant and I made a wooden base for Lightning with brass strips bolted to it, with which I planned to hang Lightning from the telephone poles. This meant that I had to make Lightning’s entire undercarriage, since it would all be visible. I’m not sure whether Lightning’s undercarriage is ever visible in the movie, but I found a Lightning toy that had a fairly detailed undercarriage for me to copy.
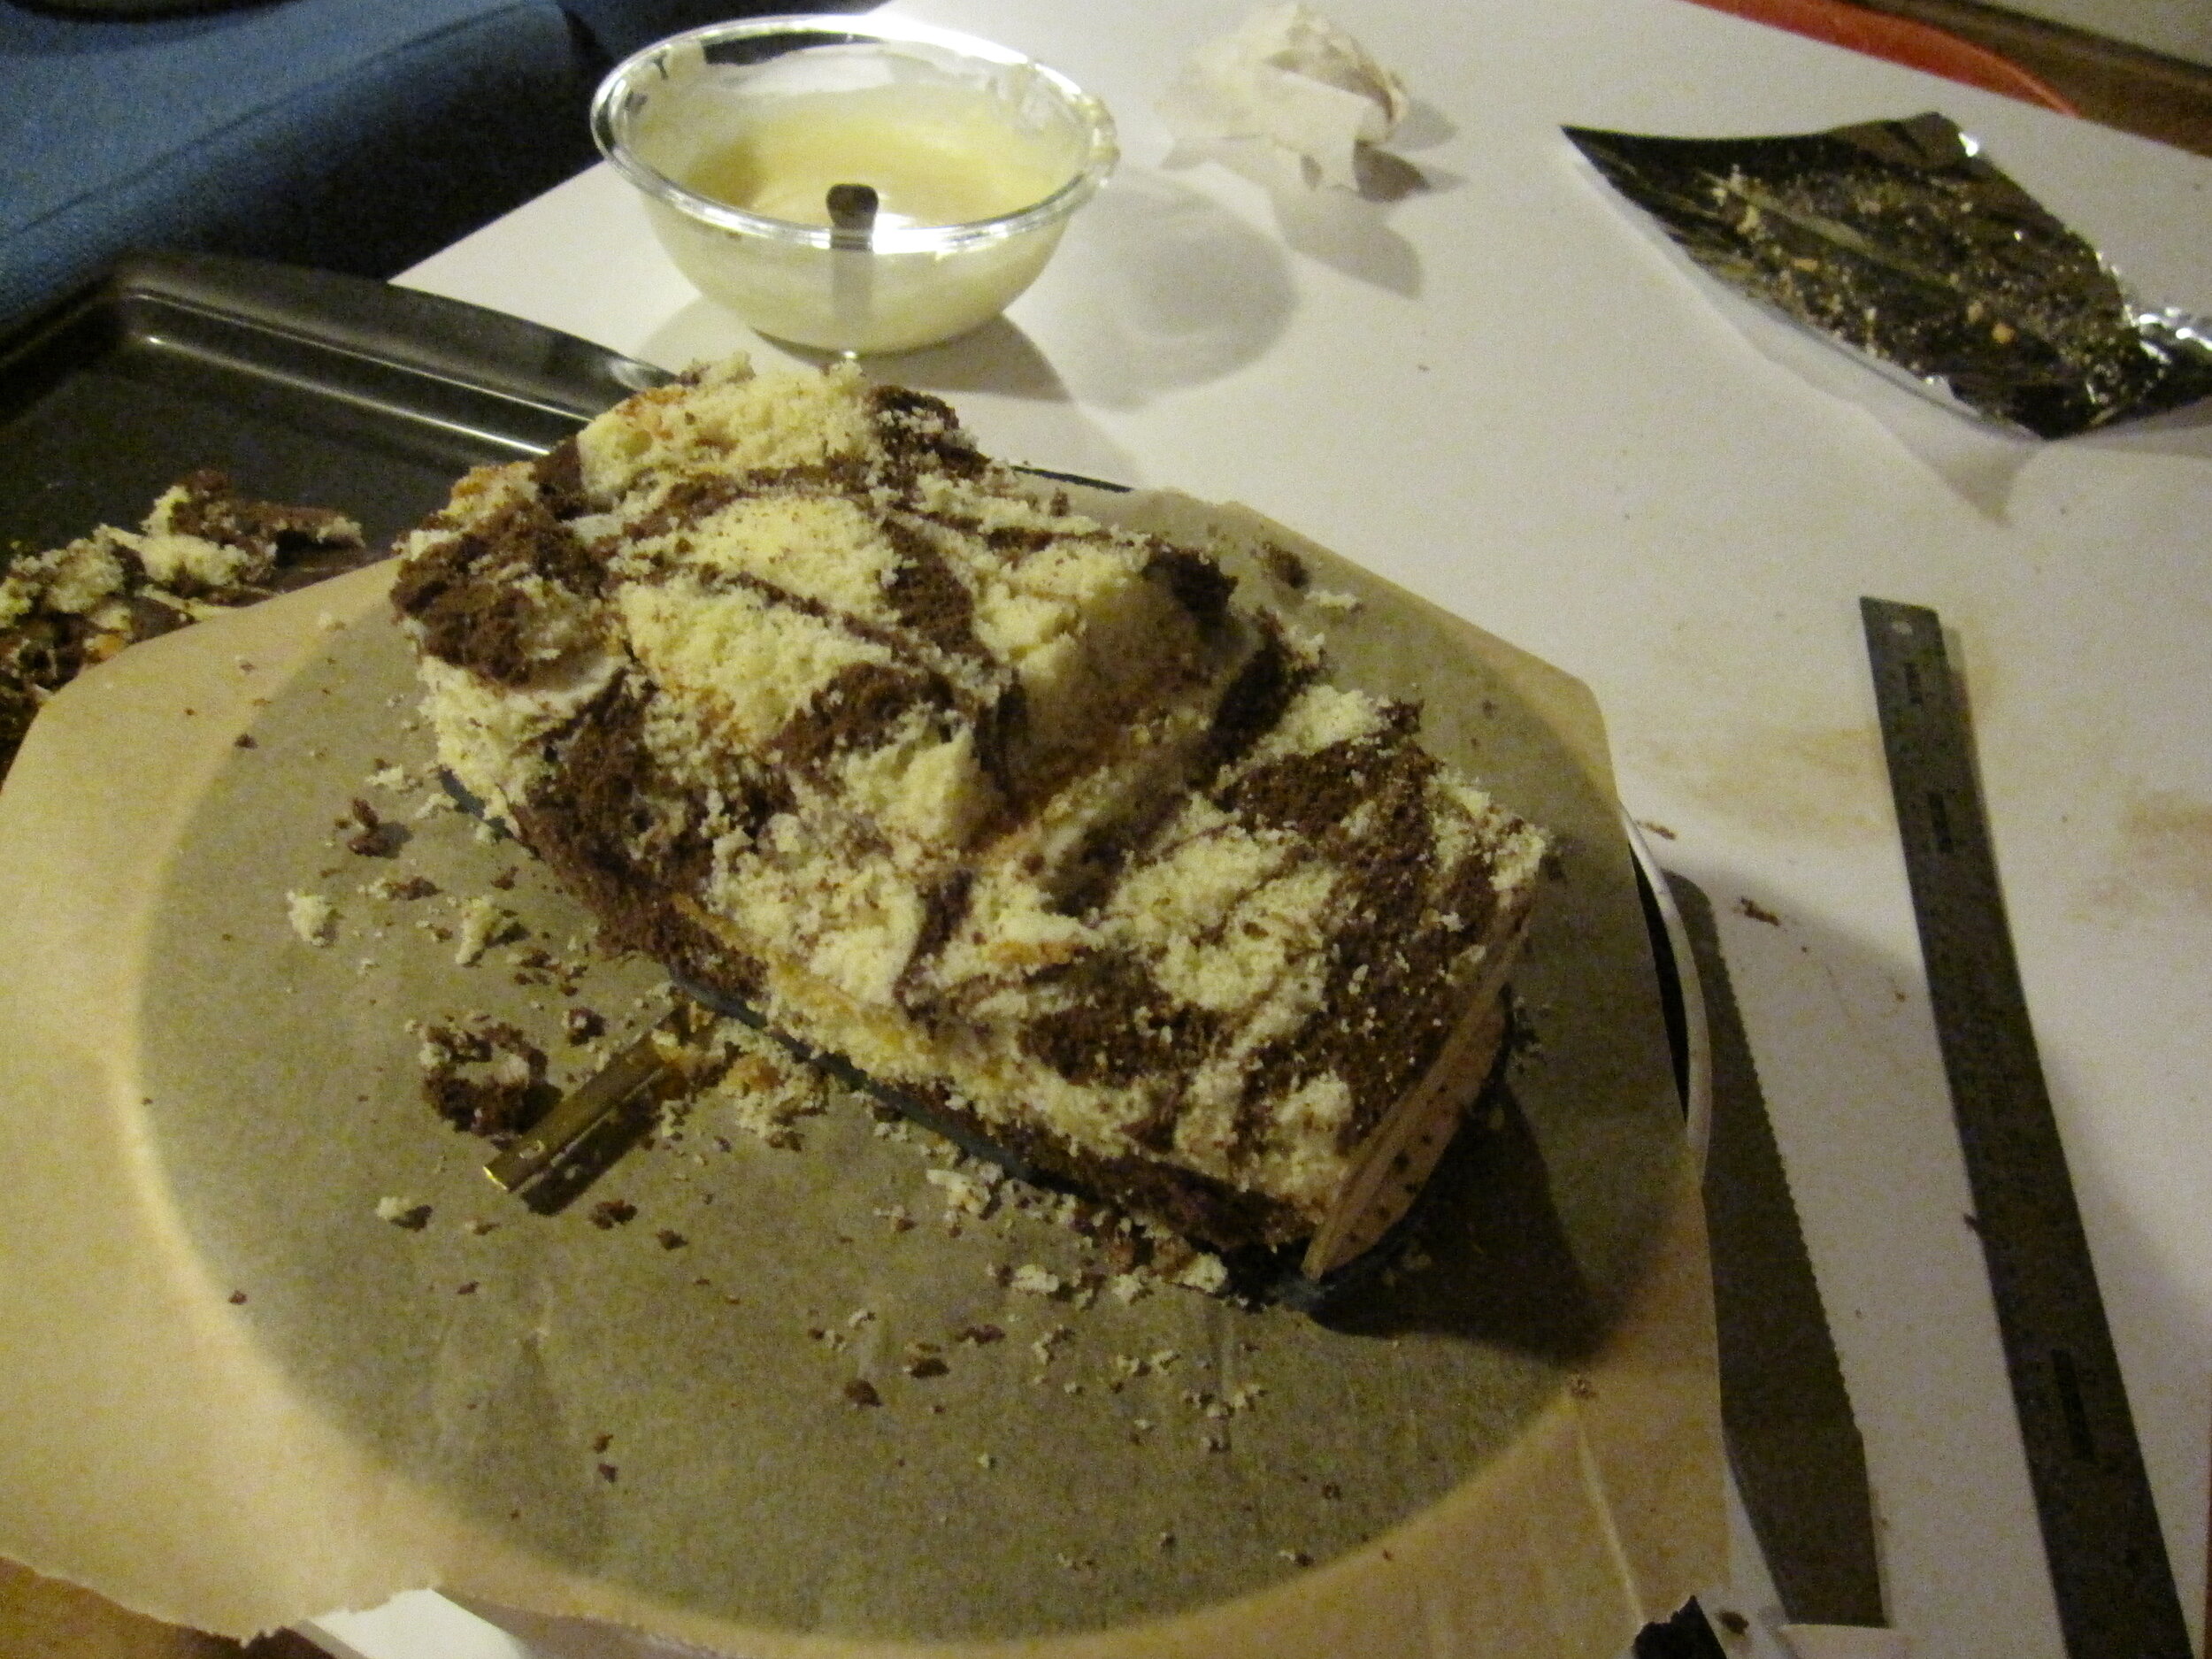
With the advance work done, it was time to make the cake. I tried a new marble cake recipe because Max’s mother told me that she likes marble cake. I think it was a tasty recipe, but, oddly, it was a little more challenging than a monochromatic cake to carve. The two colors made the shape of the cake a little harder to perceive as I was working on it.
The little birthday cake was pretty easy, even though I actually don’t do very many simple stacked cakes because they don’t generally interest me. I did a simple buttercream icing on it, and textured it a bit with a spatula. I was striving for that fine line between making the cake look like Lightning and Mater didn’t have much experience making cakes and making the cake look like I didn’t have much experience making cakes. I think I walked the line relatively successfully.
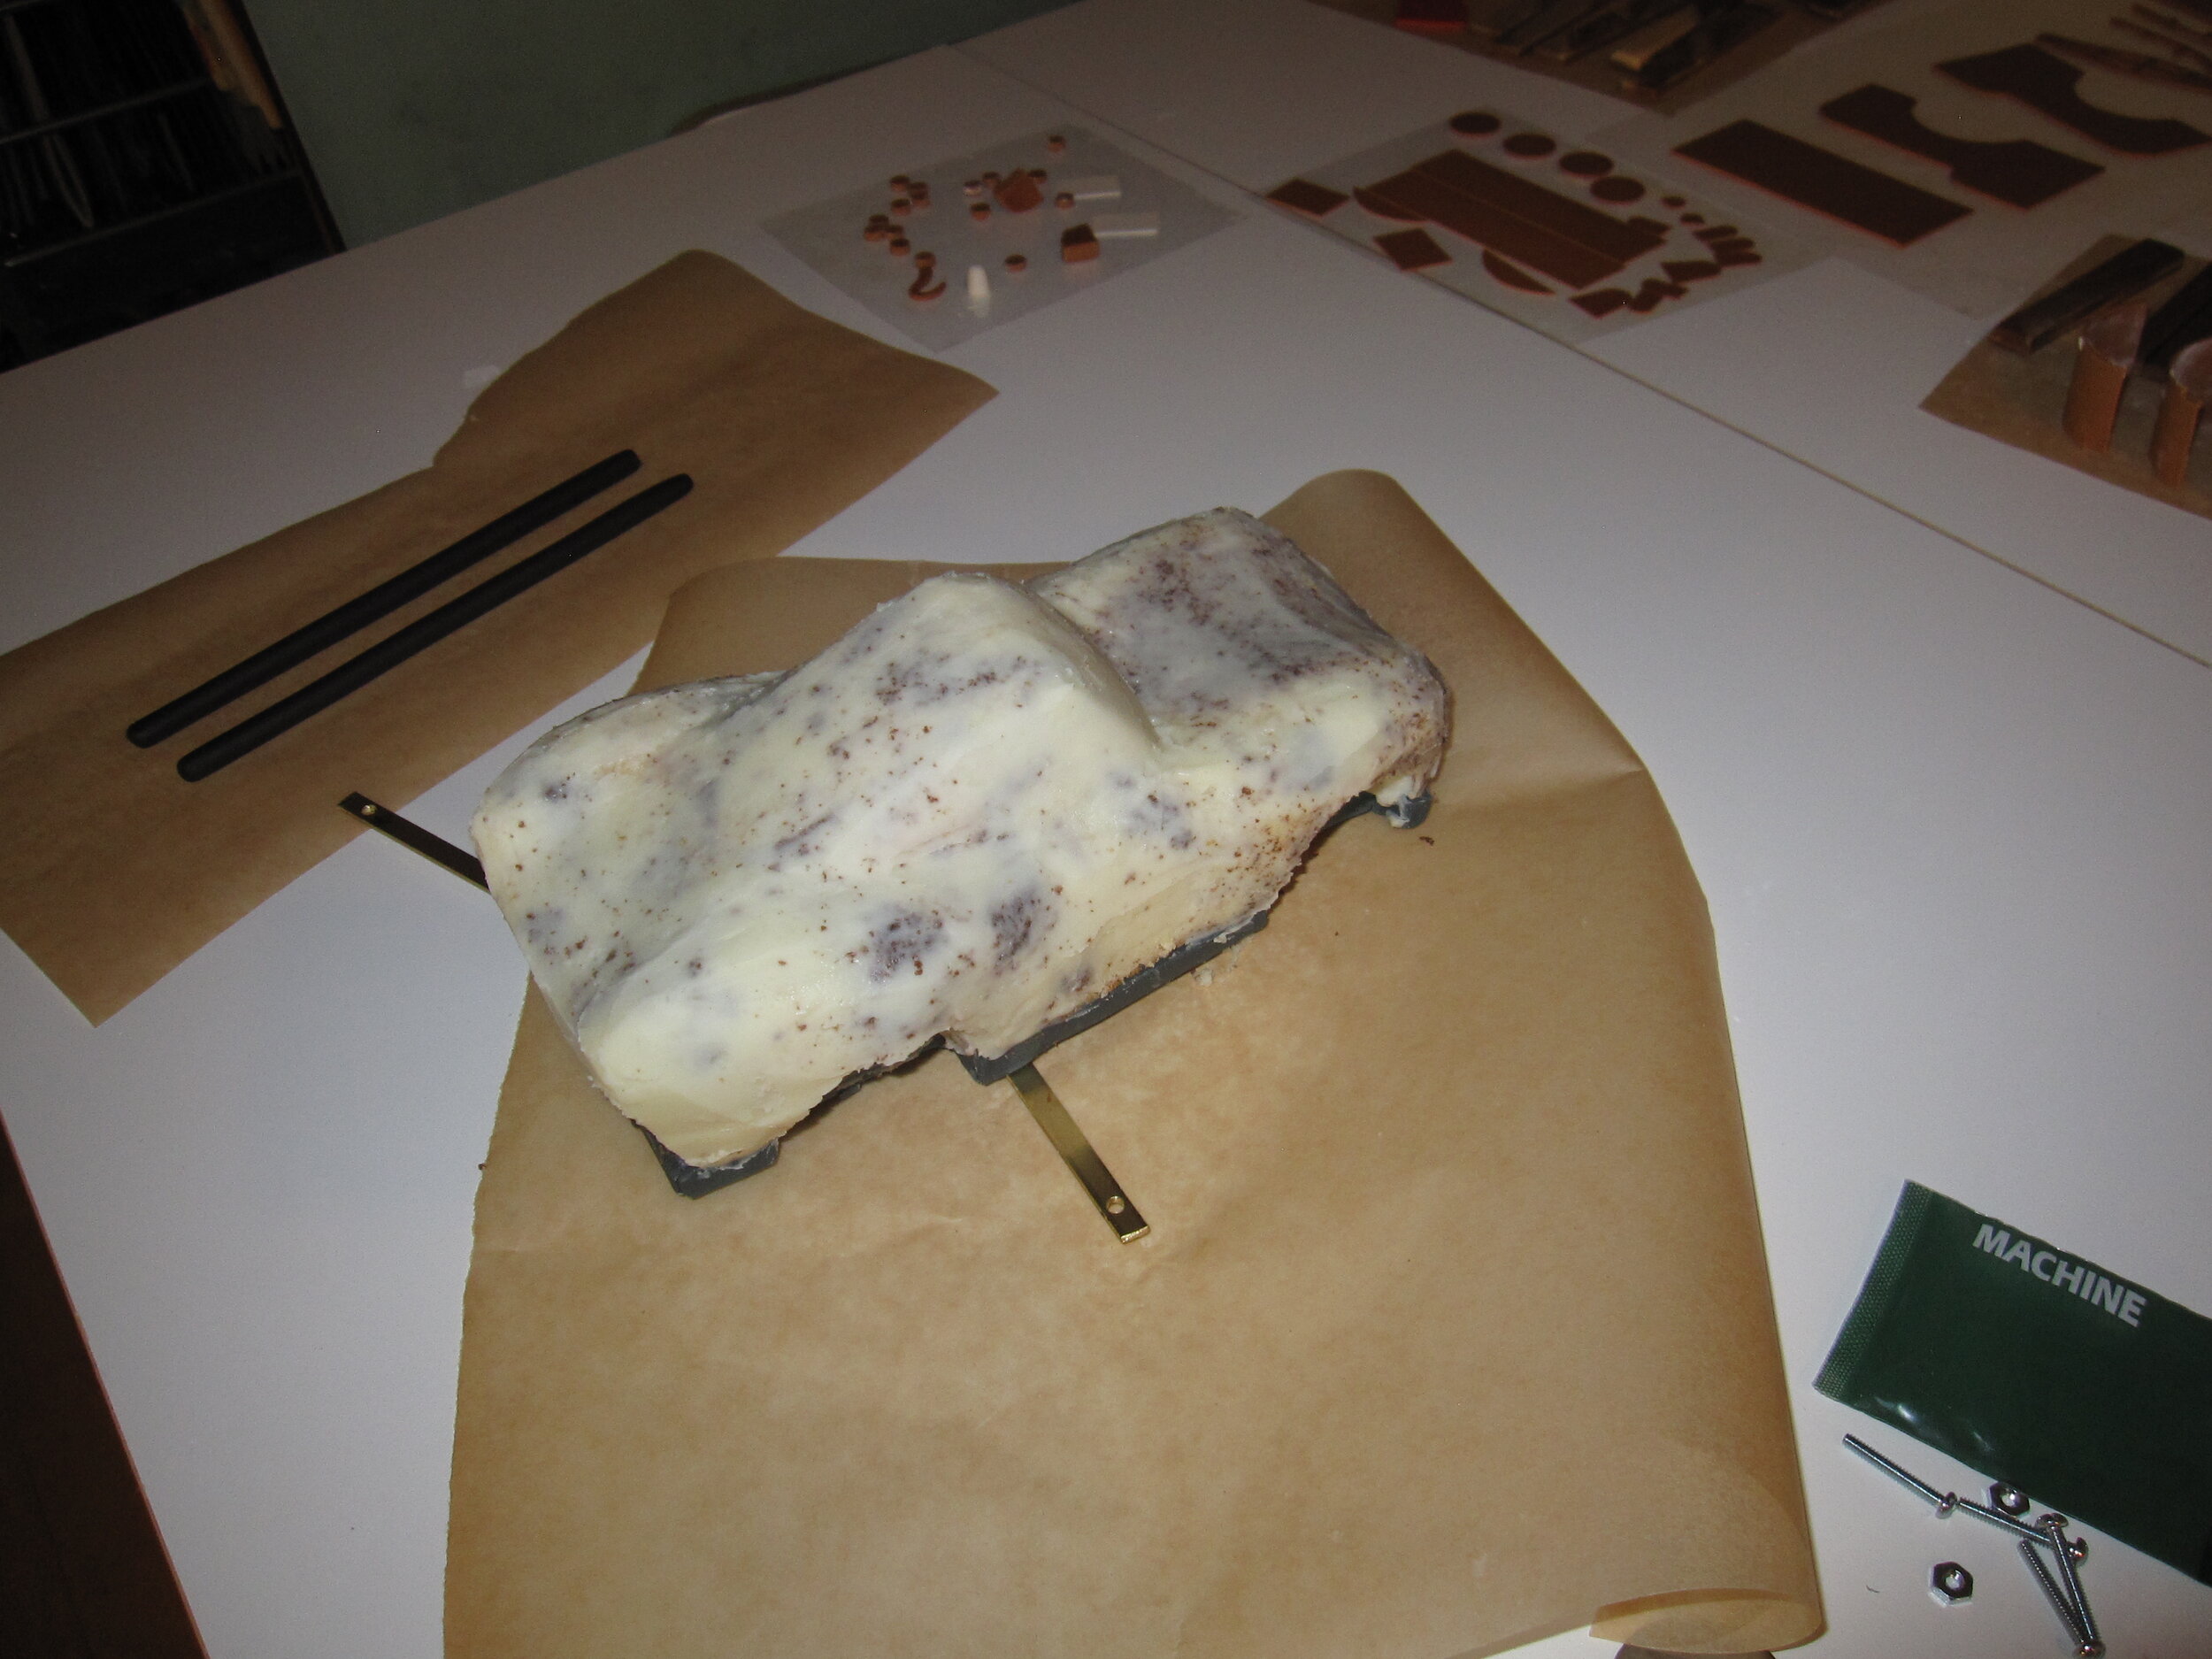
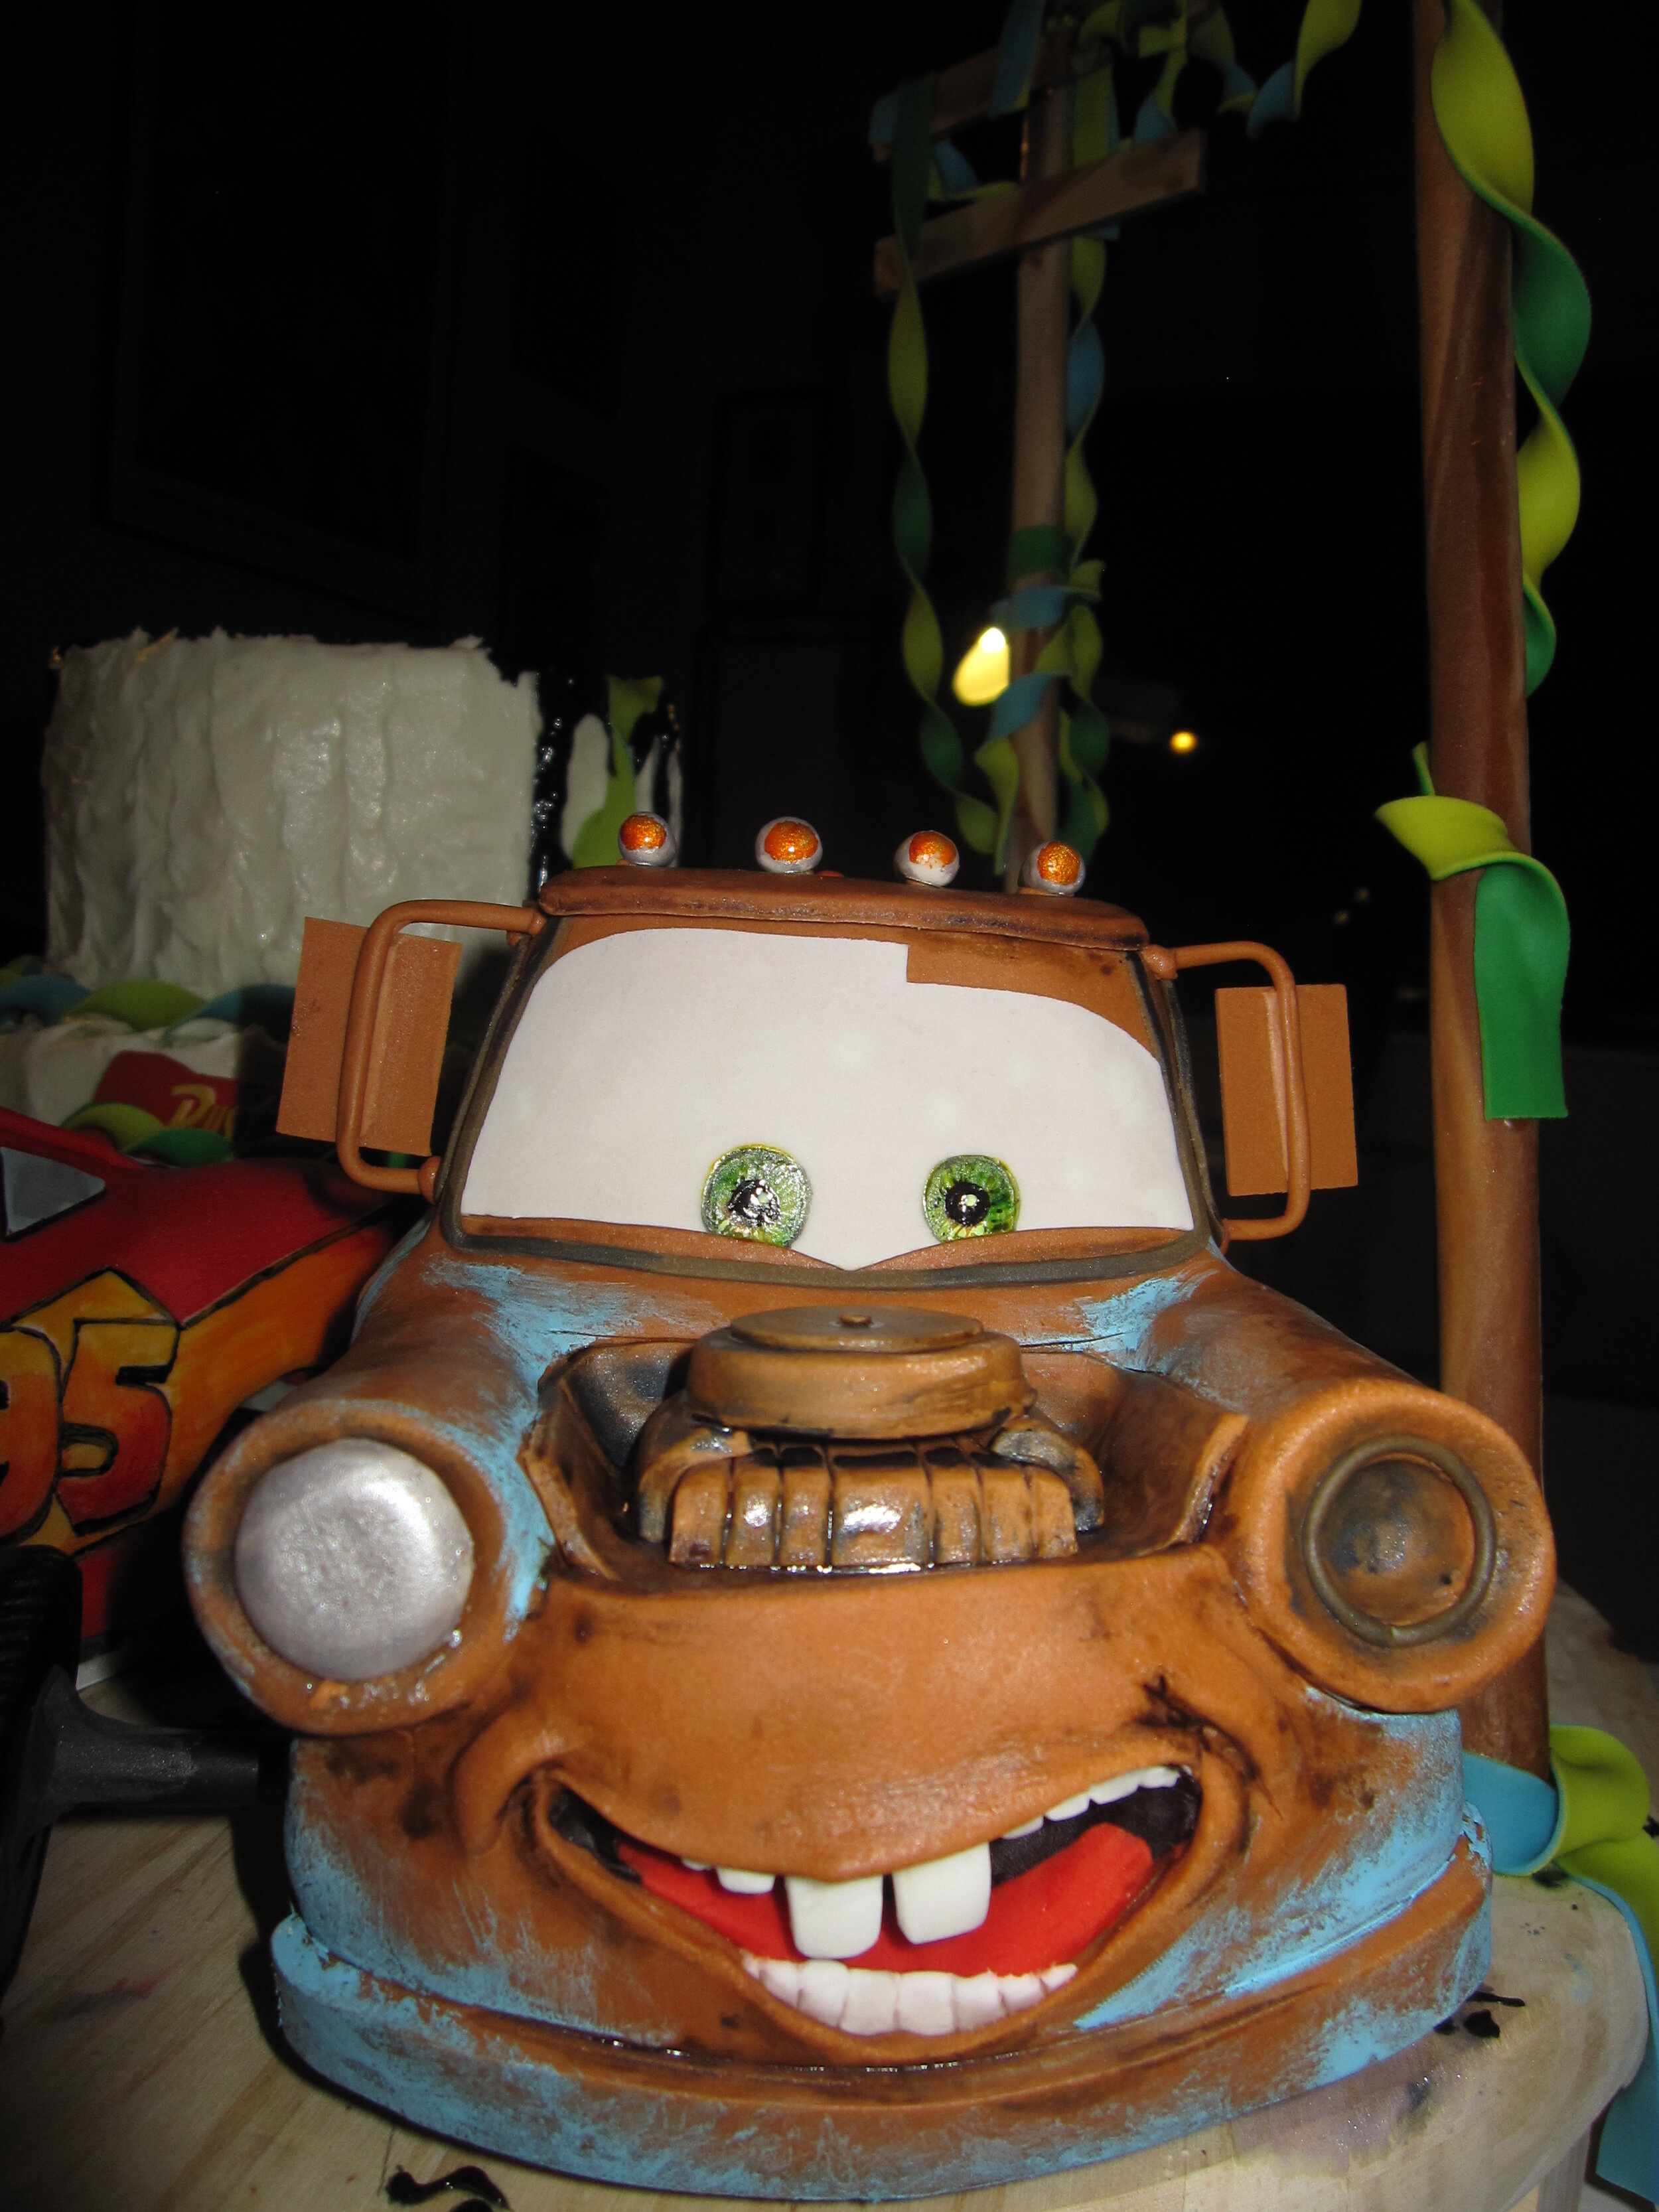
Carving Mater and Lightning went well, again using toys as helpful models. After a quick crumb coat, I was ready to cover them with fondant. Then the challenge was to get all the details on, since both Lightning and Mater have very specific paint jobs. (For those Cars aficionados out there, I went with the original Cars Mater and Lightning, as opposed to the Cars 2 Mater and Lightning, having ascertained that Max hadn’t yet seen Car 2 yet.)

Mater, of course, is so rusty that you start with the brown and then add the patches of blue and green paint on top. I assembled his bed and tow hook with royal icing, which took a bit of time, but it wound up sturdier than I was afraid it might be, which is good since I had to take the cake on a two hour drive to get to the party. I applied white gum paste for the eyes / windshield and blue-grey gum paste for the side windows and then added some extra brown gum paste trim.
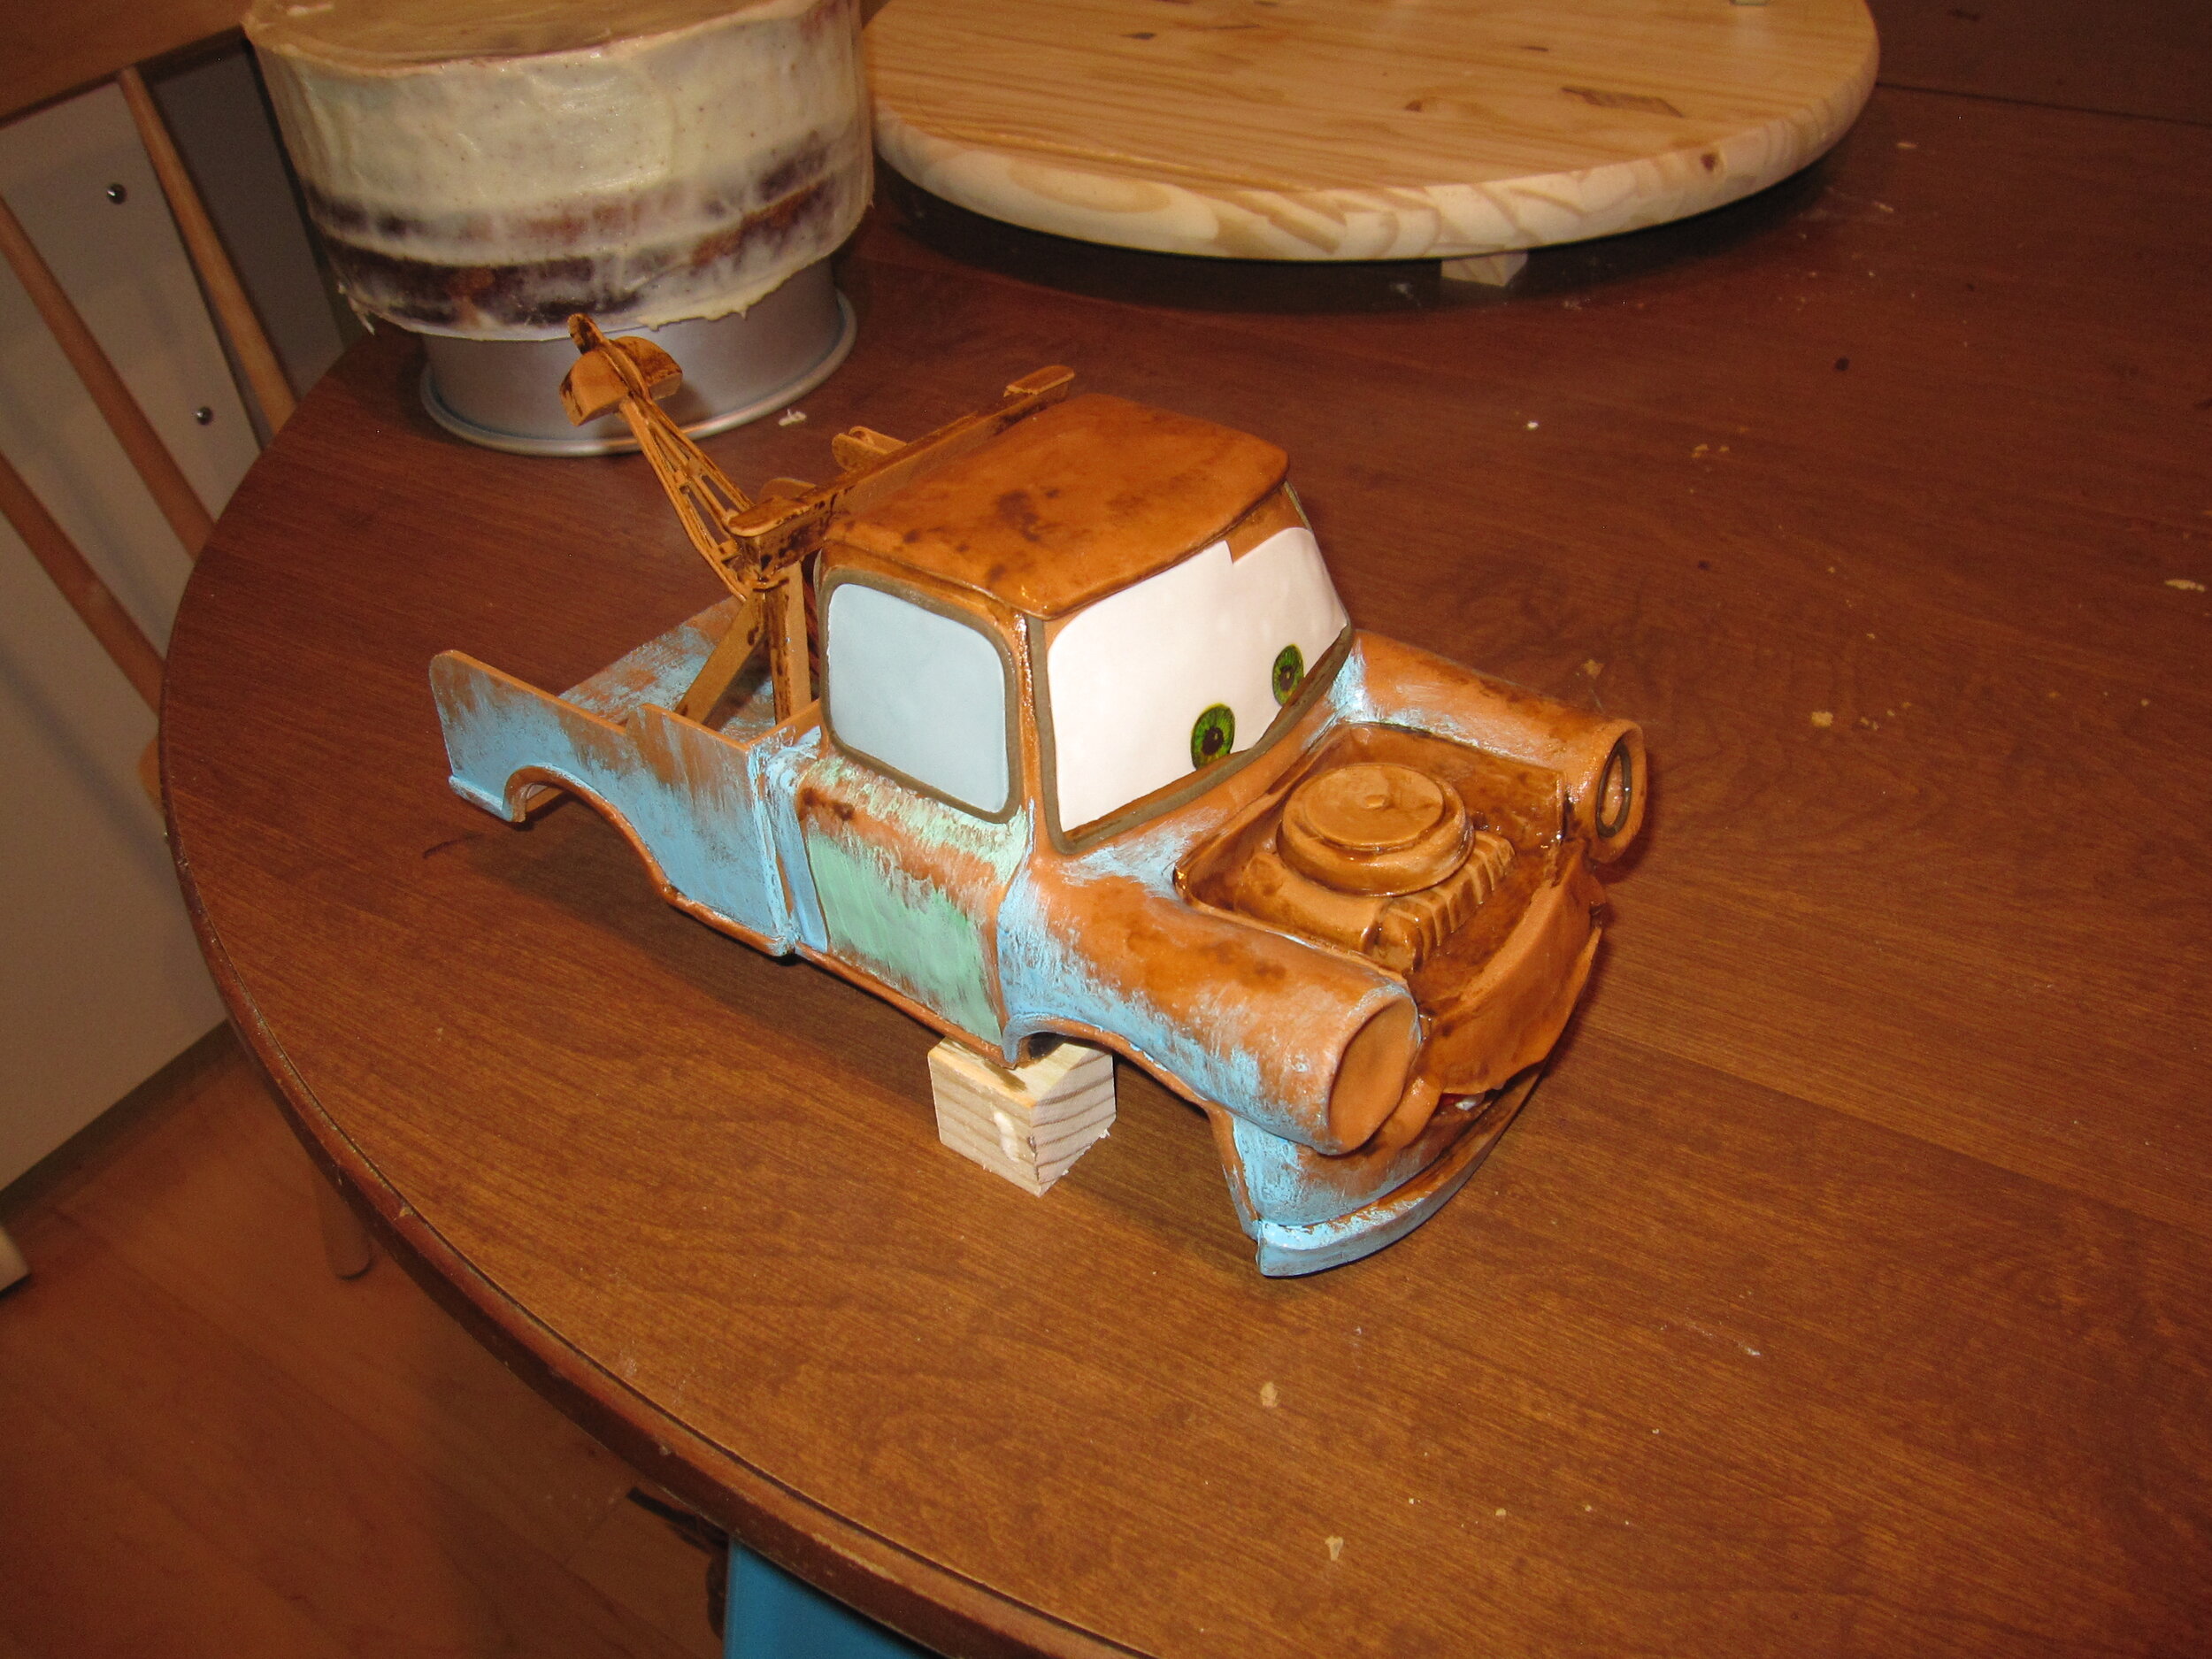
To paint the blue and green, I used white food coloring mixed with paste colors. The nice thing about this was that when I then went in with more white to write the text on Mater’s doors, it created a little dark shadow around the letters, where the green paint pulled very slightly away from the brown fondant underneath. This helped highlight the text really nicely. Then I went in with some darker brown to make the rusty parts more interesting before adding the final details like the lights on his head and his one headlight. The most important touches were, of course, his big white gum paste buckteeth, which, looking at them now, I think I made a little too small.
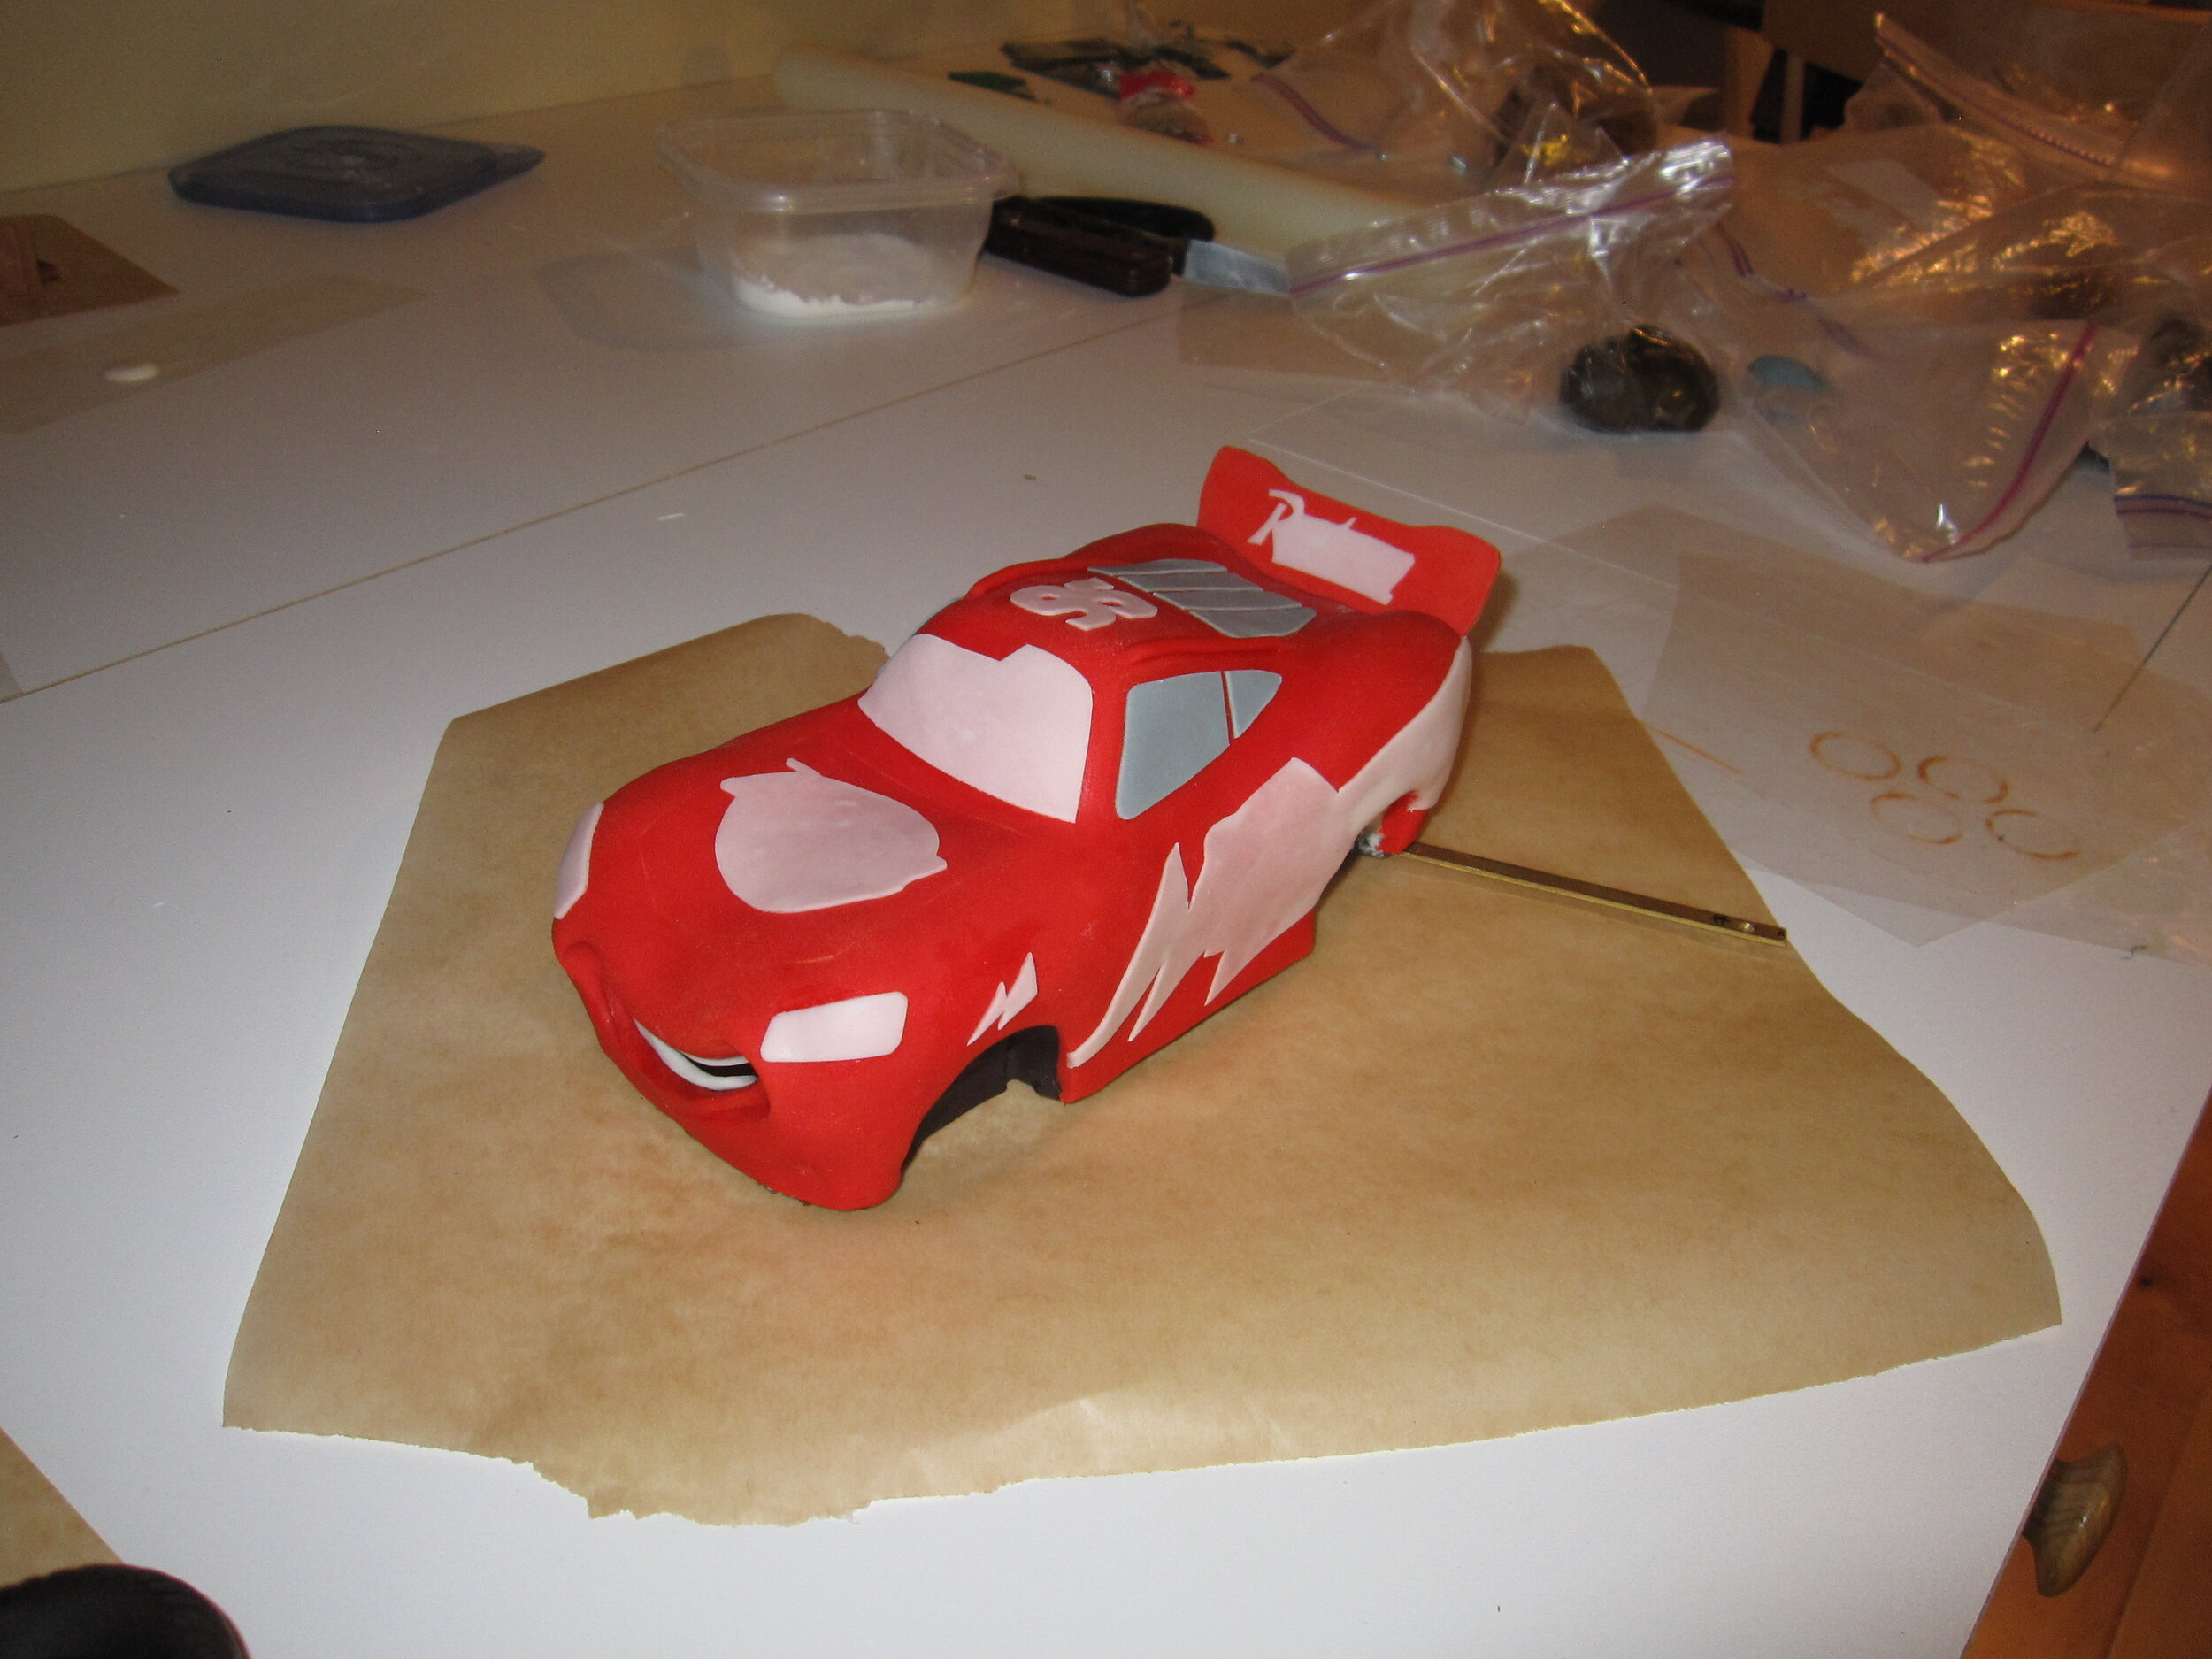
For Lightning, I made templates for all of the decals, and then cut them out of white gum paste and applied them.
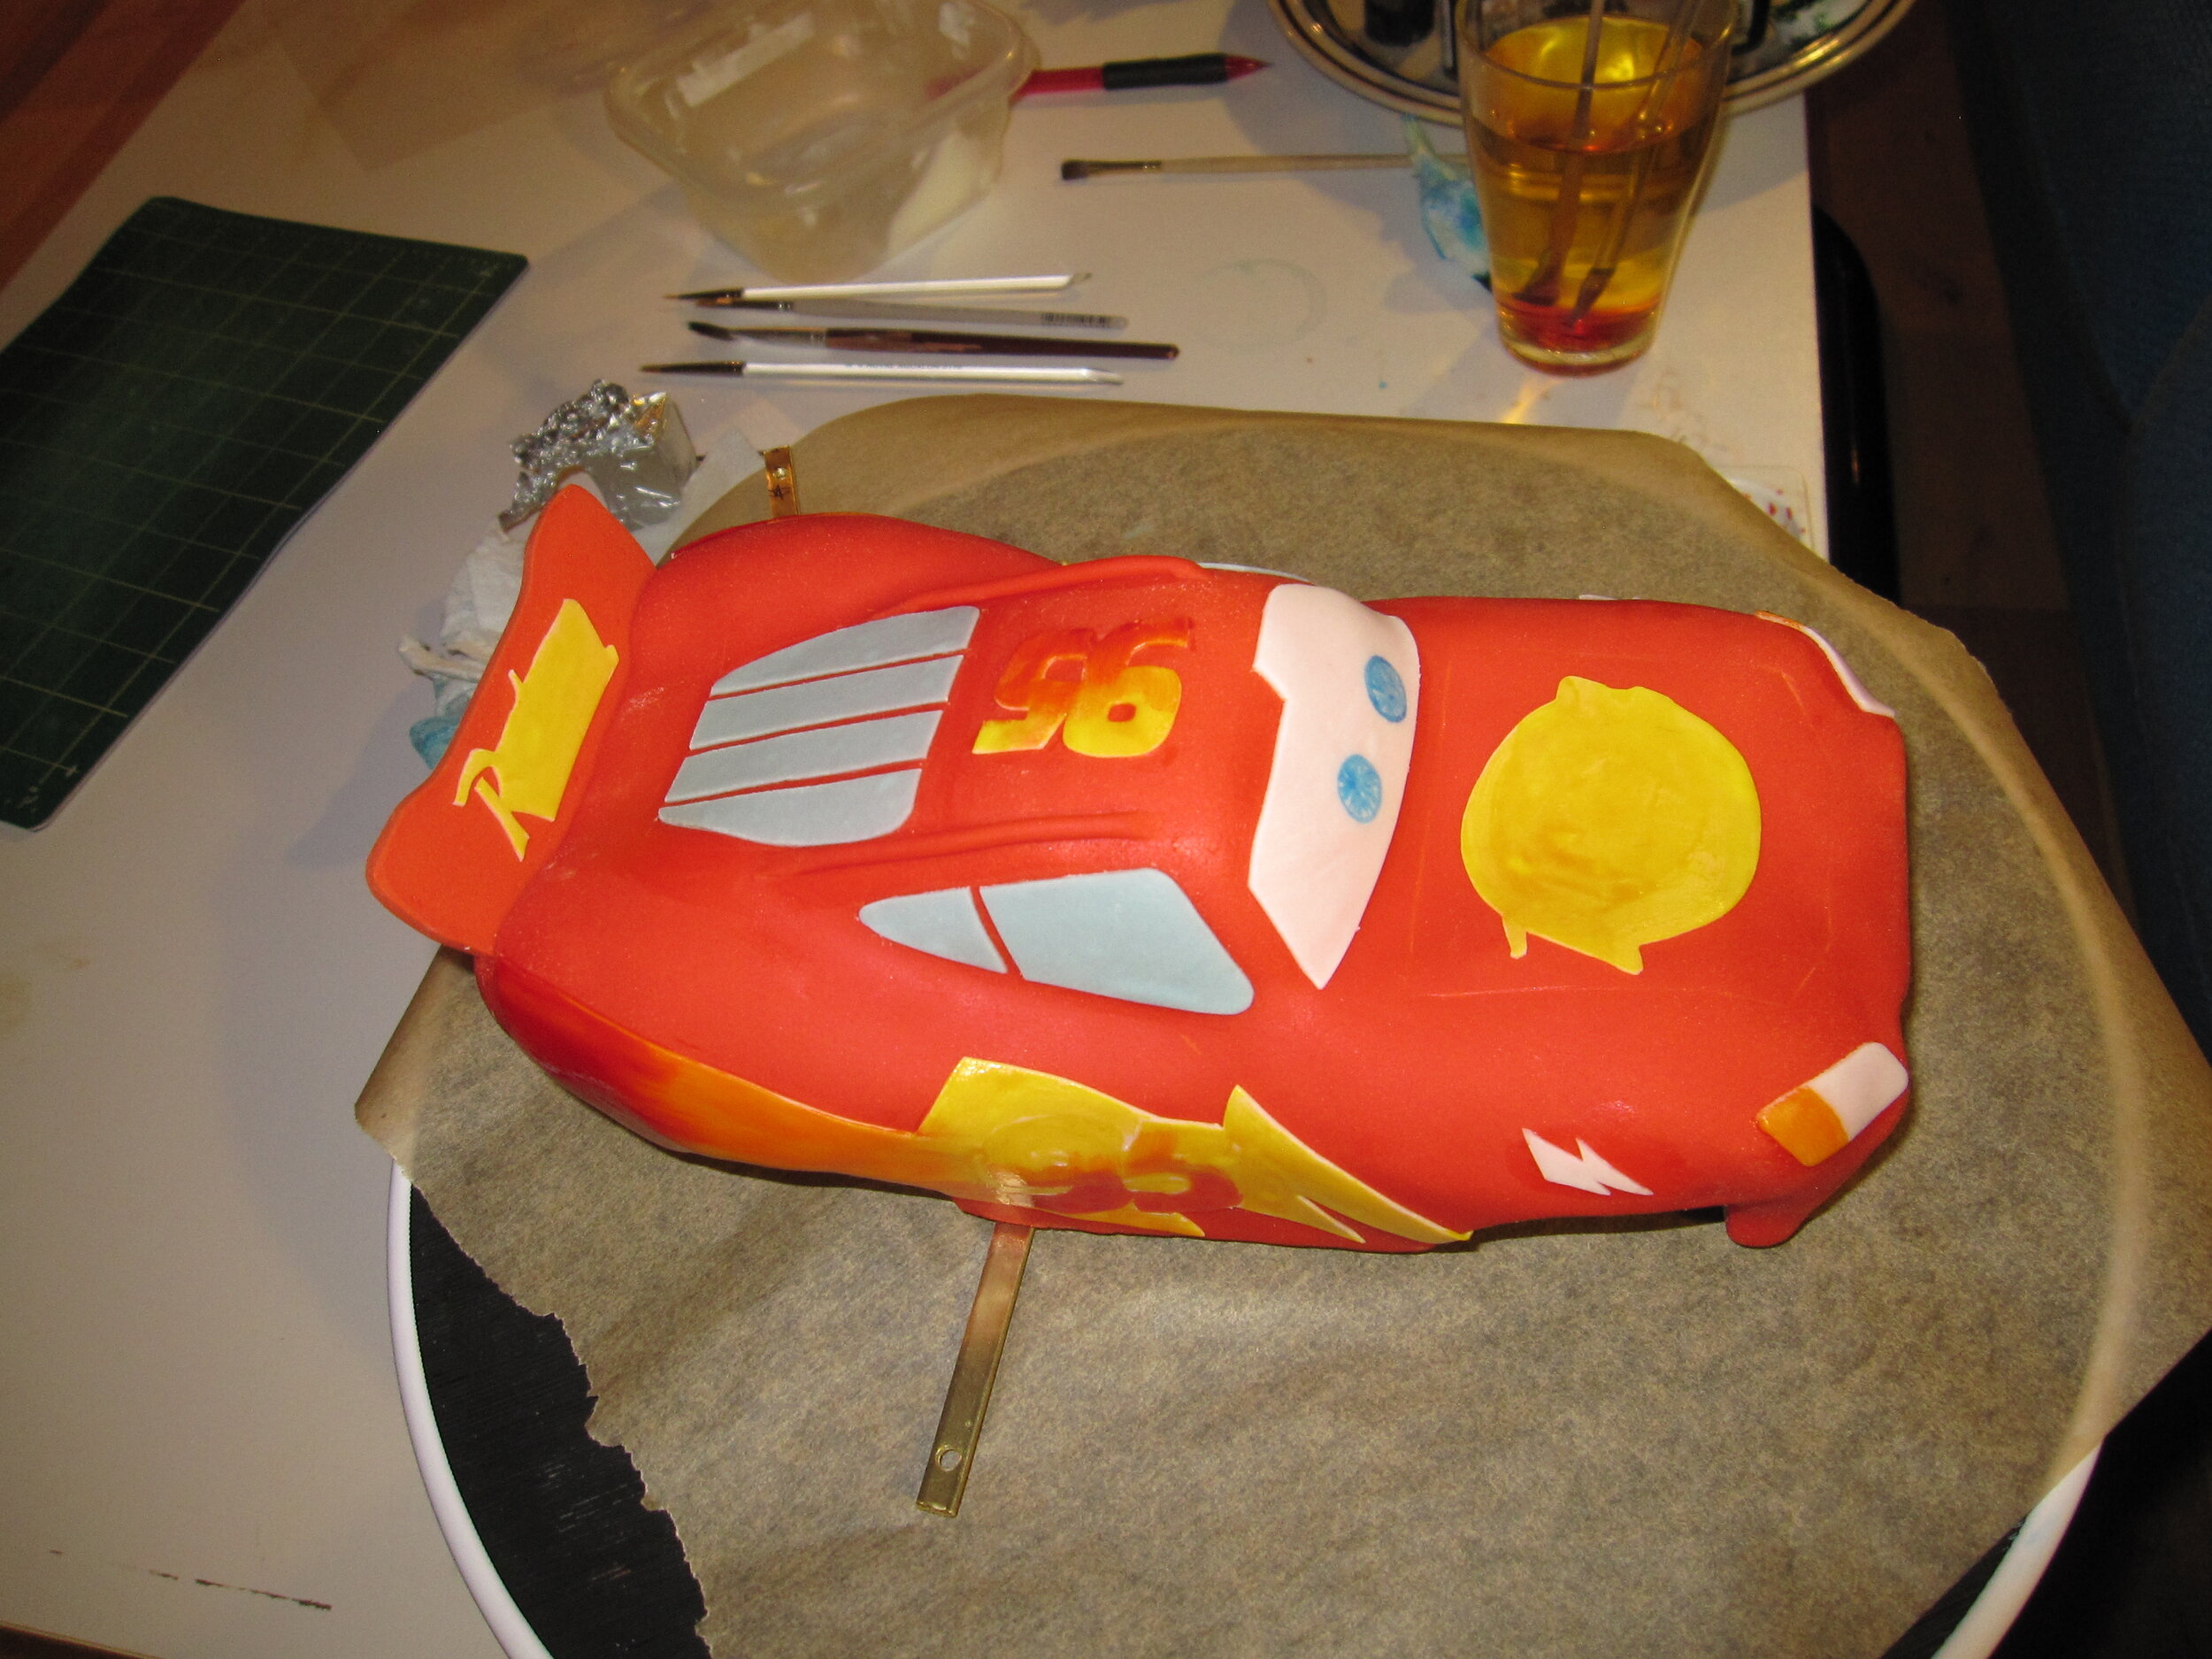
I think I did a decent job painting in all the colors, though I wasn’t entirely happy with the Rust-eze sign on his nose, since the brushstrokes were still fairly evident. This is probably the sort of project where the ability to print edible images would really come in handy.
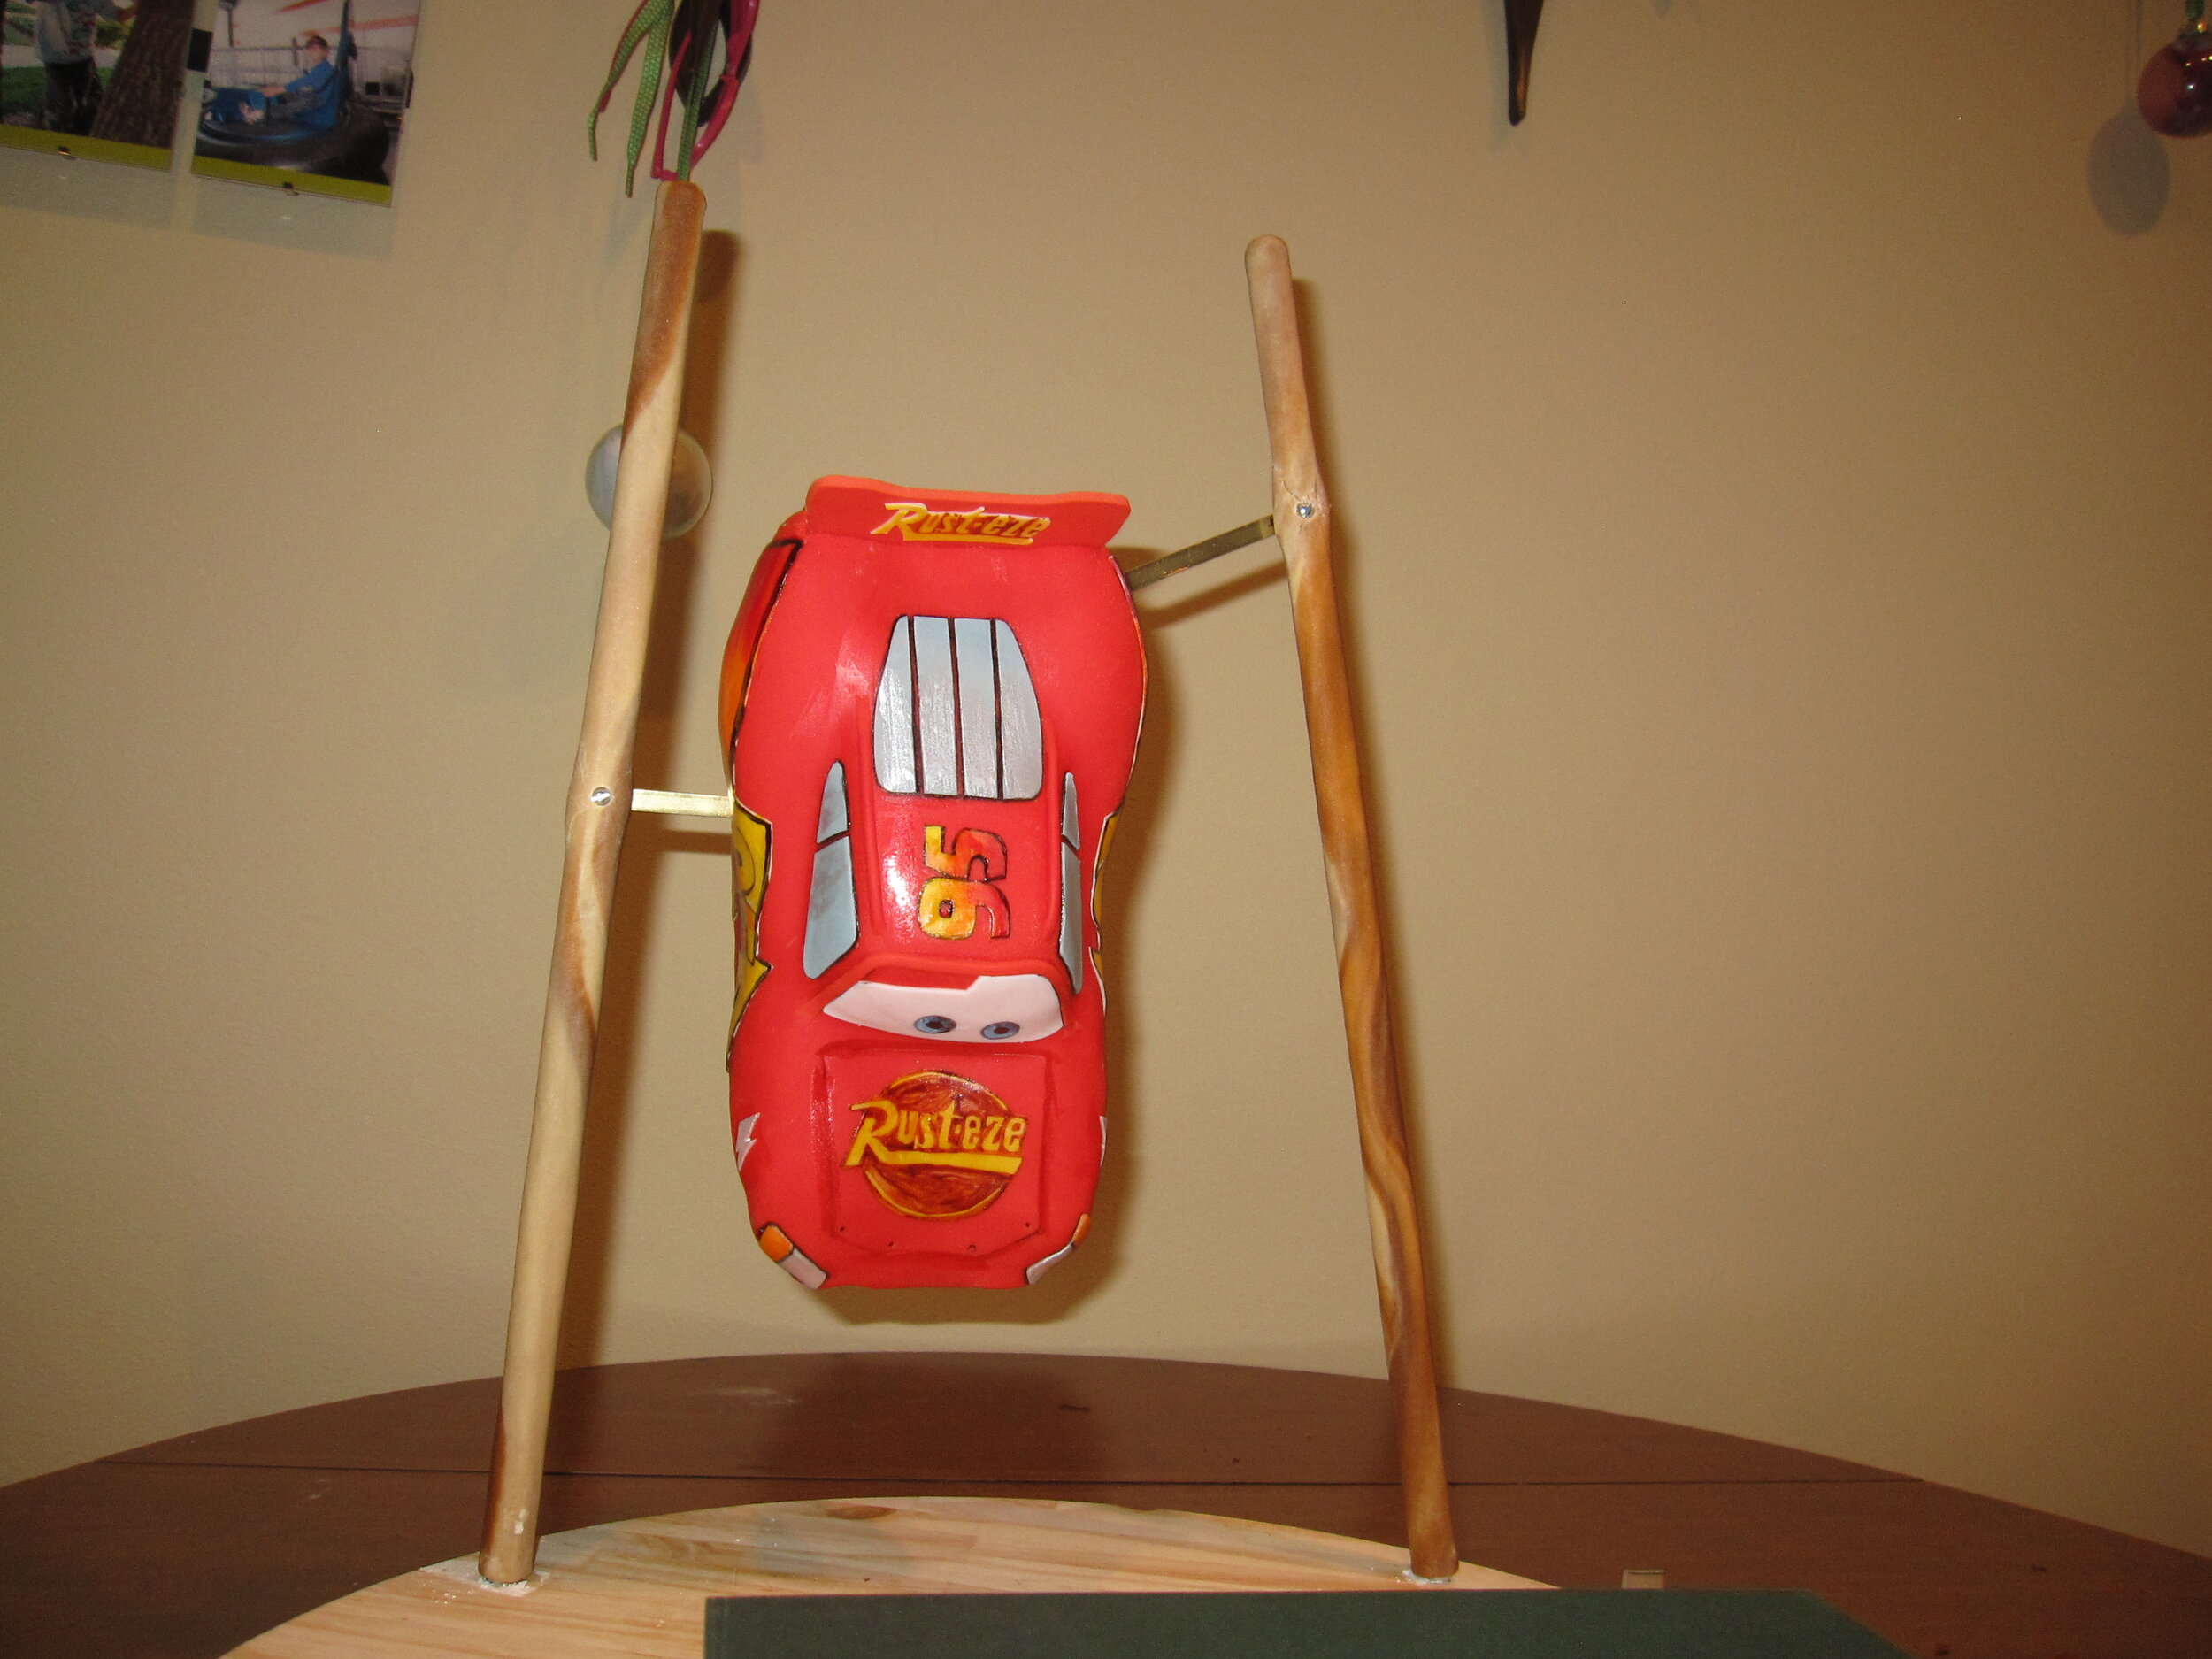
At this point, I made my attempt to hang Lightning. At first, this seemed to go fairly well. The poles were strong enough to hold him up and he seemed fairly stable. Unfortunately, after hanging there for a little while, he began to separate from his base and fall forwards. Fortunately, I noticed this and was able to catch Lightning before he did an actual header down from his perch. At this point, I decided it would be a lot smarter of me to take him down and put him on the ground – although I do maintain that, given another chance, I could have made this work.
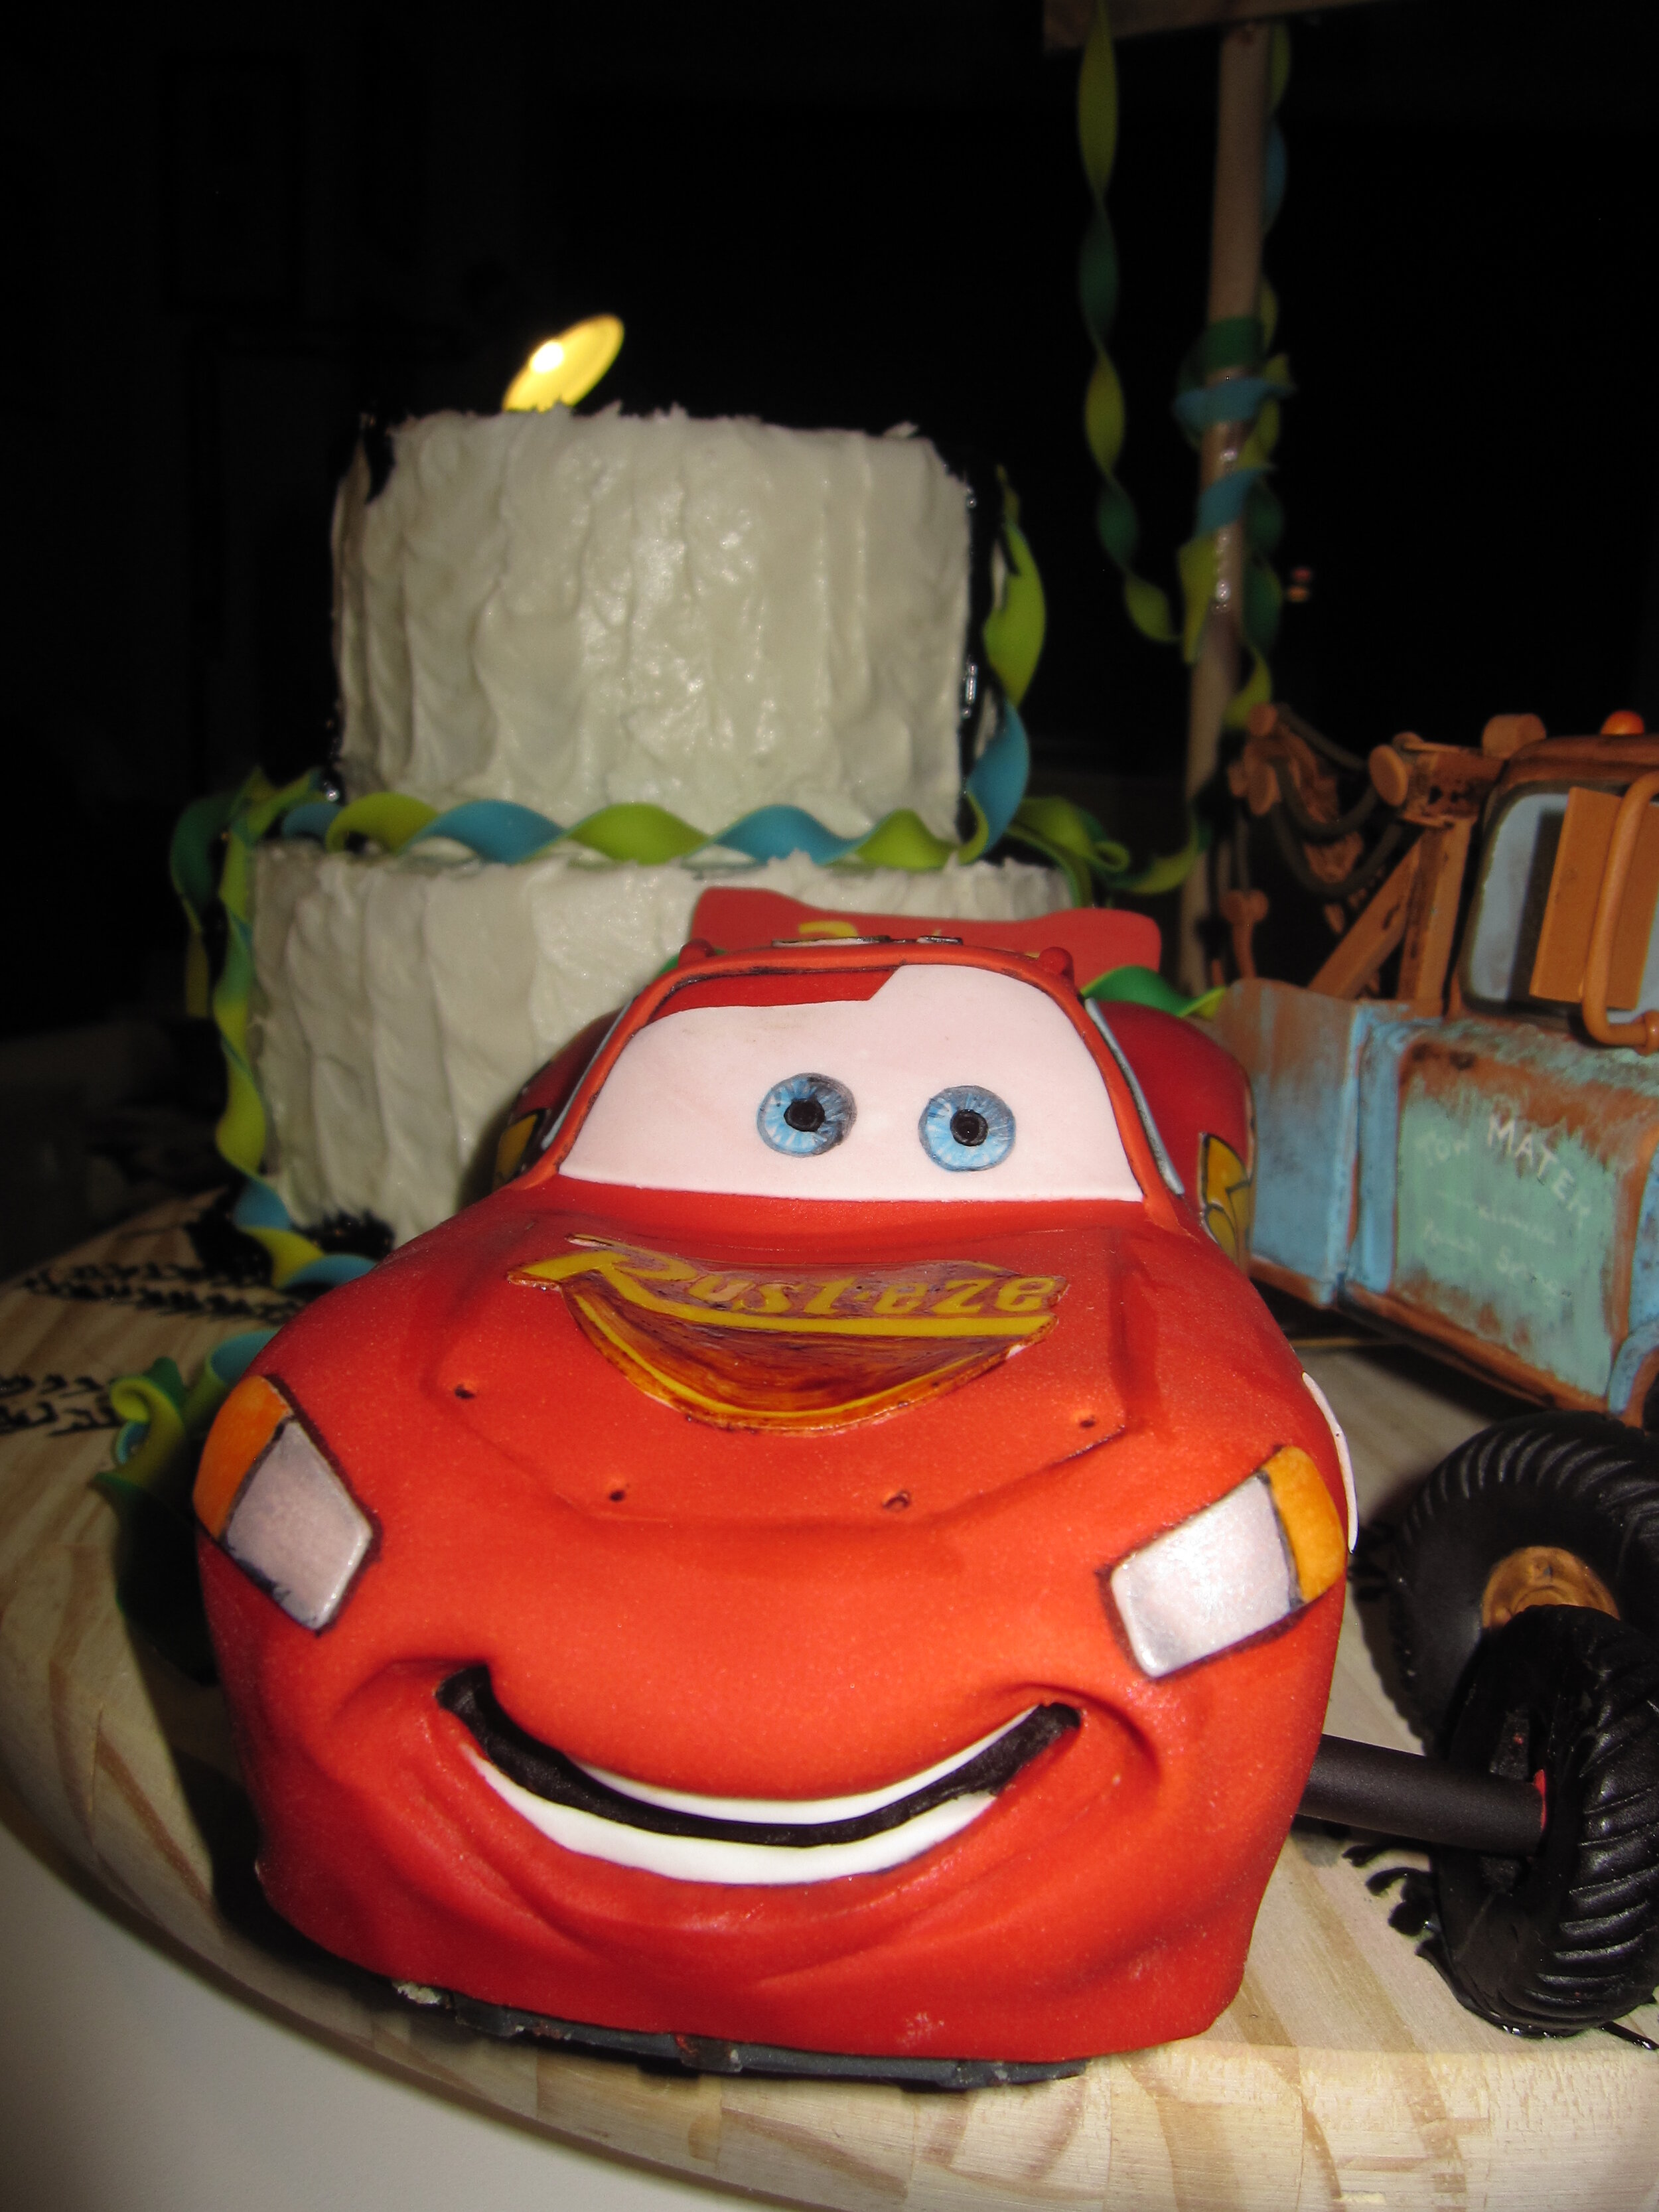
With all three cakes – Mater, Lightning, and the birthday cake – in place on the base, it was time for final touches. The fist-bumping tires read well, I thought. I used piping gel colored black to write “Happy Birthday Max” on top of the cake, as well as to glob big oil drips all over the cake. I also added oil tracks crisscrossing the board, as if Lightning and Mater had tracked it around while setting up for the party.
The very last touch was the addition of the streamers. To give them the look of two colors of streamer wound together, I rolled out two very thin pieces of gum paste and them stuck them one on top of the other and rolled them once to stick them together before cutting them to width.

I am sad that I didn’t manage to get Lightning to hang from the telephone poles, because I think that would have been super cool. But Max (and everyone else at the party) seemed to really like the cake. Like all children (at least in my experience), Max for some reason especially enjoyed the fondant tires.
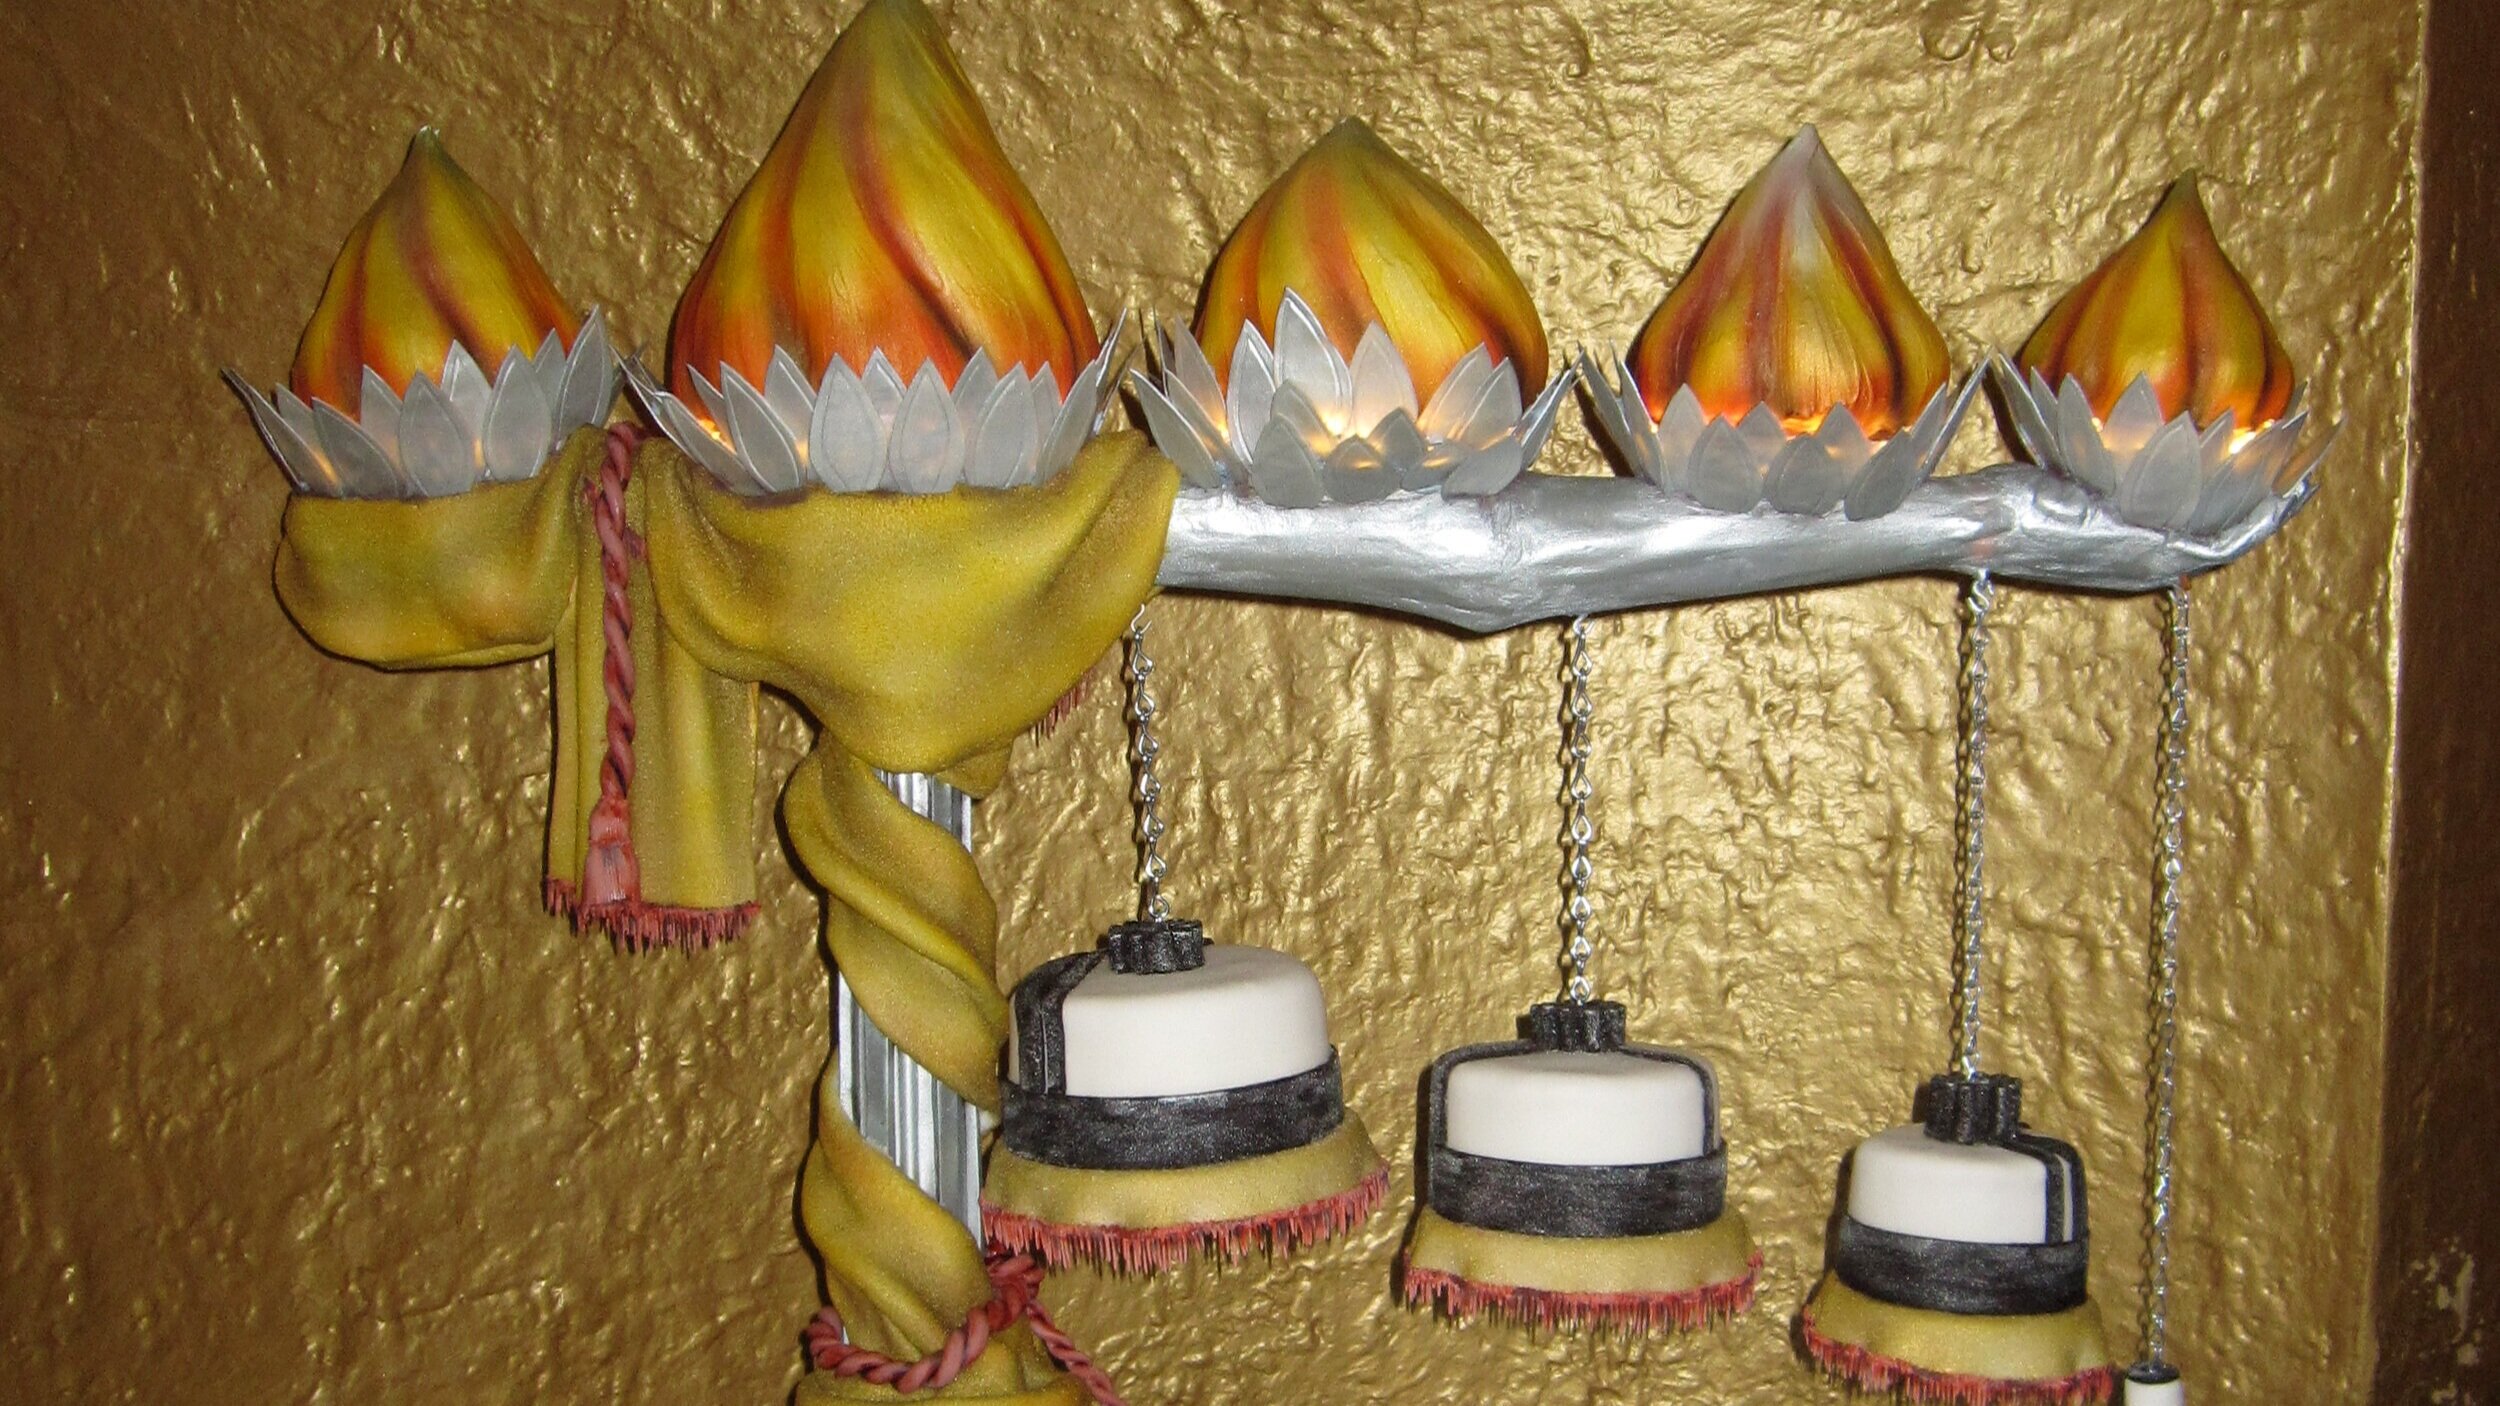
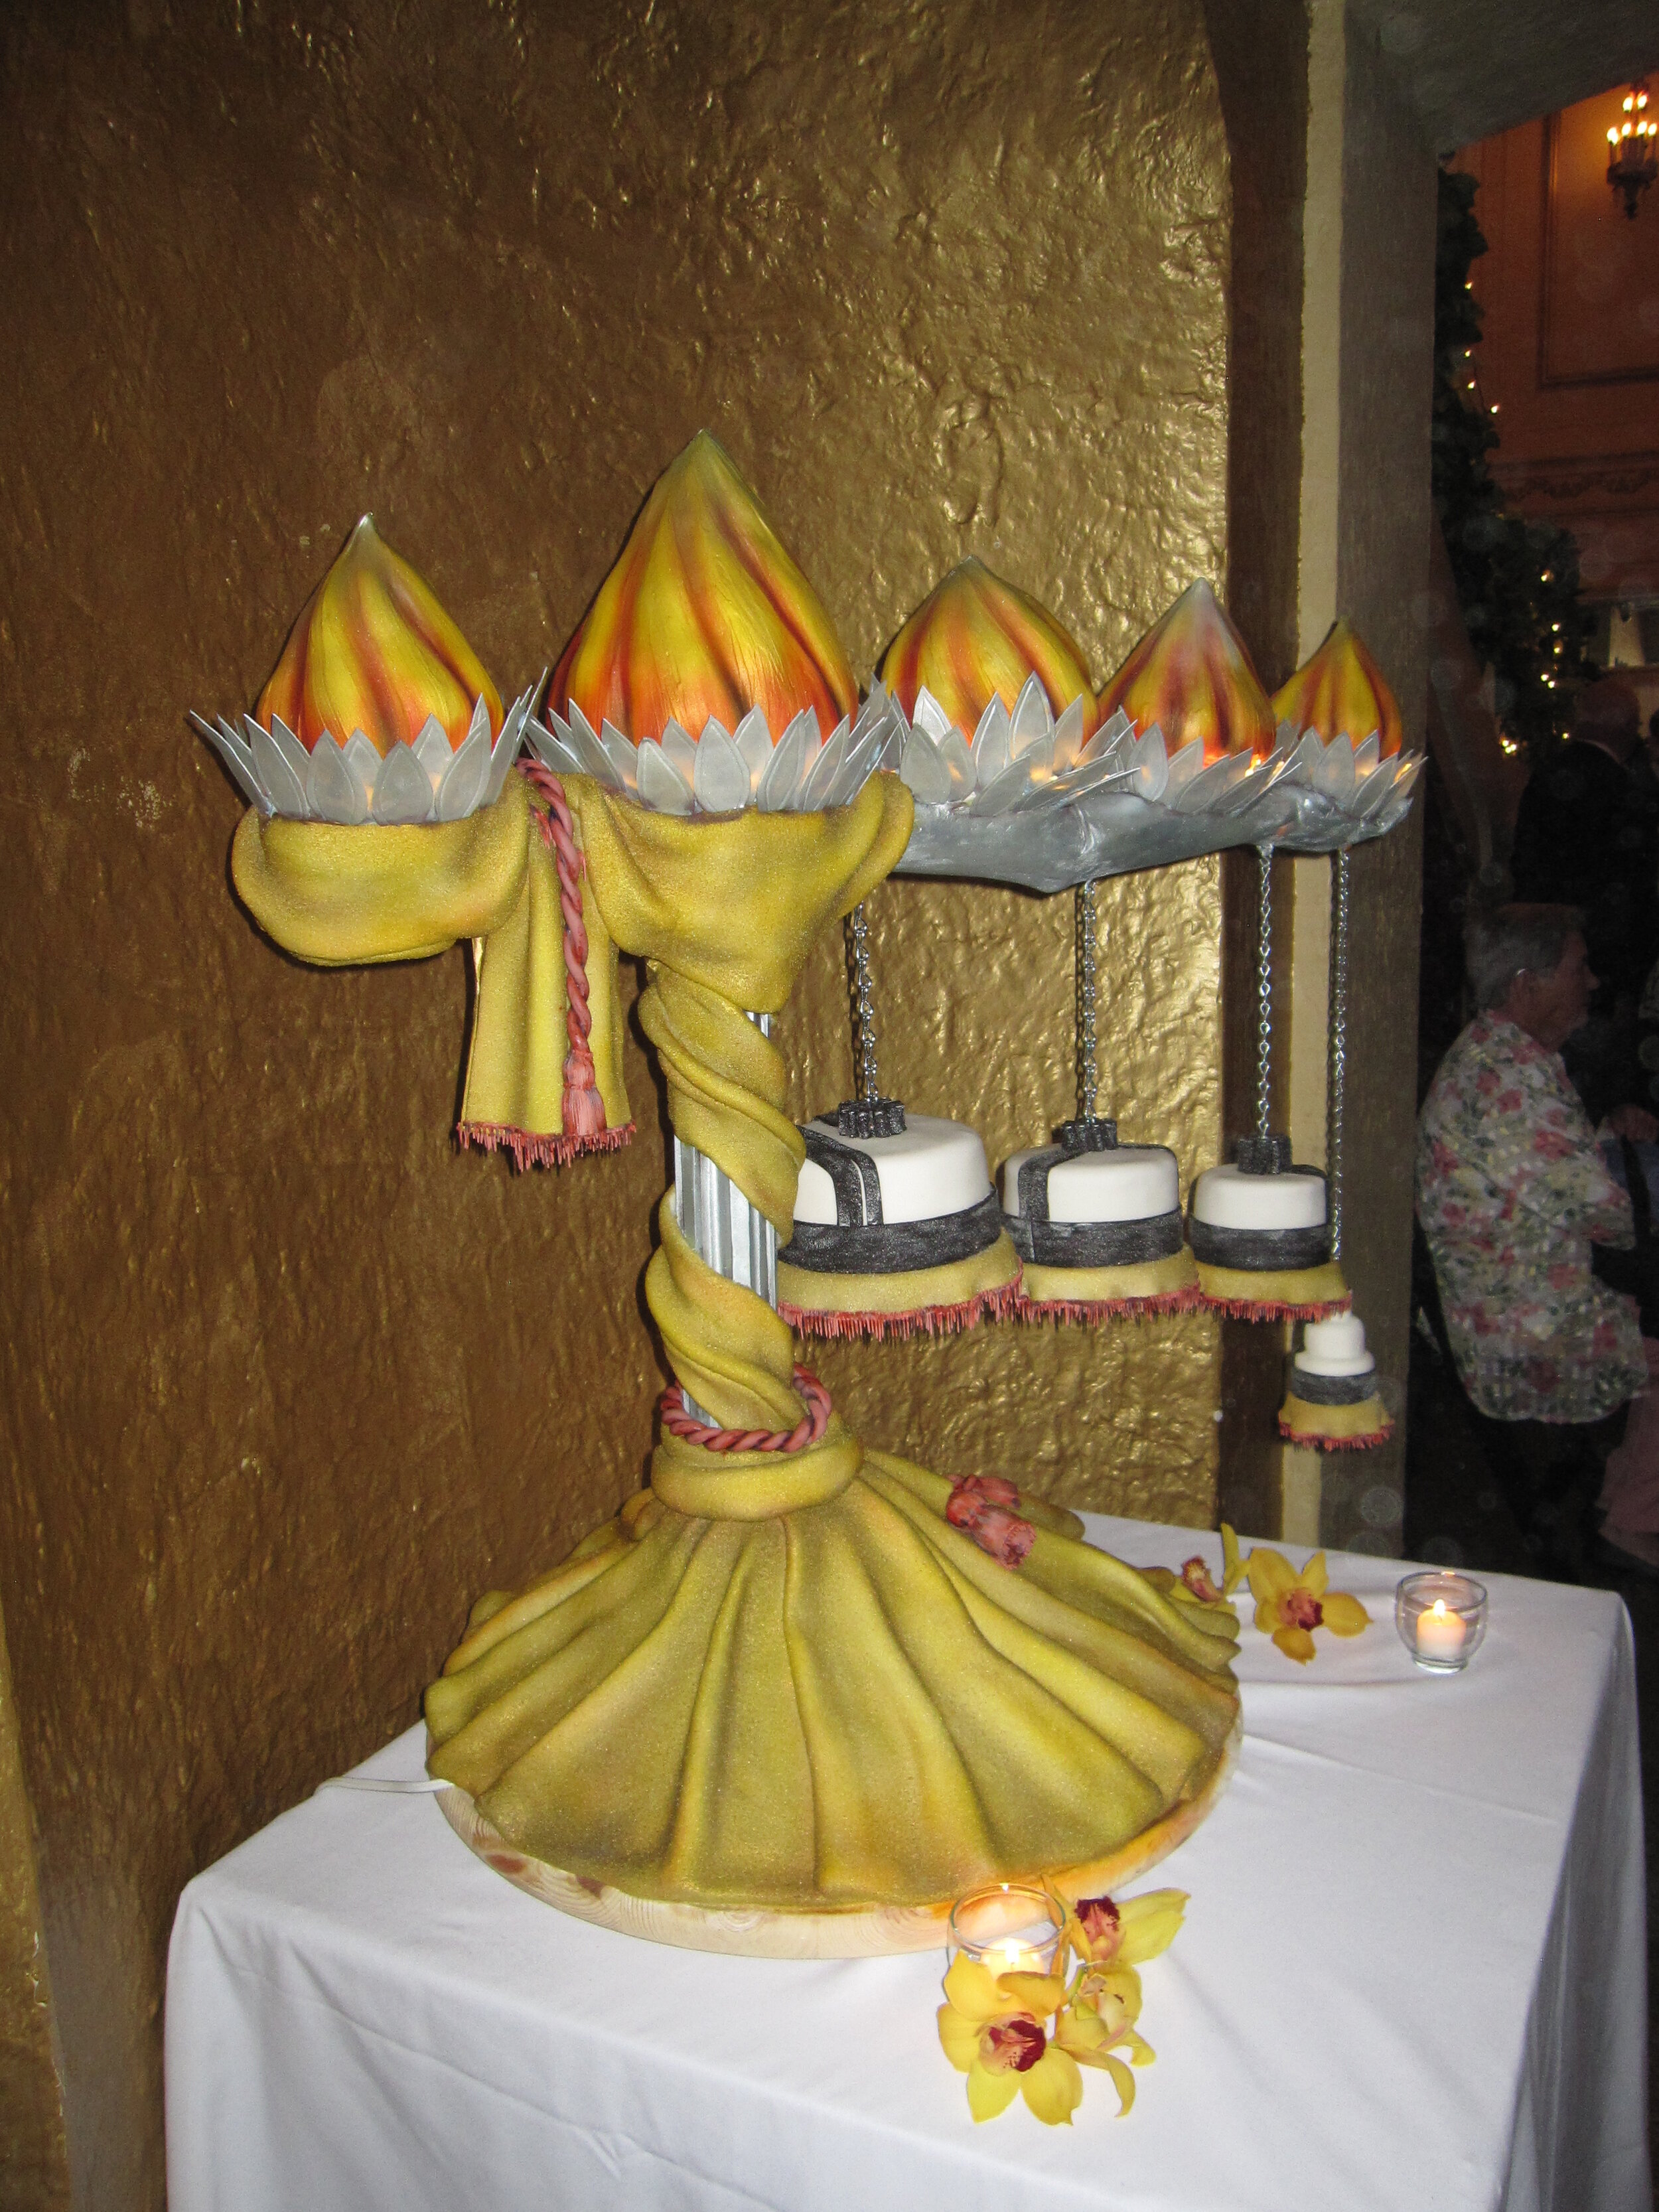
Torchiere Wedding Cake
My friends were getting married at the Orpheum, which is a beautiful old movie theater from the 20s, so I was thinking art deco; I was thinking stage lighting; I was thinking theater curtains; I was thinking dusty elegance and timeless romance.


So far, two couples have had the courage and/or the lunacy to trust me to design and make their wedding cakes. The first was the Seasons of Love Cake, which my sister and I made back in 2004. This is my second wedding cake.
My friends were getting married at the Orpheum, which is a beautiful old movie theater from the 20s, so I was thinking art deco; I was thinking stage lighting; I was thinking theater curtains; I was thinking dusty elegance and timeless romance.
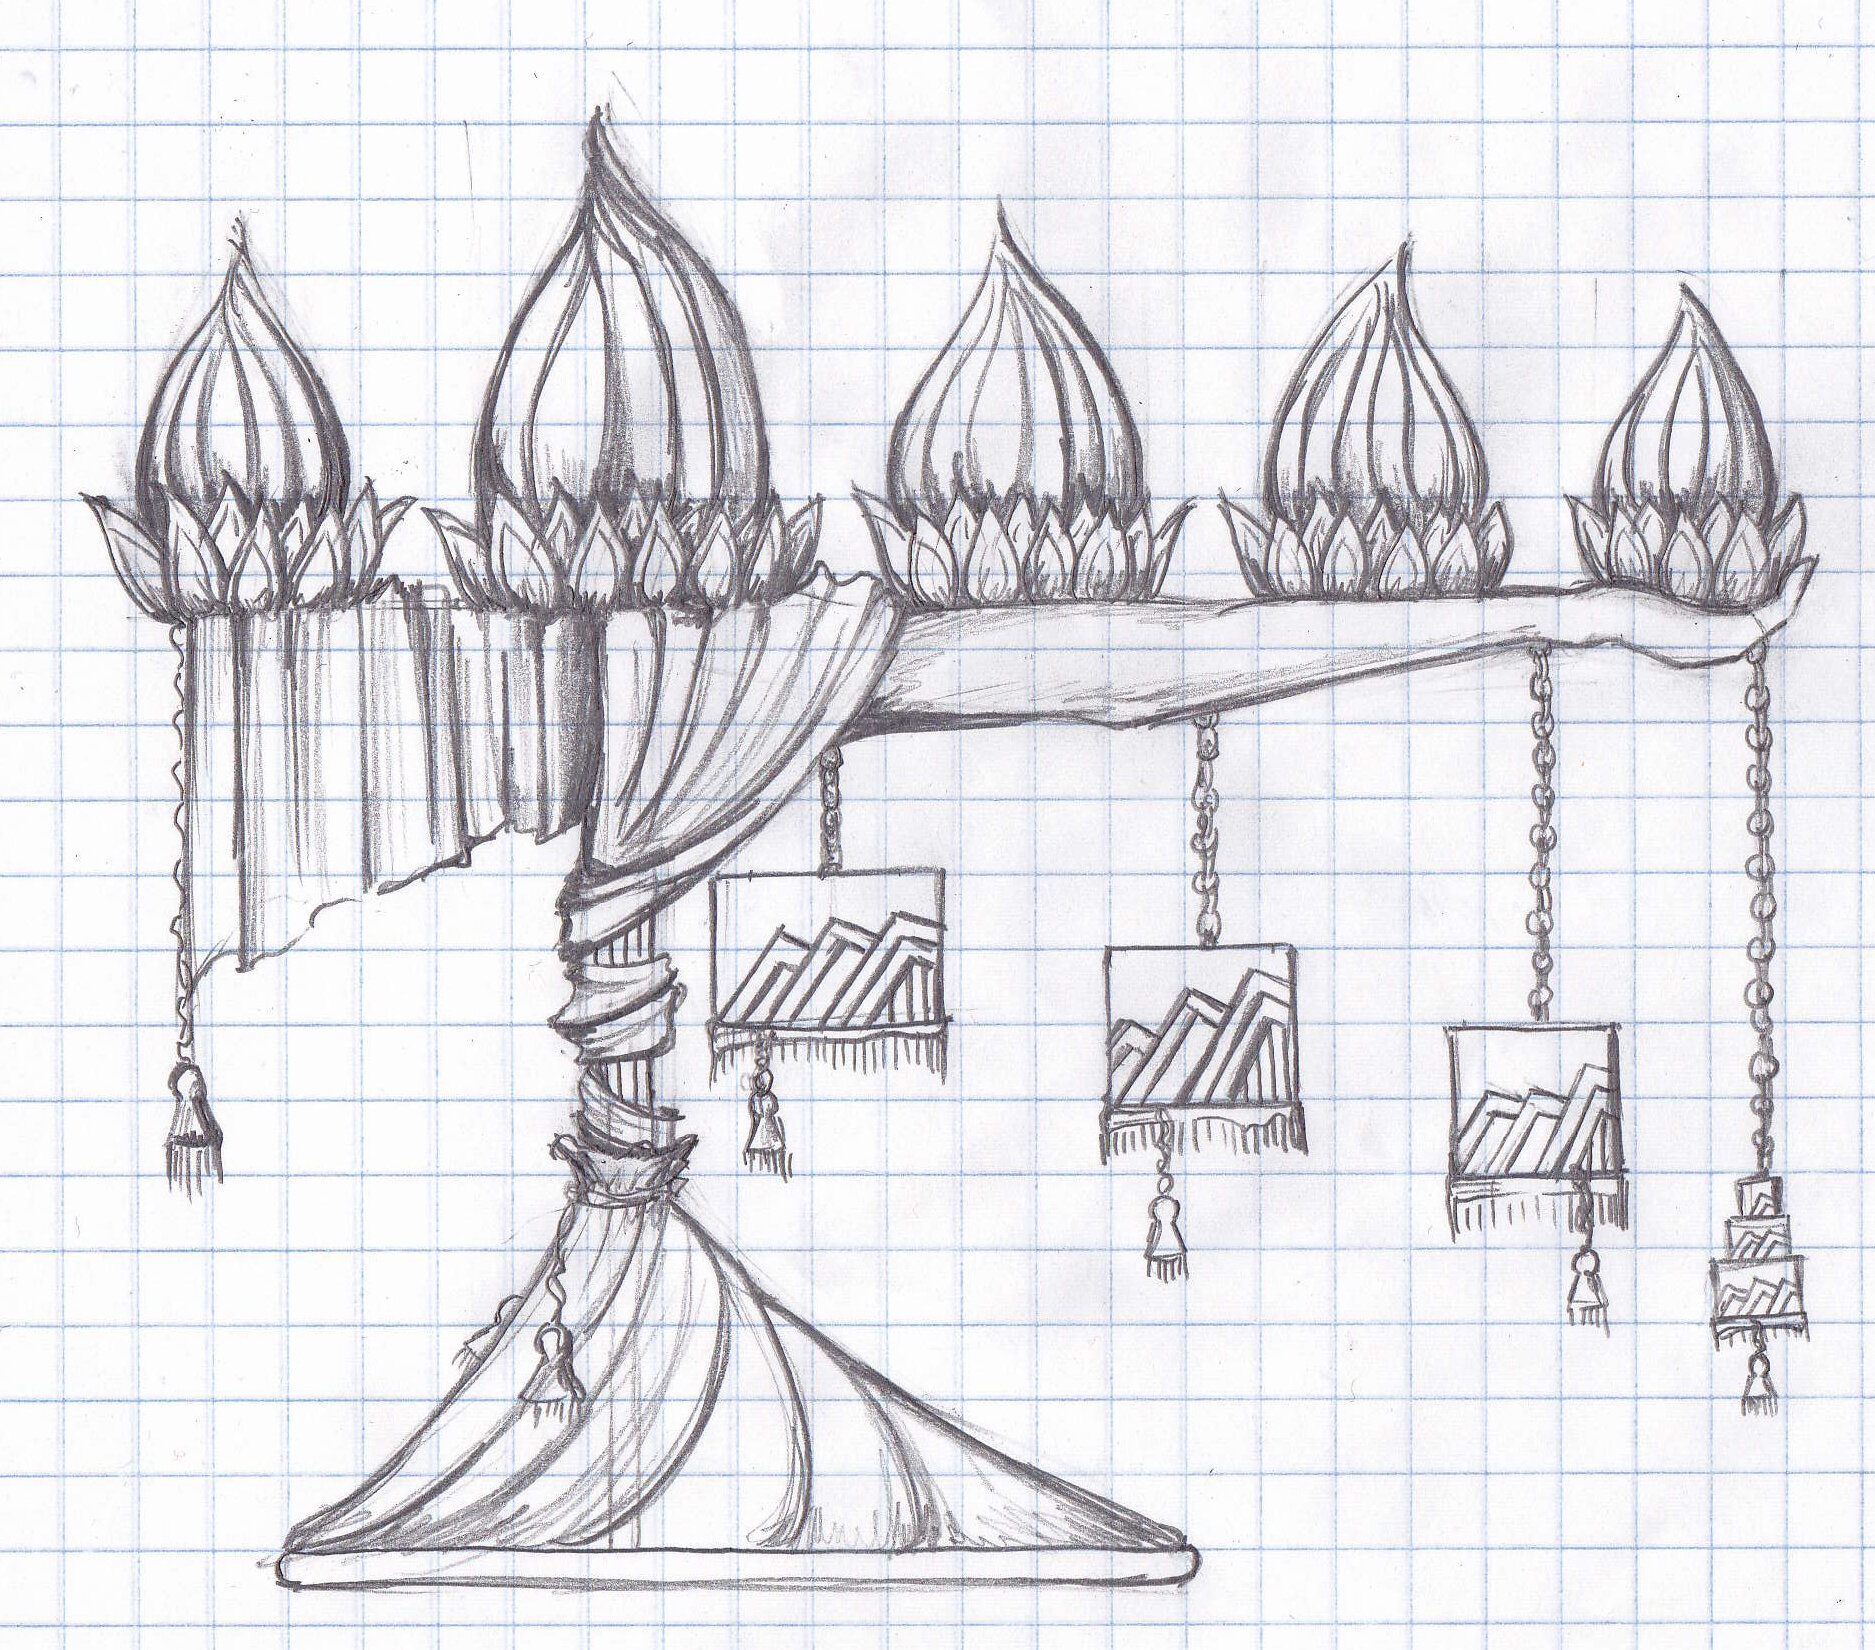
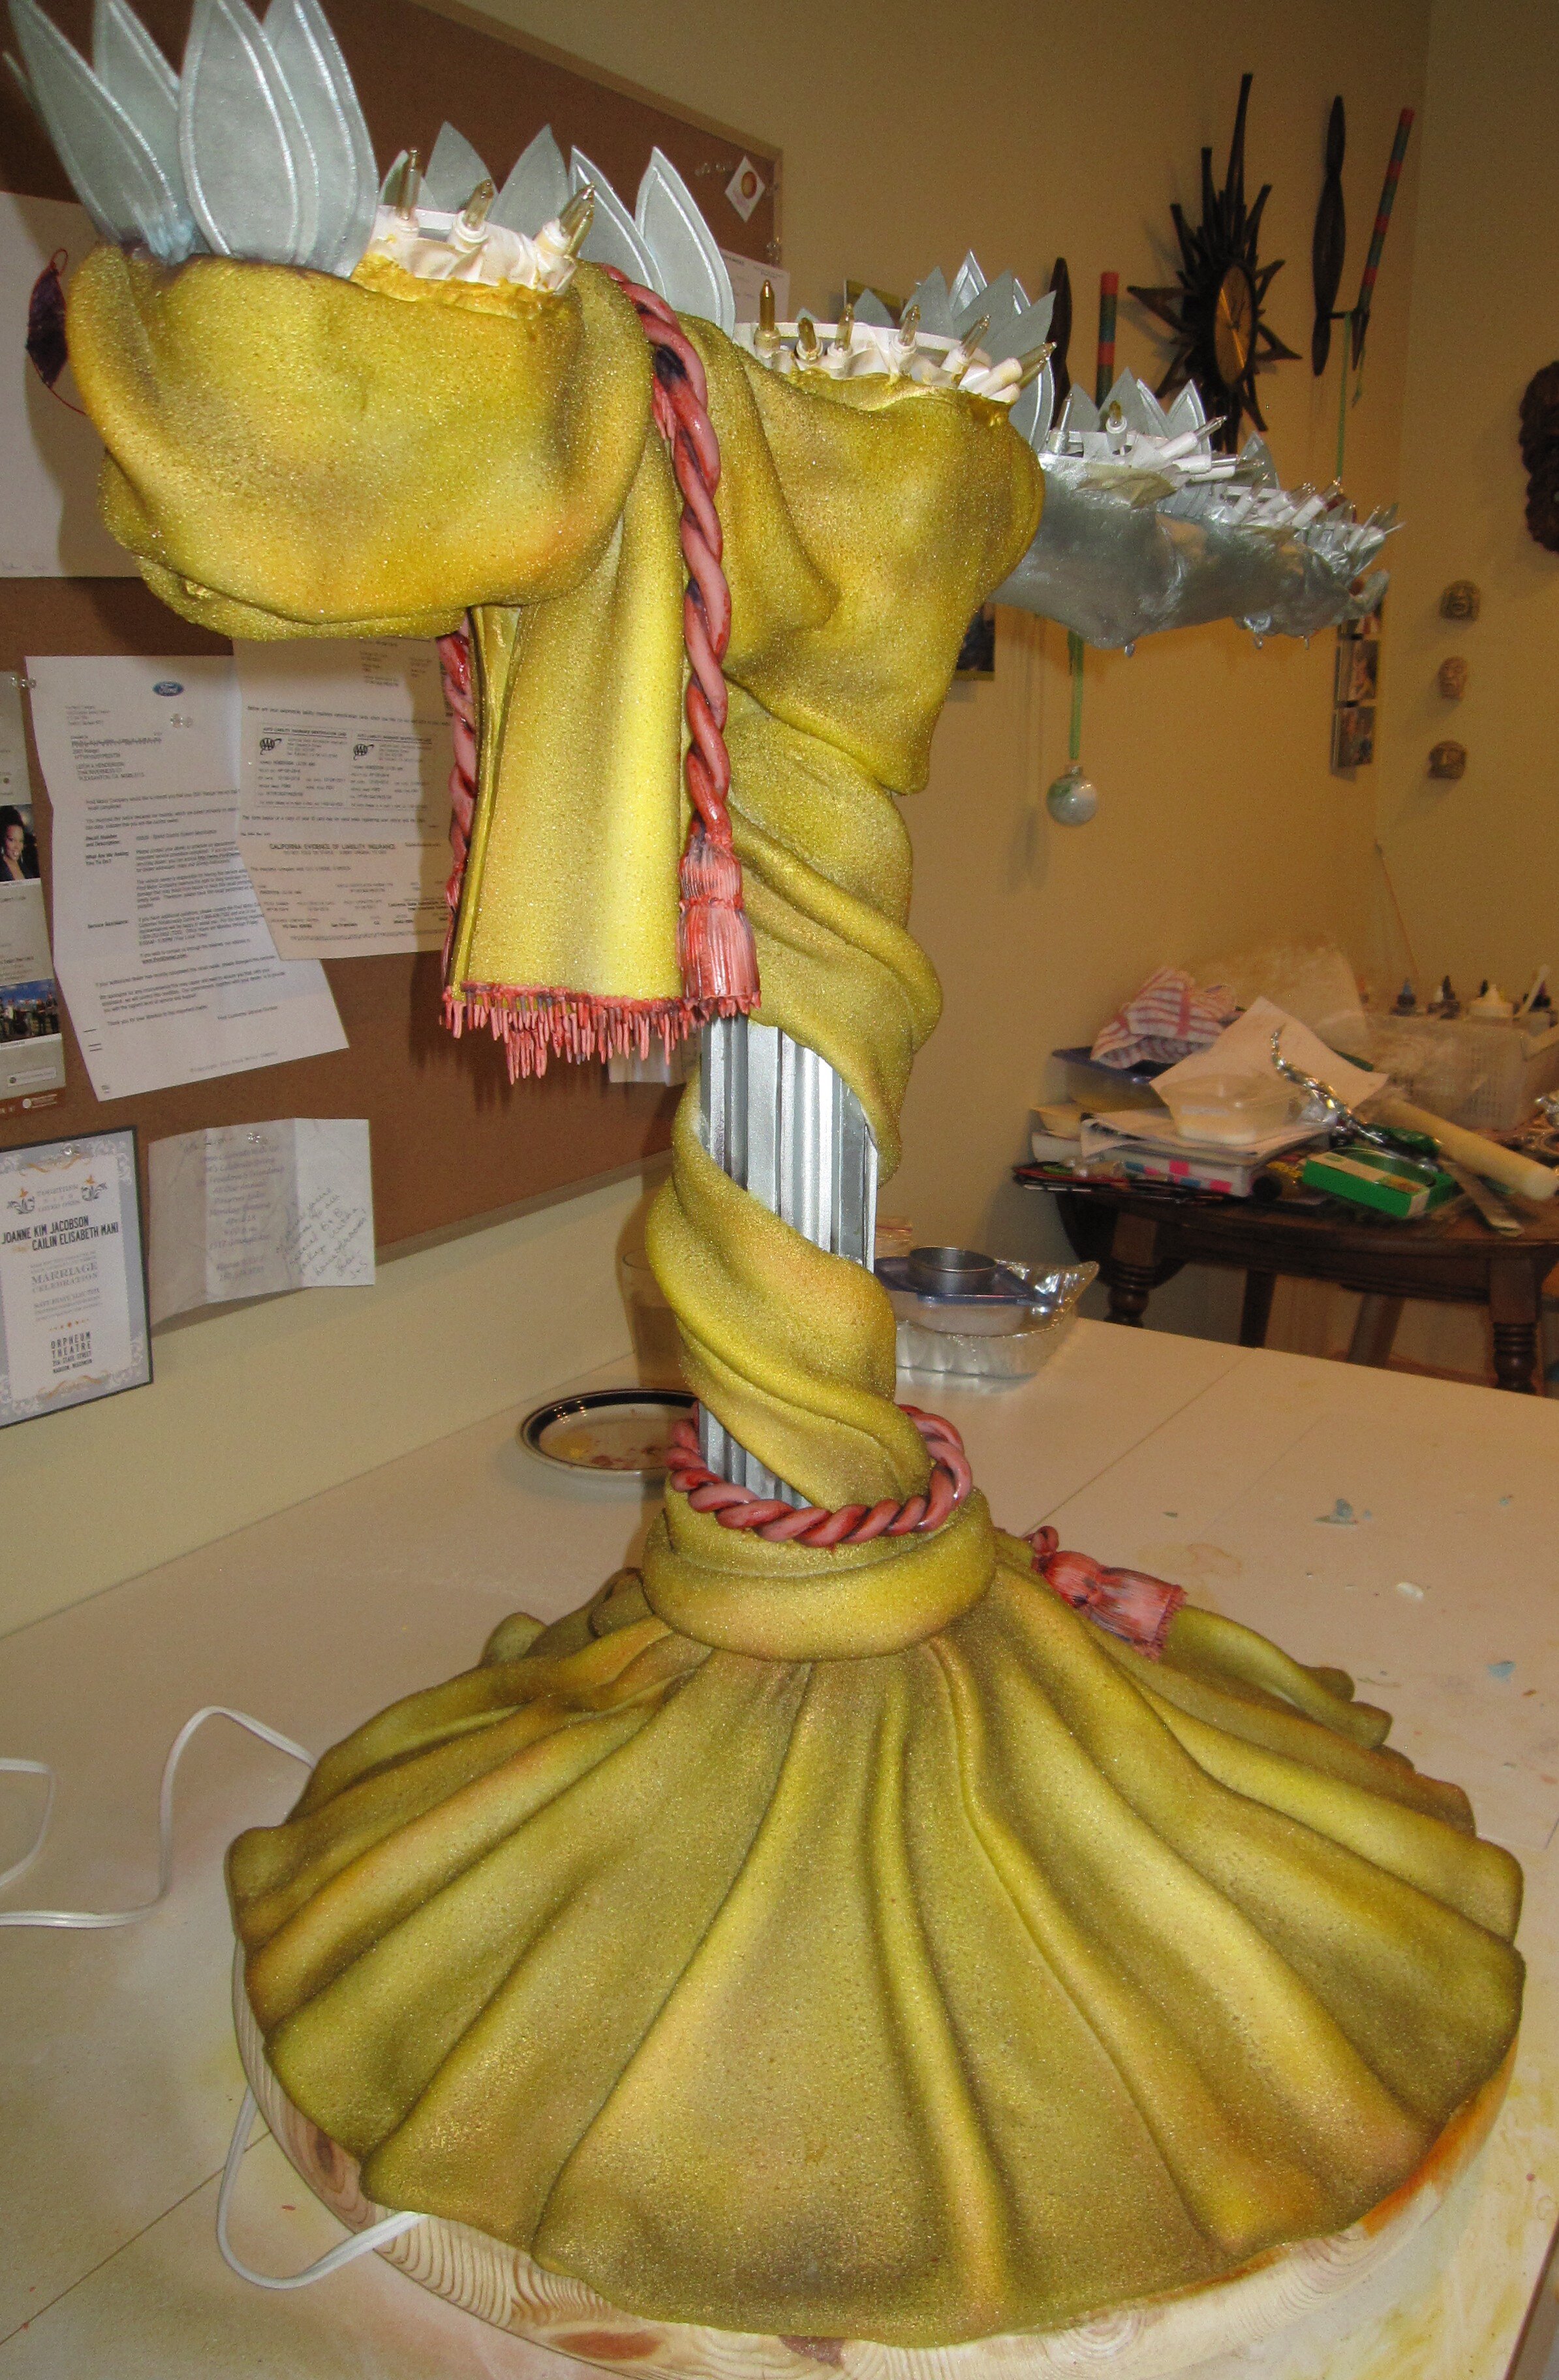
What I came up with was this bizarre art deco torchiere cake. Both this and the Seasons of Love Cake had aspects of balance and defying gravity about them. I didn’t really do this on purpose, but maybe it tells you something about how I see marriage – delicate? precarious? buoyant? at risk of collapse? I’m not sure. I’m also not sure why it’s in the shape of a human arm, except that it let me hang the little tiny wedding cake from the wedding ring finger. Apparently I just like making cakes in human form, whether appropriate to the occasion or not.
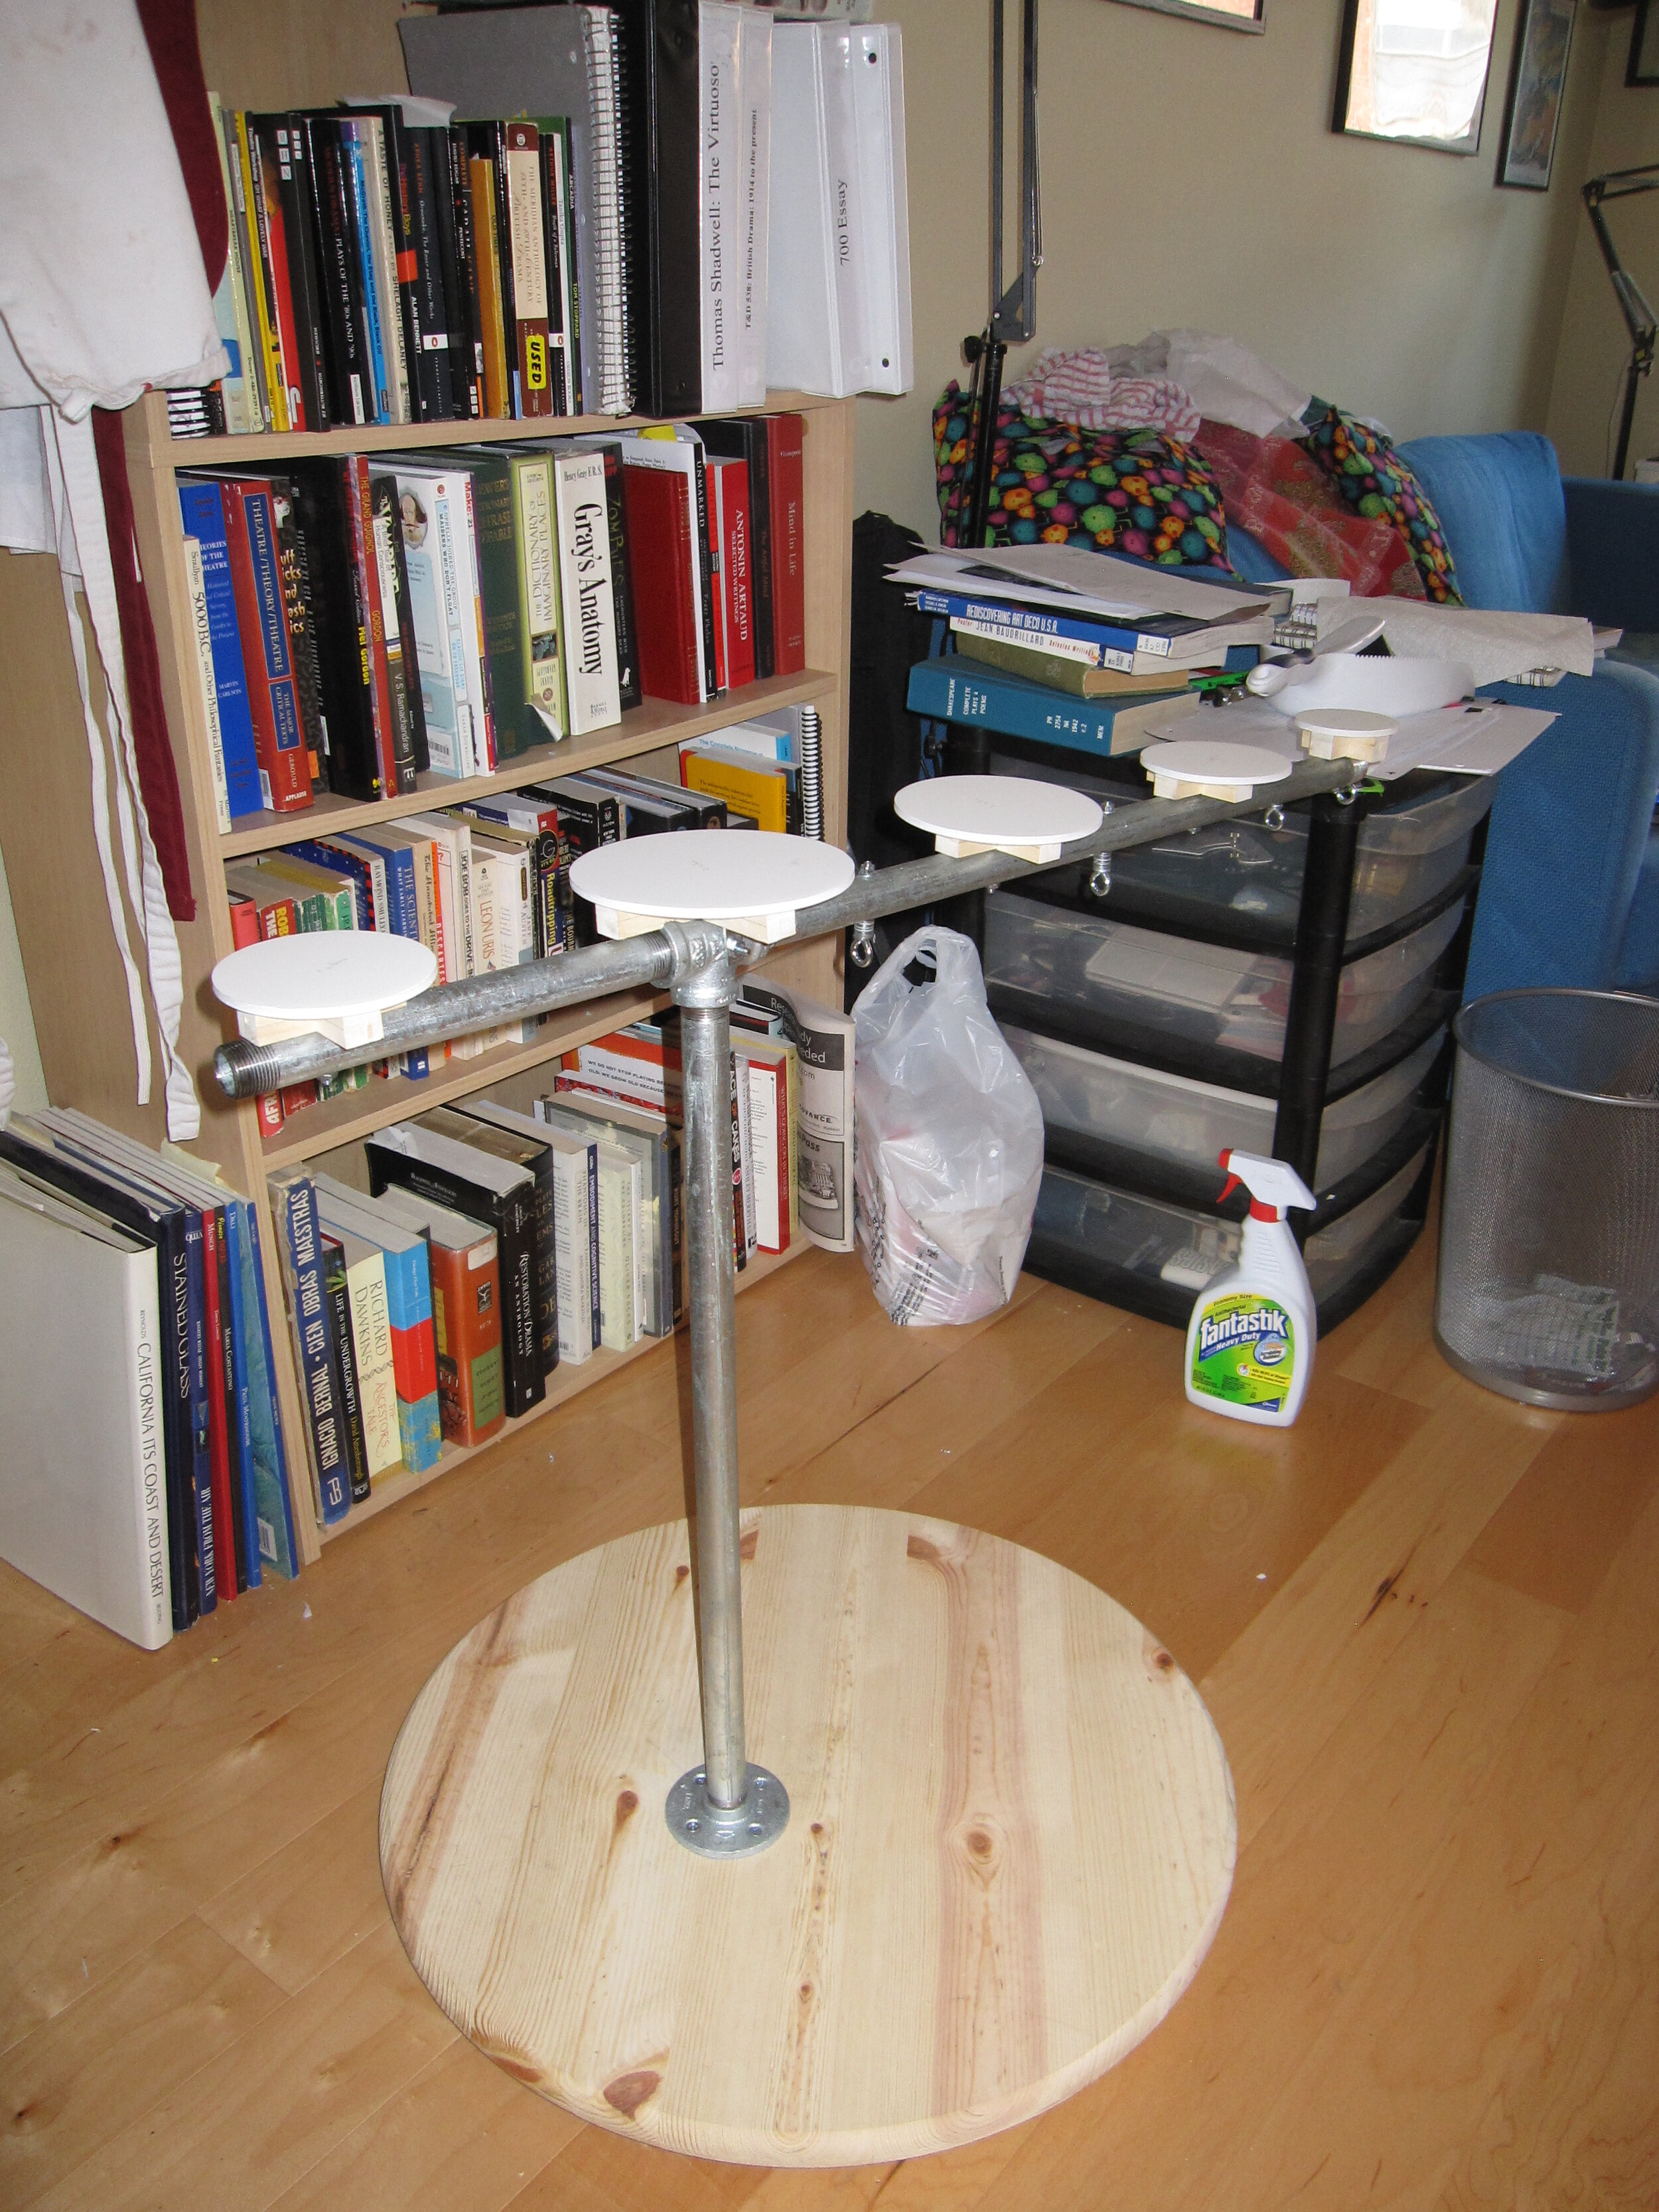
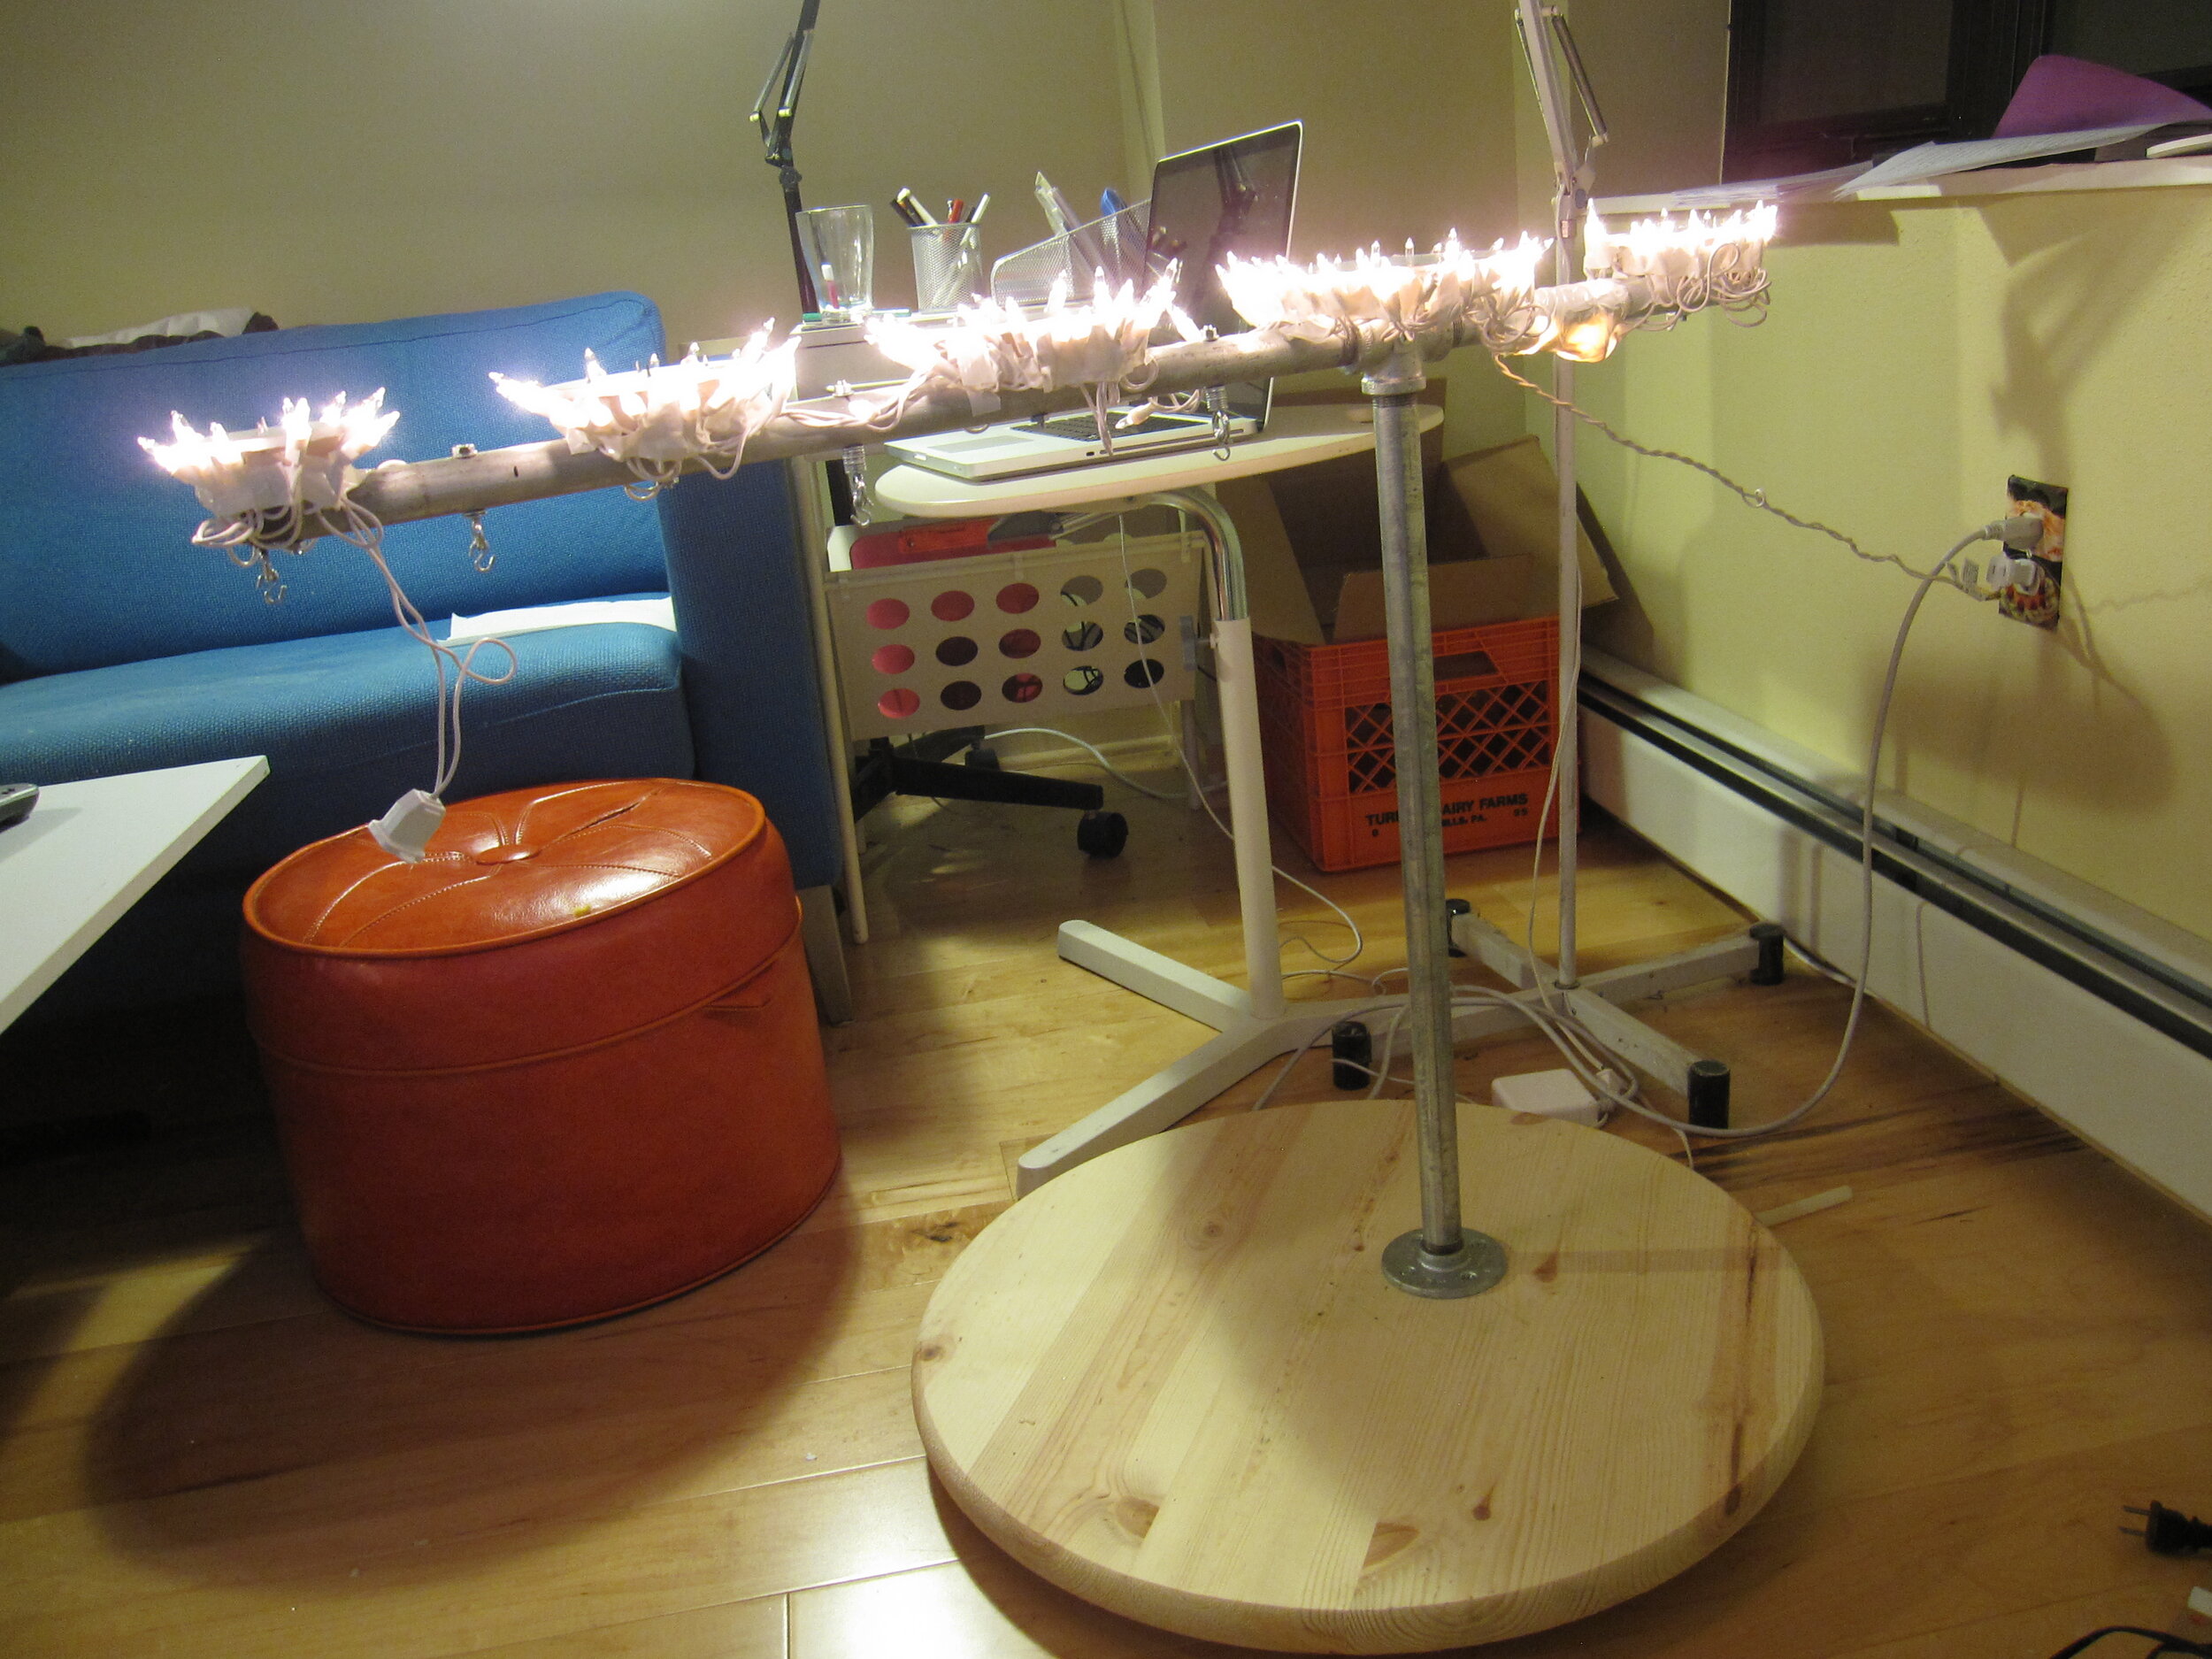
To make the arm strong enough to hold the cake, I started with ¾” steel pipes bolted to a 24” diameter solid wood base. I bolted little wood and foam core bases to the steel pipe to support the flame cakes and installed eyebolts to support the hanging cakes. To make the torchiere light up, I ran a strand of Christmas lights around all the little bases. In retrospect, it would have been better if I had used smaller lights, as I did have some difficulty later on masking the lights with the gum paste leaves.
I thought about making the arm out of white modeling chocolate, because I thought that would be the easiest to sculpt, but I was afraid that the silver airbrush color wouldn’t show up as well on that as it would on some other materials. Then I thought about making it out of fondant, but I thought that would be too heavy to stay up on the pipe. So I decided to form the shape of the arm out of rice cereal treats and then cover it and put in the details with royal icing.
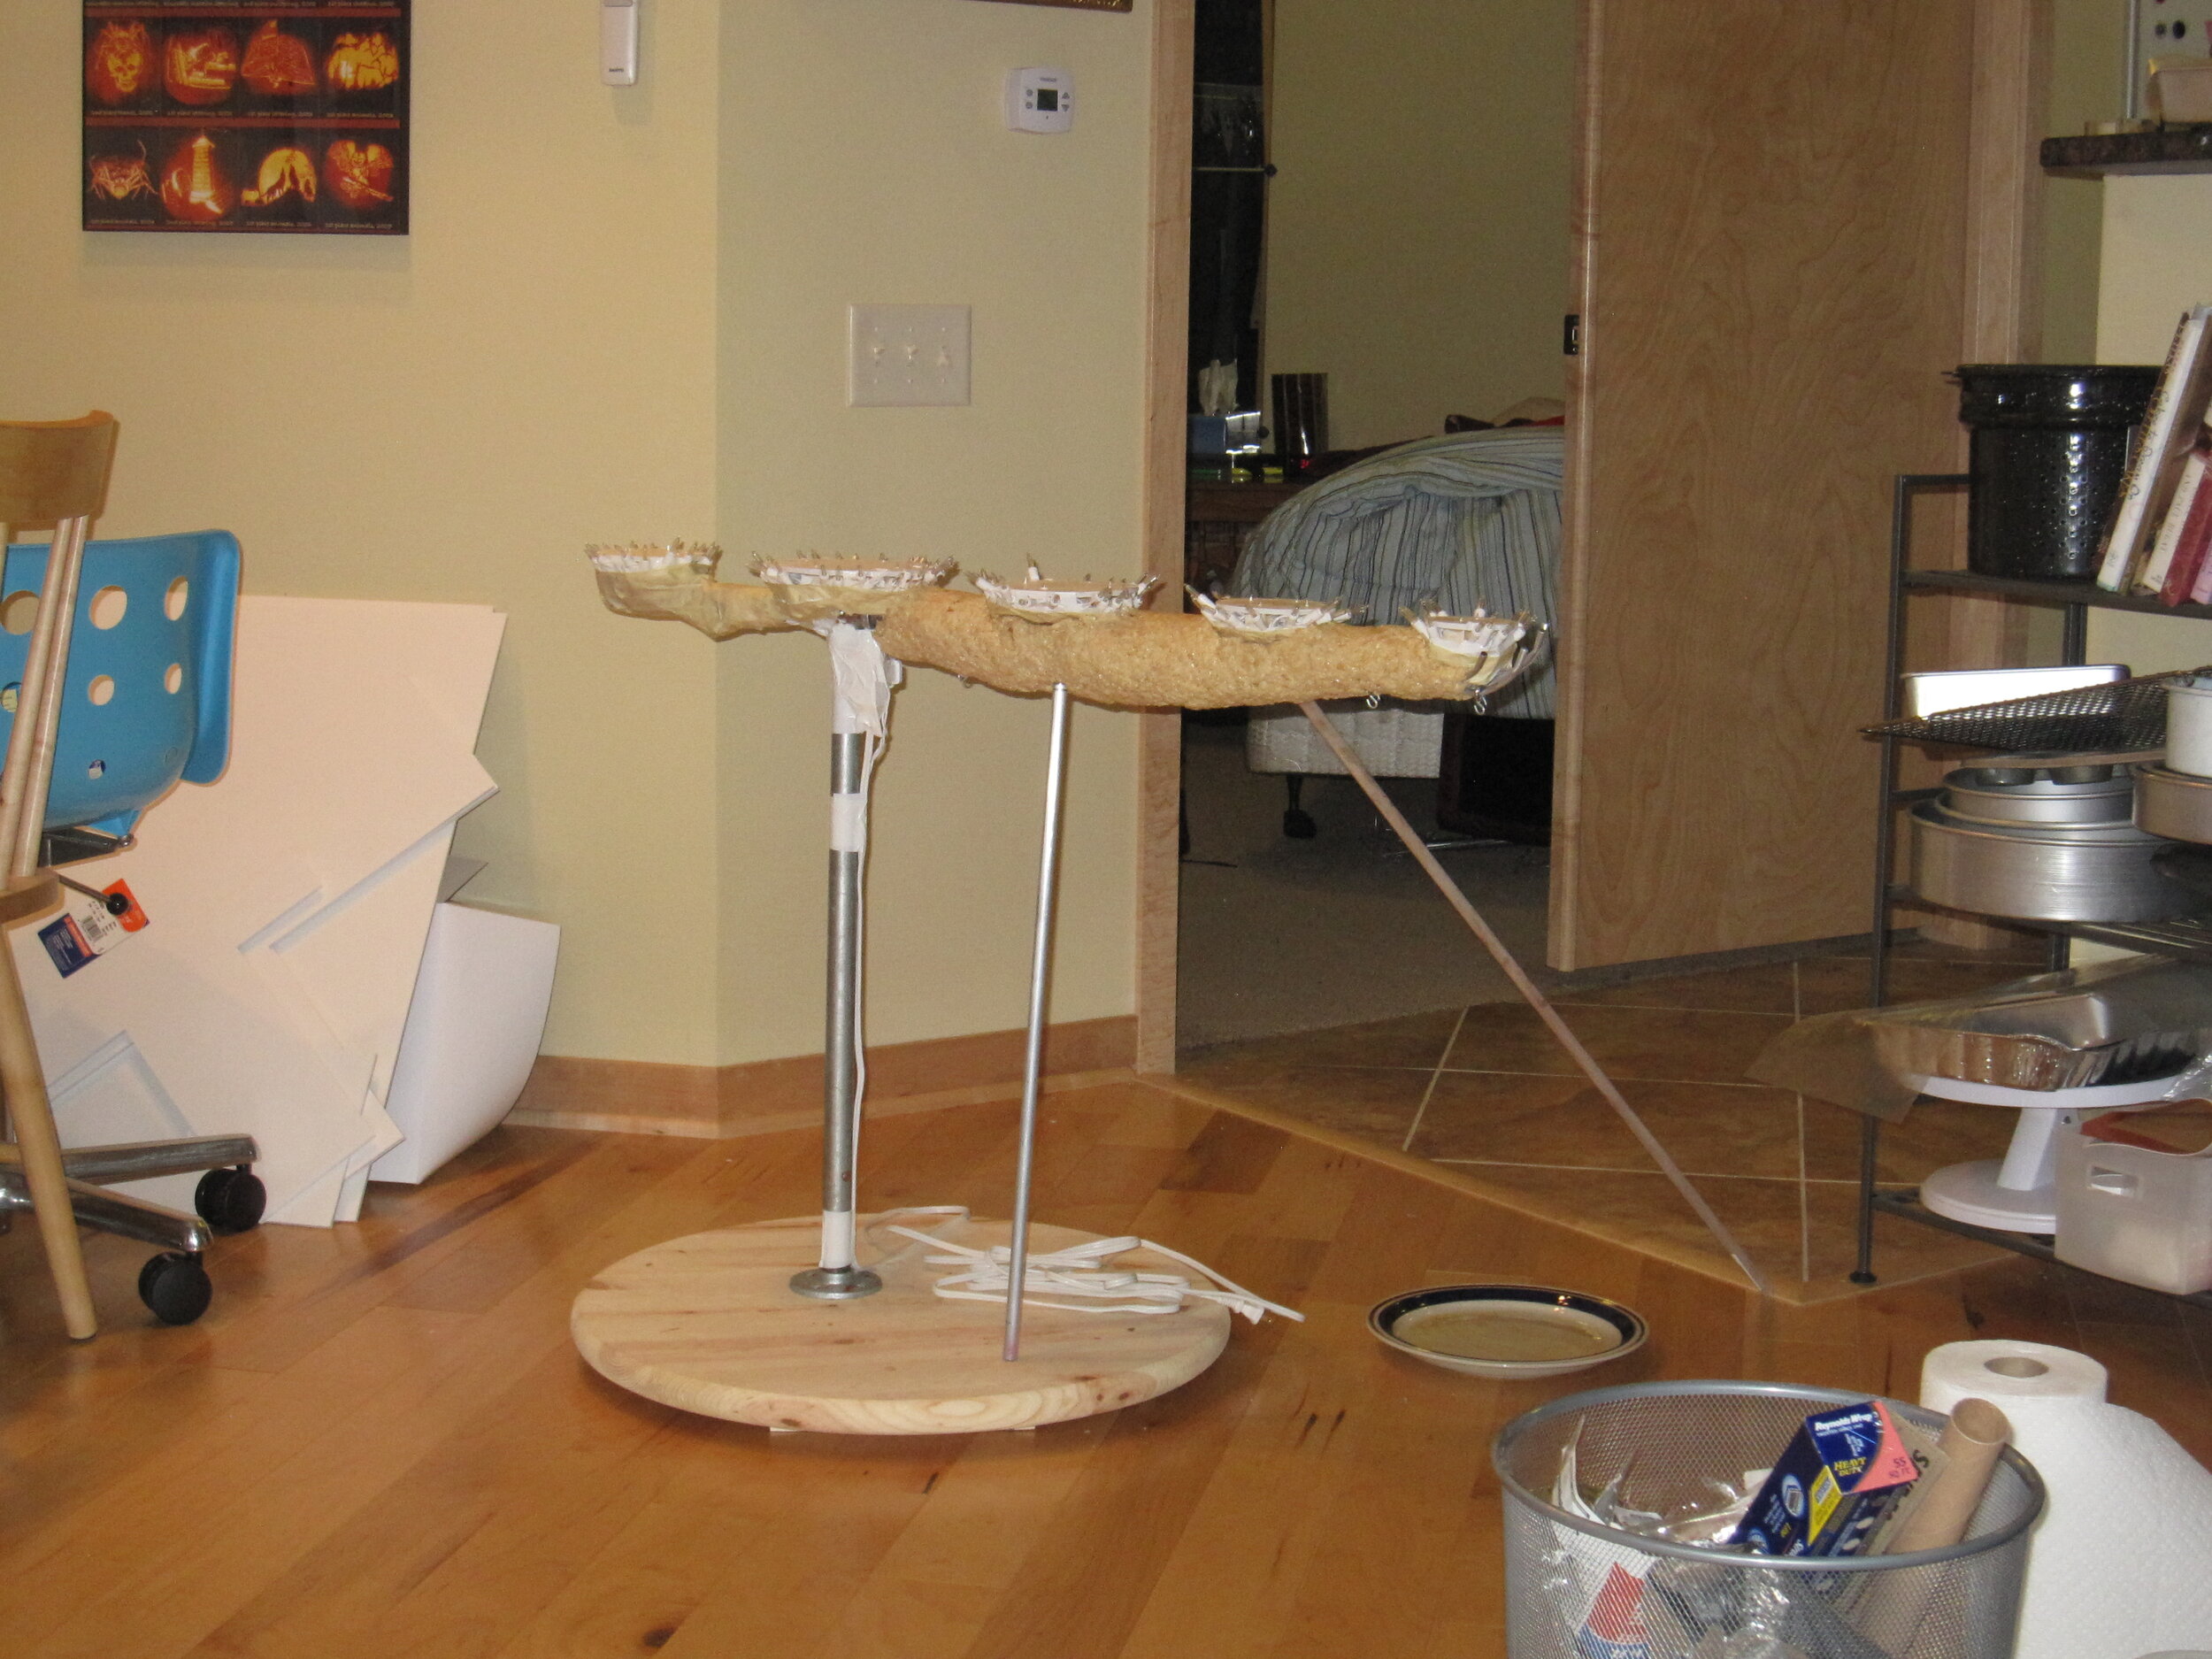
Rice cereal treats always wind up being more difficult to work with than I expect them to be. I had a lot of trouble getting them to stay in place, to the point where I briefly feared that I might have to resort to a non-edible material instead. Eventually, though, I figured out how to hold them in place with aluminum foil until they firmed up. Then I carved them down to shape and slapped on a coat of royal icing. In retrospect, I would have been better served by a more carefully applied coat of royal icing.
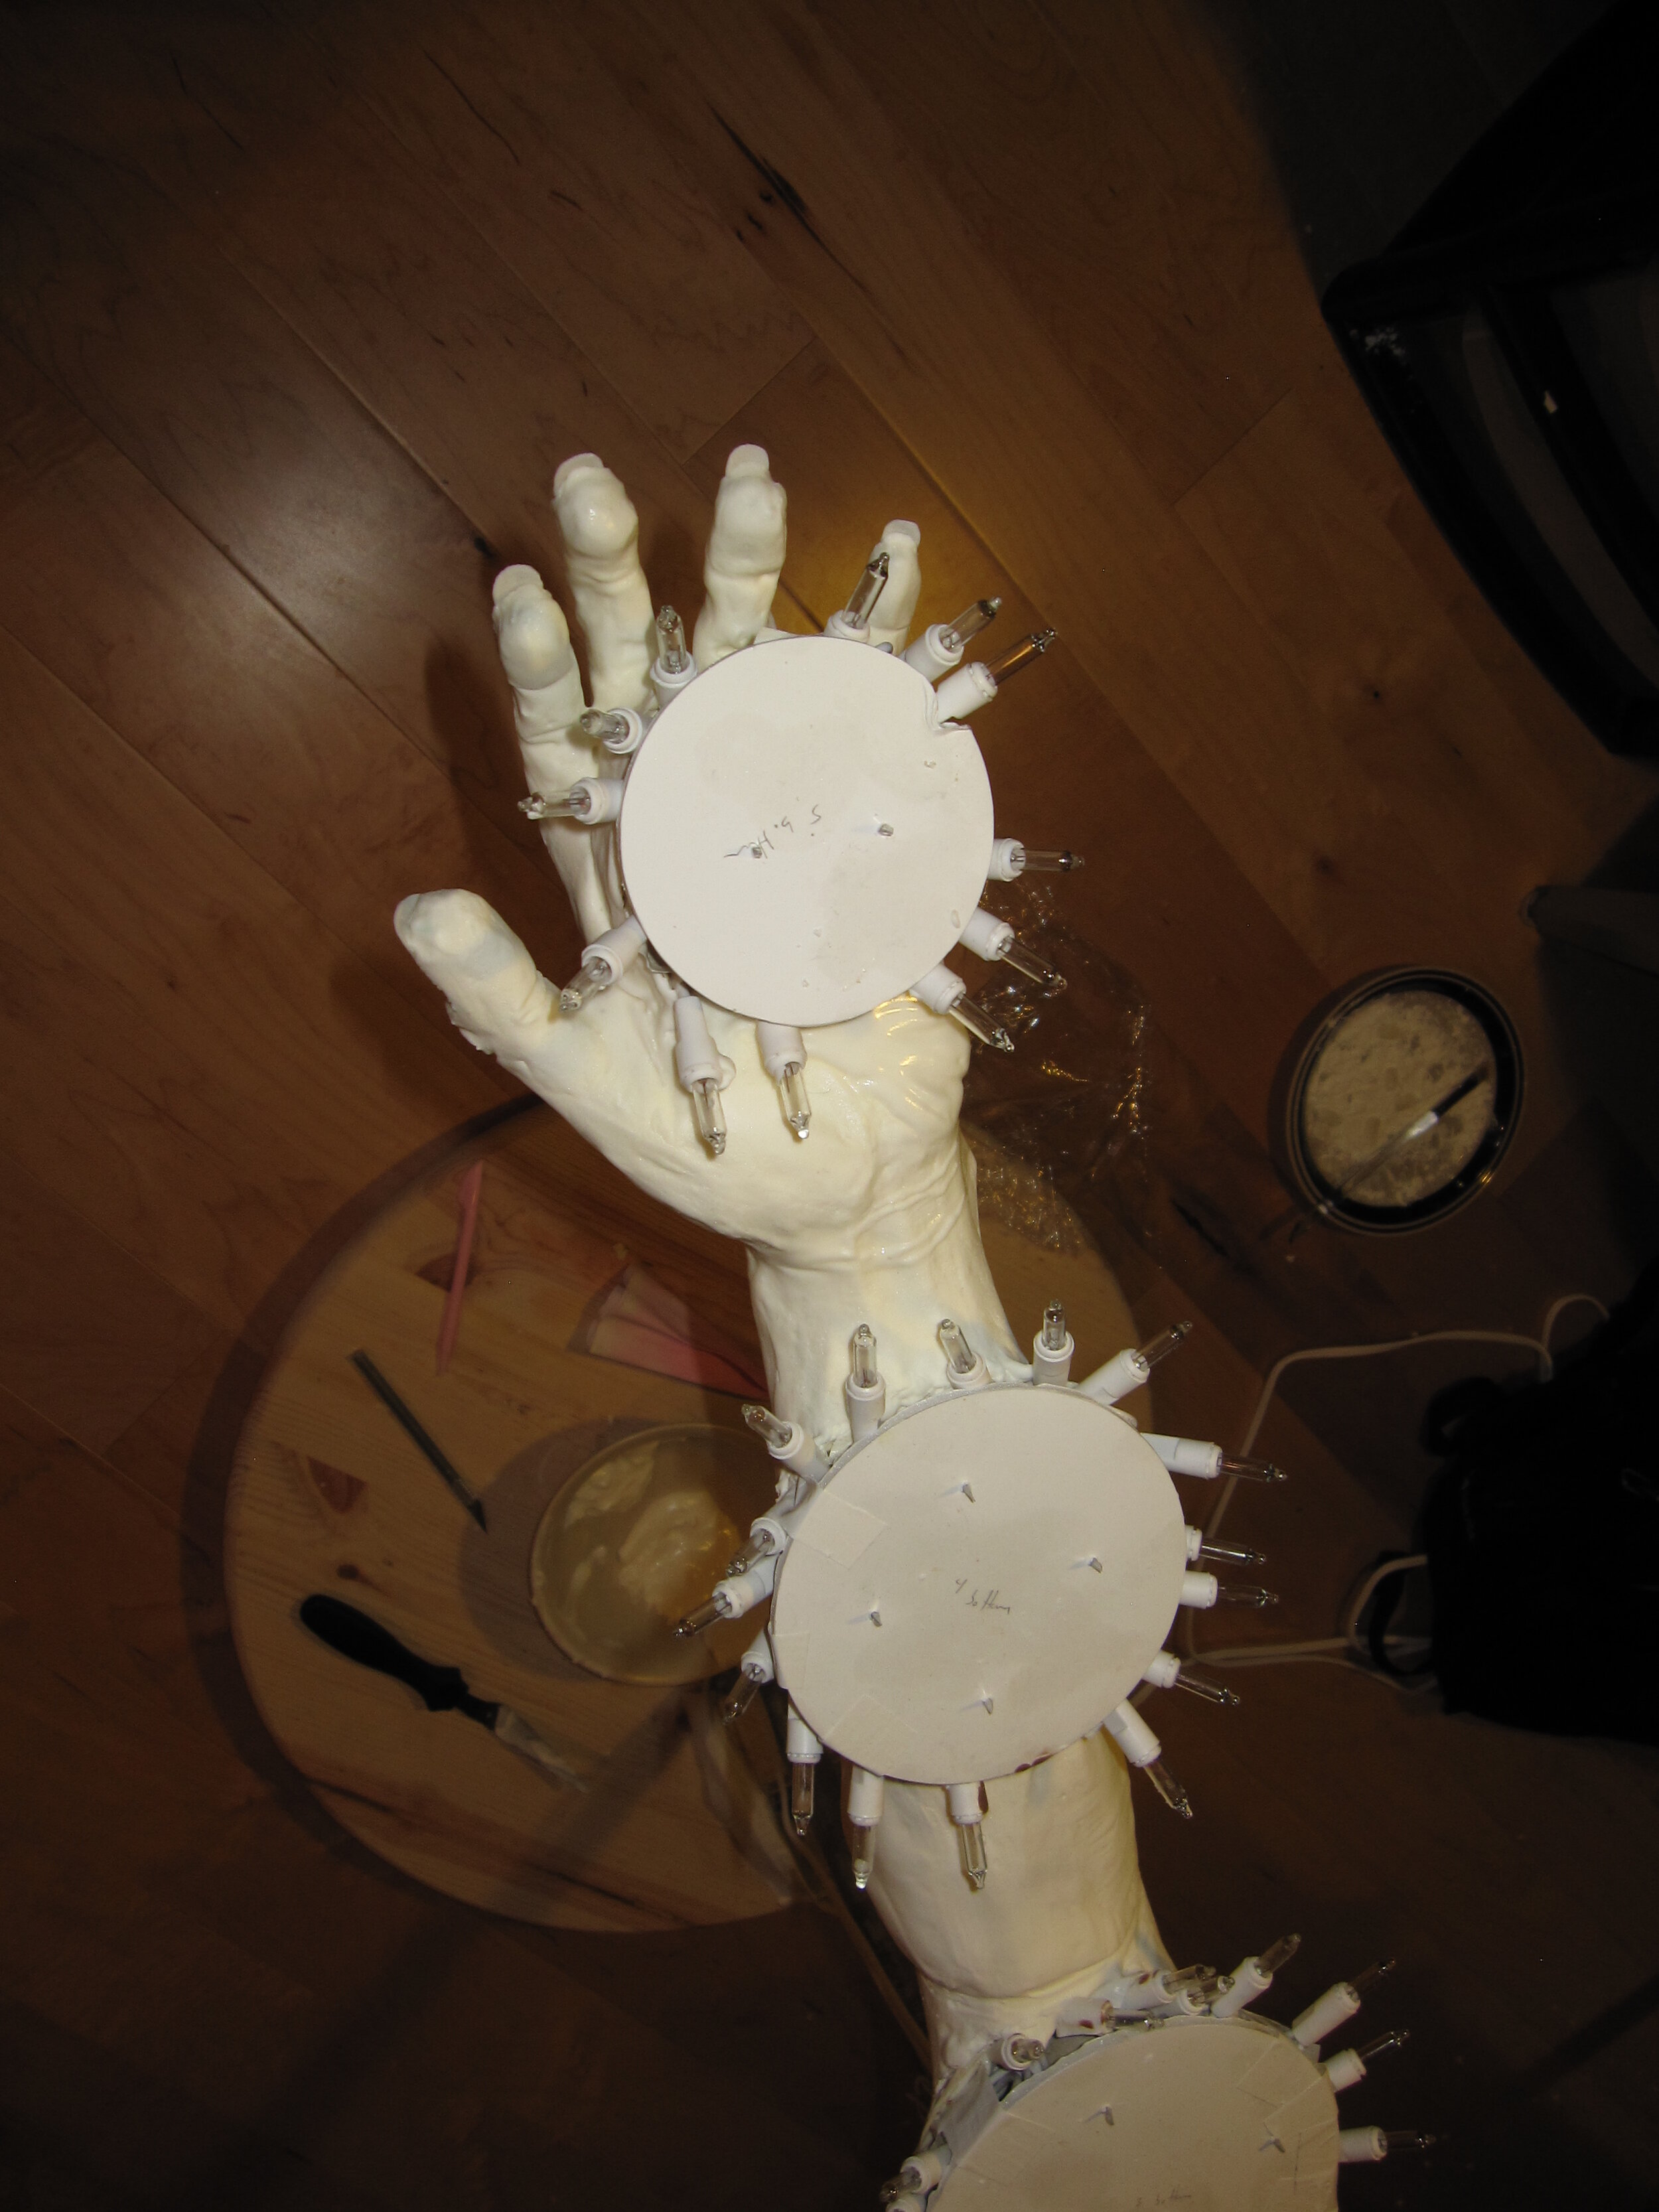
Once that coat of royal icing dried, I sanded the rough edges, a process that would have been much easier if I had given more attention to the first coat. Then I applied a second coat, this time carefully smoothing it with a damp paintbrush. I found that I needed to install some small aluminum tubing to get the fingers to hold their shapes. I also sanded this coat of royal icing with a fine grit sand paper after it dried. I then went in one more time to create the details of the bone structure and skin folds. I made the fingernails out of gum paste, a technique that worked well for me on the Killer Rats Cake. This time I had a little trouble because the royal icing had dried too much to let me really sink the nails into the nail beds, so I had to add some more icing over the top of the nails to marry them to the fingers. As a result, the fingertips wound up perhaps a bit bulkier than ideal. Apparently the arm was wearing acrylic nails.
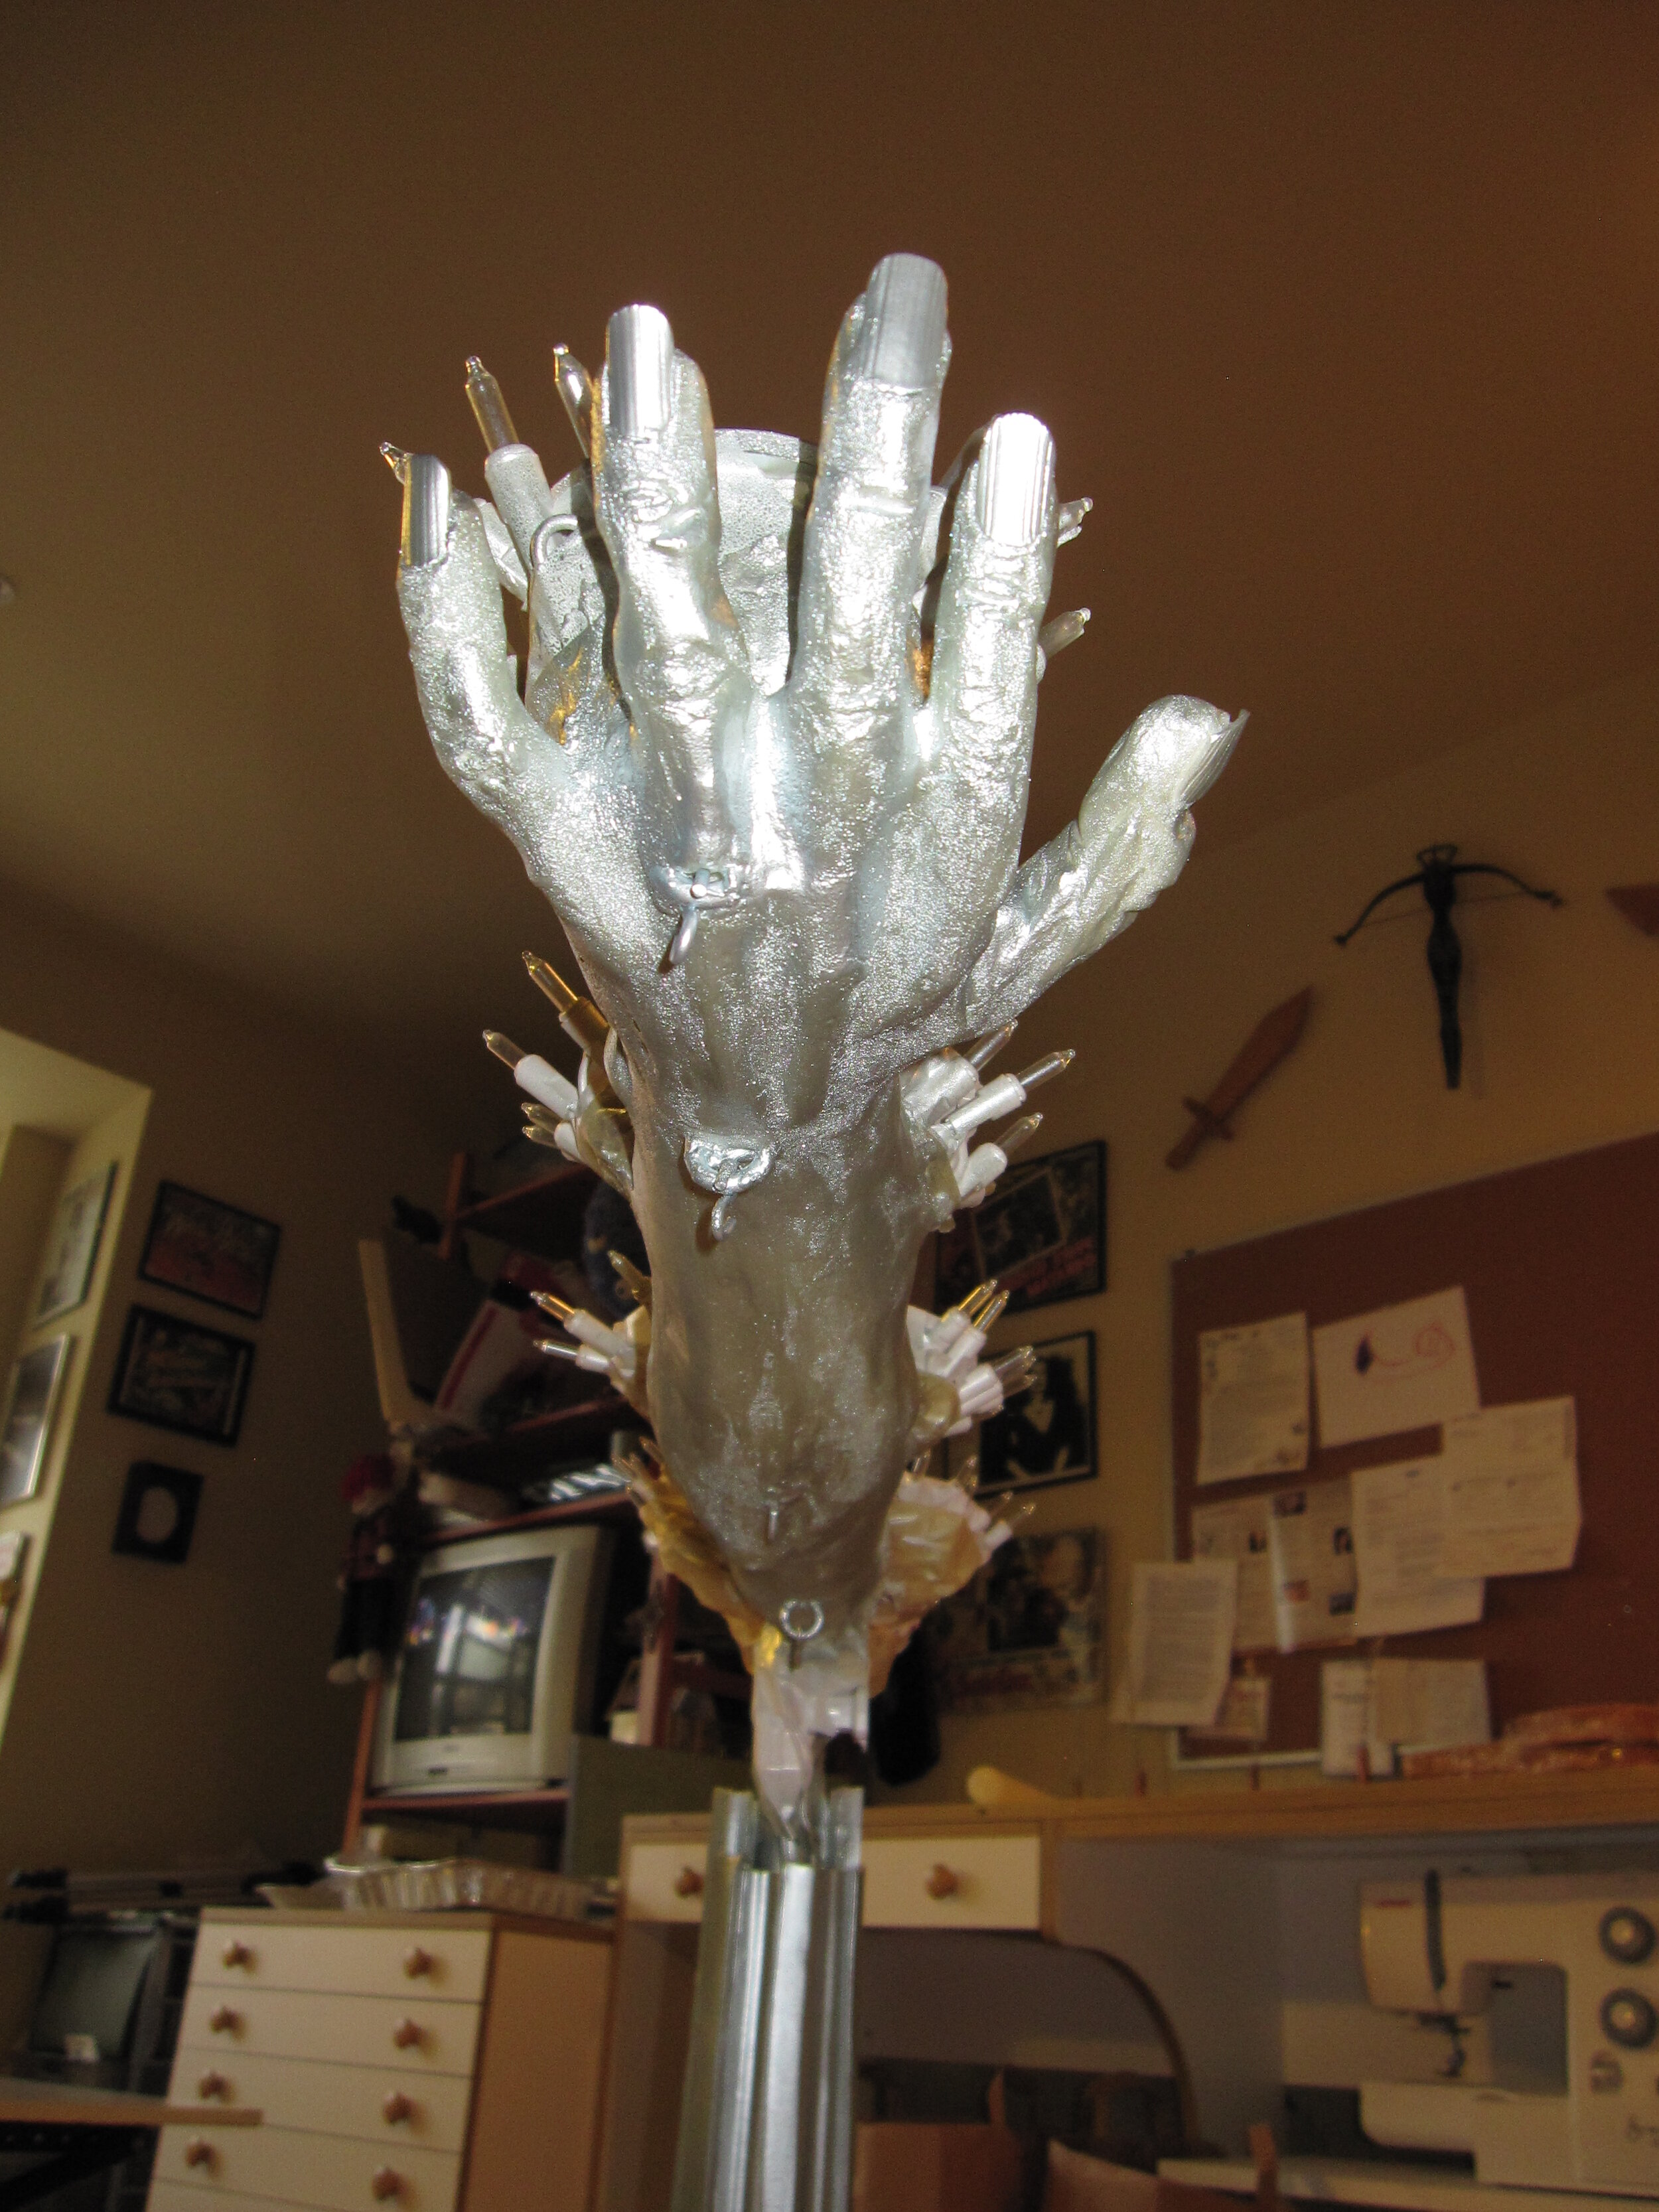
To mask the central support pipe, I used some pieces of foam core covered with fondant to create a fluted hexagonal column. I also made some stylized art deco leaves out of gum paste to cover the lights at the bases of the flame cakes. Then I got busy with the airbrush spraying the arm, the column, and the leaves silver. I also added a little gum paste wedding ring to the ring finger that would support the hanging mini wedding cake.

The next step was to make the fondant curtains. I had expected this to be a challenge, and I was right. Unsupported fondant drapery is difficult under any circumstances because it’s hard to drape the heavy fondant realistically without the weight of it ripping itself apart. This fondant drapery was especially tricky because I wanted it to have the worn velour texture of old theater curtains. To accomplish this, after I rolled out the fondant, I moistened the surface and then coated it with an even layer of granulated sugar. So not only was I worried about getting a natural drape, I also had to be careful not to damage the sugar texture. Because I was applying the drapery to the arm and the column that had already been airbrushed, there was also the risk that I would mar the paint job if I moved the fondant drapery around too much. In the end, it worked out pretty well, though, and I was able to wrap some tin foil around to hold the fondant in place until it set in place. I also draped some fondant over the foam core bases that I had made for the four hanging cakes.
Another problem with my sugar fabric texture technique is that it has a tendency to get sugar everywhere. So from this point forward, my apartment was covered with a fine layer of stickiness. My good friend Angie came to stay with me for a few days for the wedding and she made a valiant effort to keep the mess under control, but I still had to loan my slippers to my other friend Jenn when she came over to visit so that her stockings wouldn’t get covered with sugar.

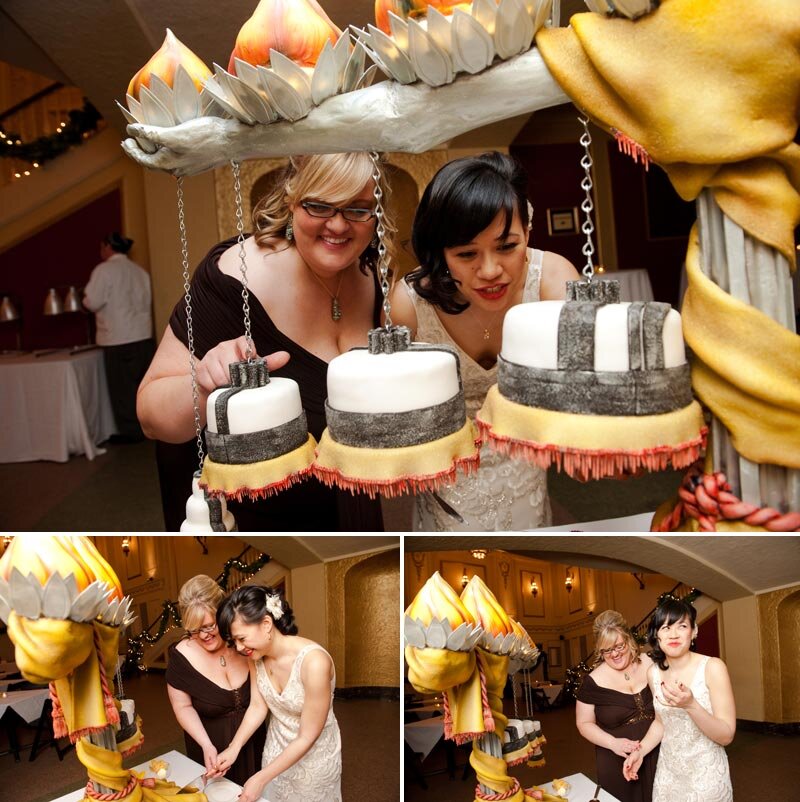
With the torchiere structure in place, it was time to bake the cake. It needed to serve about 150 people, so this was the biggest cake I have made thus far. I actually rather dramatically overbought on ingredients because I thought that the cake recipe I was using made only six cups of batter when, in fact, it made ten cups of batter, so I didn’t have to make nearly as many batches I thought I would have to make. I believe that in the end I made 11 batches instead of the 16 I had initially anticipated. It’s perhaps just as well that I underestimated the yield of the recipe, as I also underestimated the number of eggs that it takes to make up a cup of egg whites. I bought eggs thinking that it would take 6 eggs per cup, when it actually took 8 eggs per cup, so in this case my miscalculations almost cancelled each other out and I had about the right number of eggs.
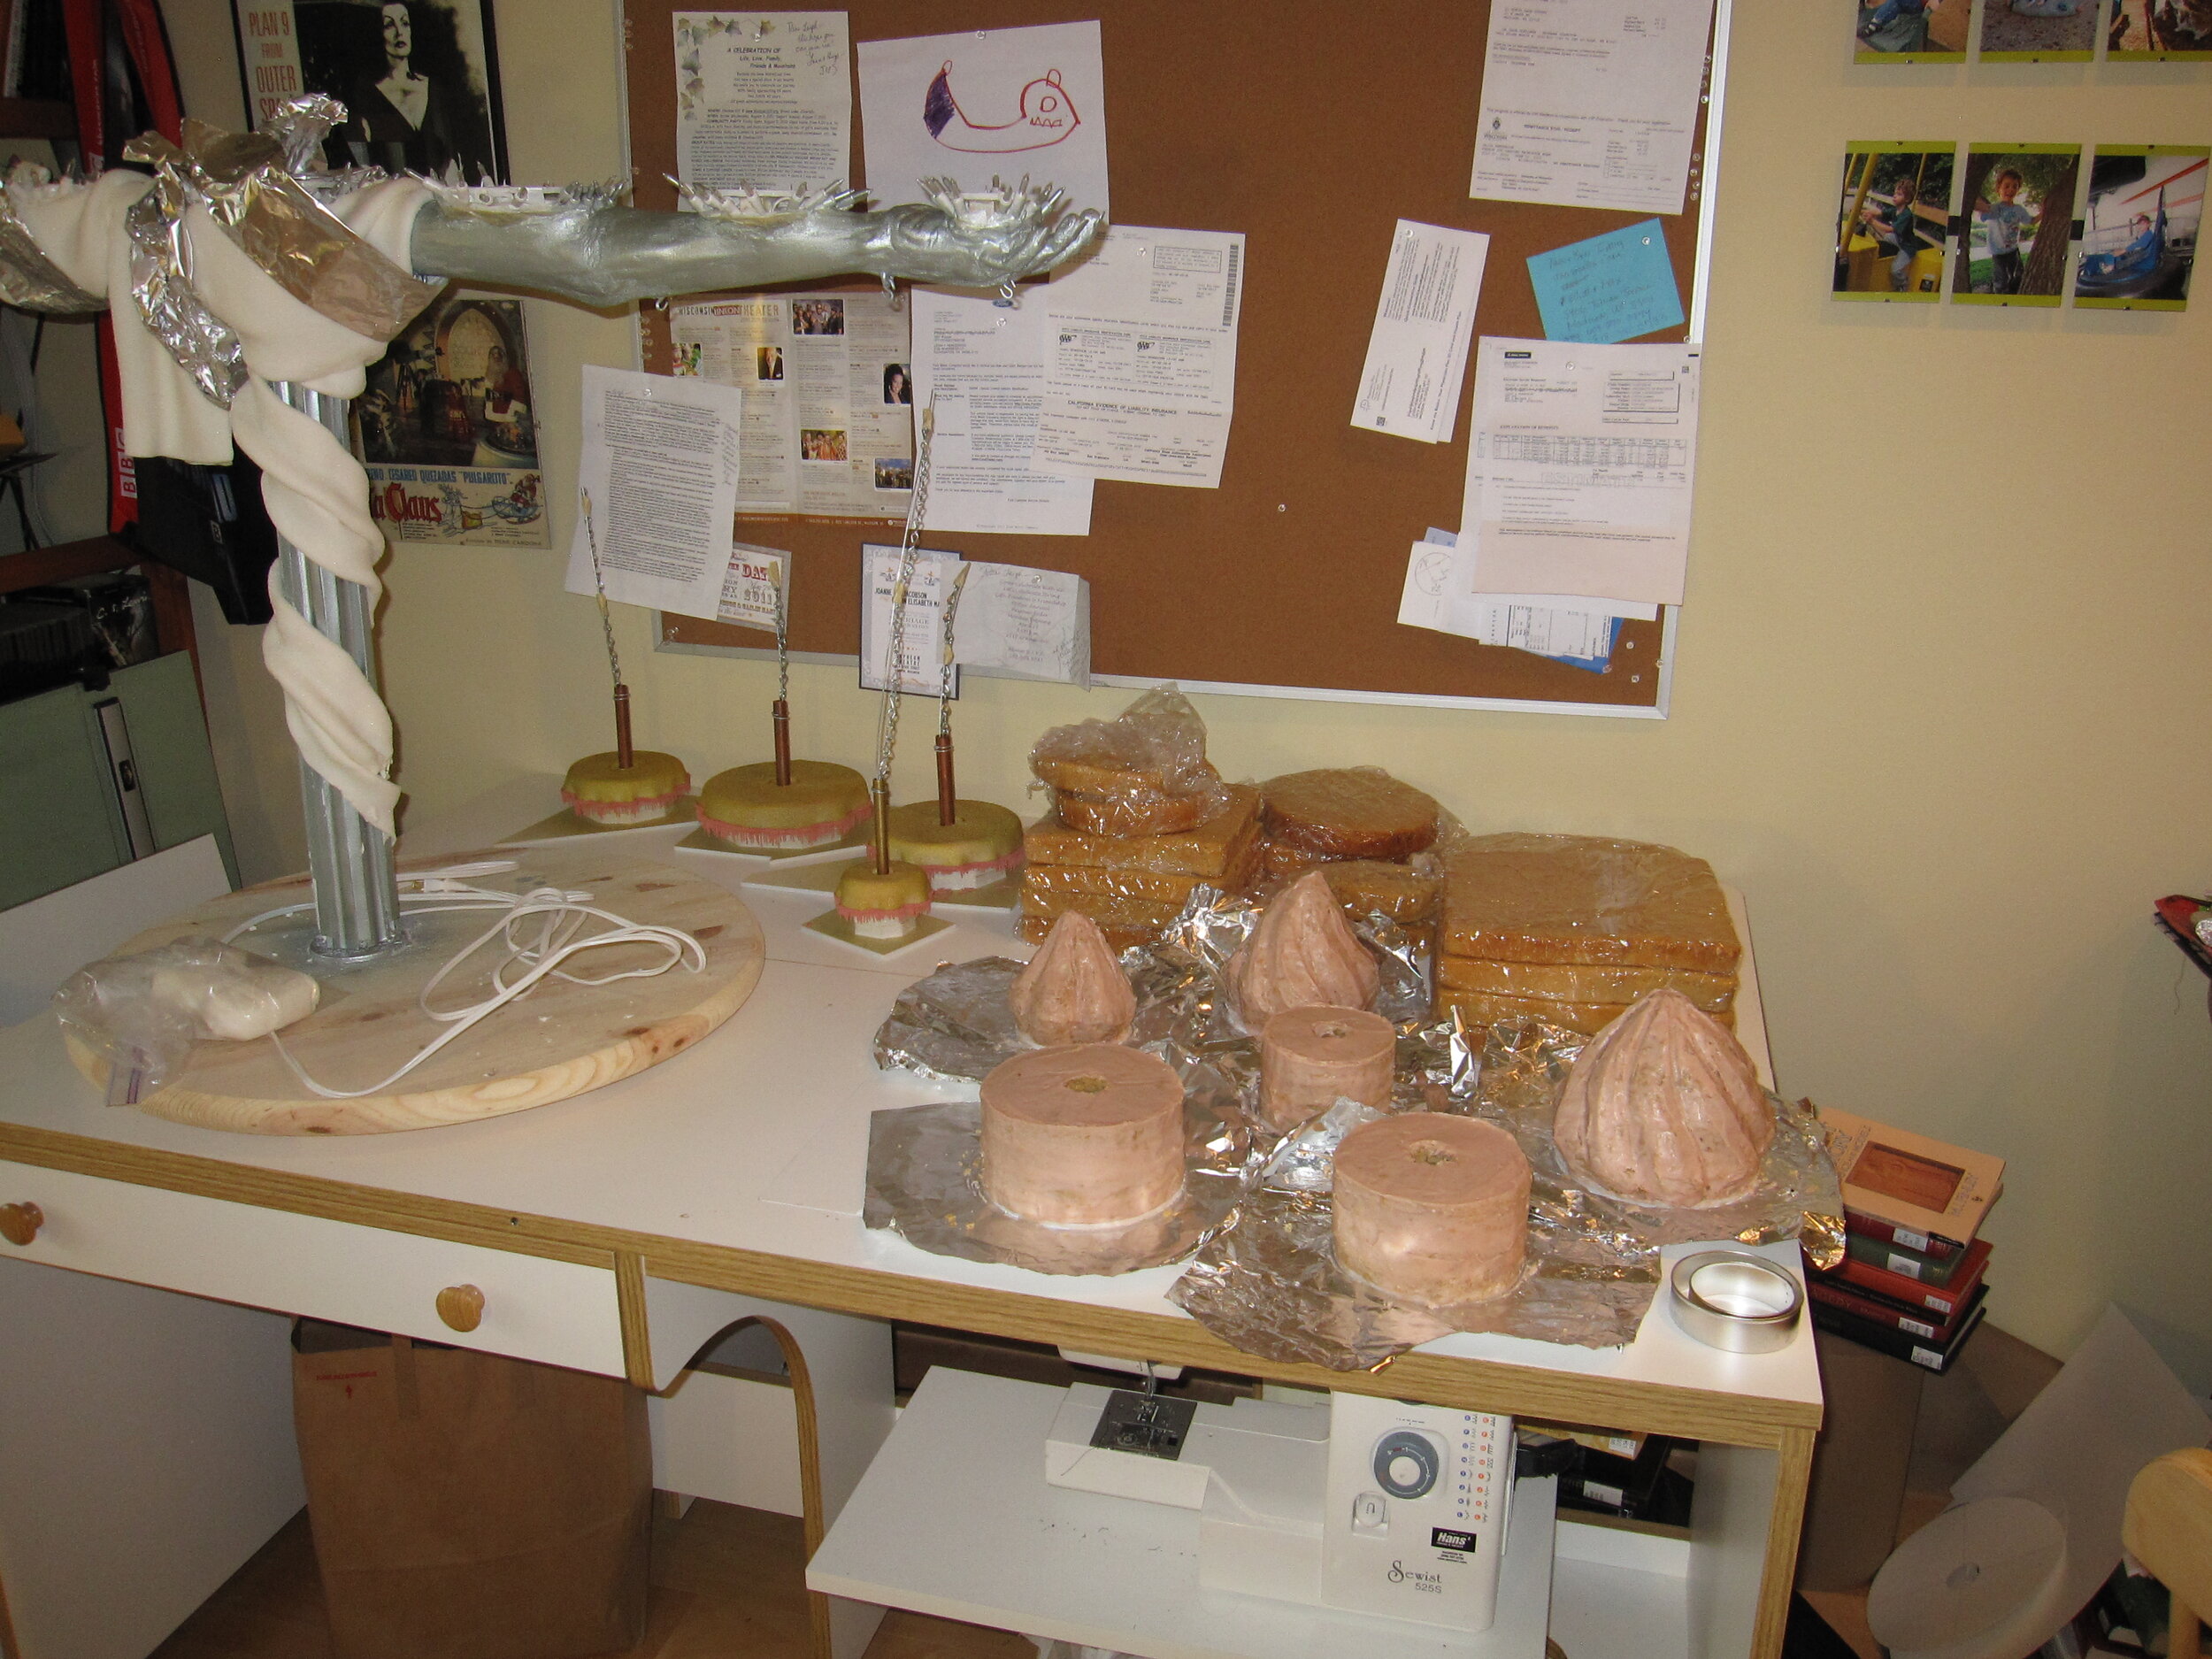
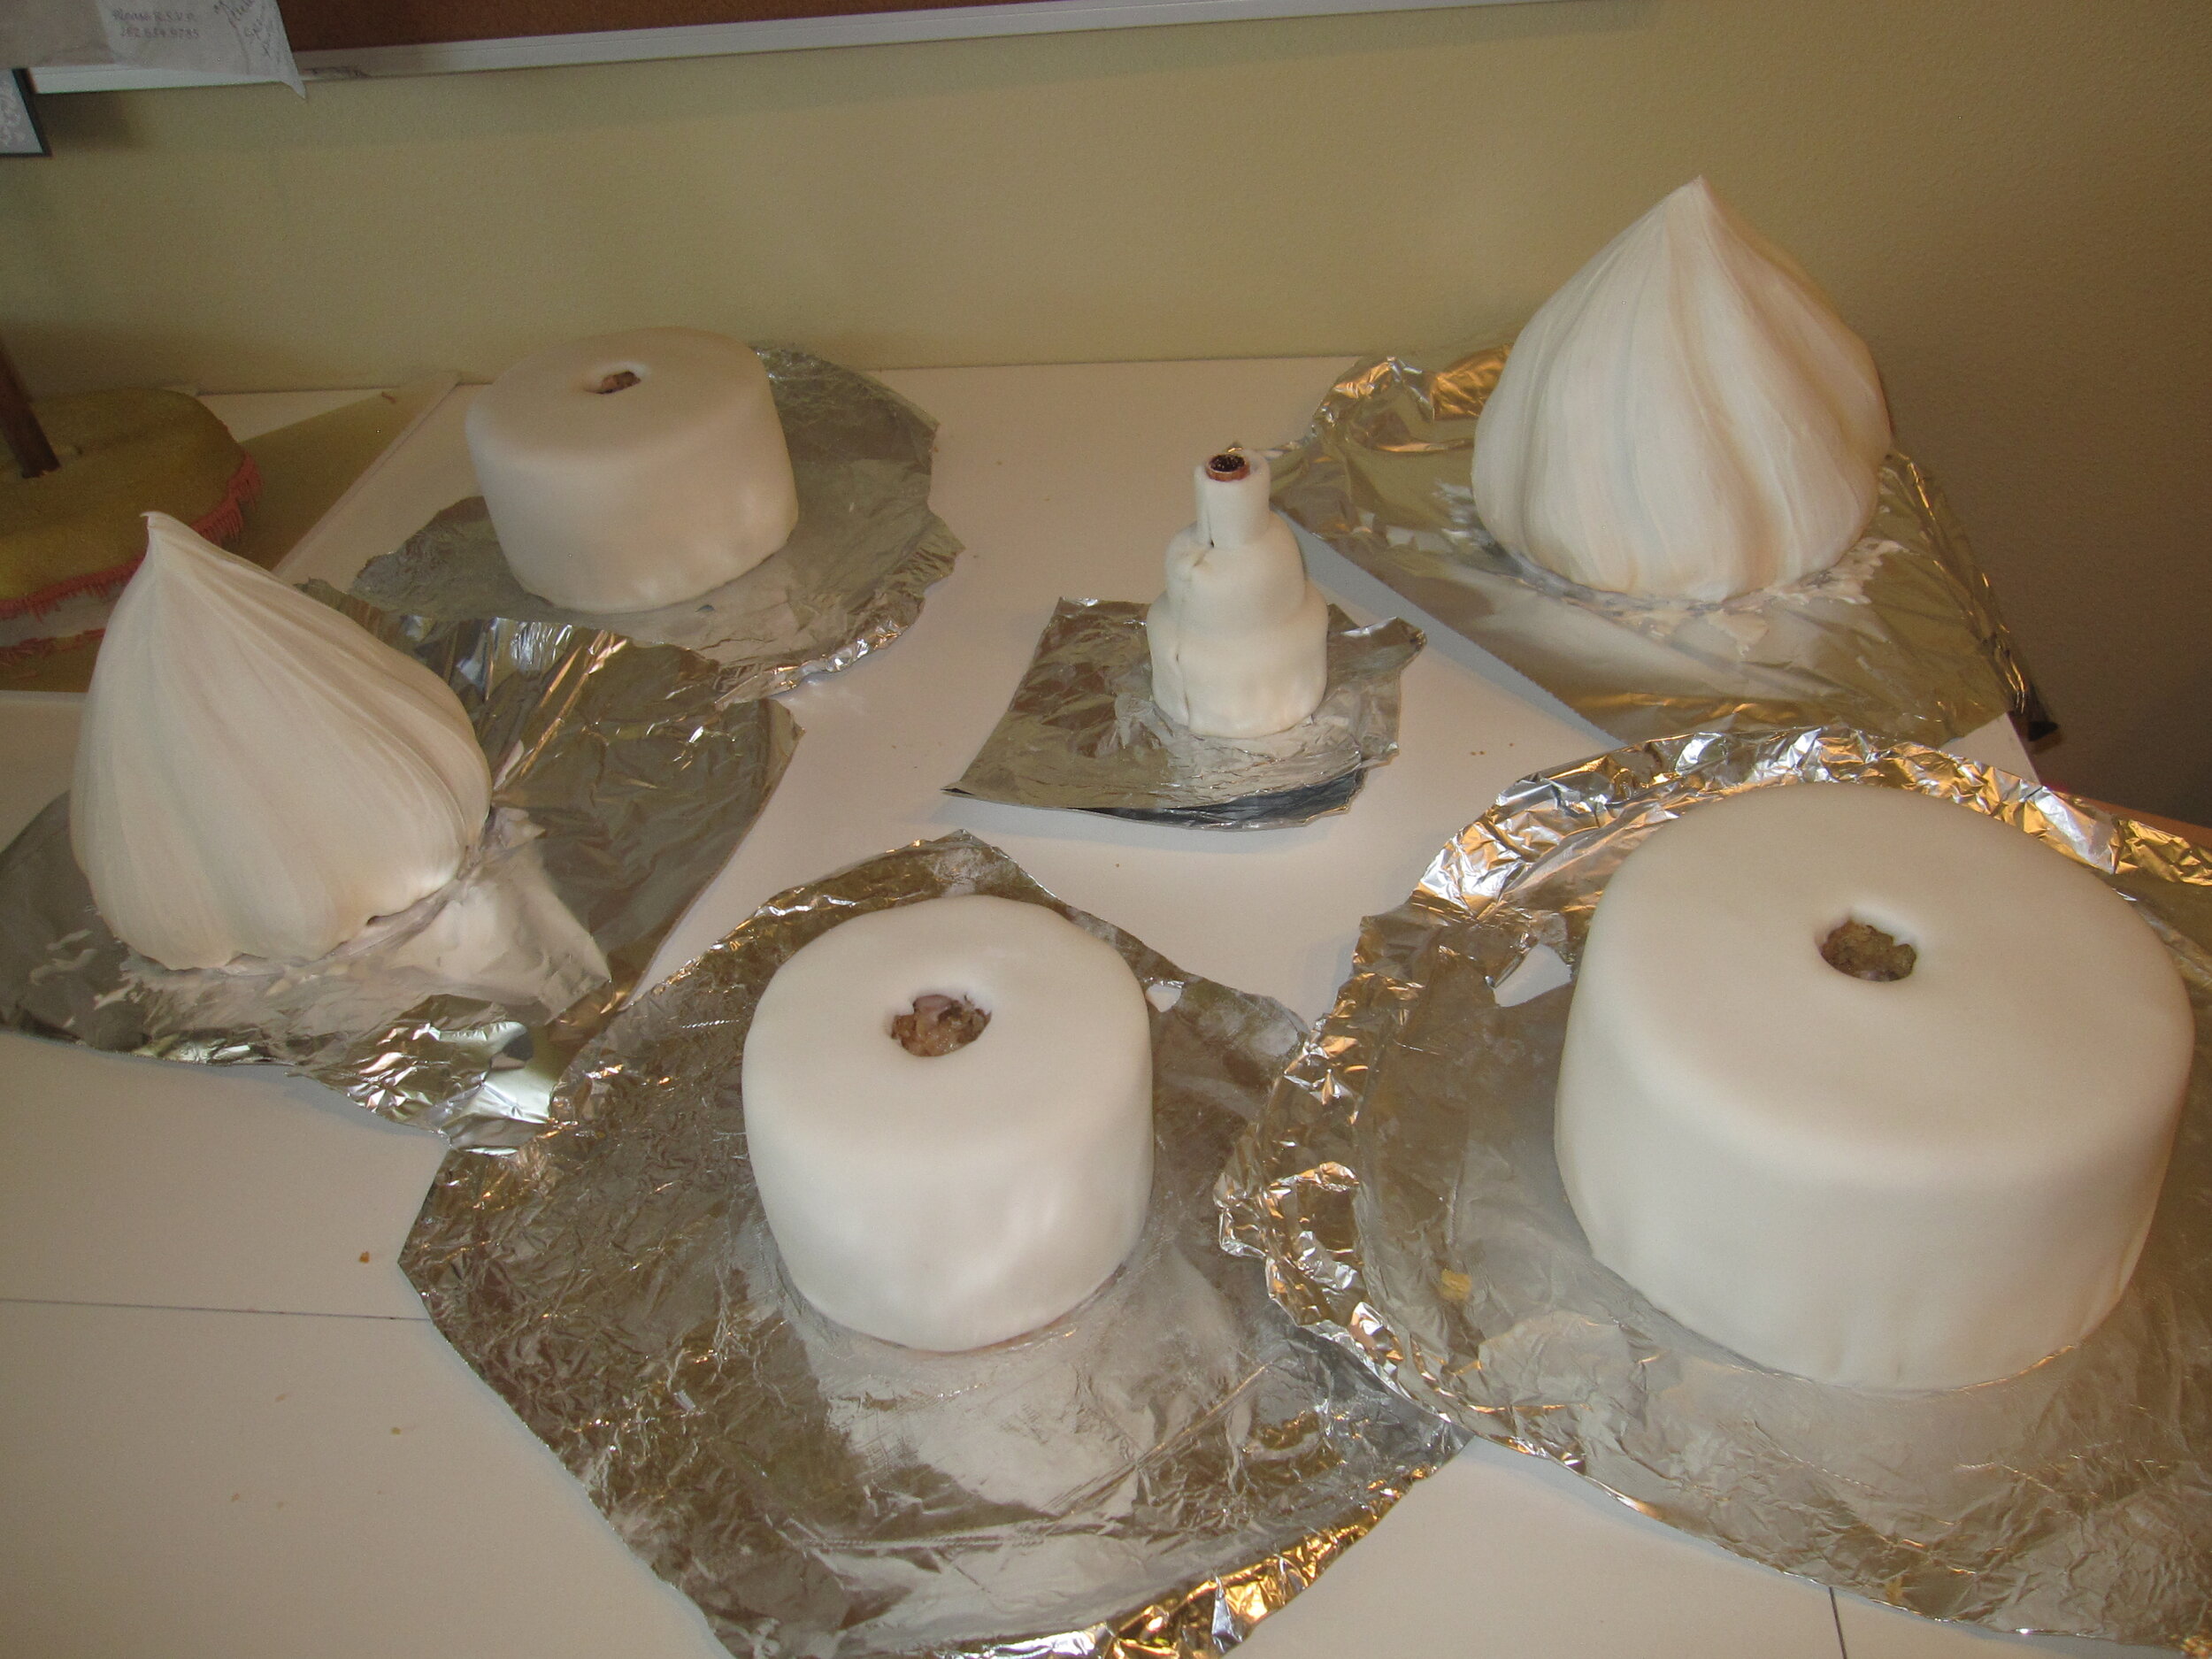
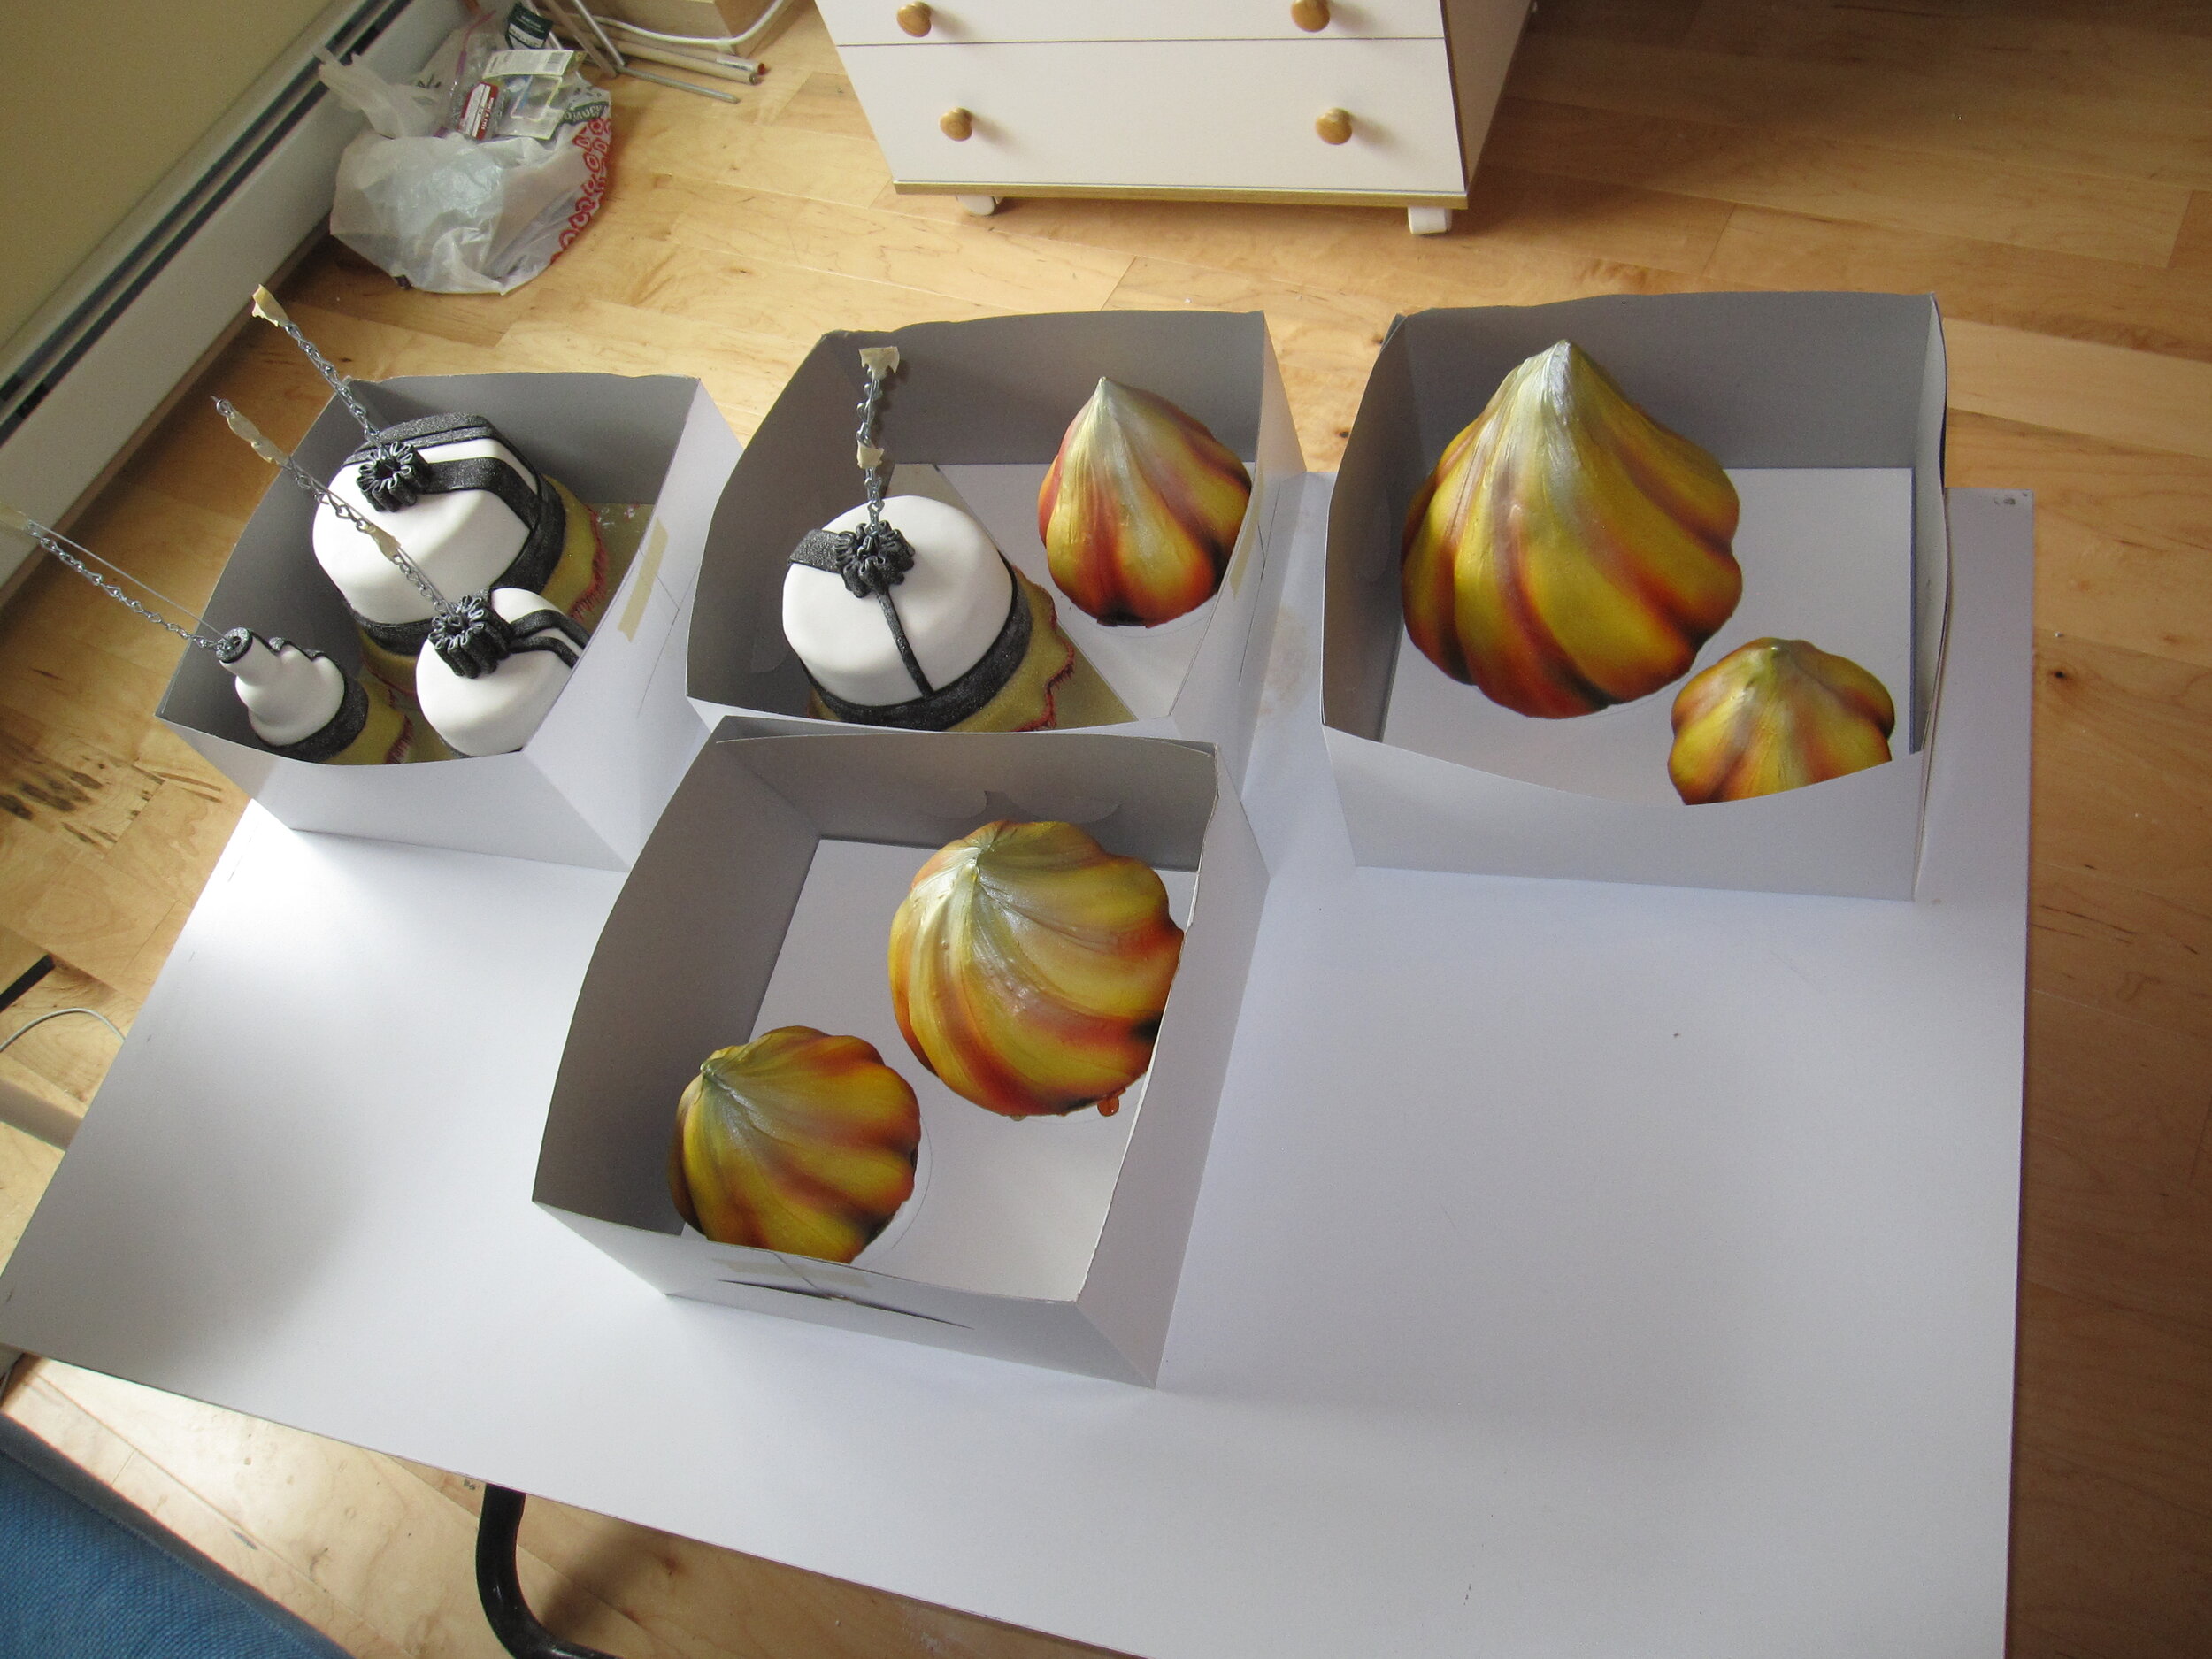
With a truly massive pile of cake baked, I was ready to begin assembly. First I put together the nine smaller cakes – 5 for the flames, and 4 for the hanging cakes. Three of the hanging cakes were pretty easy because they were round. The fourth was a little tiny three-tiered cake. The only request that the brides had made of me was that there be a mini wedding cake, because one of them loves miniature things. This cake was so small that there actually was only cake in the lower two tiers. The top was just fondant wrapped around the central tube that all the hanging cakes needed in order to attached the chain to the base. The flame cakes took a little longer to assemble and carve because they were tall enough to require internal supports and their shape was a bit complicated. Once all the cakes were carved, I covered them with fondant. Not to brag, but I was pretty pleased with how well I did covering such small cakes.
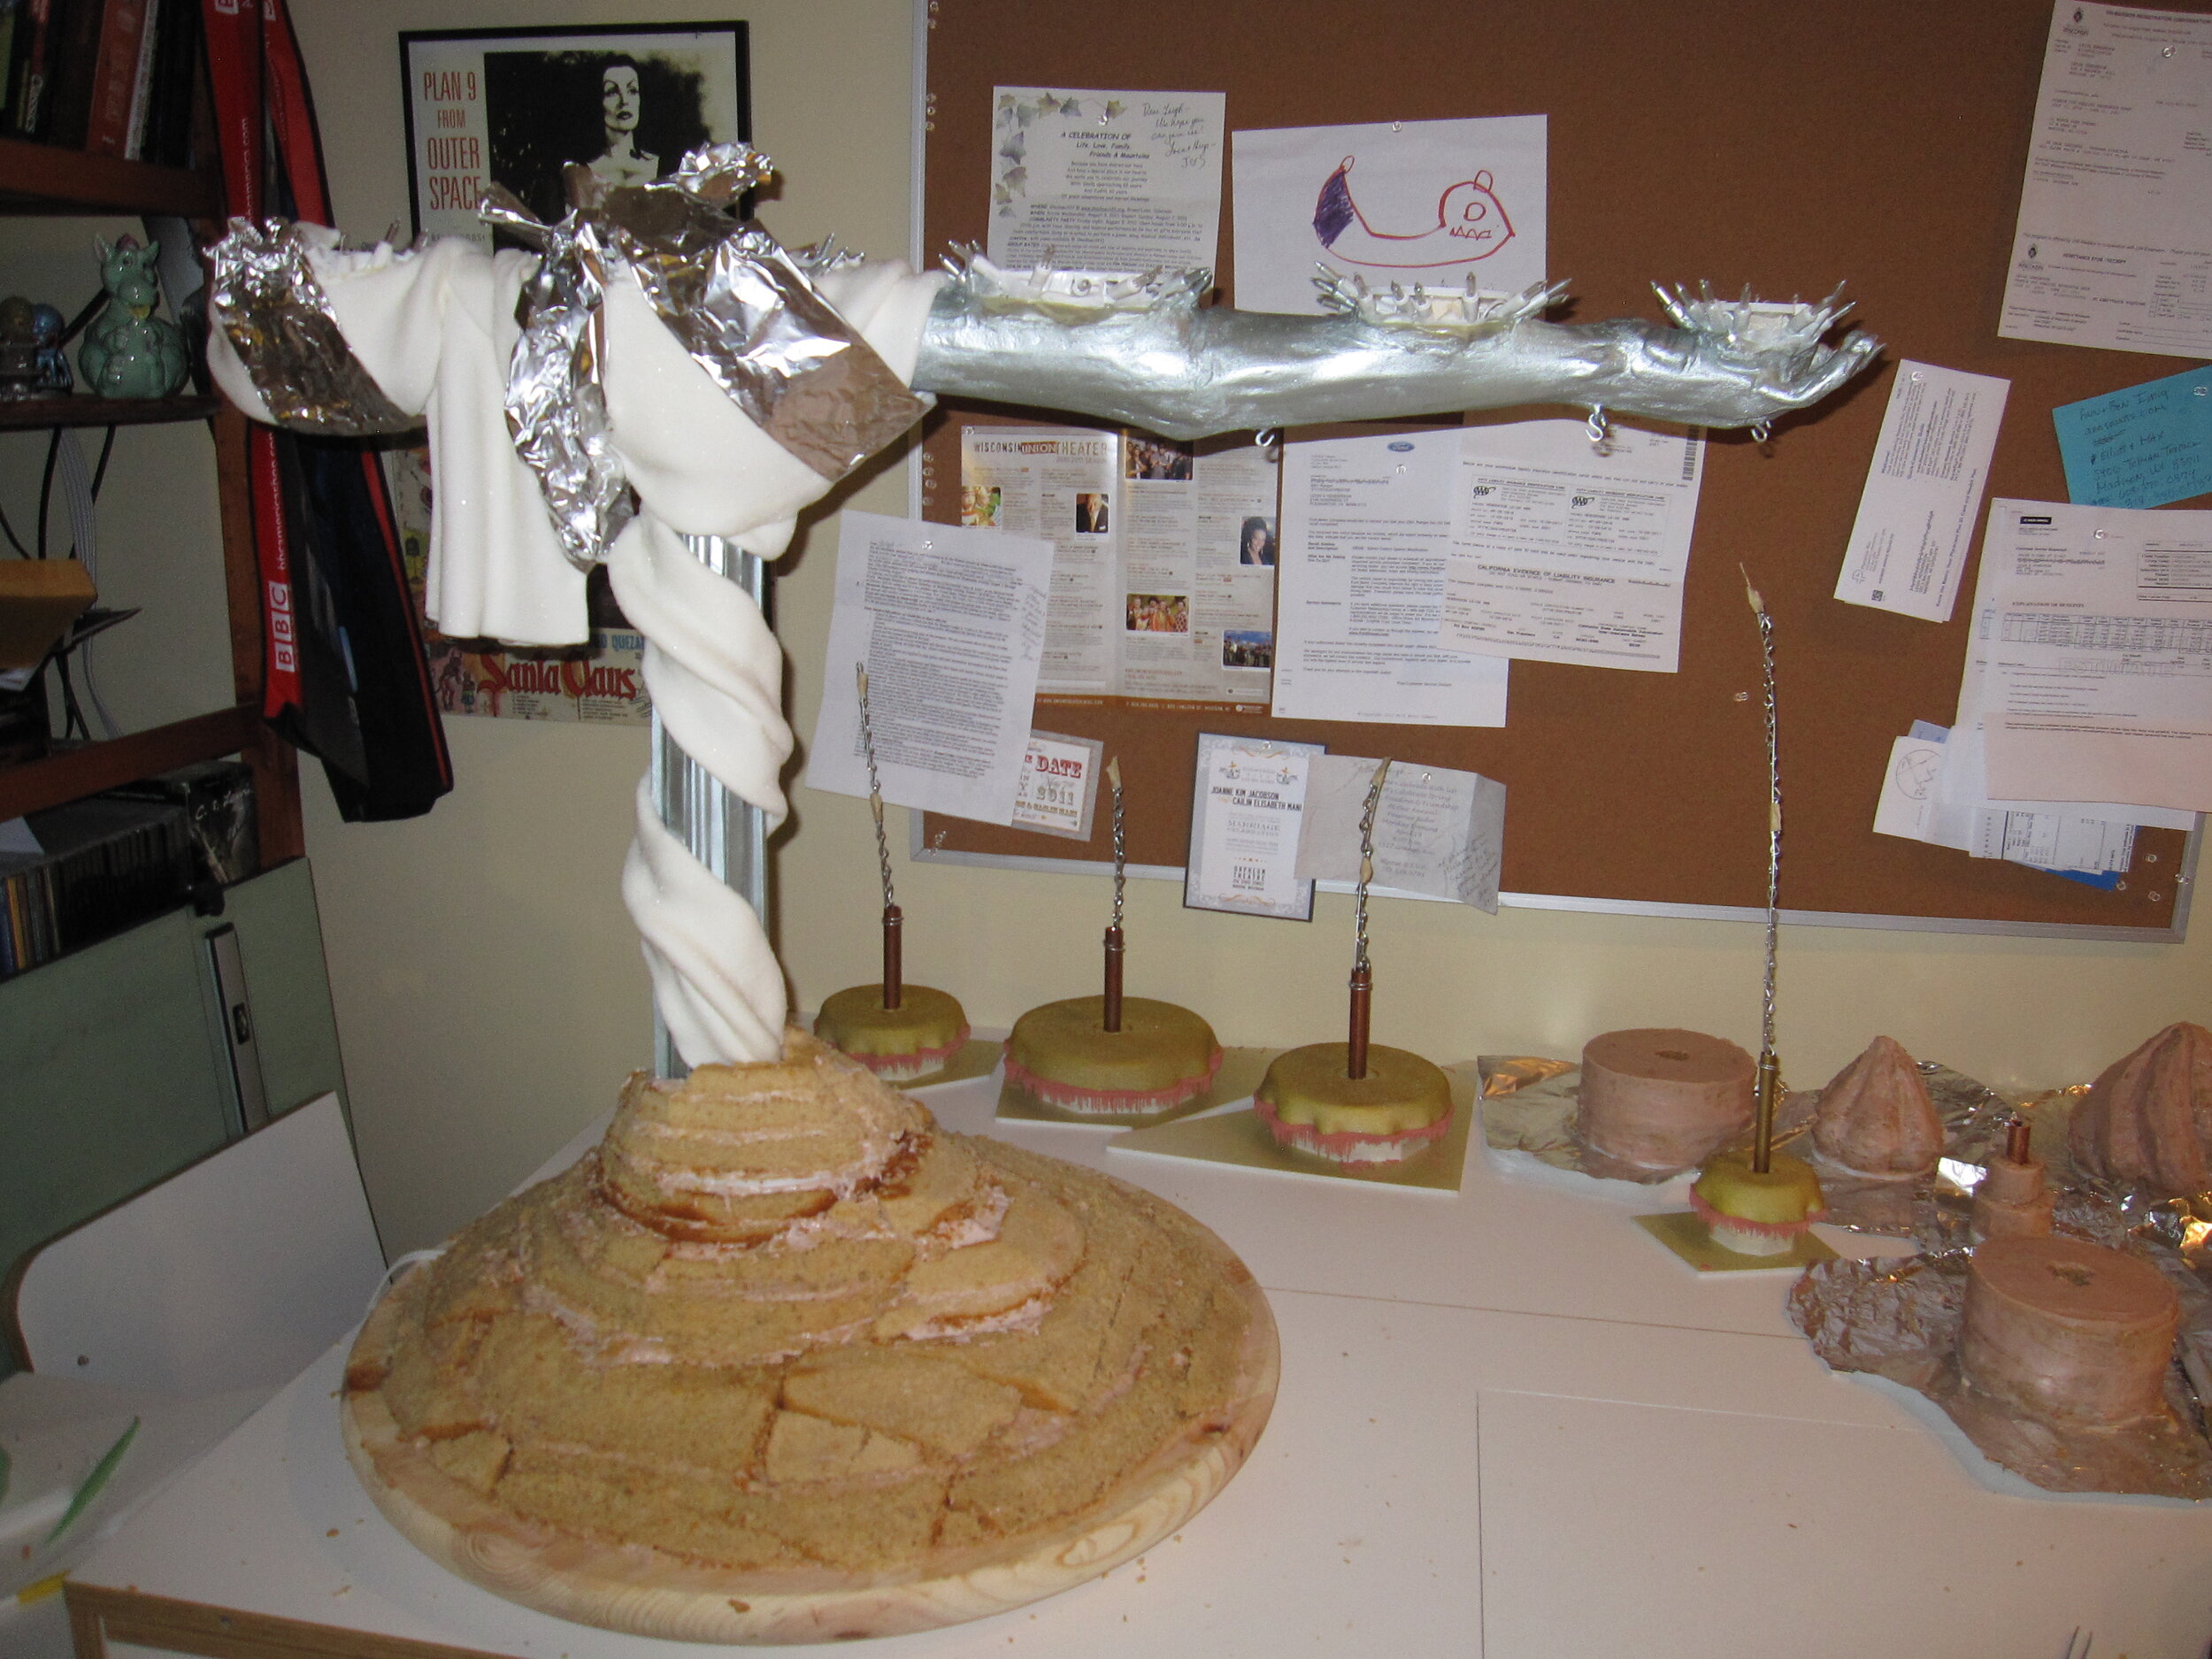
The majority of the cake went directly onto the base around the central column. Basically, I just made a big pile of cake and carved it into an organic pyramid shape. To cover it, I used the same sugared fondant technique that I had used for the rest of the drapery. Rather than trying to cover such a big cake with one enormous piece of fondant, I did it with a number of smaller trapezoidal pieces, which worked out quite well.
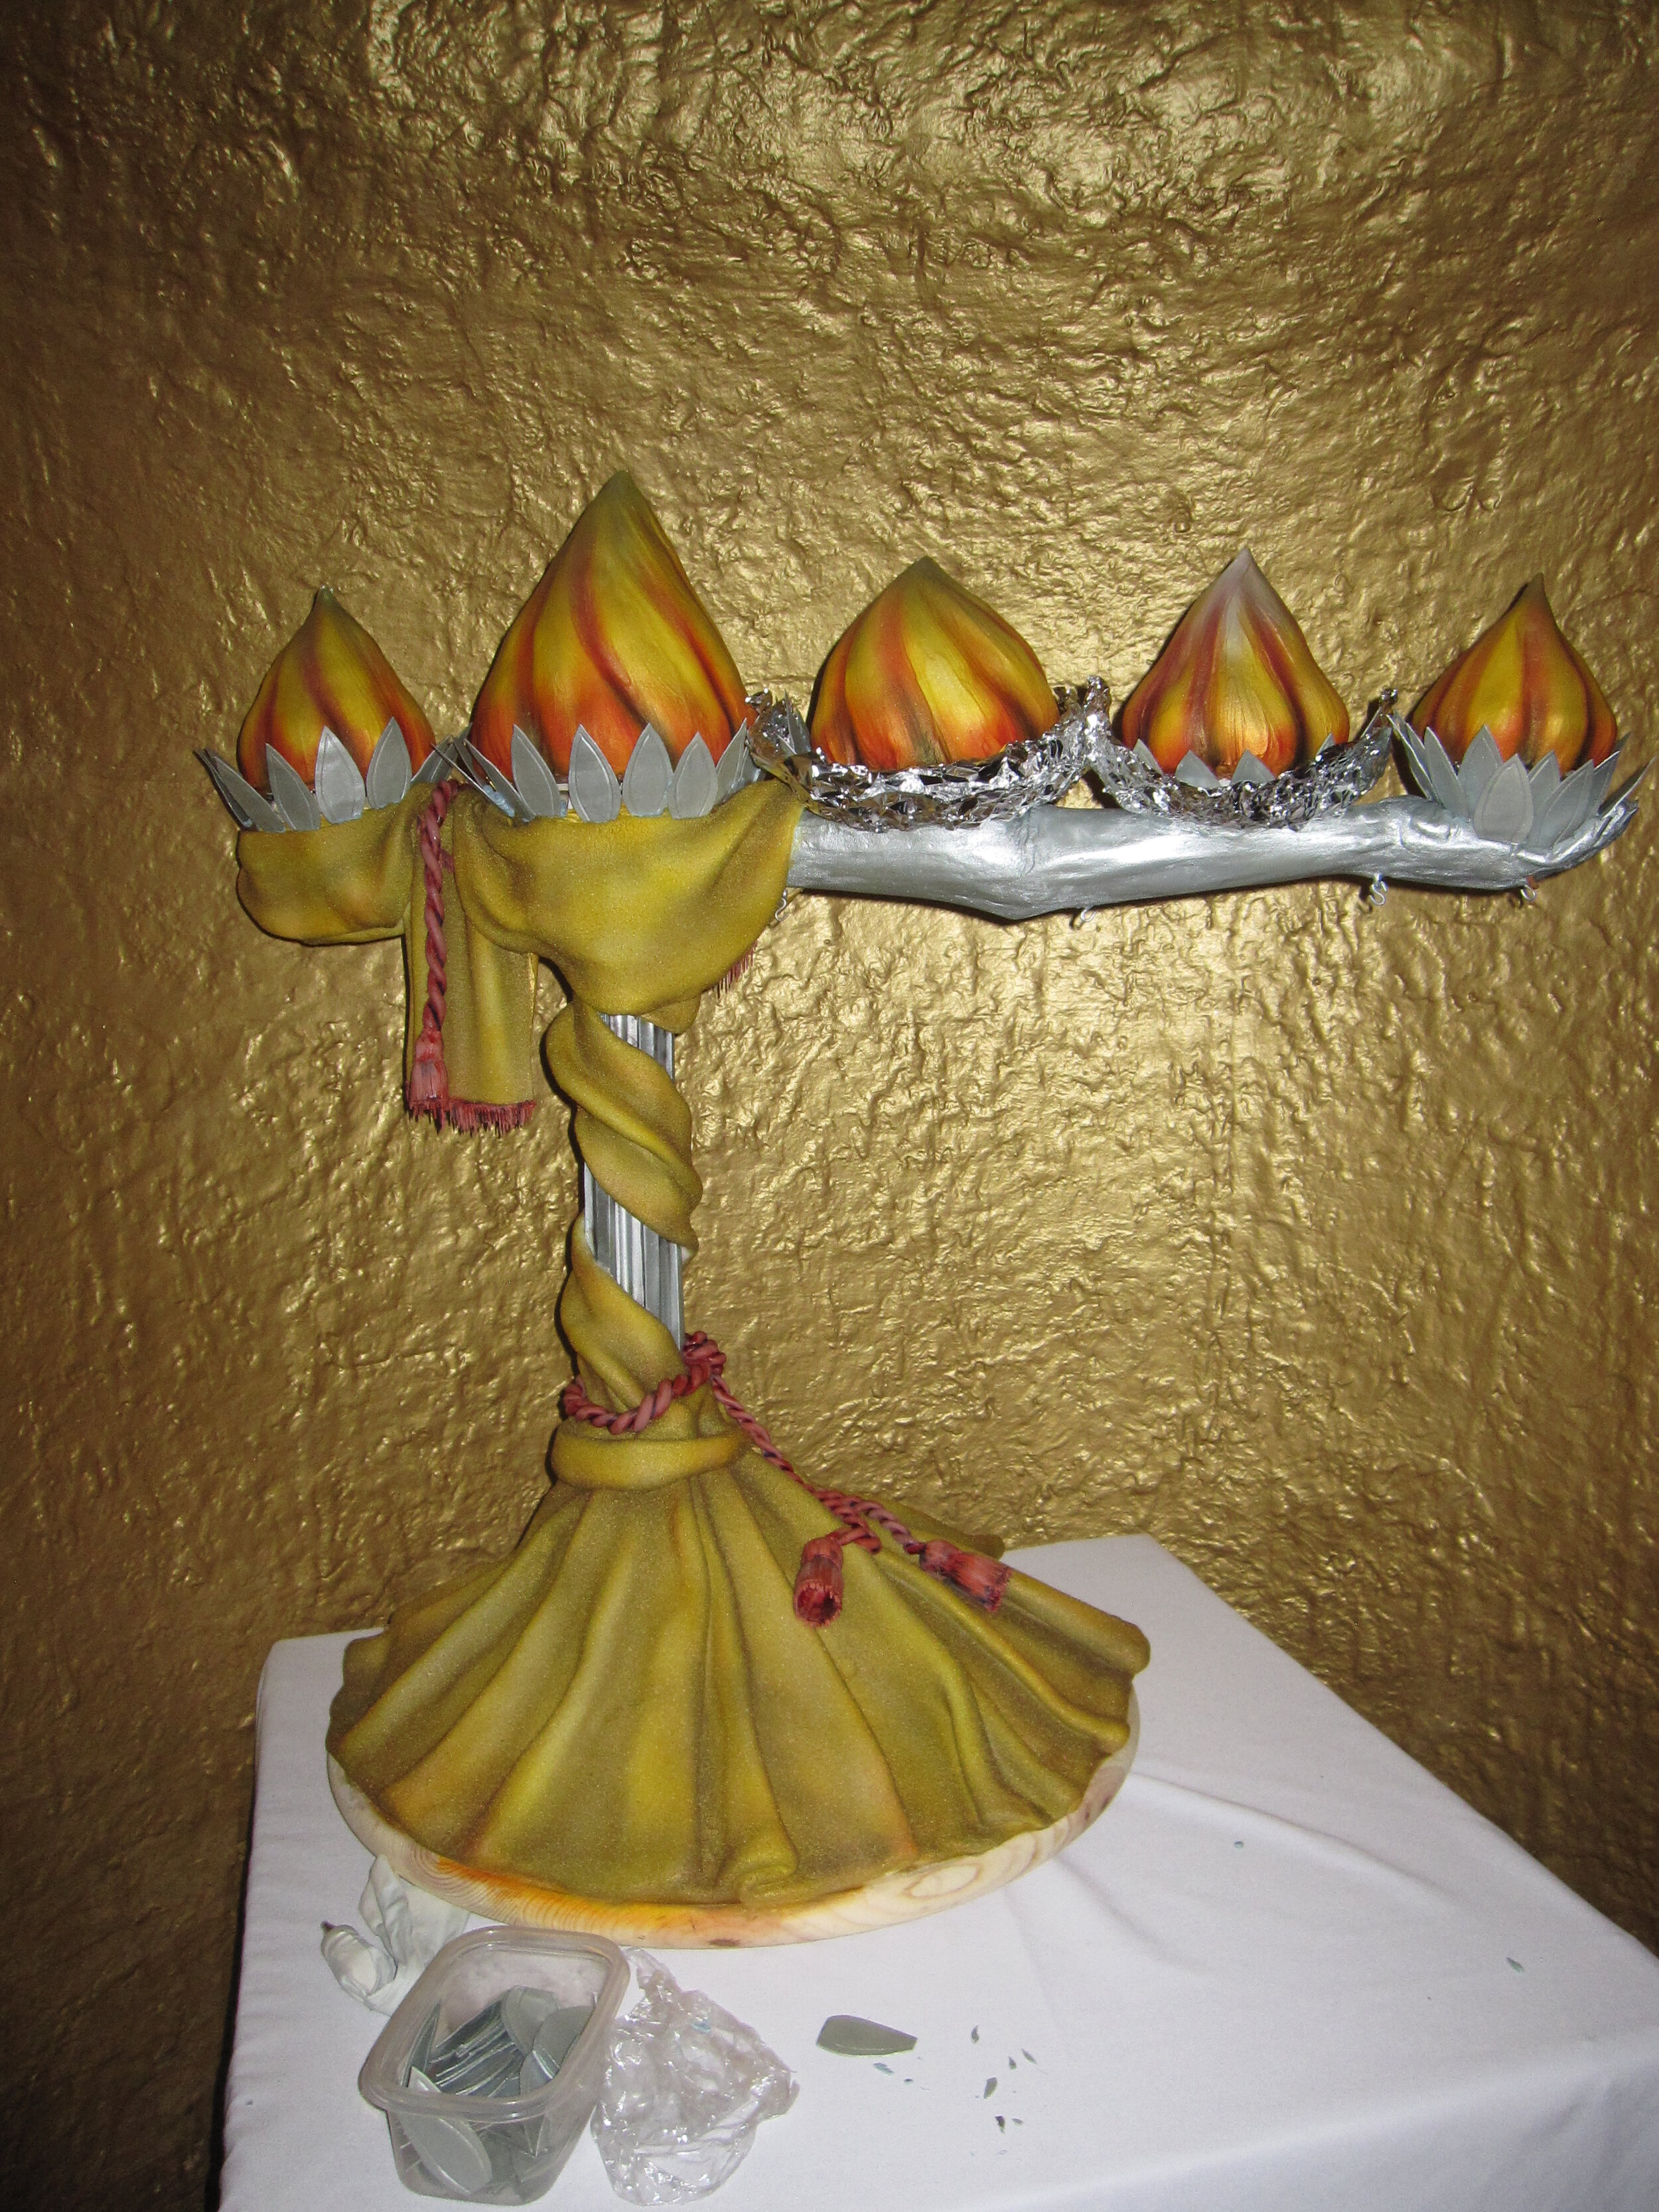
At this point I wasn’t happy with the way that the flame cakes looked. For one thing, a few of them did have imperfections in their fondant, but more importantly, they didn’t have the sense of movement and life that I had been hoping for. After a bit of experimentation I found that I could kill both birds with one stone by adding a layer of royal icing, striated and textured with a damp paintbrush, which gave them more flow.
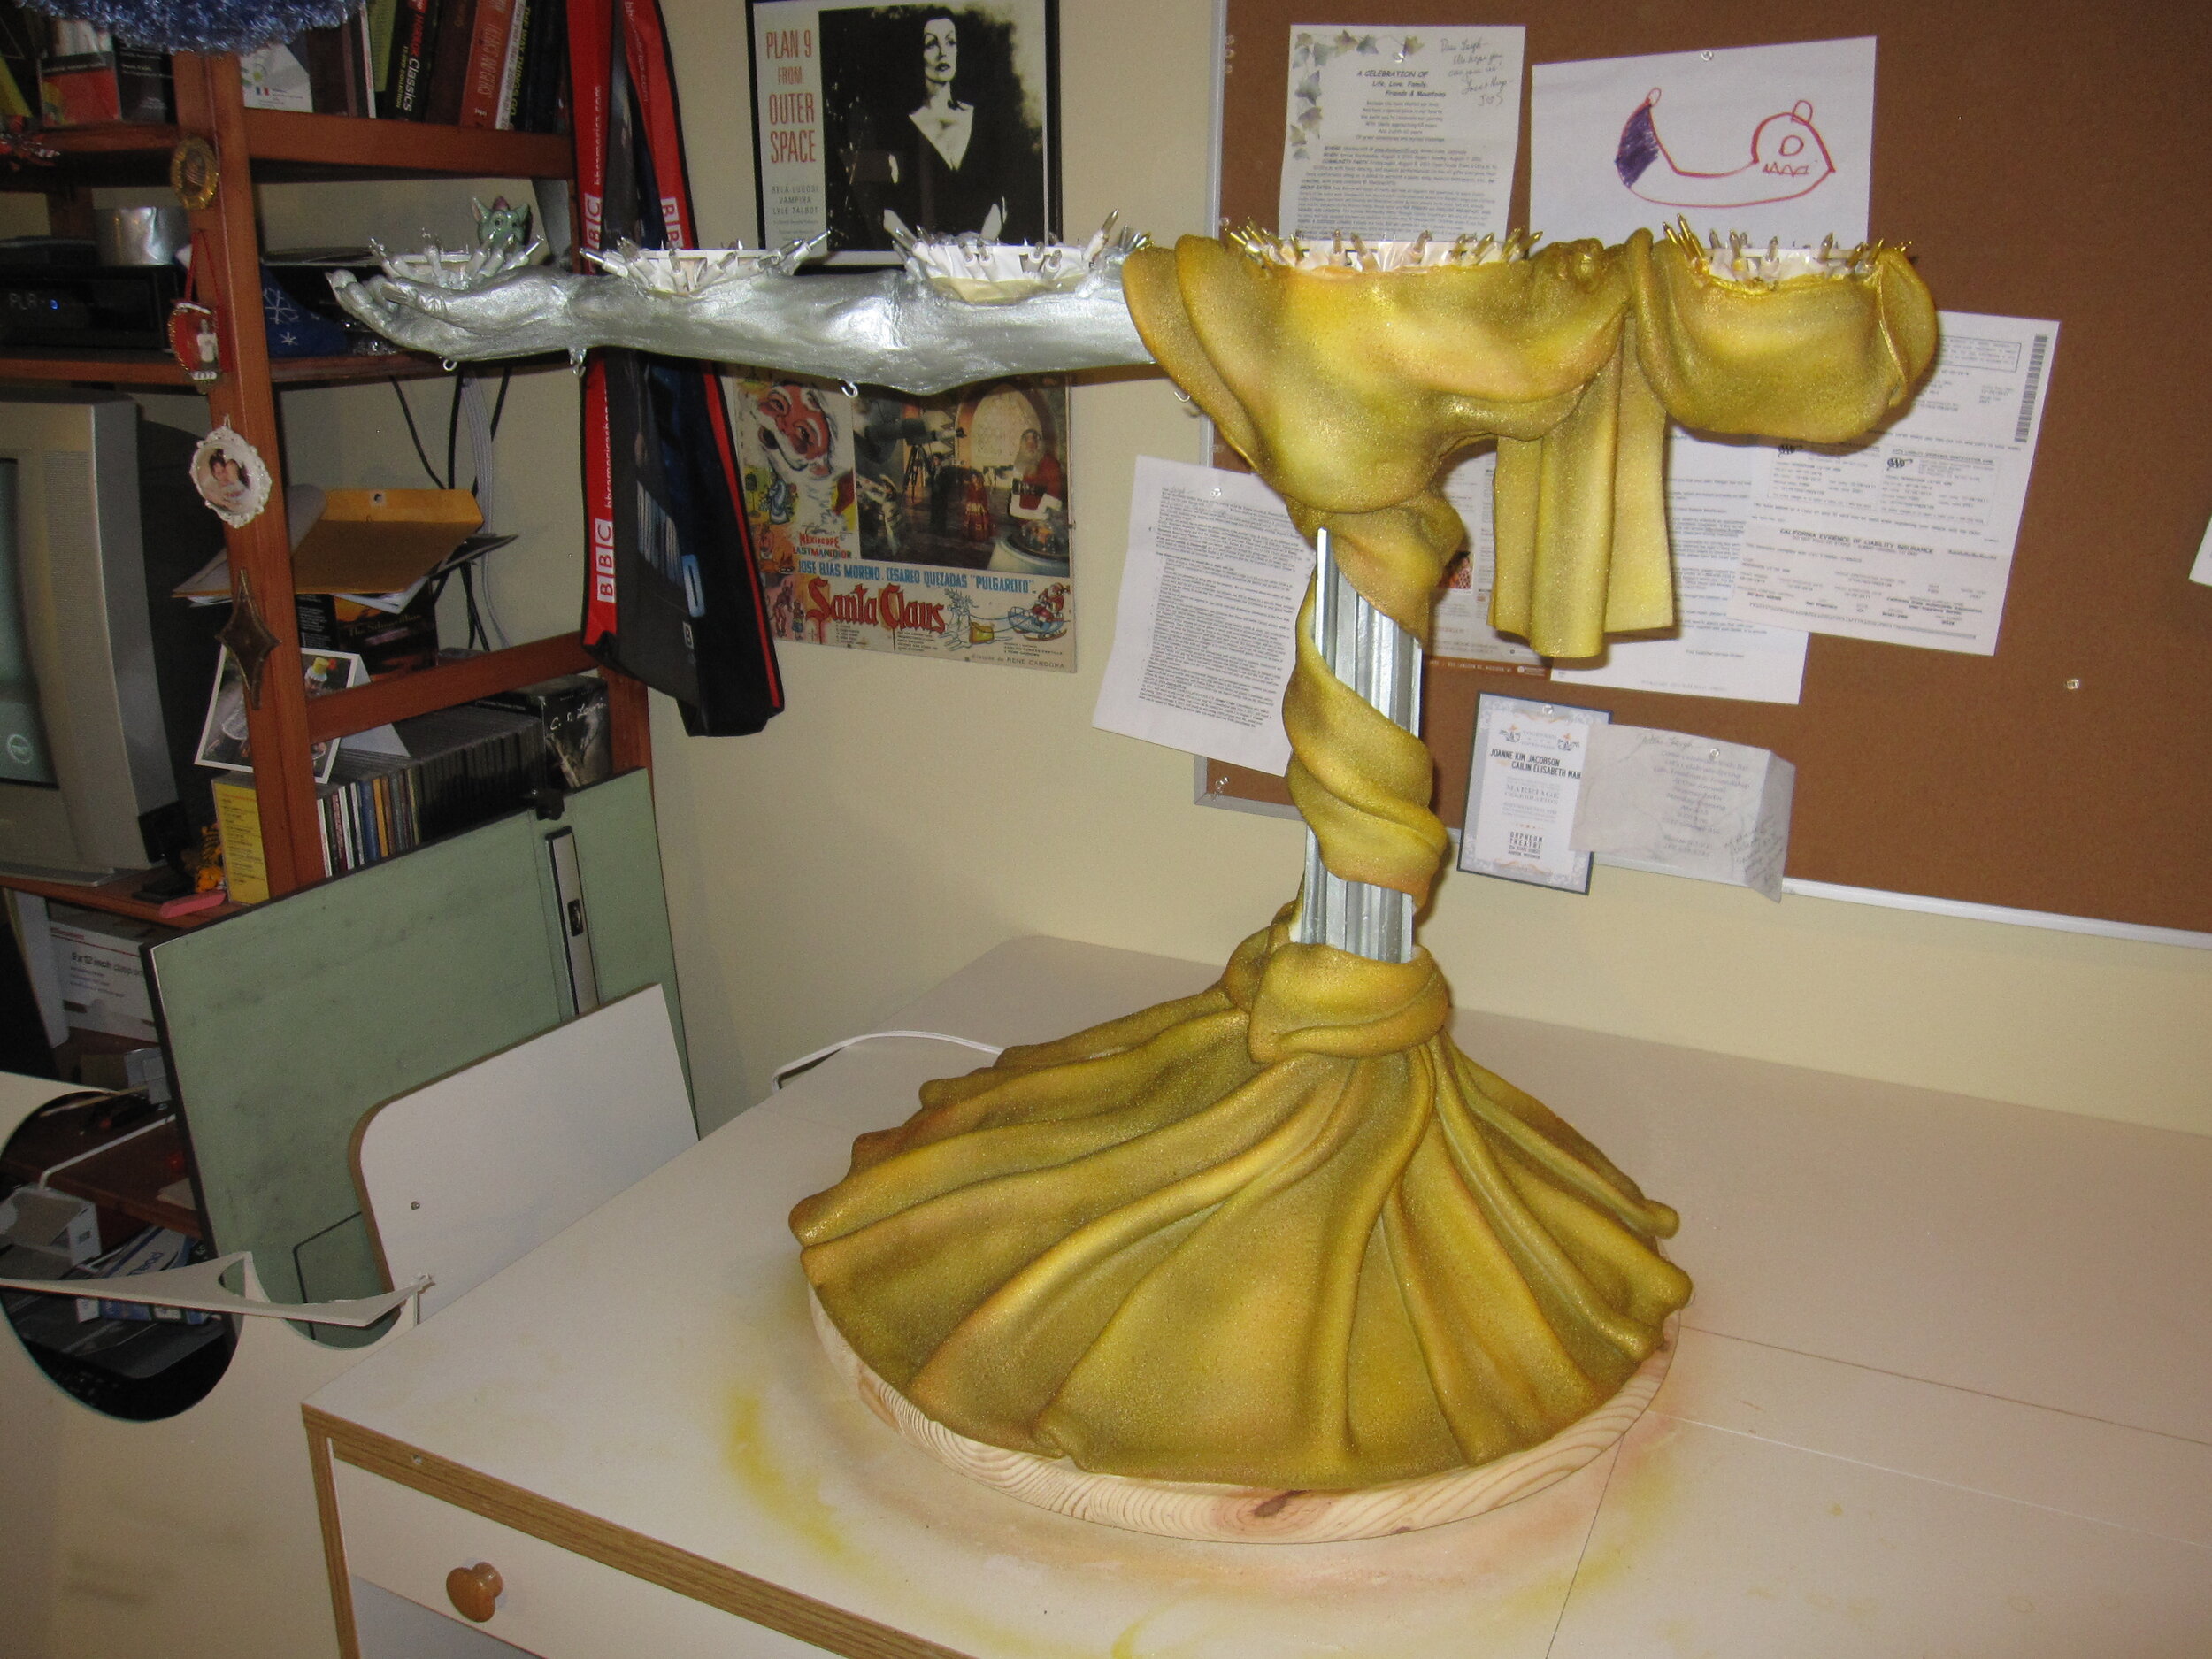
Then it was time to paint. The colors for the wedding, to the extent that there were any, were grey and a sort of muted yellow. So I tried to tie in with this by making the structure silver and the curtains a dusty yellow-gold. After masking off the arm, column, and base with tin foil, I sprayed a layer of yellow, then just a smidge of red, some gold for shine, and finally some bronze to add a sense of age.
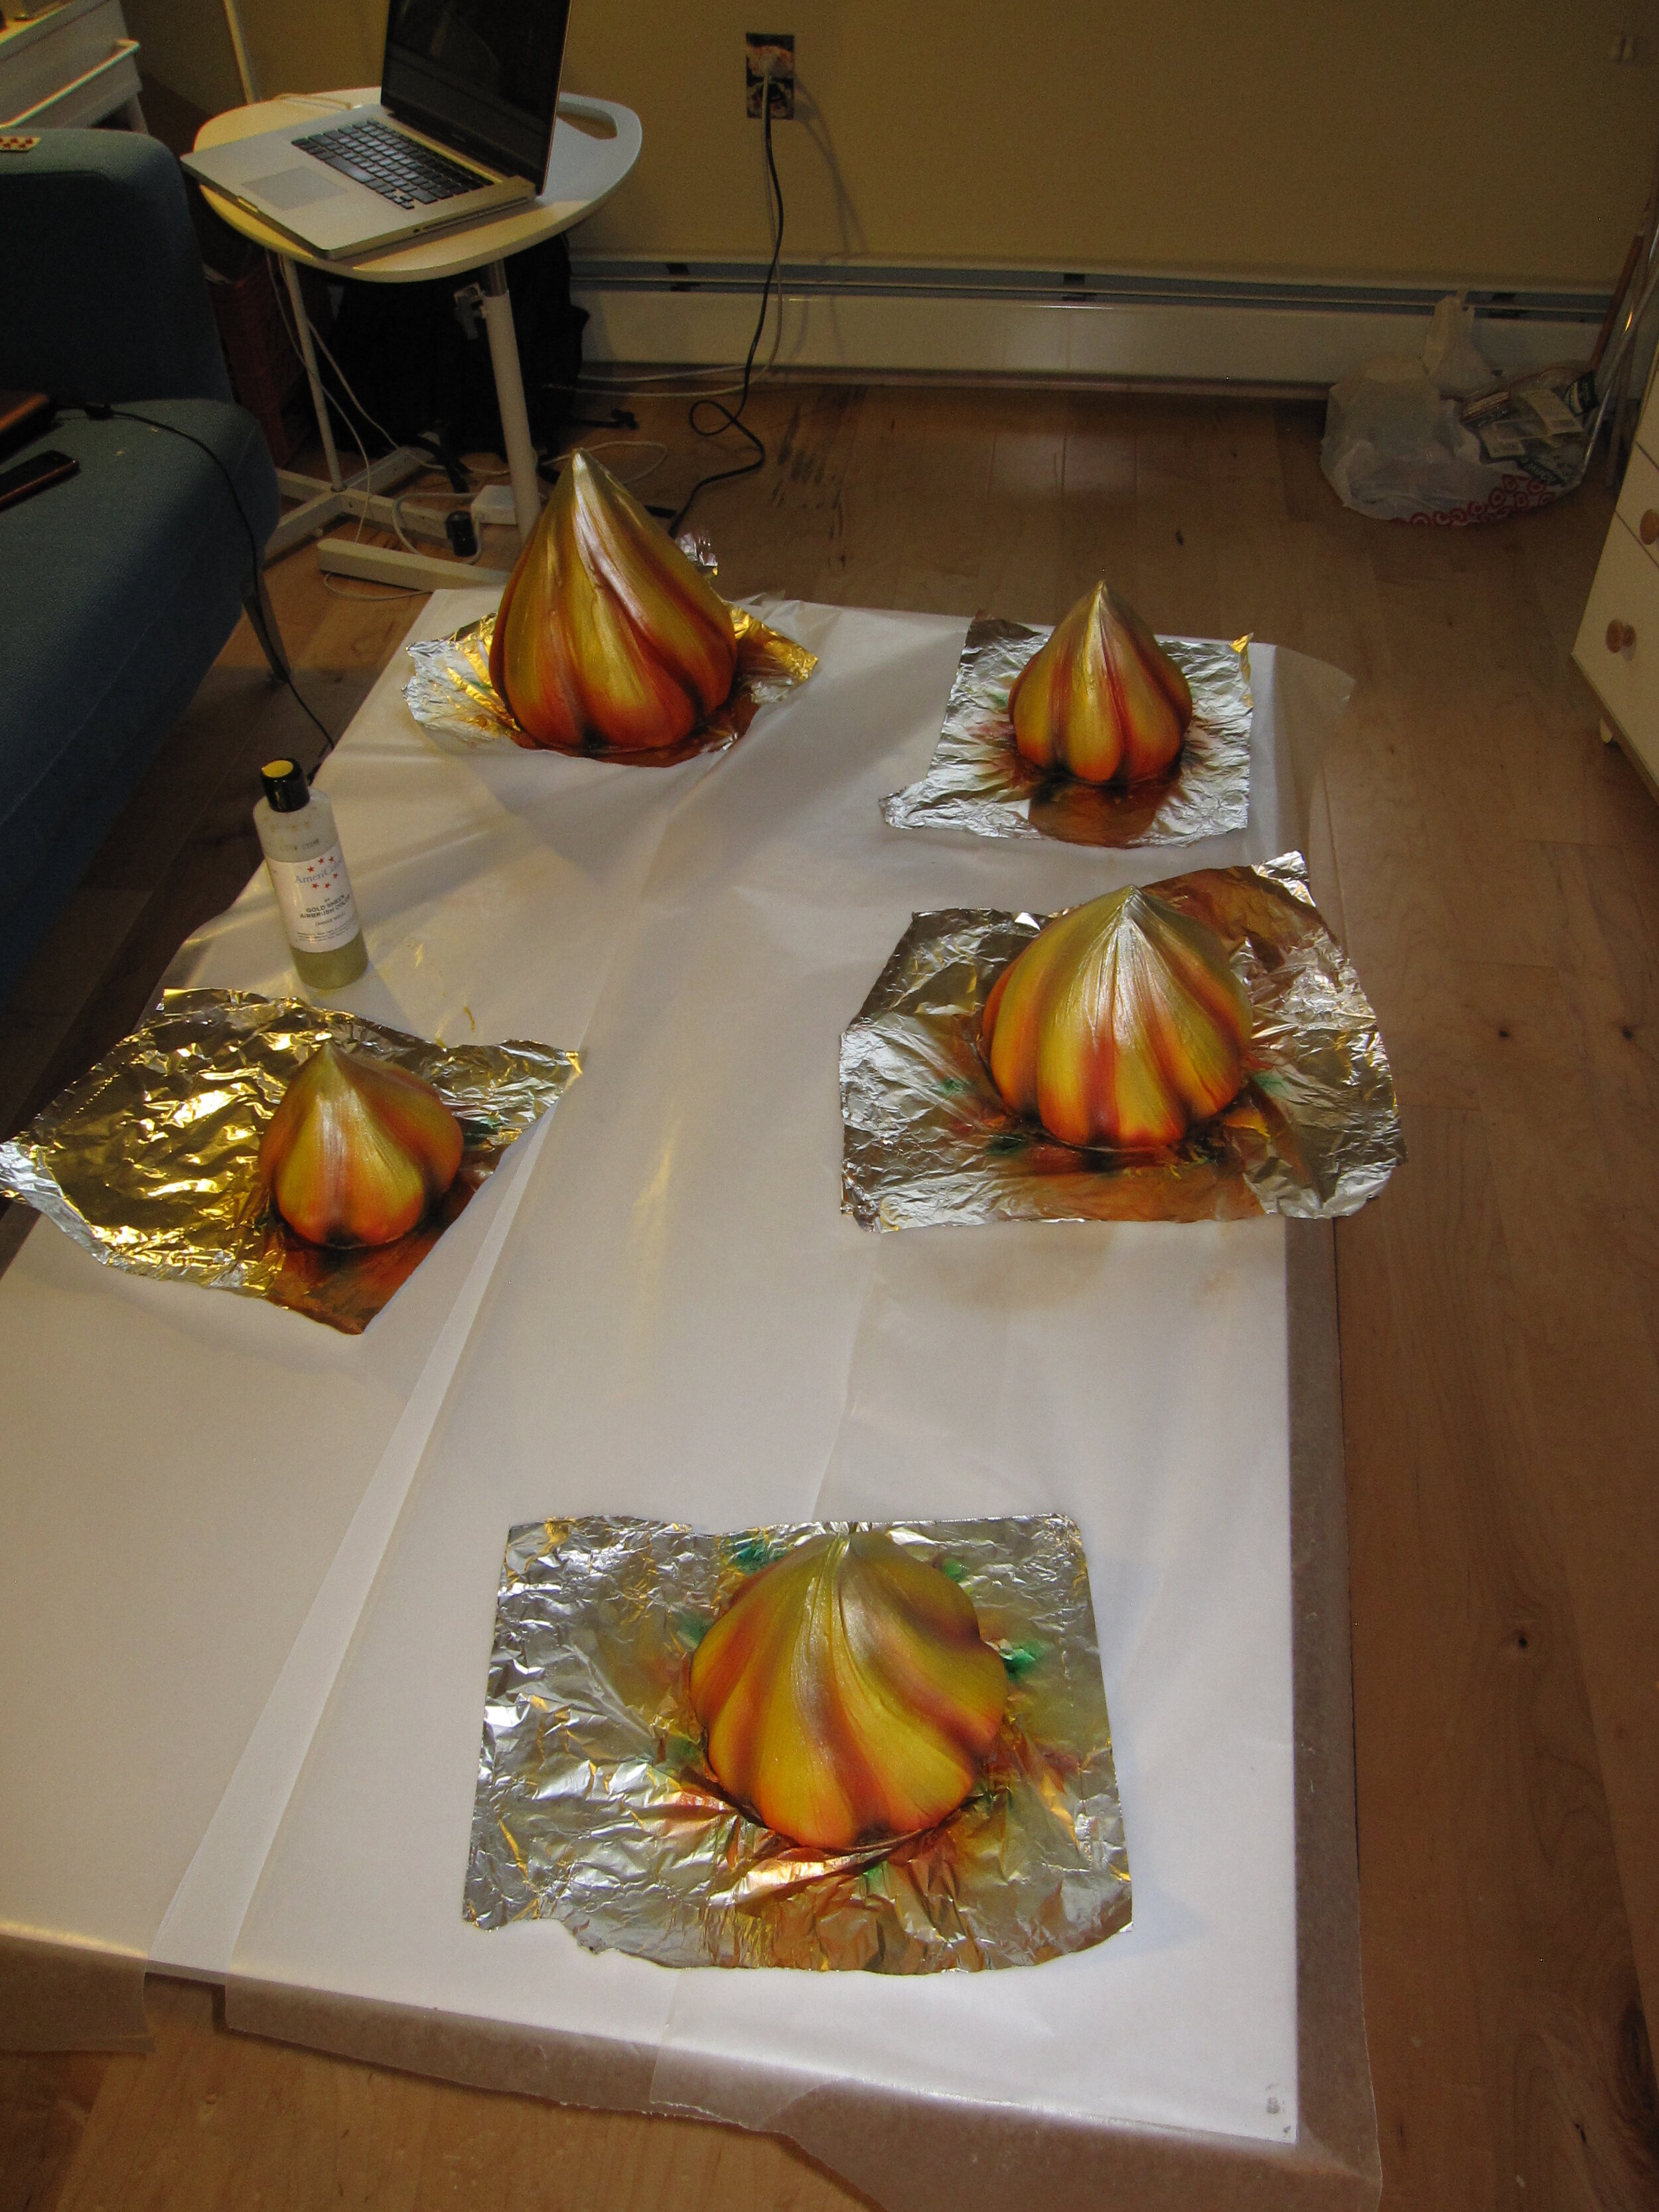
The flames took quite a few layers of color. I’m still not sure that I didn’t overdo it a bit. I think I did yellow first, then orange, then red, then blue, then bronze, then gold, then finally silver.
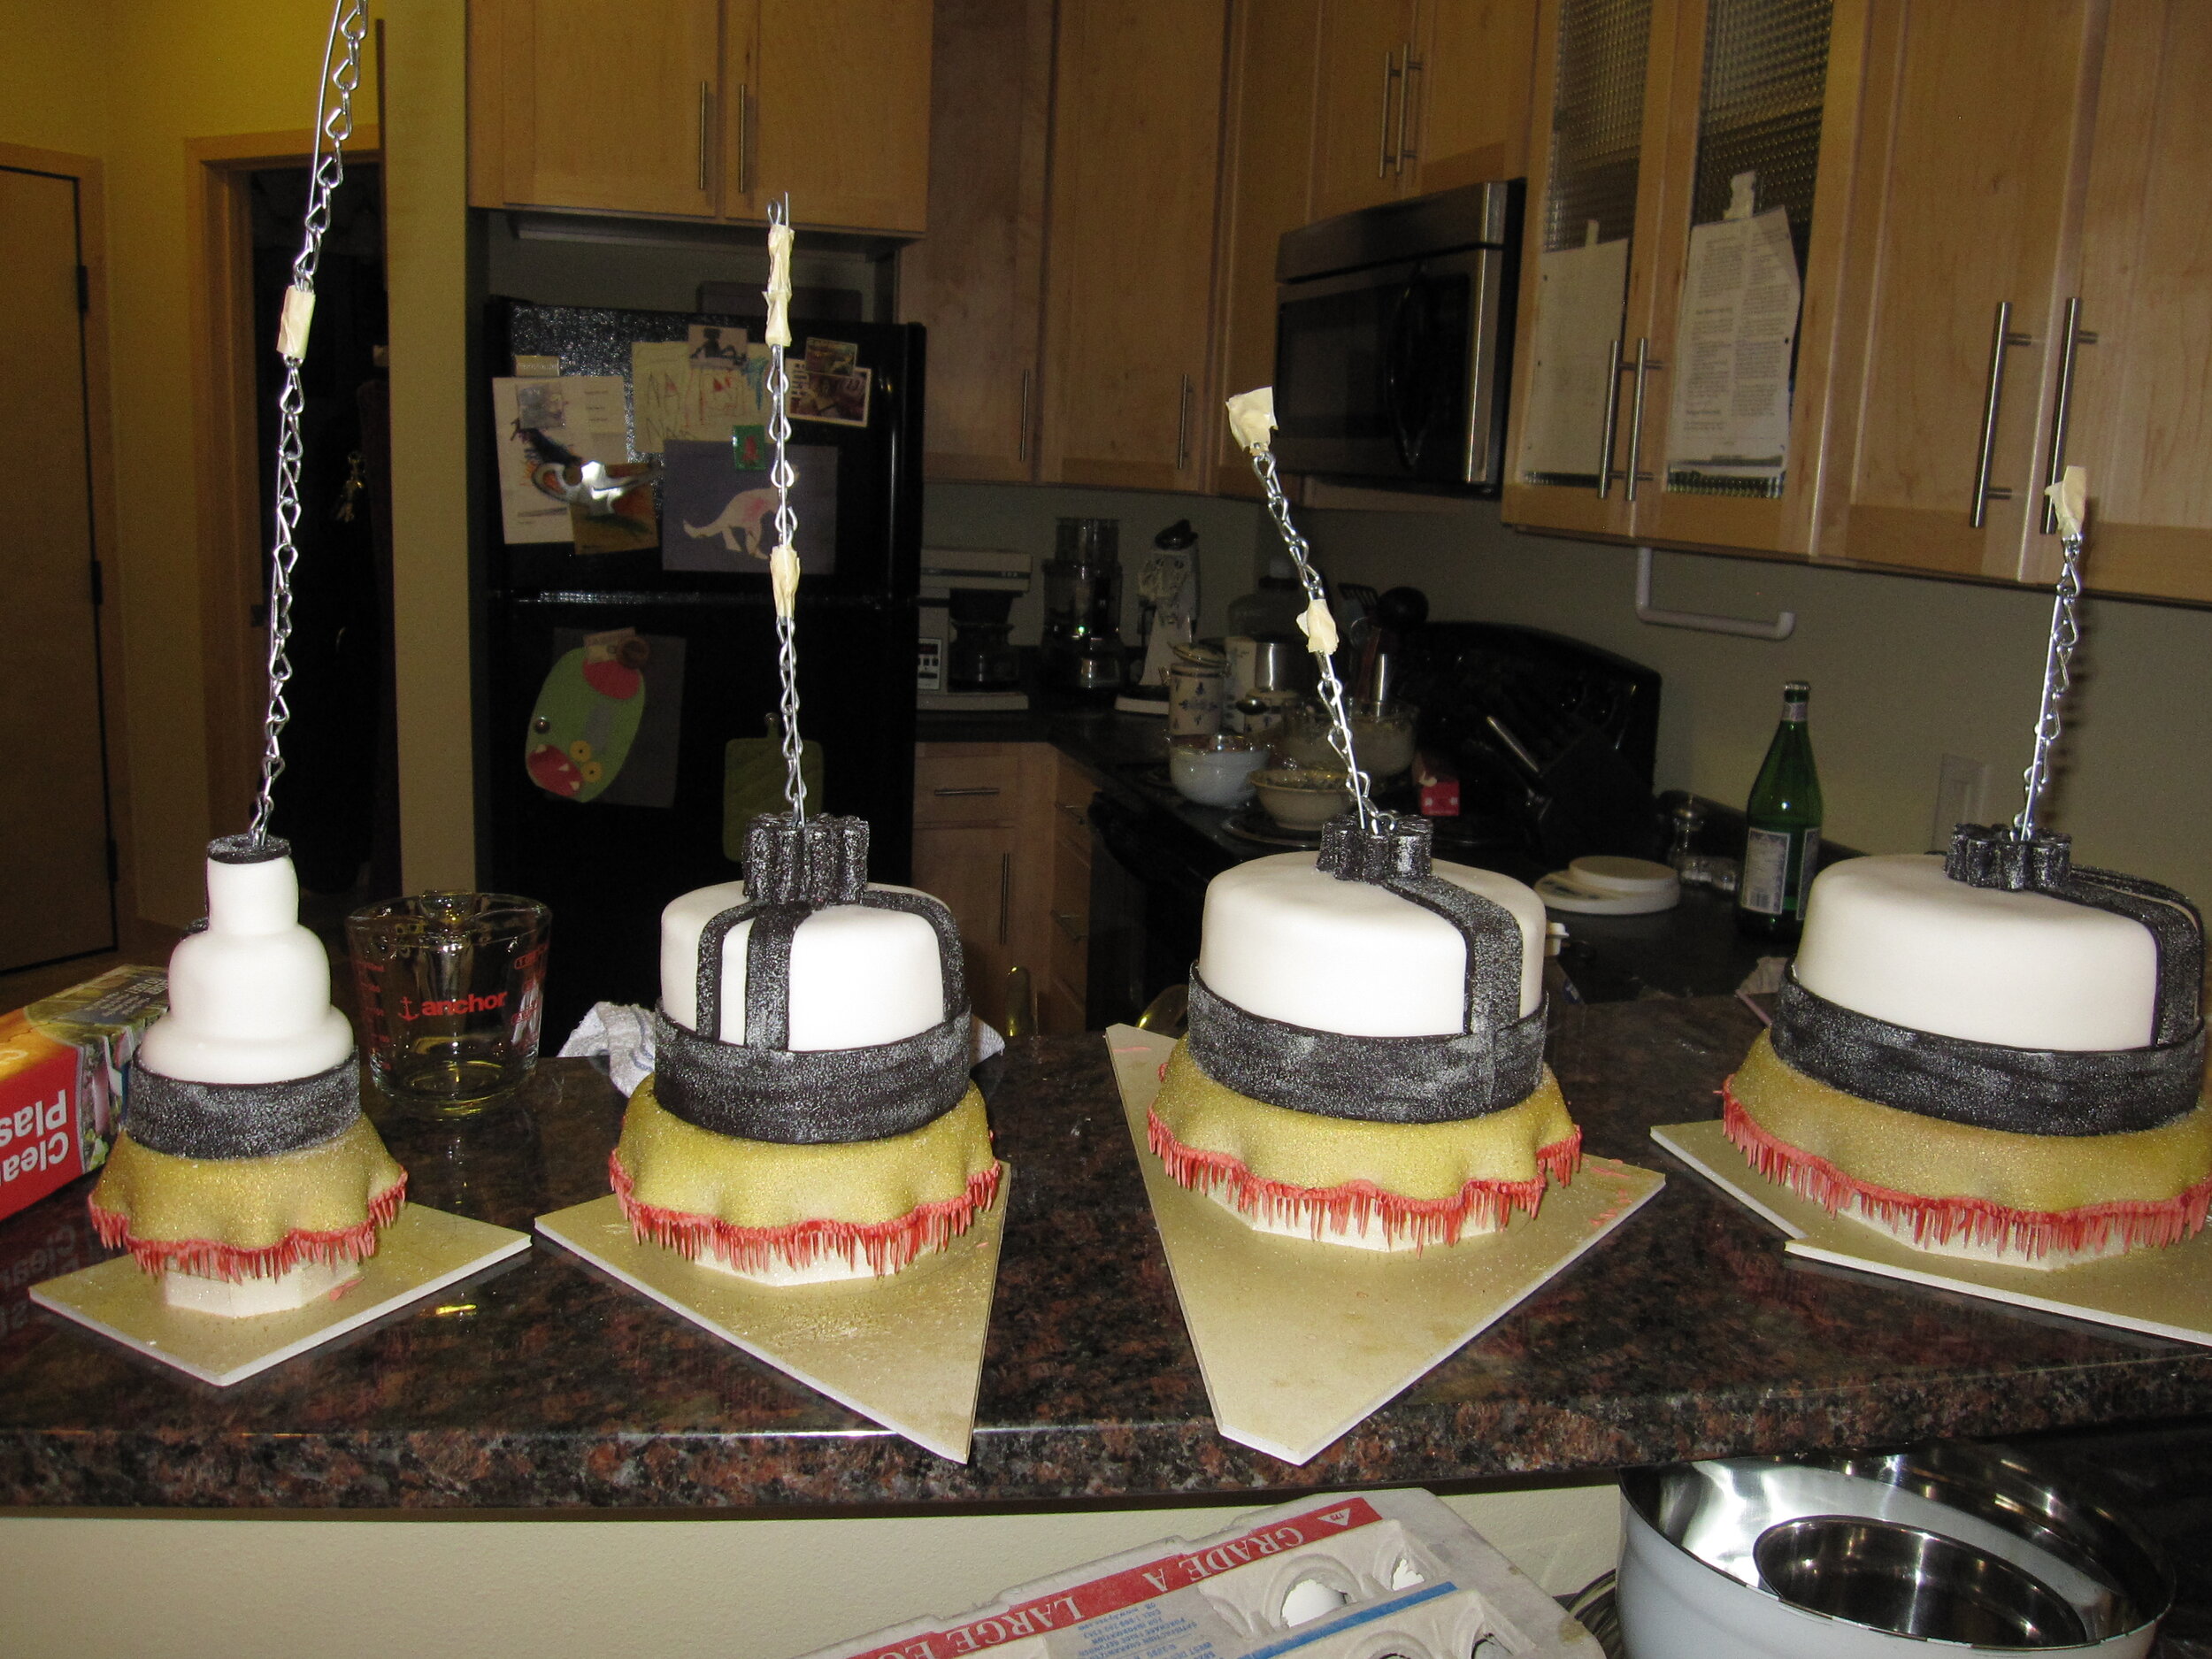
Instead of painting the hanging cakes, I just adorned them / concealed their imperfections with some black fondant details. To tie them in with the rest of the cake, I textured the black fondant with the same granulated sugar technique, and then highlighted the texture by brushing on a bit of silver luster dust.
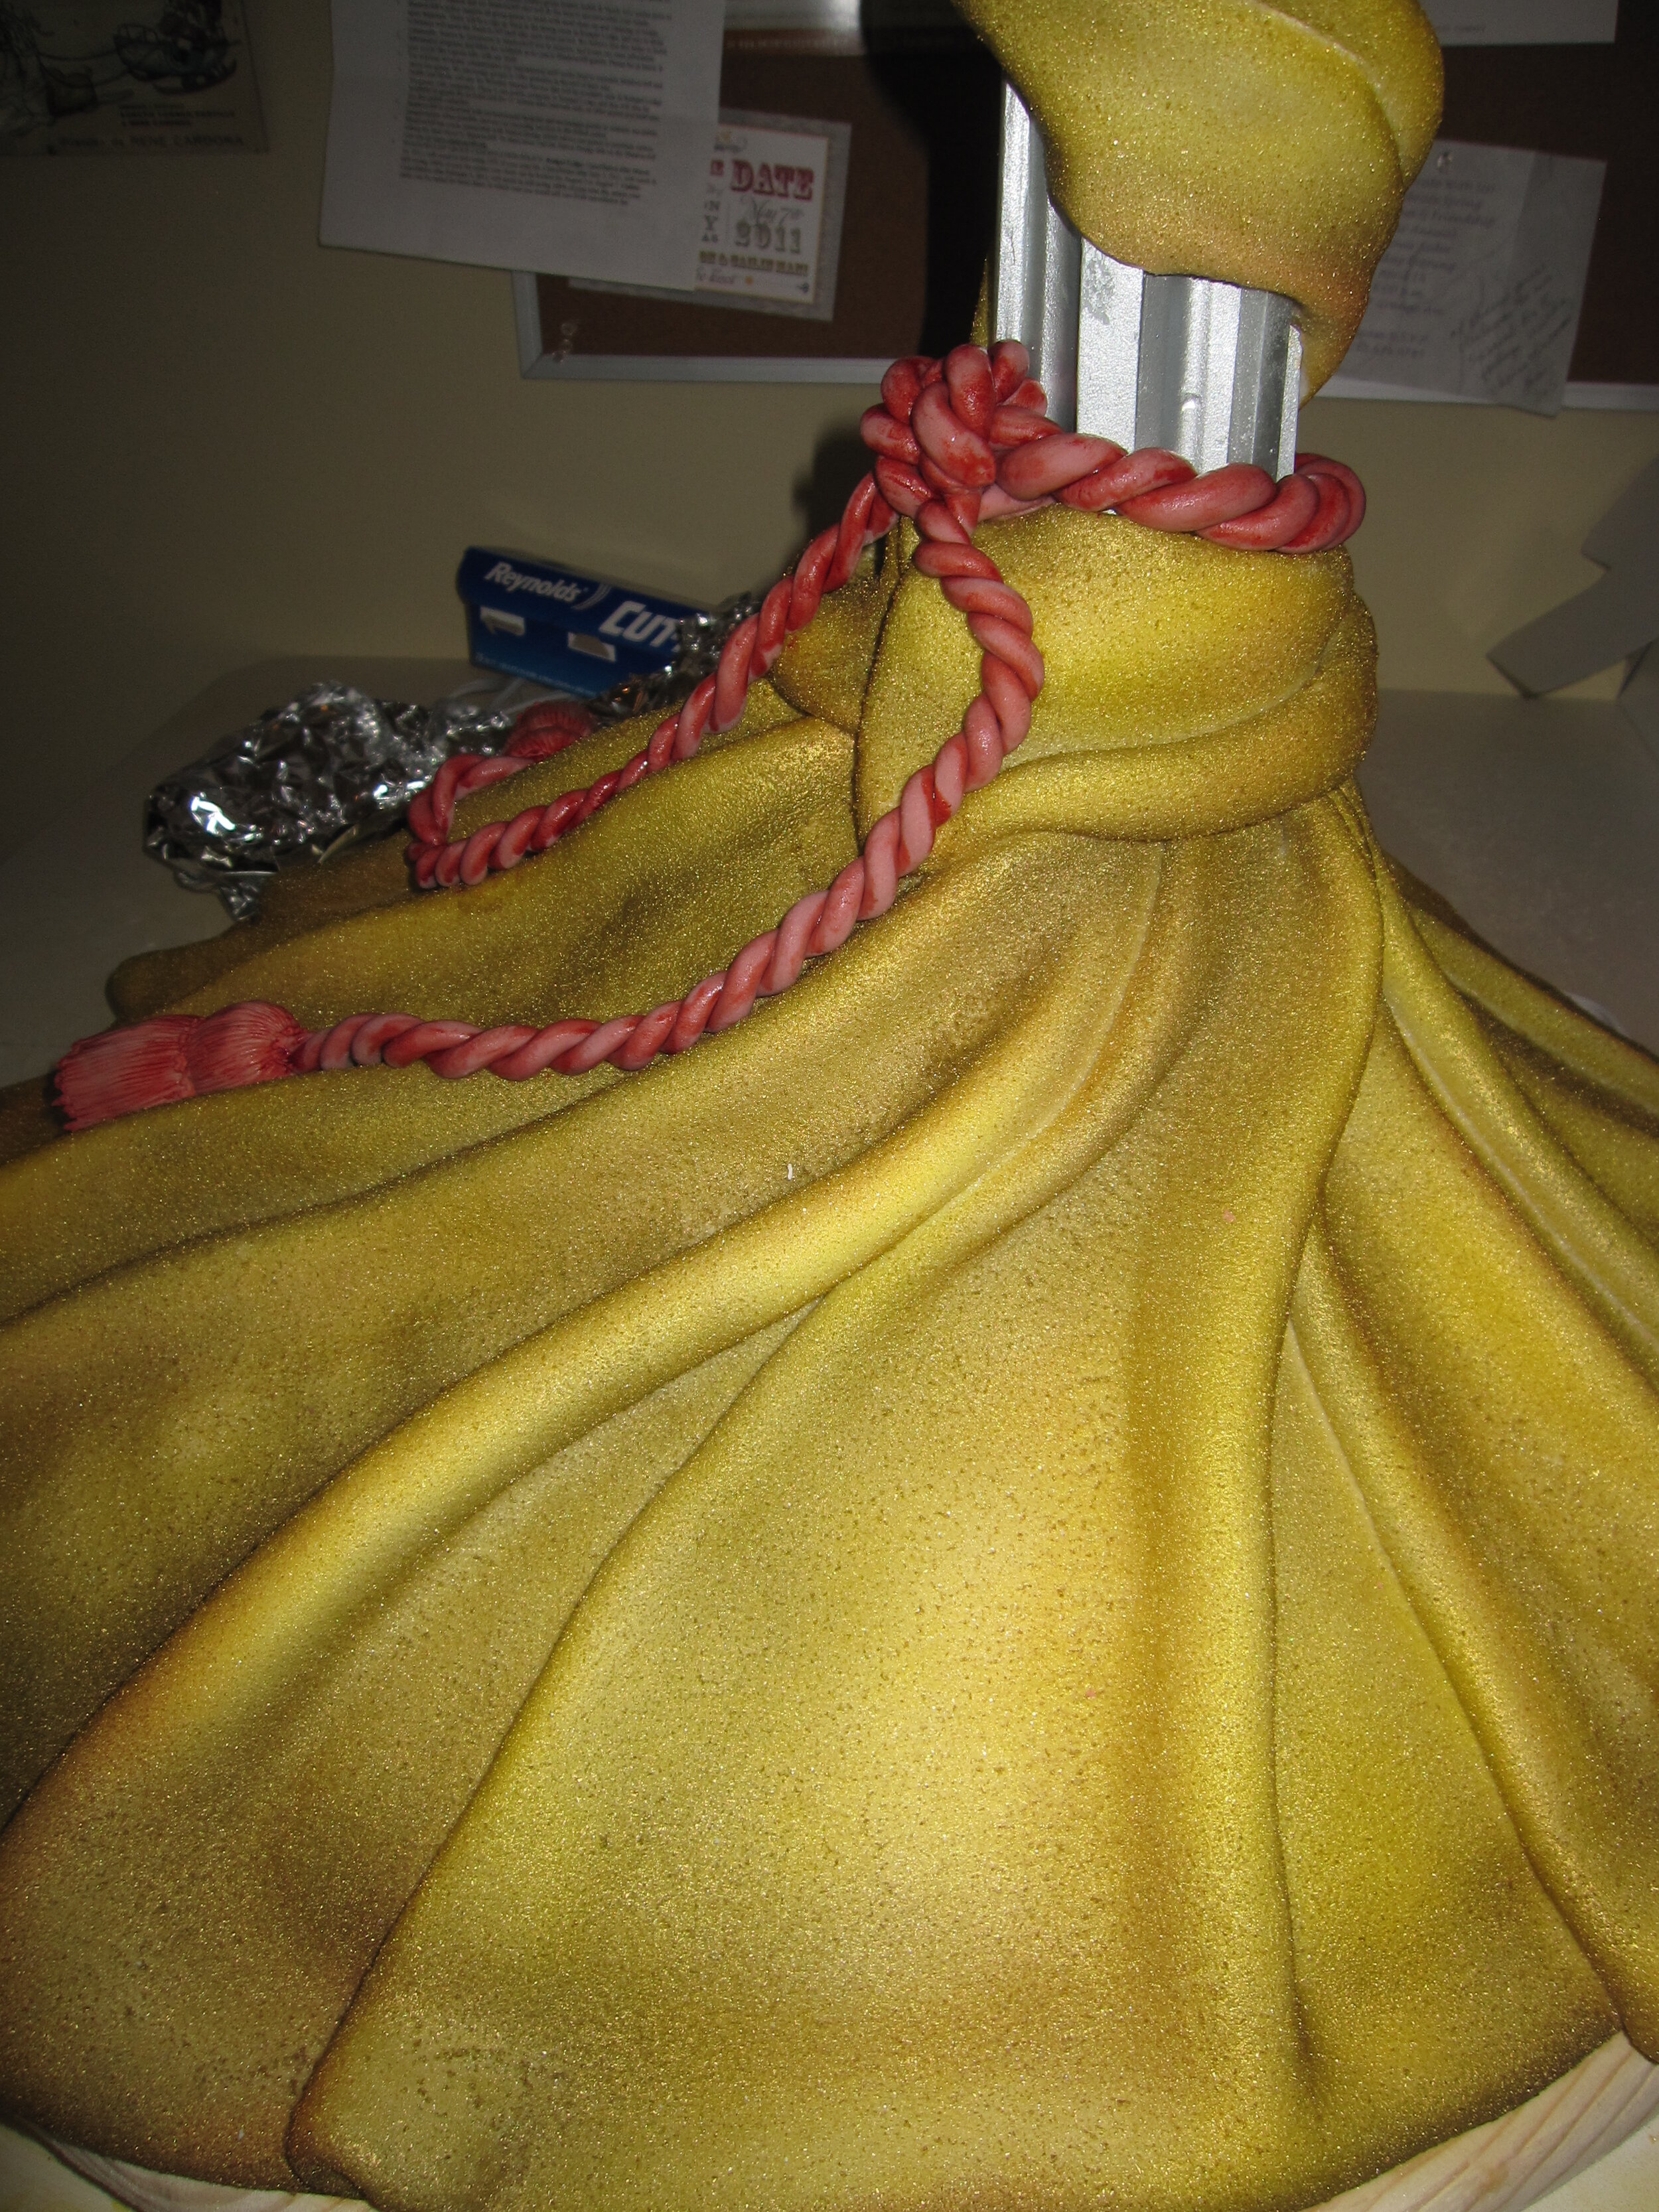
I put just a little more color into the cake by adding dusty rose royal icing fringe to the hanging cake bases and to the drapery, as well as some fondant ropes and tassels. Once these dried, I painted a little bright red and a touch of blue onto them.
I wasn’t planning to actually install the flames and the hanging cakes until the cake was at the venue, but I did attach some of the gum paste leaves around the Christmas lights that would be under the flames. I could only attach about half of them, because I needed one side to be open in order to place the flames. This made me rather nervous because I had some trouble getting them to stick and had to create elaborate tin foil supports to hold them in place until the royal icing dried. I also had trouble with the royal icing sticking because I had made it a little too thick. So I was scared that, if I had that much trouble at the venue, I wouldn’t be able to get it all together in time.
Even though the venue was less than two miles from my apartment, transport was hair-raising. At first I had for some inexplicable reason imagined that I could transport the cake in the front seat of my pickup. Since the cake was two feet wide, three feet long, and about two and half feet tall, apparently I was temporarily insane when I was picturing sticking this thing in my passenger seat. My friend Alejandro very kindly volunteered to come pick up the cake in his SUV, though I don’t think he really knew what he was getting into.
The cake literally came within inches of not fitting in the back of his SUV along all three dimensions. On the top, there was not even a quarter of an inch of clearance. All I can do is thank my lucky stars that it made it in. The only reason that I didn’t make the cake six inches longer is because that was the size that the steel pipe came in.
I actually didn’t ride in the car with the cake on the way to the venue, because I wanted to have my truck there as well, but fortunately Angie was able to go with Alejandro, so he didn’t have to face the nerve-wracking ride alone. I can now admit that I was terrified that something would go wrong on the way over, though of course I didn’t say this to Alejandro until the cake was safely at the venue. All sorts of horrific scenarios were running through my head. The royal icing arm might crack. The fondant curtains could rip. All the leaves might break off. The entire cantilevered arm might collapse somehow. I packed two huge bags full of repair equipment and supplies to cope with any eventuality.
Of course, none of these dire events happened, or even had any real likelihood of happening. The cake got to the Orpheum with no problem whatsoever. A passing stranger even helped out by holding the door as Alejandro and I carried it into the venue.
This is the first time that I’ve ever completed a cake in the midst of professionals setting up a wedding venue. I was feeling very insecure about having that many people around while I was working, but Angie kindly hung around and kept me company and distracted me with stories about her love life. The assembly actually went quite smoothly and fairly quickly. Really it was just a matter of dropping the flames onto their bases, sticking on a few more leaves, and aging the silver leaves with just a touch of black powdered food coloring.
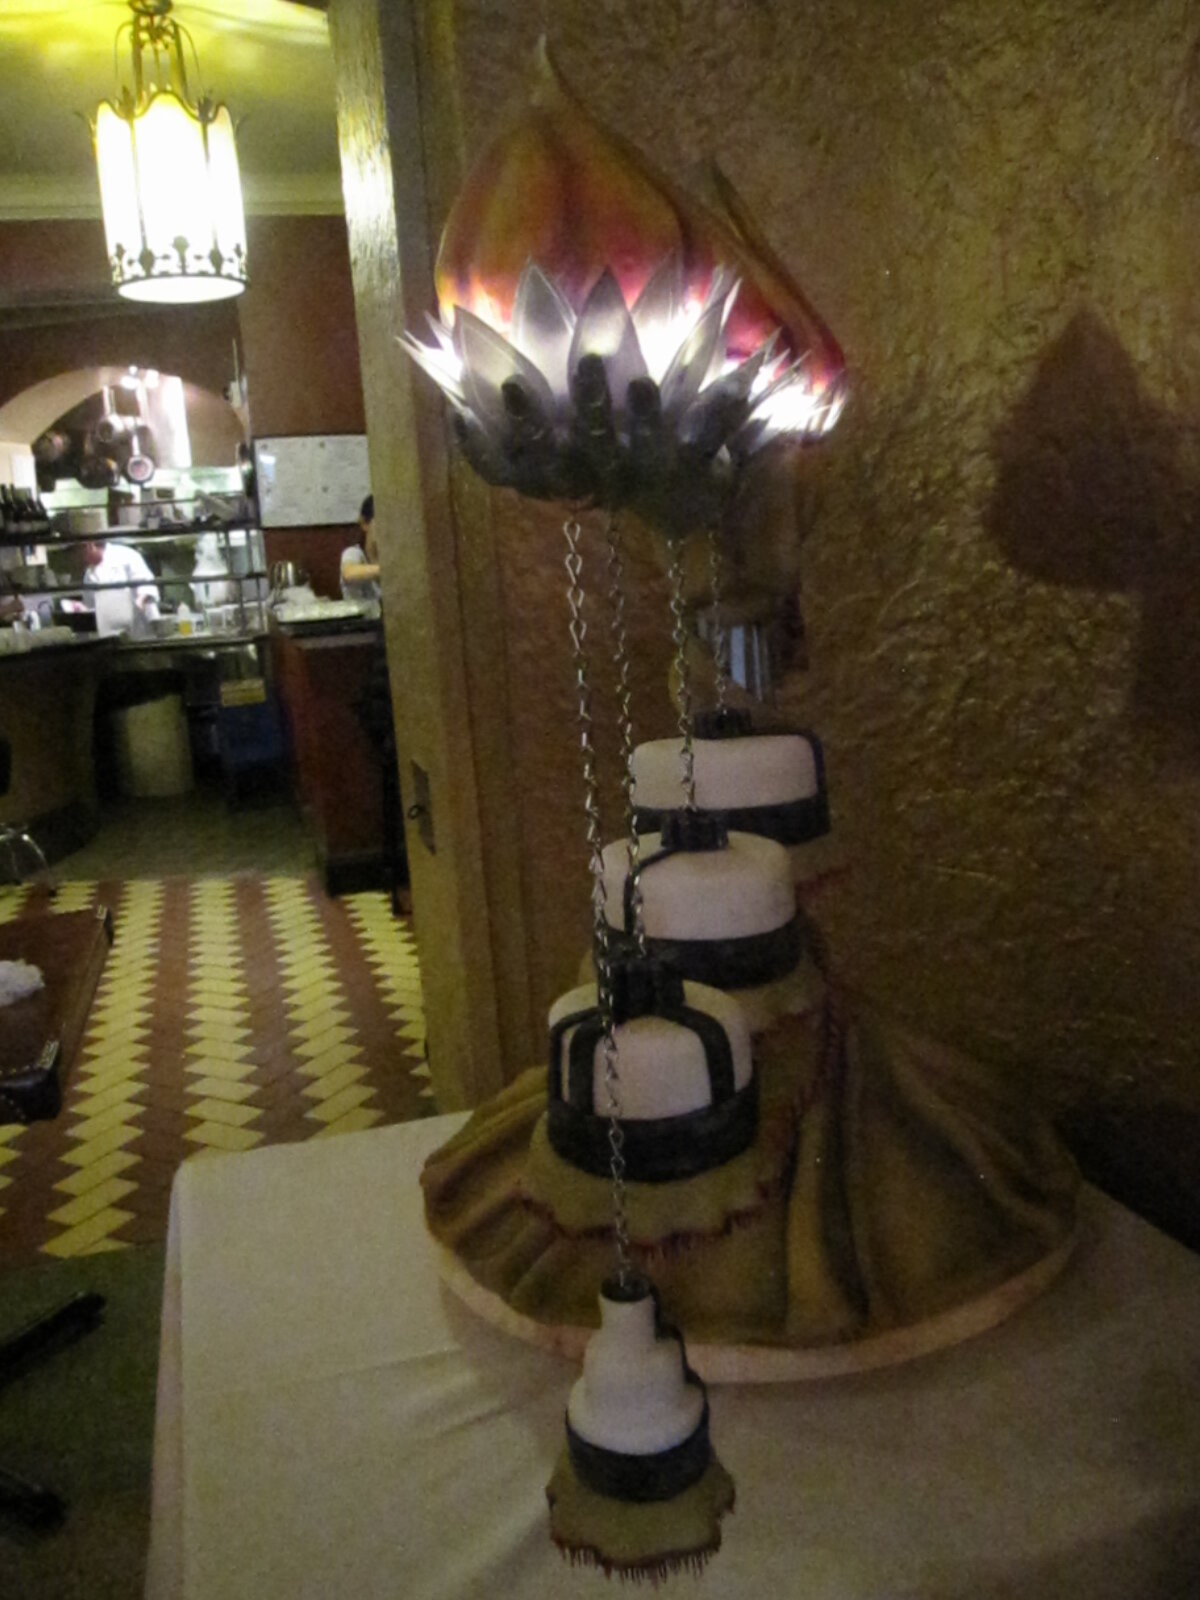
Because I wasn’t sure how long it would take to finish the assembly at the venue, we had tried to come up with some sort of complicated plan of vehicle switching that would allow me to stay at the venue if necessary while Angie went back to my apartment to change. I was so distracted that I never understood the plan in the first place, so it’s a good thing that we didn’t actually attempt to put it into action. In the end, we had plenty of time to drive home and change and then take a bus back to the venue in time for a pre-ceremony cocktail. While we were gone, they even accessorized the cake table with votive candles and flowers that matched the colors of the cake flawlessly.
The wedding was absolutely beautiful. I was so nervous about the cake that I hadn’t eaten all day and there was an open bar, so I may have had a few more glasses of wine than was really good for me. The wedding coordinator for the venue told me that the cake was a challenge to cut, which I don’t doubt is true. Apparently he put a note to that effect in the file. Not that there’s any real likelihood that I’ll ever serve a cake there again.
I have absolutely no idea whether there was any leftover cake or what happened to the cake base, since by the end of the night I was too drunk and exhausted to do anything but let Angie roll me into a cab home I like to picture a severed, silver, sugar arm sticking out of a dumpster being devoured by ants.
As promised, I’d like to give Executive Producer credit on this cake to Angie for cleaning my apartment, to Jenn for running to the store for emergency powdered sugar, and to Alejandro for driving the cake to the venue. Thanks guys!
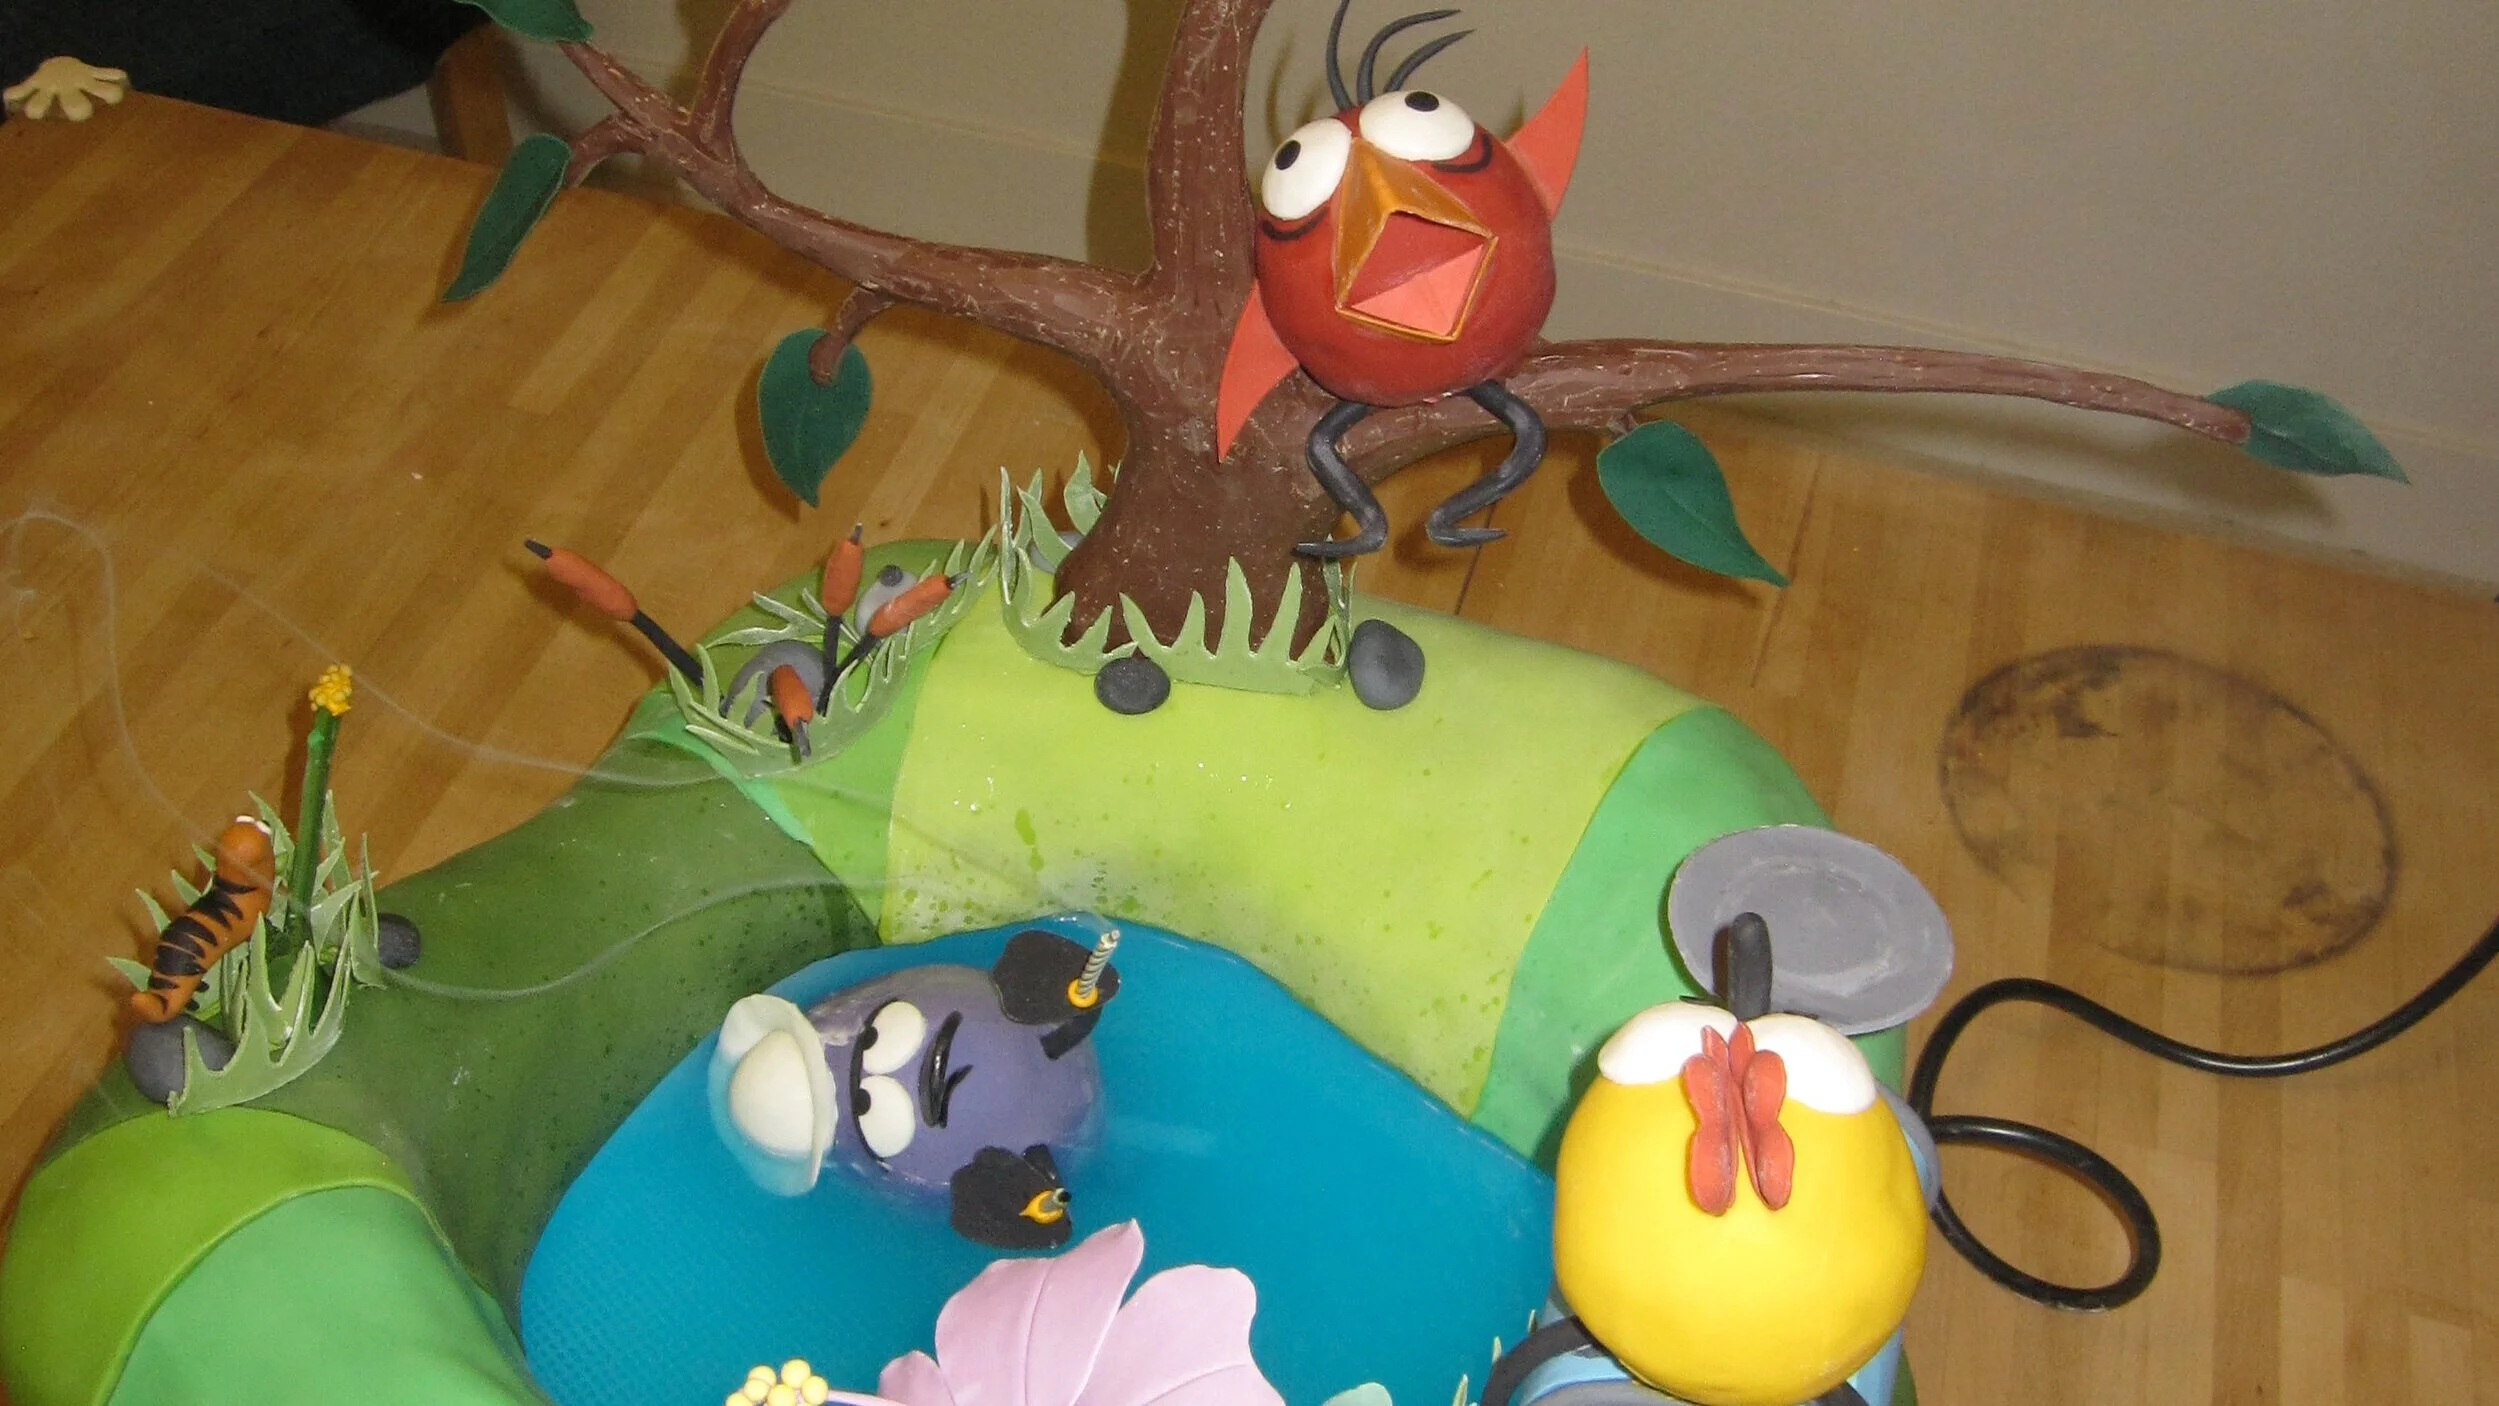
Peep and the Big Wide World Cake
When it came time to design my nephew Sam’s second birthday cake, I turned to Sam’s older sister, Alex, to help me conceptualize the cake. Alex came up with the idea that Sam might like a duck cake, which I thought was a very good idea. Sam loves animals of all kinds. After further discussion, I suggested that we should make a cake based on the TV show Peep and the Big Wide World, which could include not only Quack (a duck), but also Peep (a chick) and Chirp (a baby bird).
When it came time to design my nephew Sam’s second birthday cake, I turned to Sam’s older sister, Alex, to help me conceptualize the cake. Sam, while remarkably verbal for a two-year-old, still cannot be relied up to respond to specific questions in a direct manner.
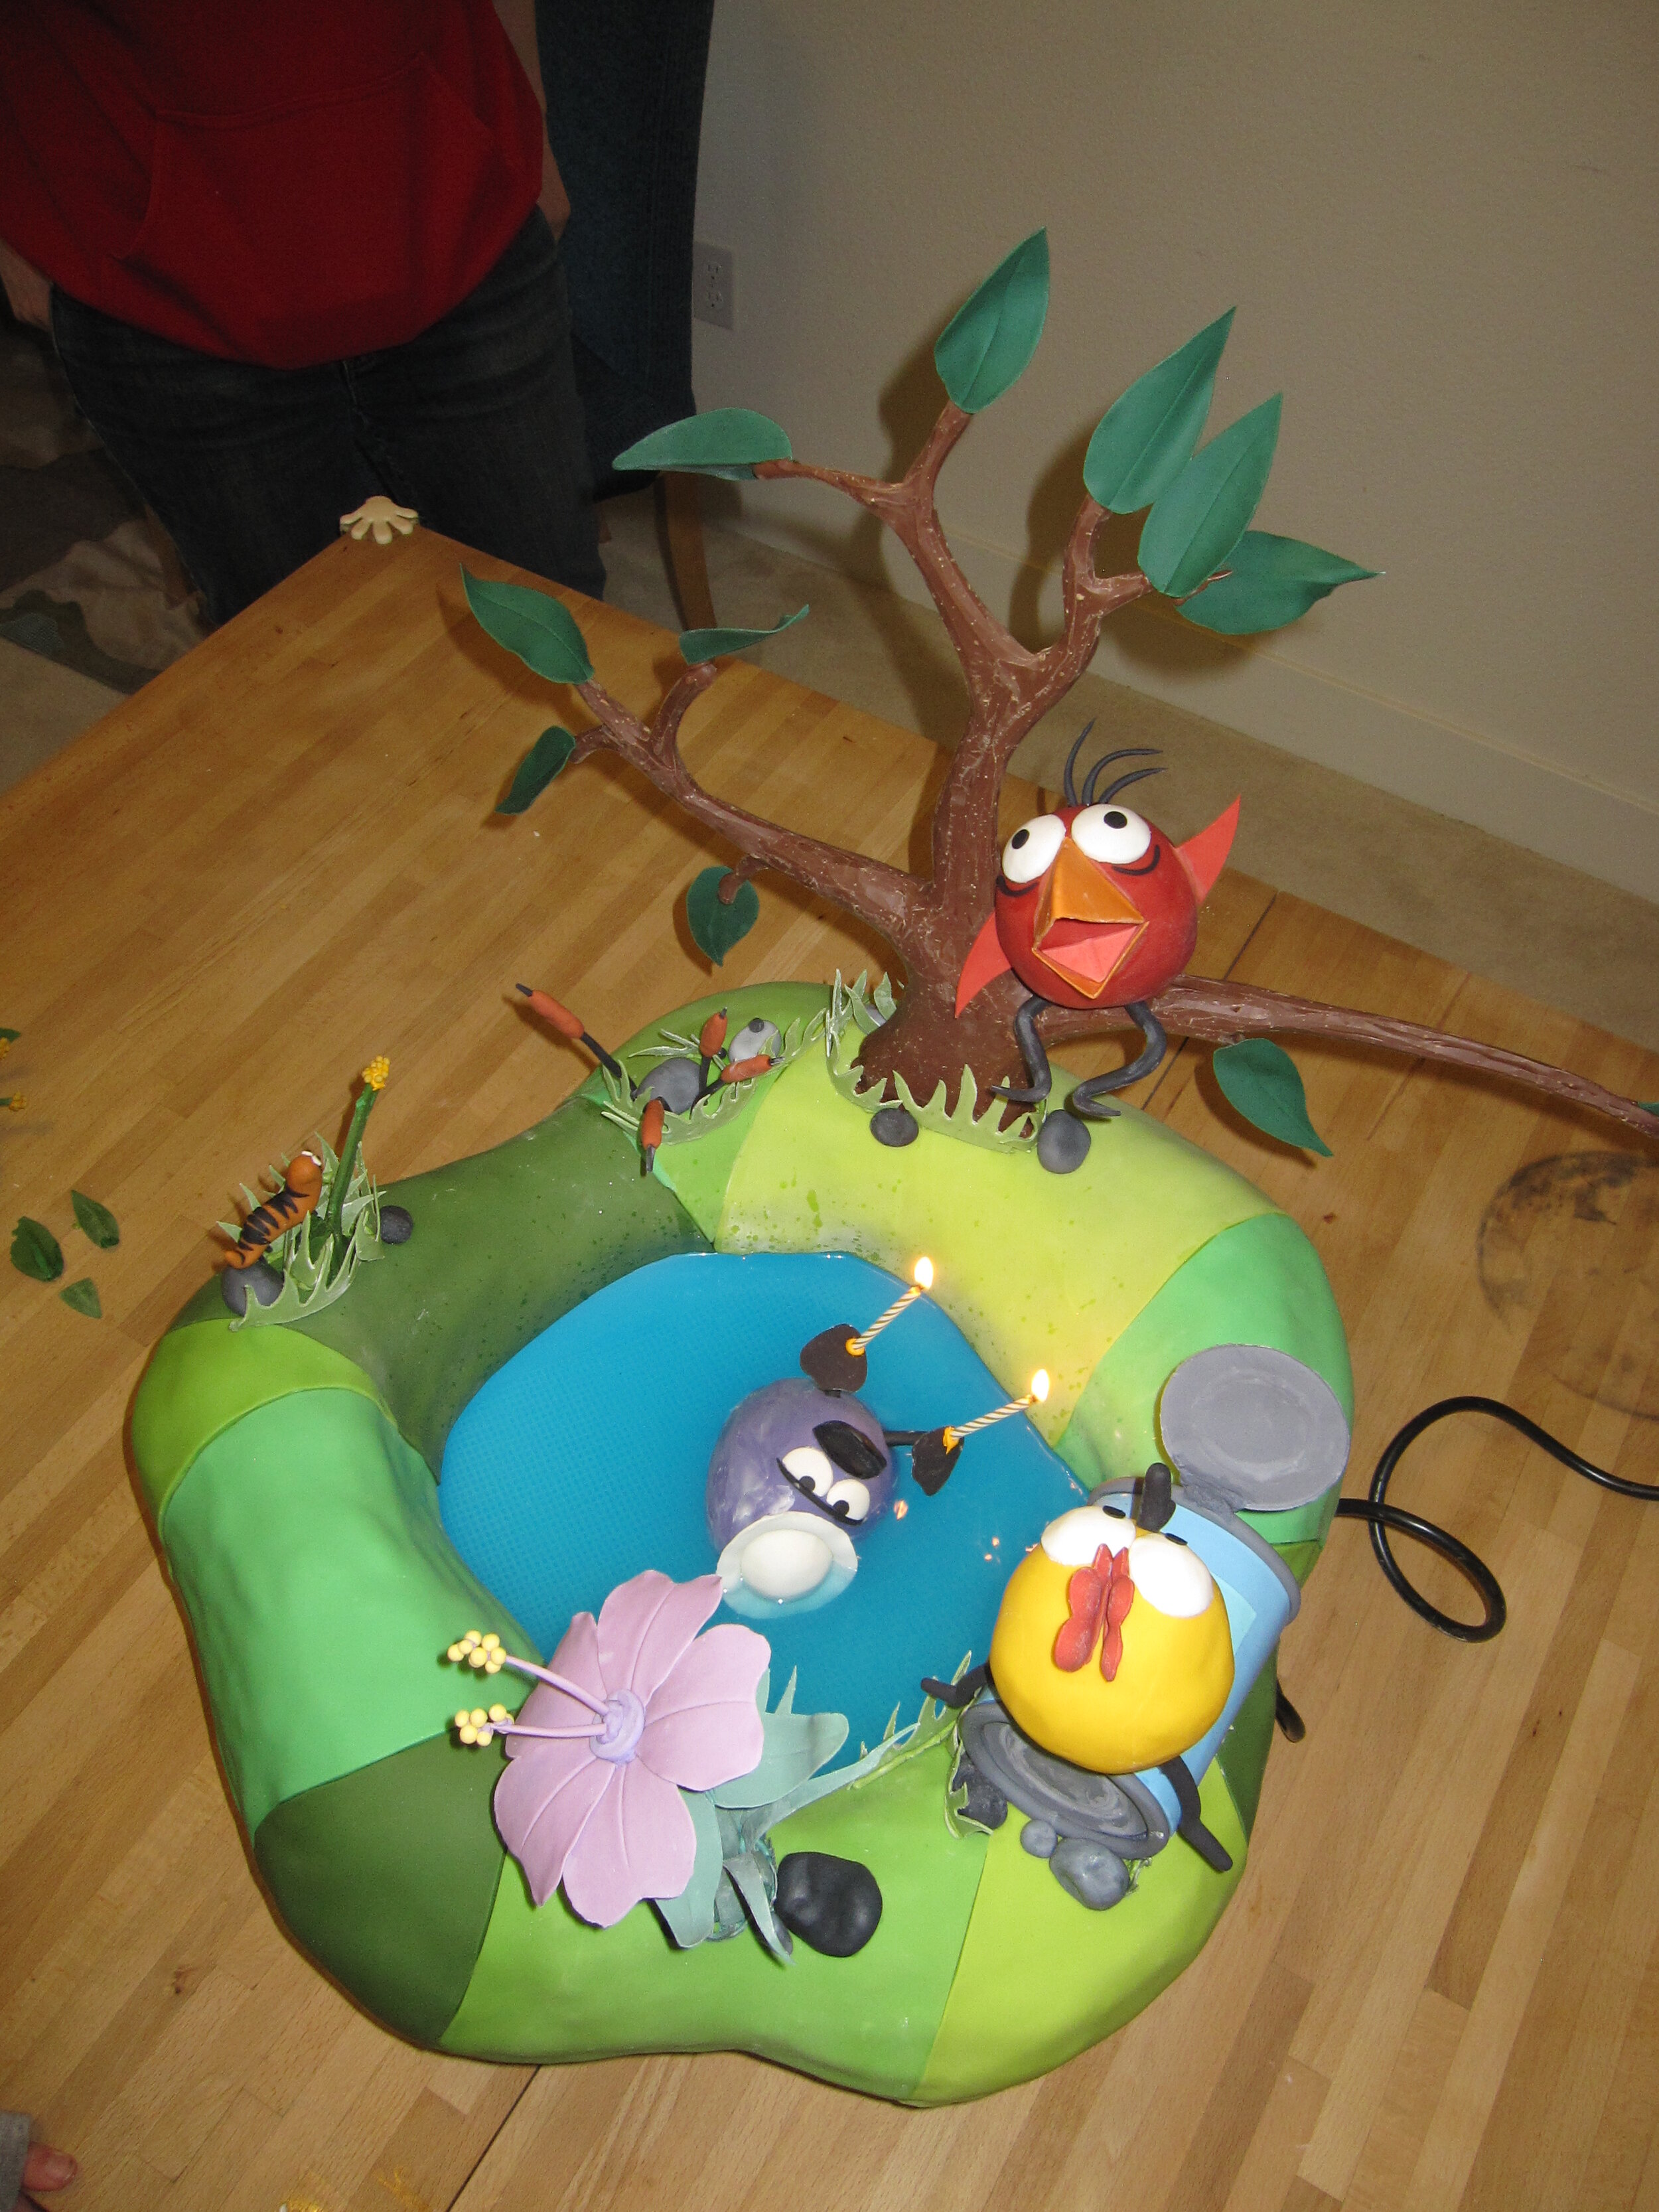
At first, Alex suggested various vehicle-based concepts because Alex loves vehicles. Eventually, I was able to convince Alex that we should base the cake design primarily on things that Sam likes, which may not correlate directly to things that Alex likes. At this point, Alex came up with the idea that Sam might like a duck cake, which I thought was a very good idea. Sam loves animals of all kinds. After further discussion, I suggested that we should make a cake based on the TV show Peep and the Big Wide World, which could include not only Quack (a duck), but also Peep (a chick) and Chirp (a baby bird). Since Quack is very much attached to his pond, I decided that it would be fun to make Quack float in a lake of blue Kool-Aid. As it turns out, blue Kool-Aid is difficult to find, but Gatorade makes an absolutely disgusting flavor that was the perfect color for Quack’s pond, so I used that instead.
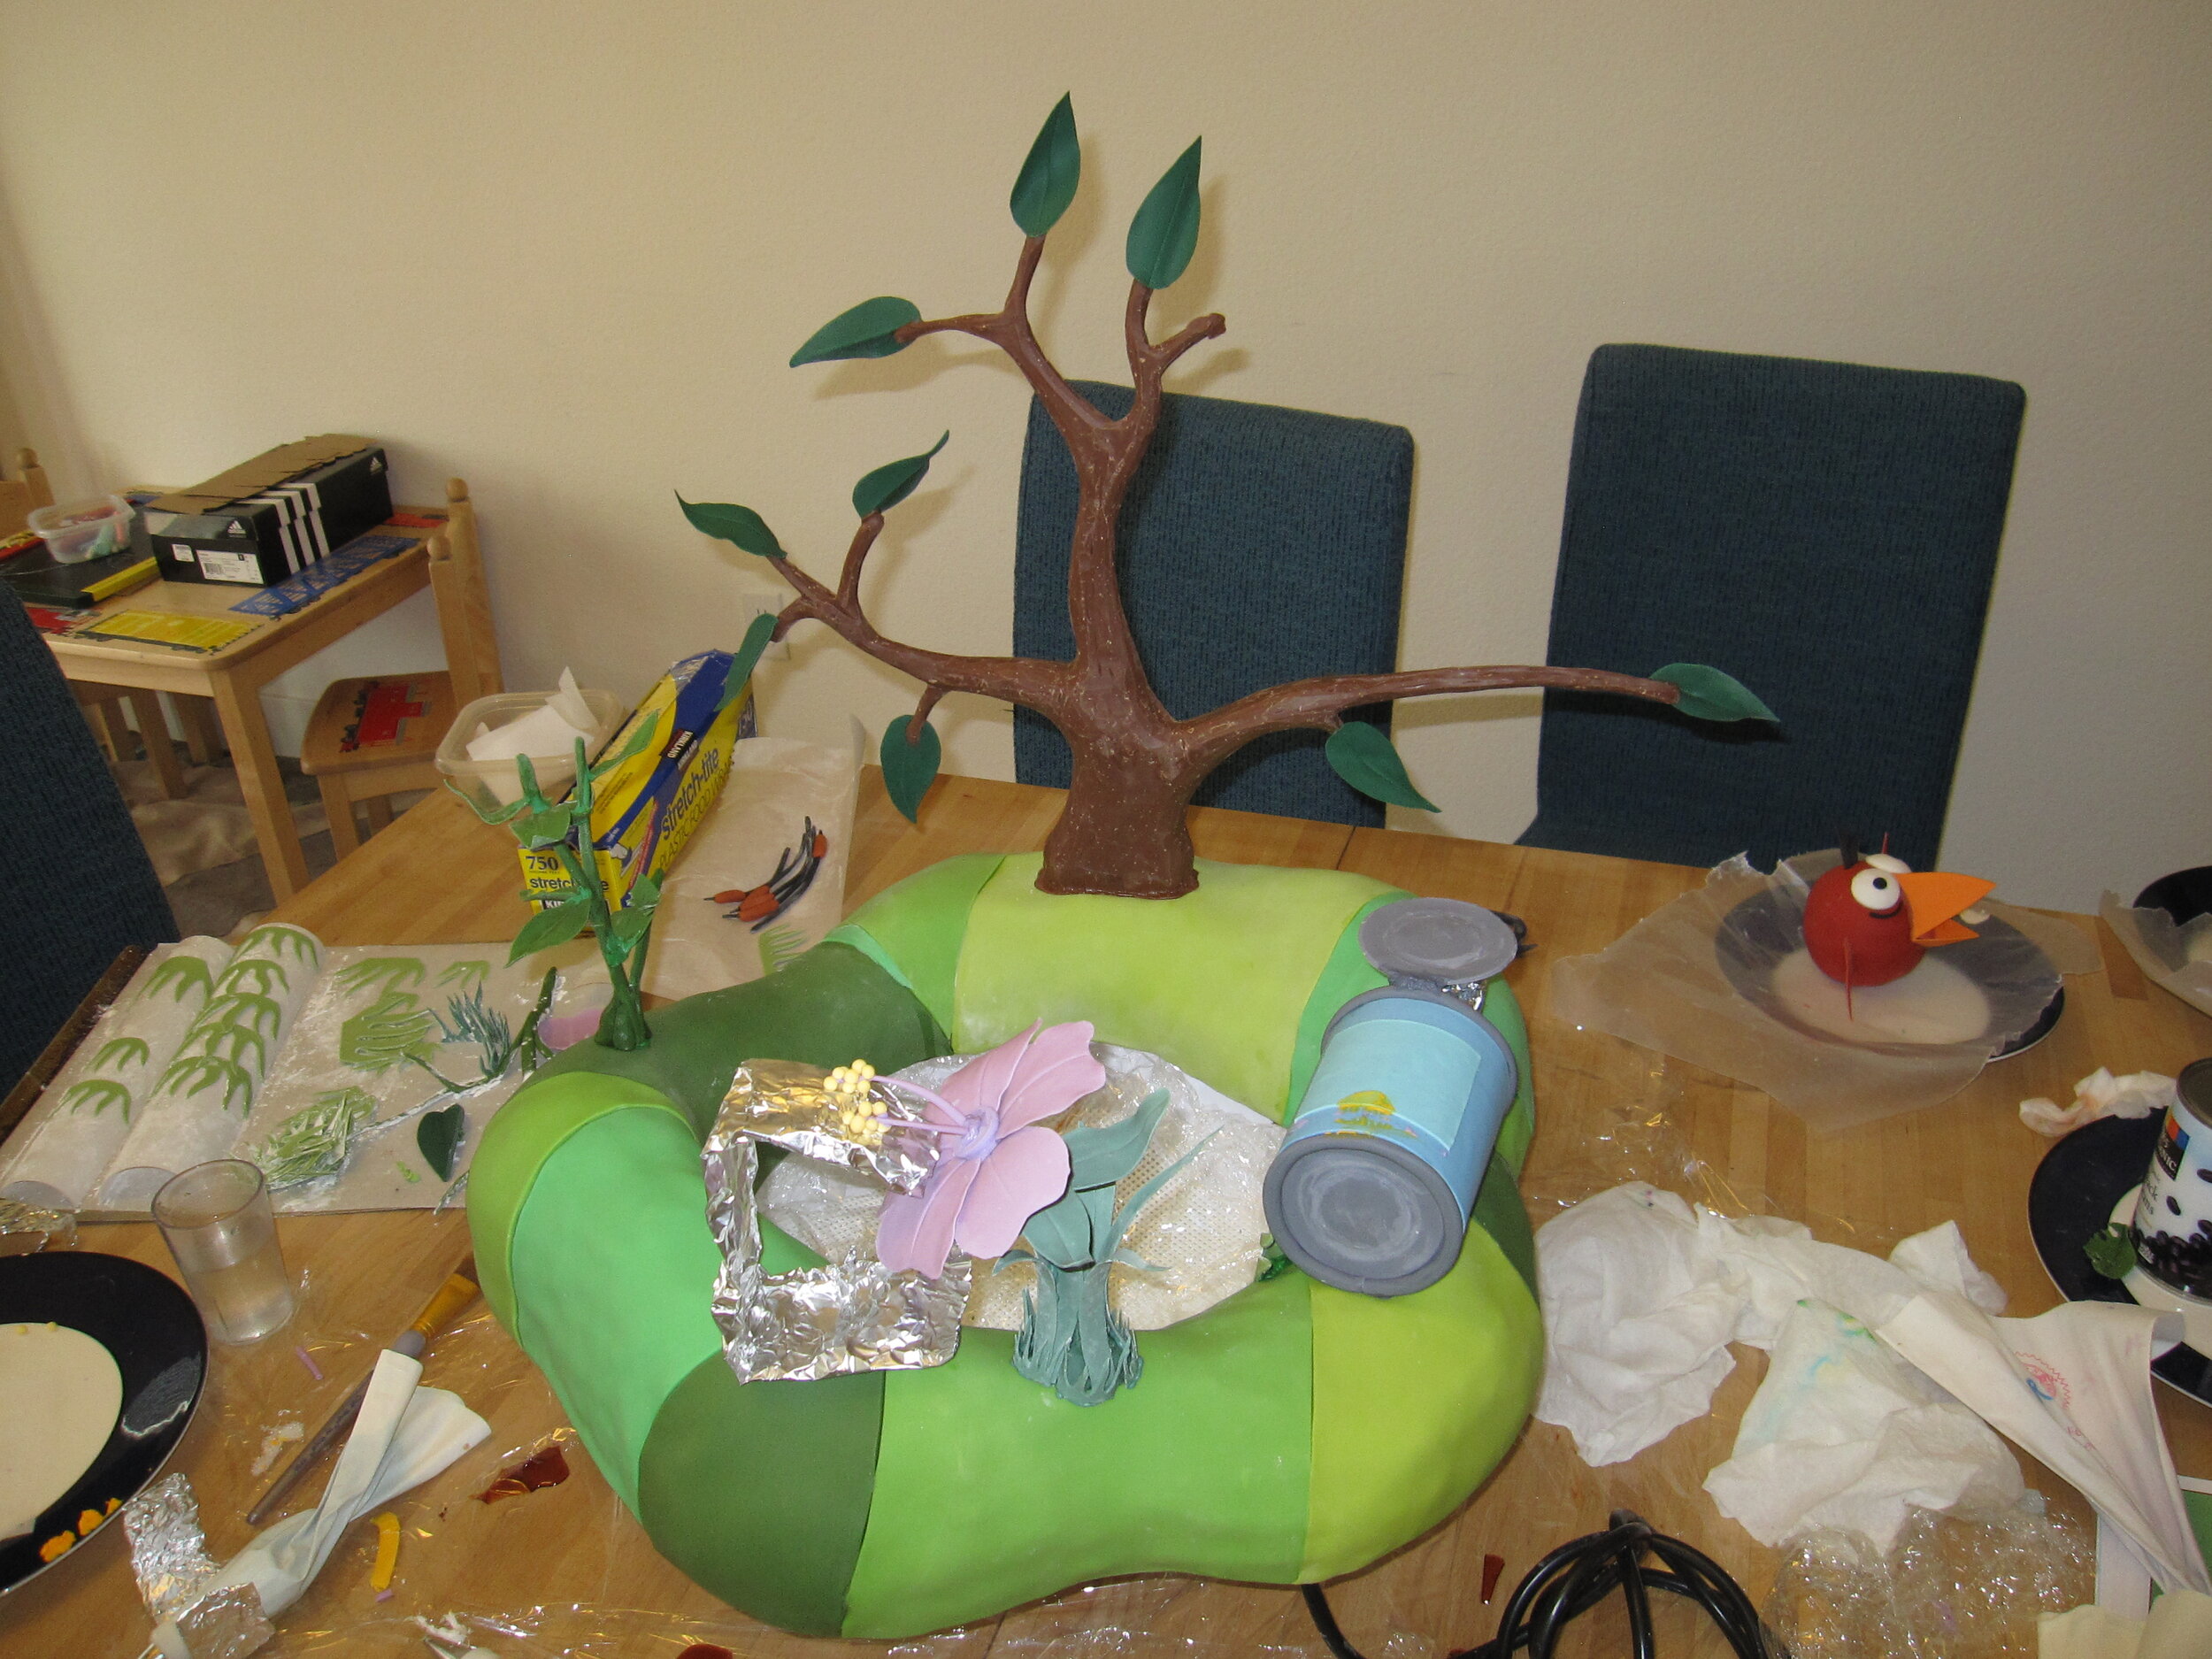
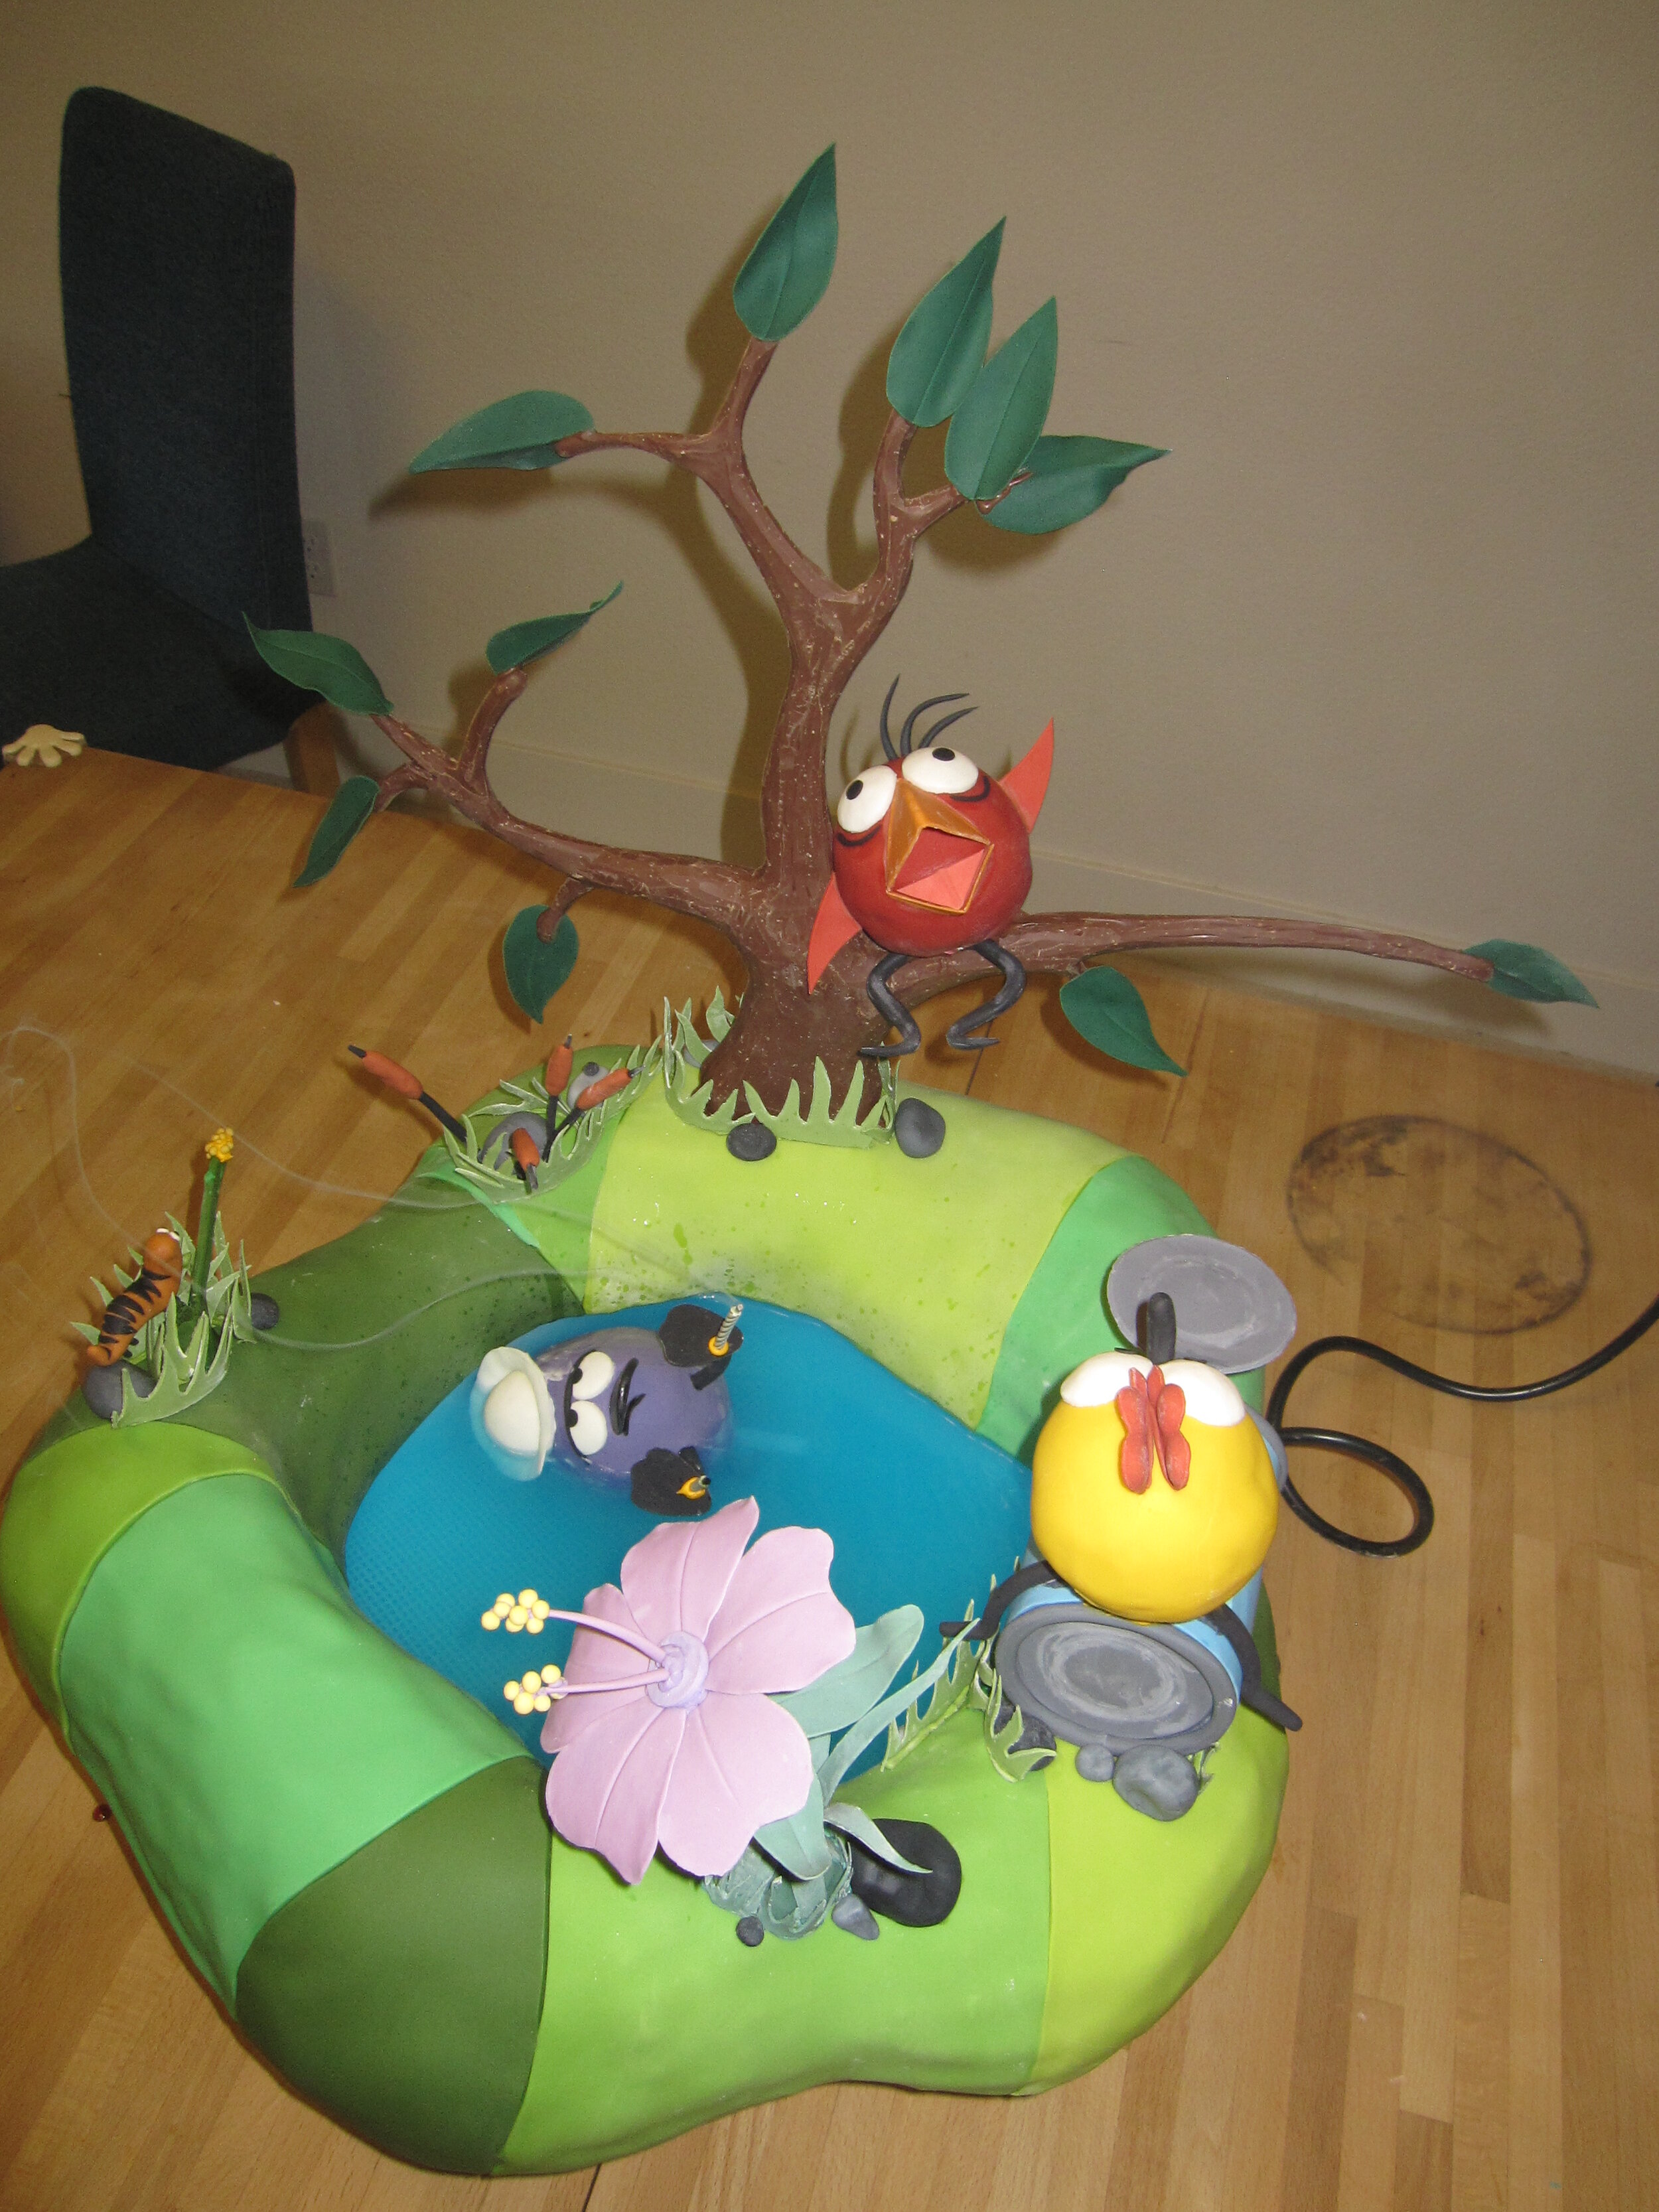
This is almost the first cake I’ve made that was primarily landscape-based, rather than primarily object- or character-based. Each major character in Peep and the Big Wide World has a special landscape feature with which he or she is associated. Quack has his pond; Chirp perches in her big tree; Peep lives in an old tin can. I also decided to include “the most beautiful flower,” because I really like that episode, and a caterpillar. The caterpillar is a minor character in the show, but Sam had recently said “caterpillar,” which he pronounced something like “patta-putter,” when I was reading to him. I thought this was absolutely adorable and I hoped that, if I put a caterpillar on his cake, he might say it again.
All of this required a great deal of advance work in gum paste and in chocolate. Most of the gum paste work was fairly conventional – cutting leaves and flower petals out of gum paste and draping them over various things to get graceful curves. The can was easily accomplished by wrapping gum paste around an actual tin can.

I was quite proud of Chirp’s tree. Rather than making the tree out of gum paste or fondant, I decided to make it out of chocolate. While I have taken classes in chocolate-work and I frequently make truffles and such, this was my first attempt at making anything this big out of chocolate, at least since the white chocolate rib cage of the Thorax Cake. The first step in casting the tree was to cut the basic shape out of foam core. Then I made a soft bed of cocoa powder by sifting it into a baking tray. I pushed the foam core positive into the cocoa powder to make the negative mold, then piped tempered milk chocolate into the depression in the cocoa powder. Then I flipped the piece of foam core over and did the same thing again to make the other side of the tree. Once those pieces had set, I glued them together with more milk chocolate. After carving off the excess cocoa powder and smoothing out the rough edges with a knife, I was really pleased with the result. And, as it turns out, properly tempered chocolate is much more rigid than my usual building materials of gum paste and fondant. I’m going to have to start incorporating chocolate into my cakes more often.
To create the pond, I bought a big bowl. Then I cut a piece of ½” foam core with a hole in the middle to sit on top of the bowl to support the cake for the land. I also bought a little pump and put it into the pond. The idea was that, if the water was moving, Quack would float around the pond, rather than remaining stationary.
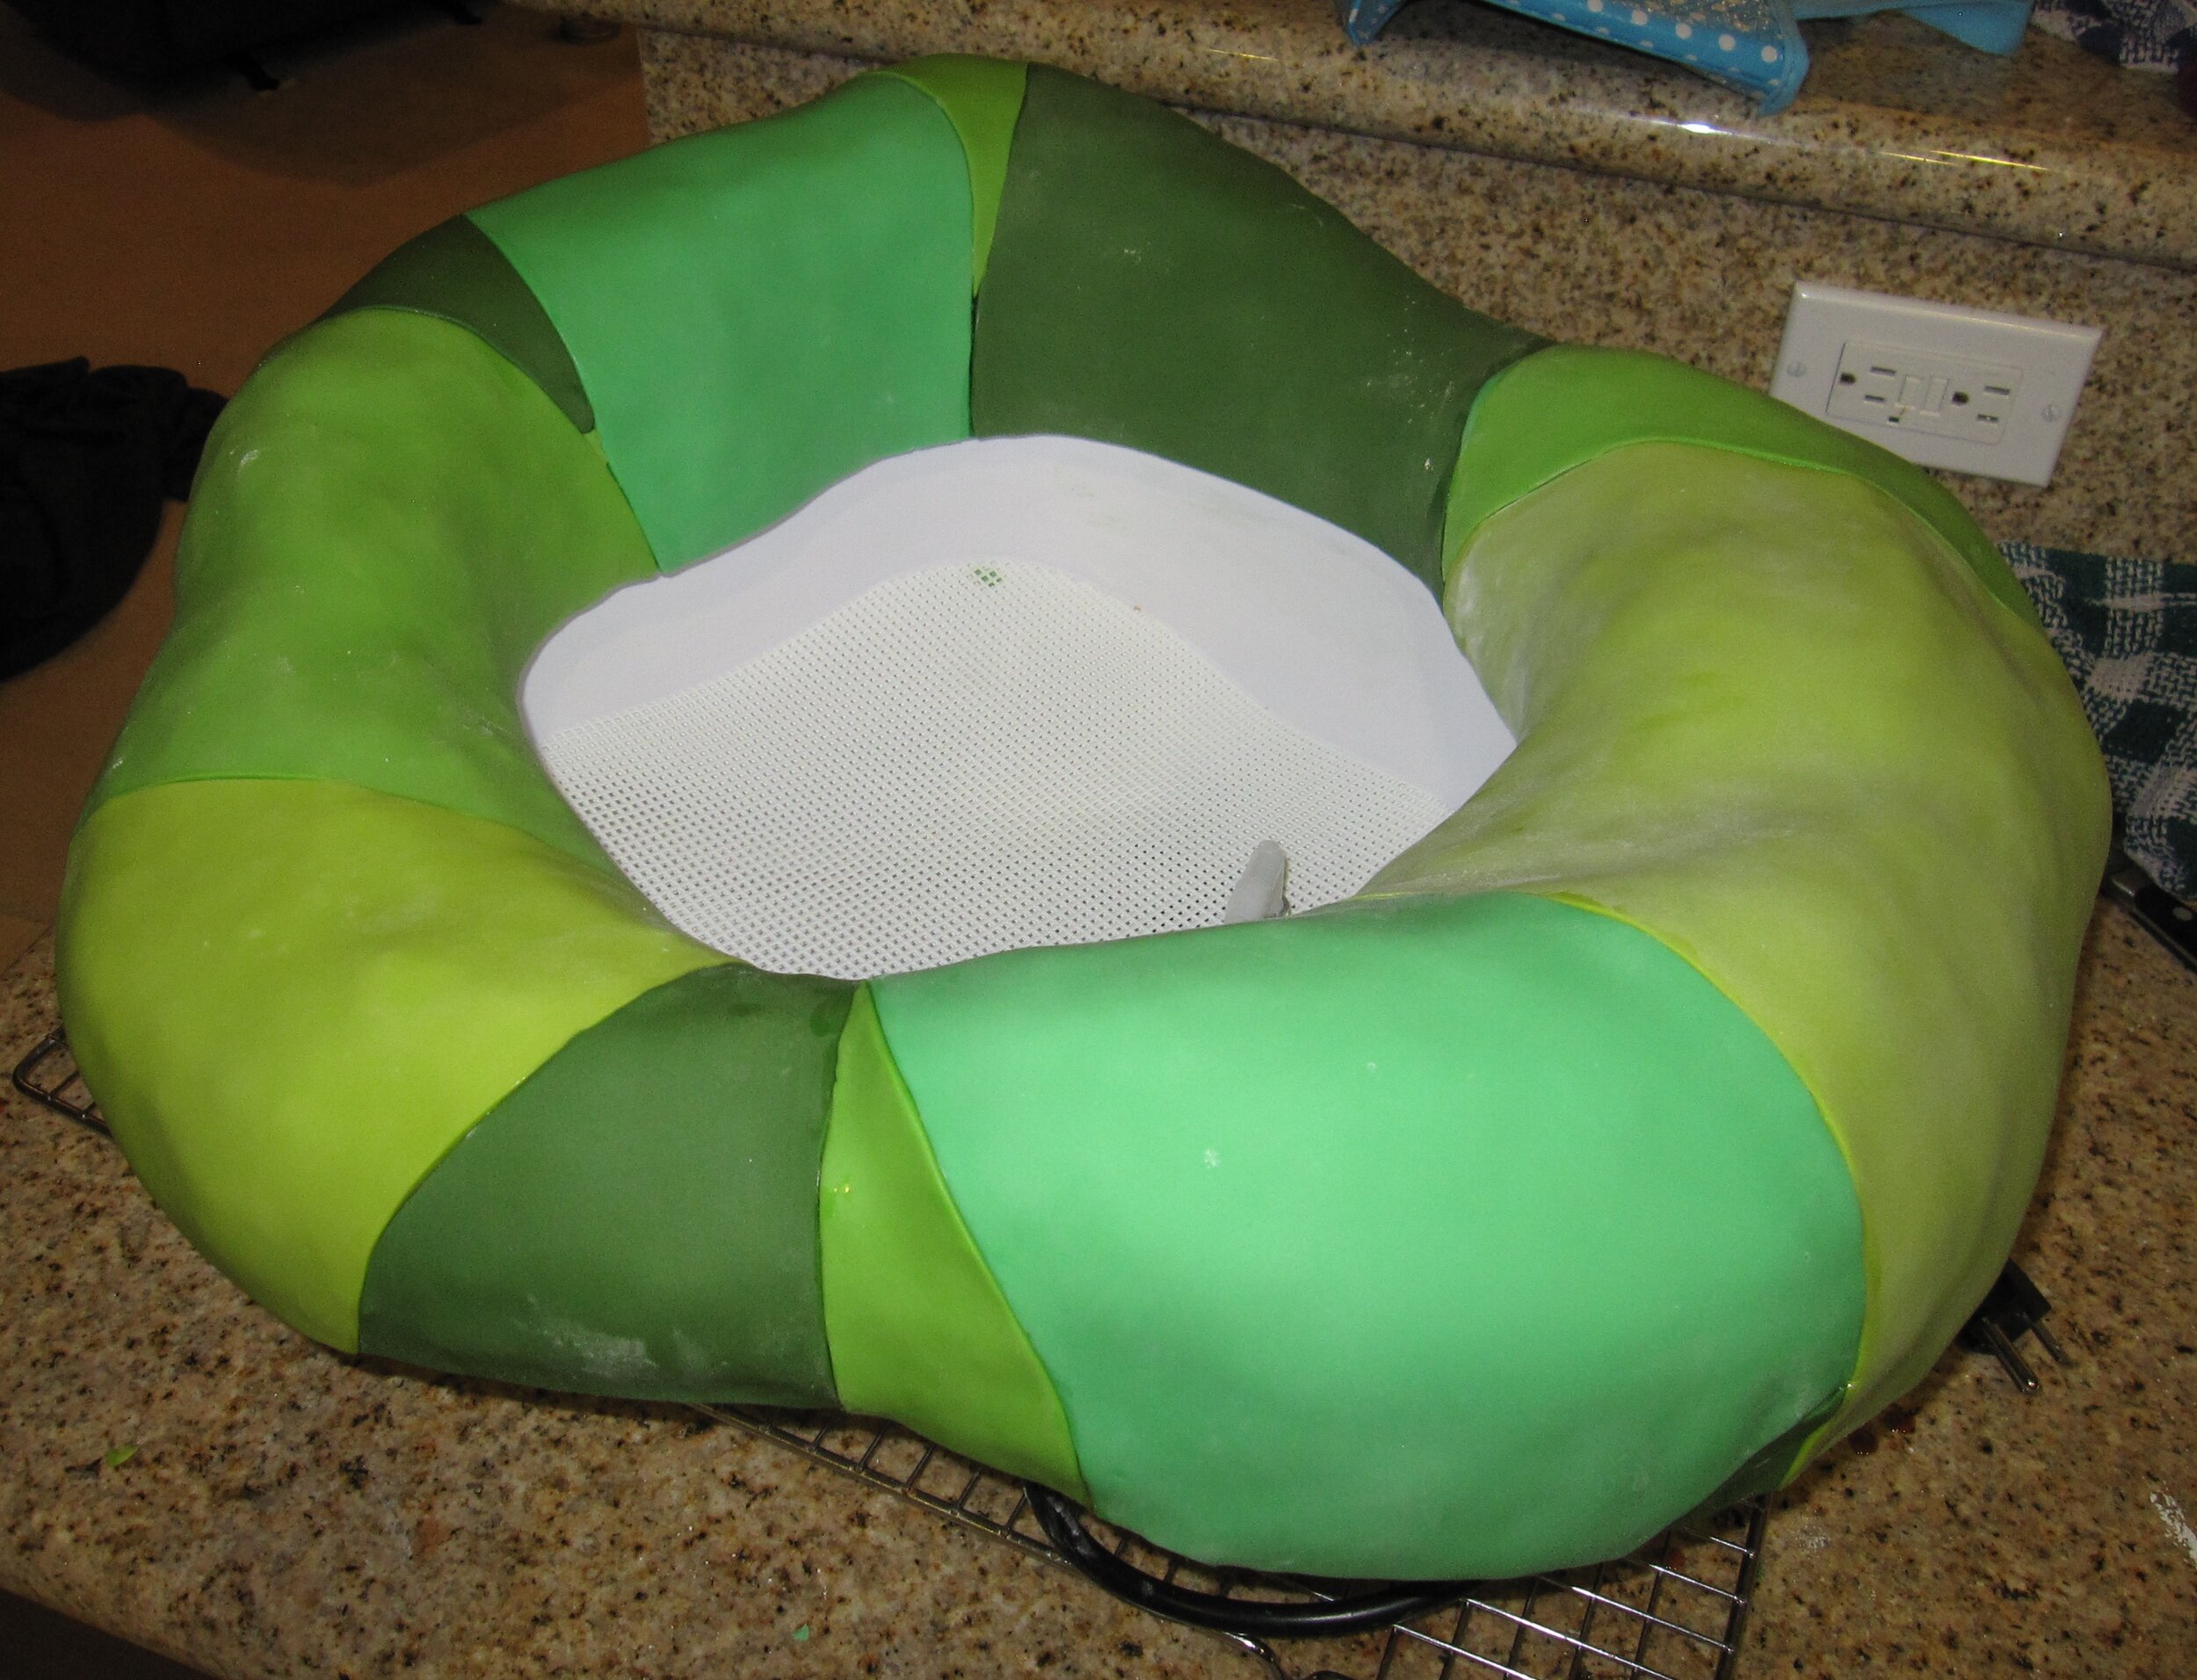
Sculpting the cake into a scenic hilly landscape was easy. Rather than attempting to cover the entire thing in a single piece of fondant, I decided to cover it in a patchwork of various shades of green. This didn’t perfectly mimic the landscape of the show, but I felt that it still captured the cartoony effect.

Installing the tree went remarkably well. I cut a big hole in the cake, poured tempered chocolate into it, and then stuck in the tree. A little more chocolate easily adhered the leaves. It worked perfectly. Have I mentioned that I need to use chocolate more often?
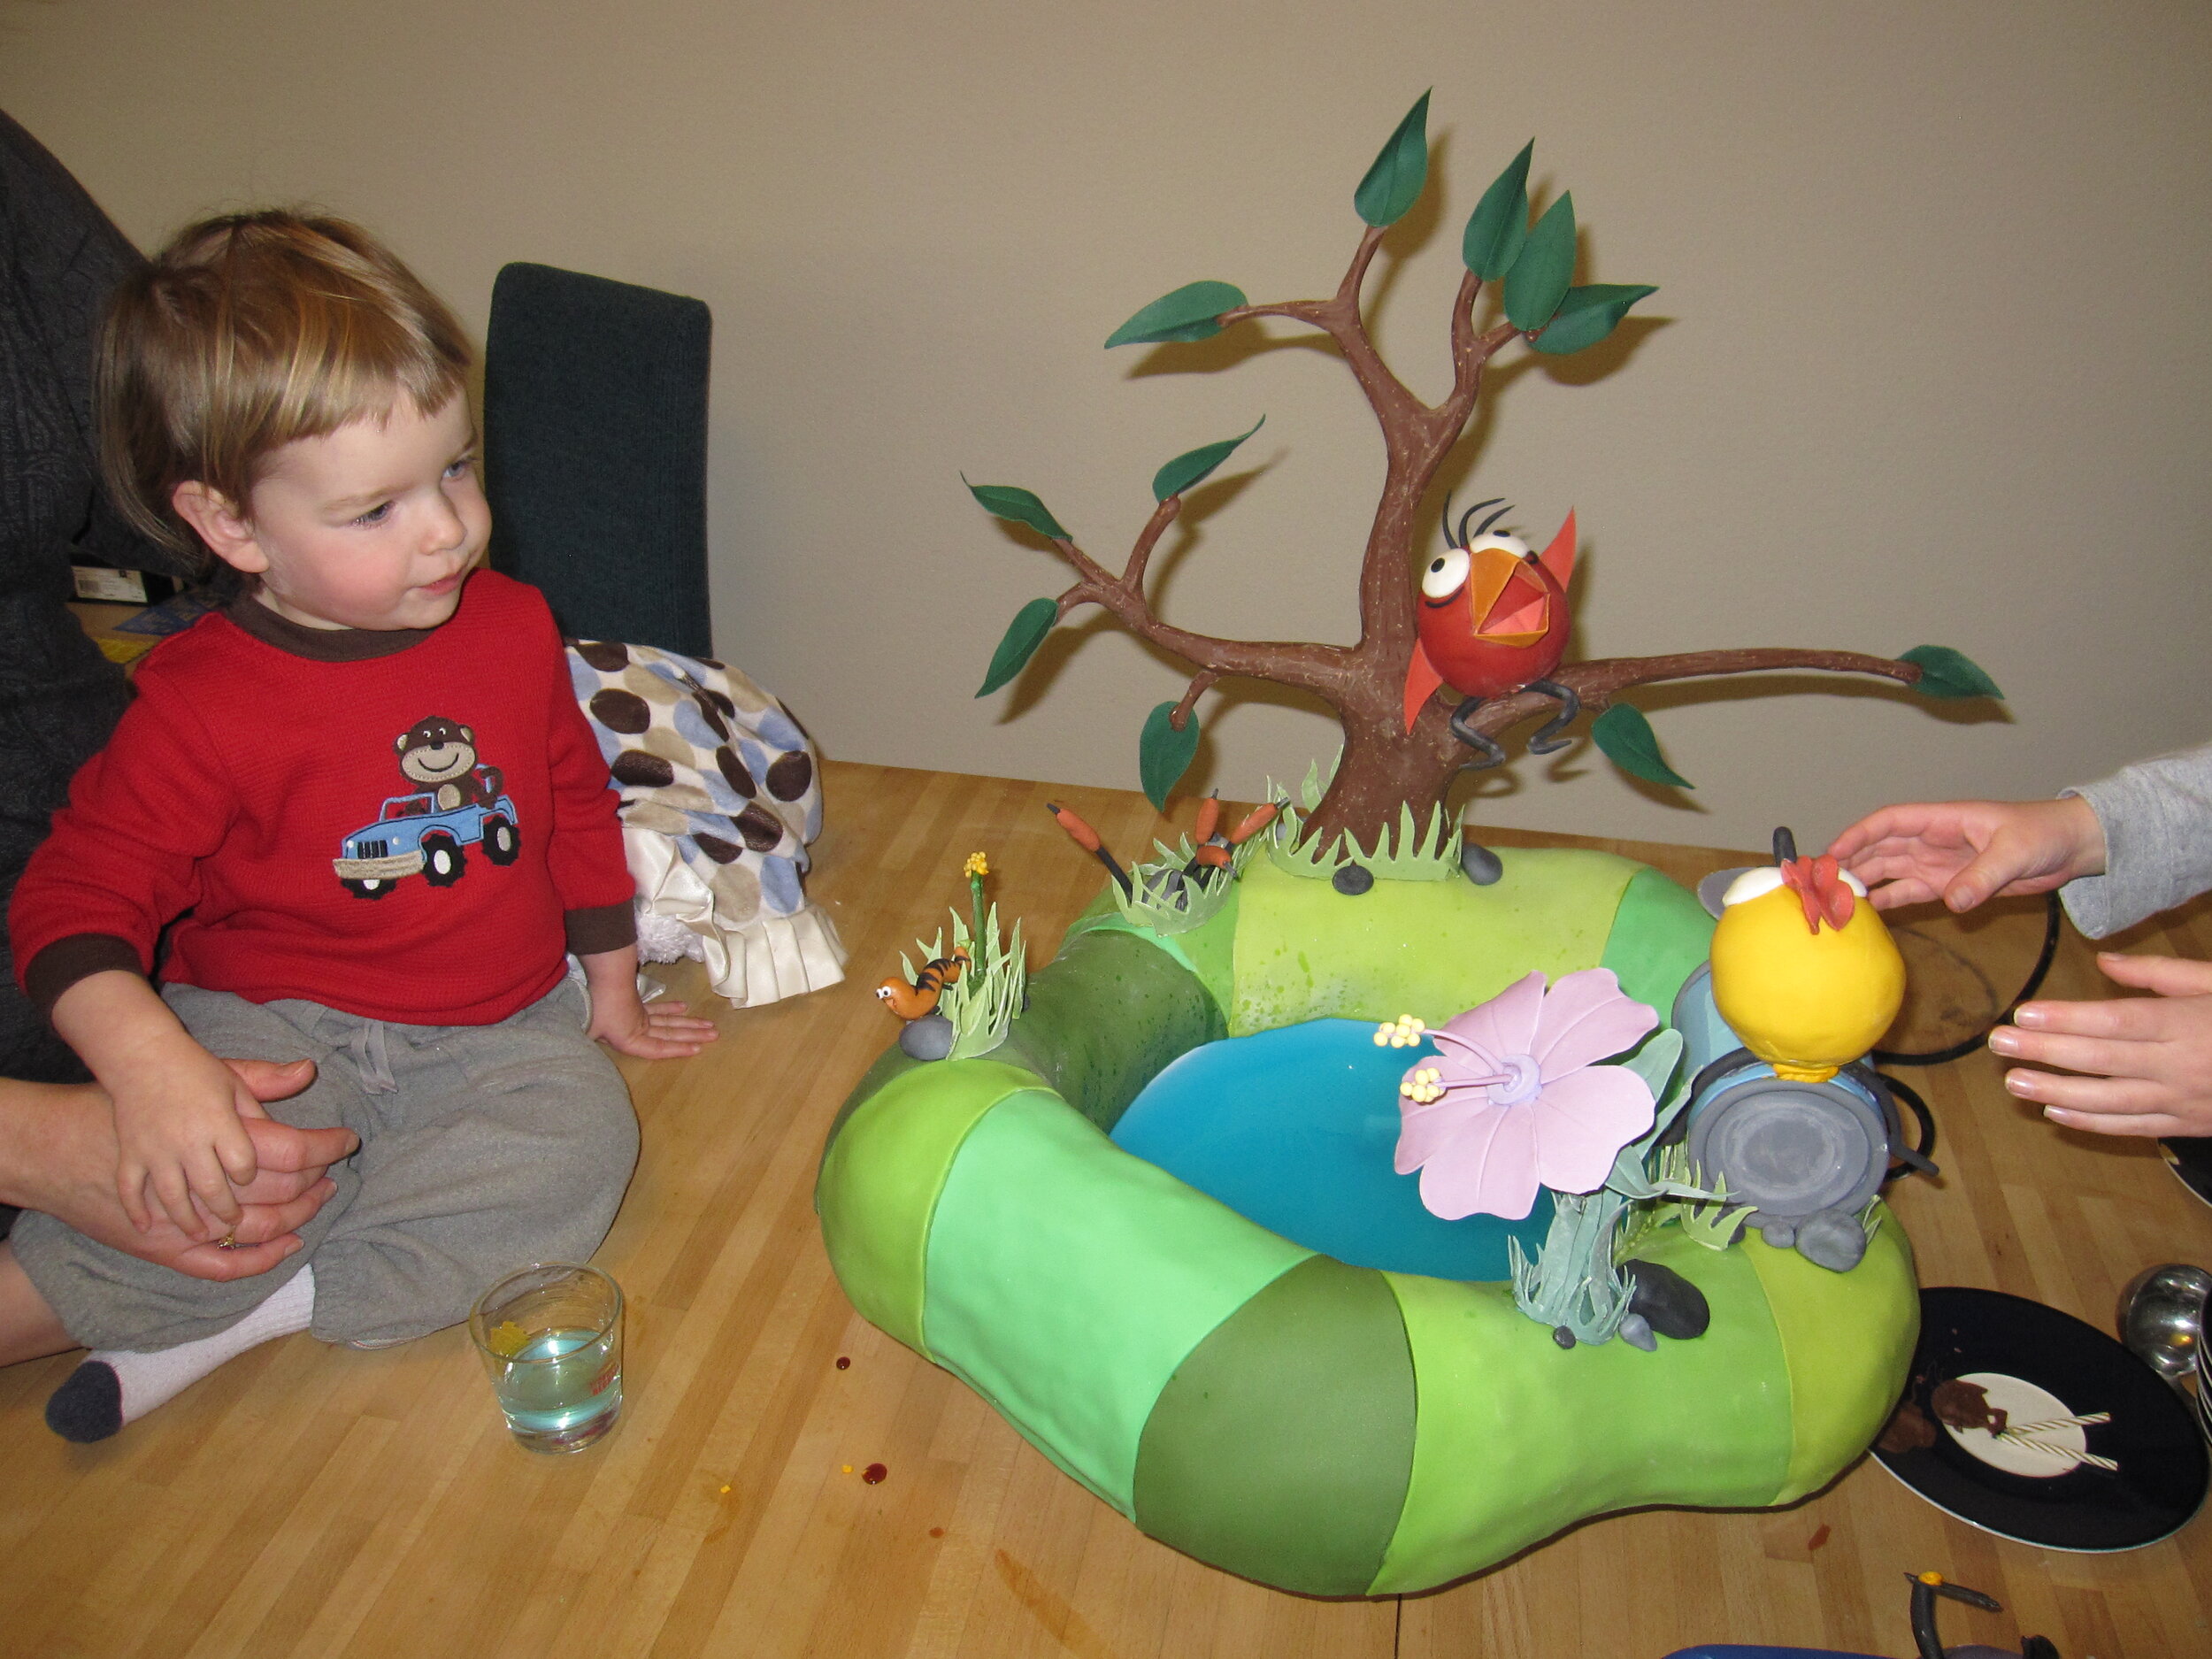
At this point in the project, two days before the birthday party was scheduled, Sam came down with a truly unfortunate case of croup. Sam and his parents spent the day before what was supposed to be his party at the hospital and I spent the day that I had planned to spend finishing Sam’s cake watching Alex and reassuring him that Mommy and Sam would be home soon. Obviously, we cancelled the party. But it was too late not to finish the cake, and the point of the cake was largely to amuse Sam and Alex, rather than our guests, so I decided to finish the cake anyway, even though there was no longer a party at which to serve it.
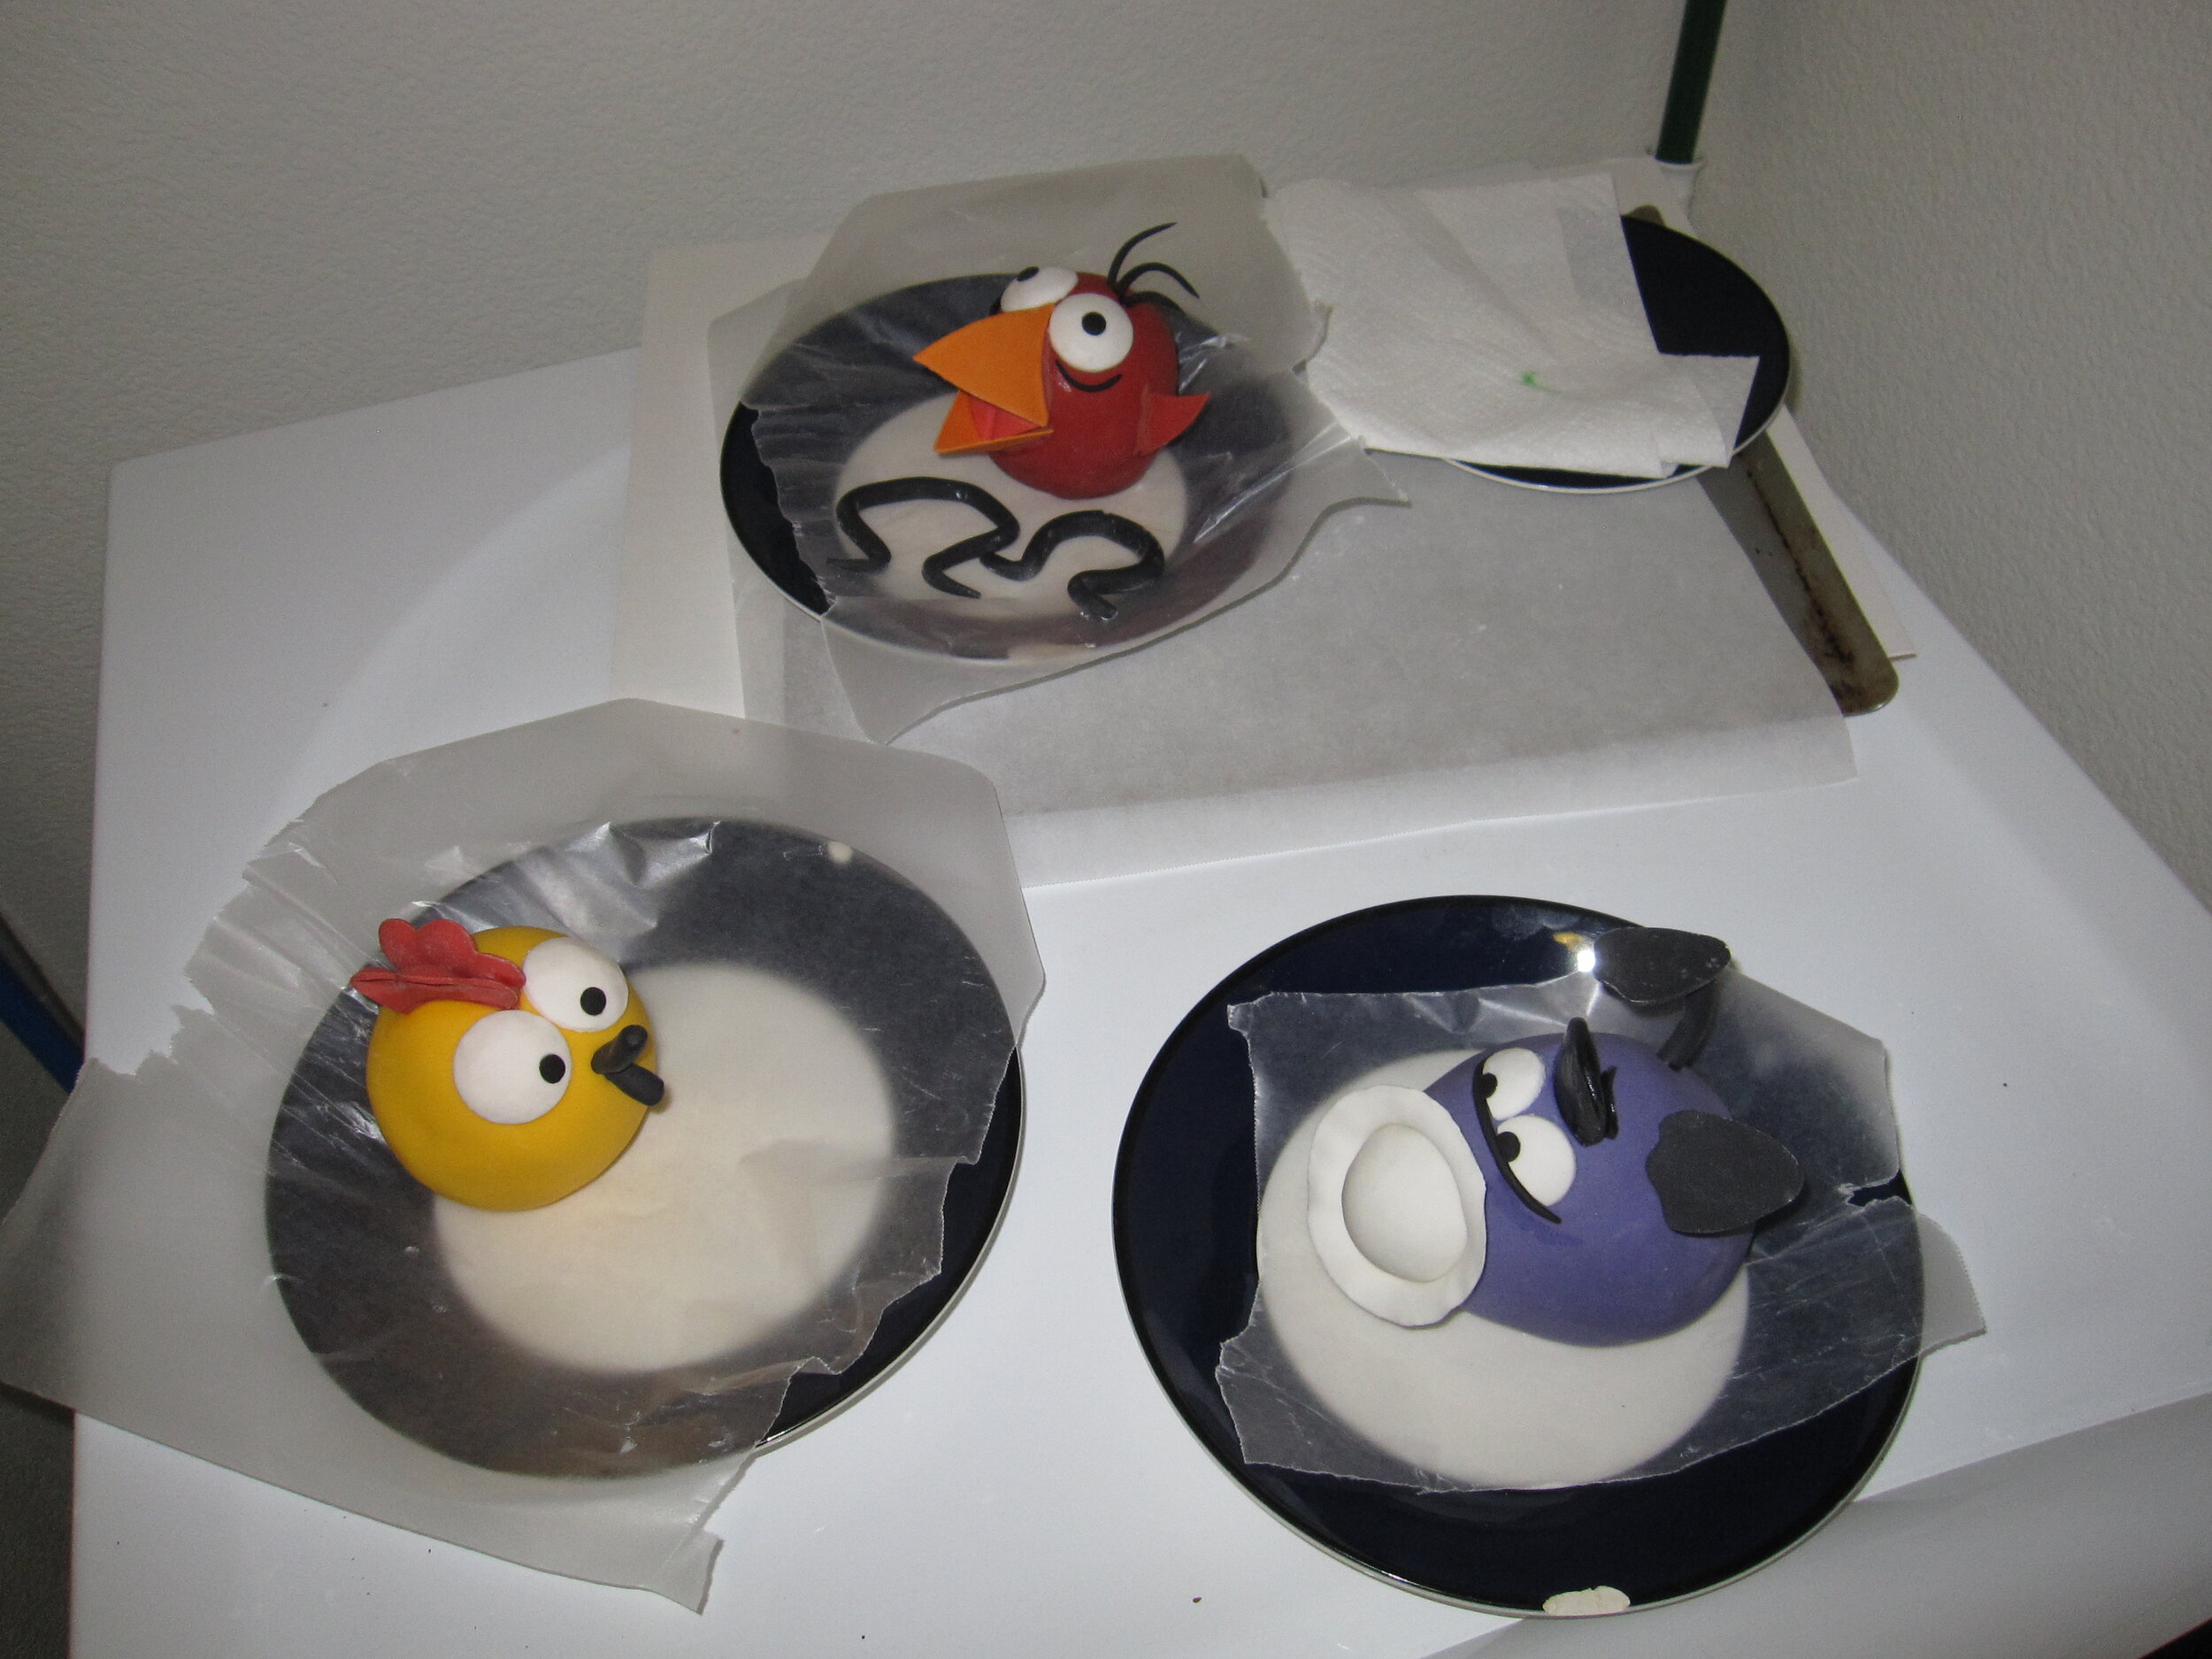
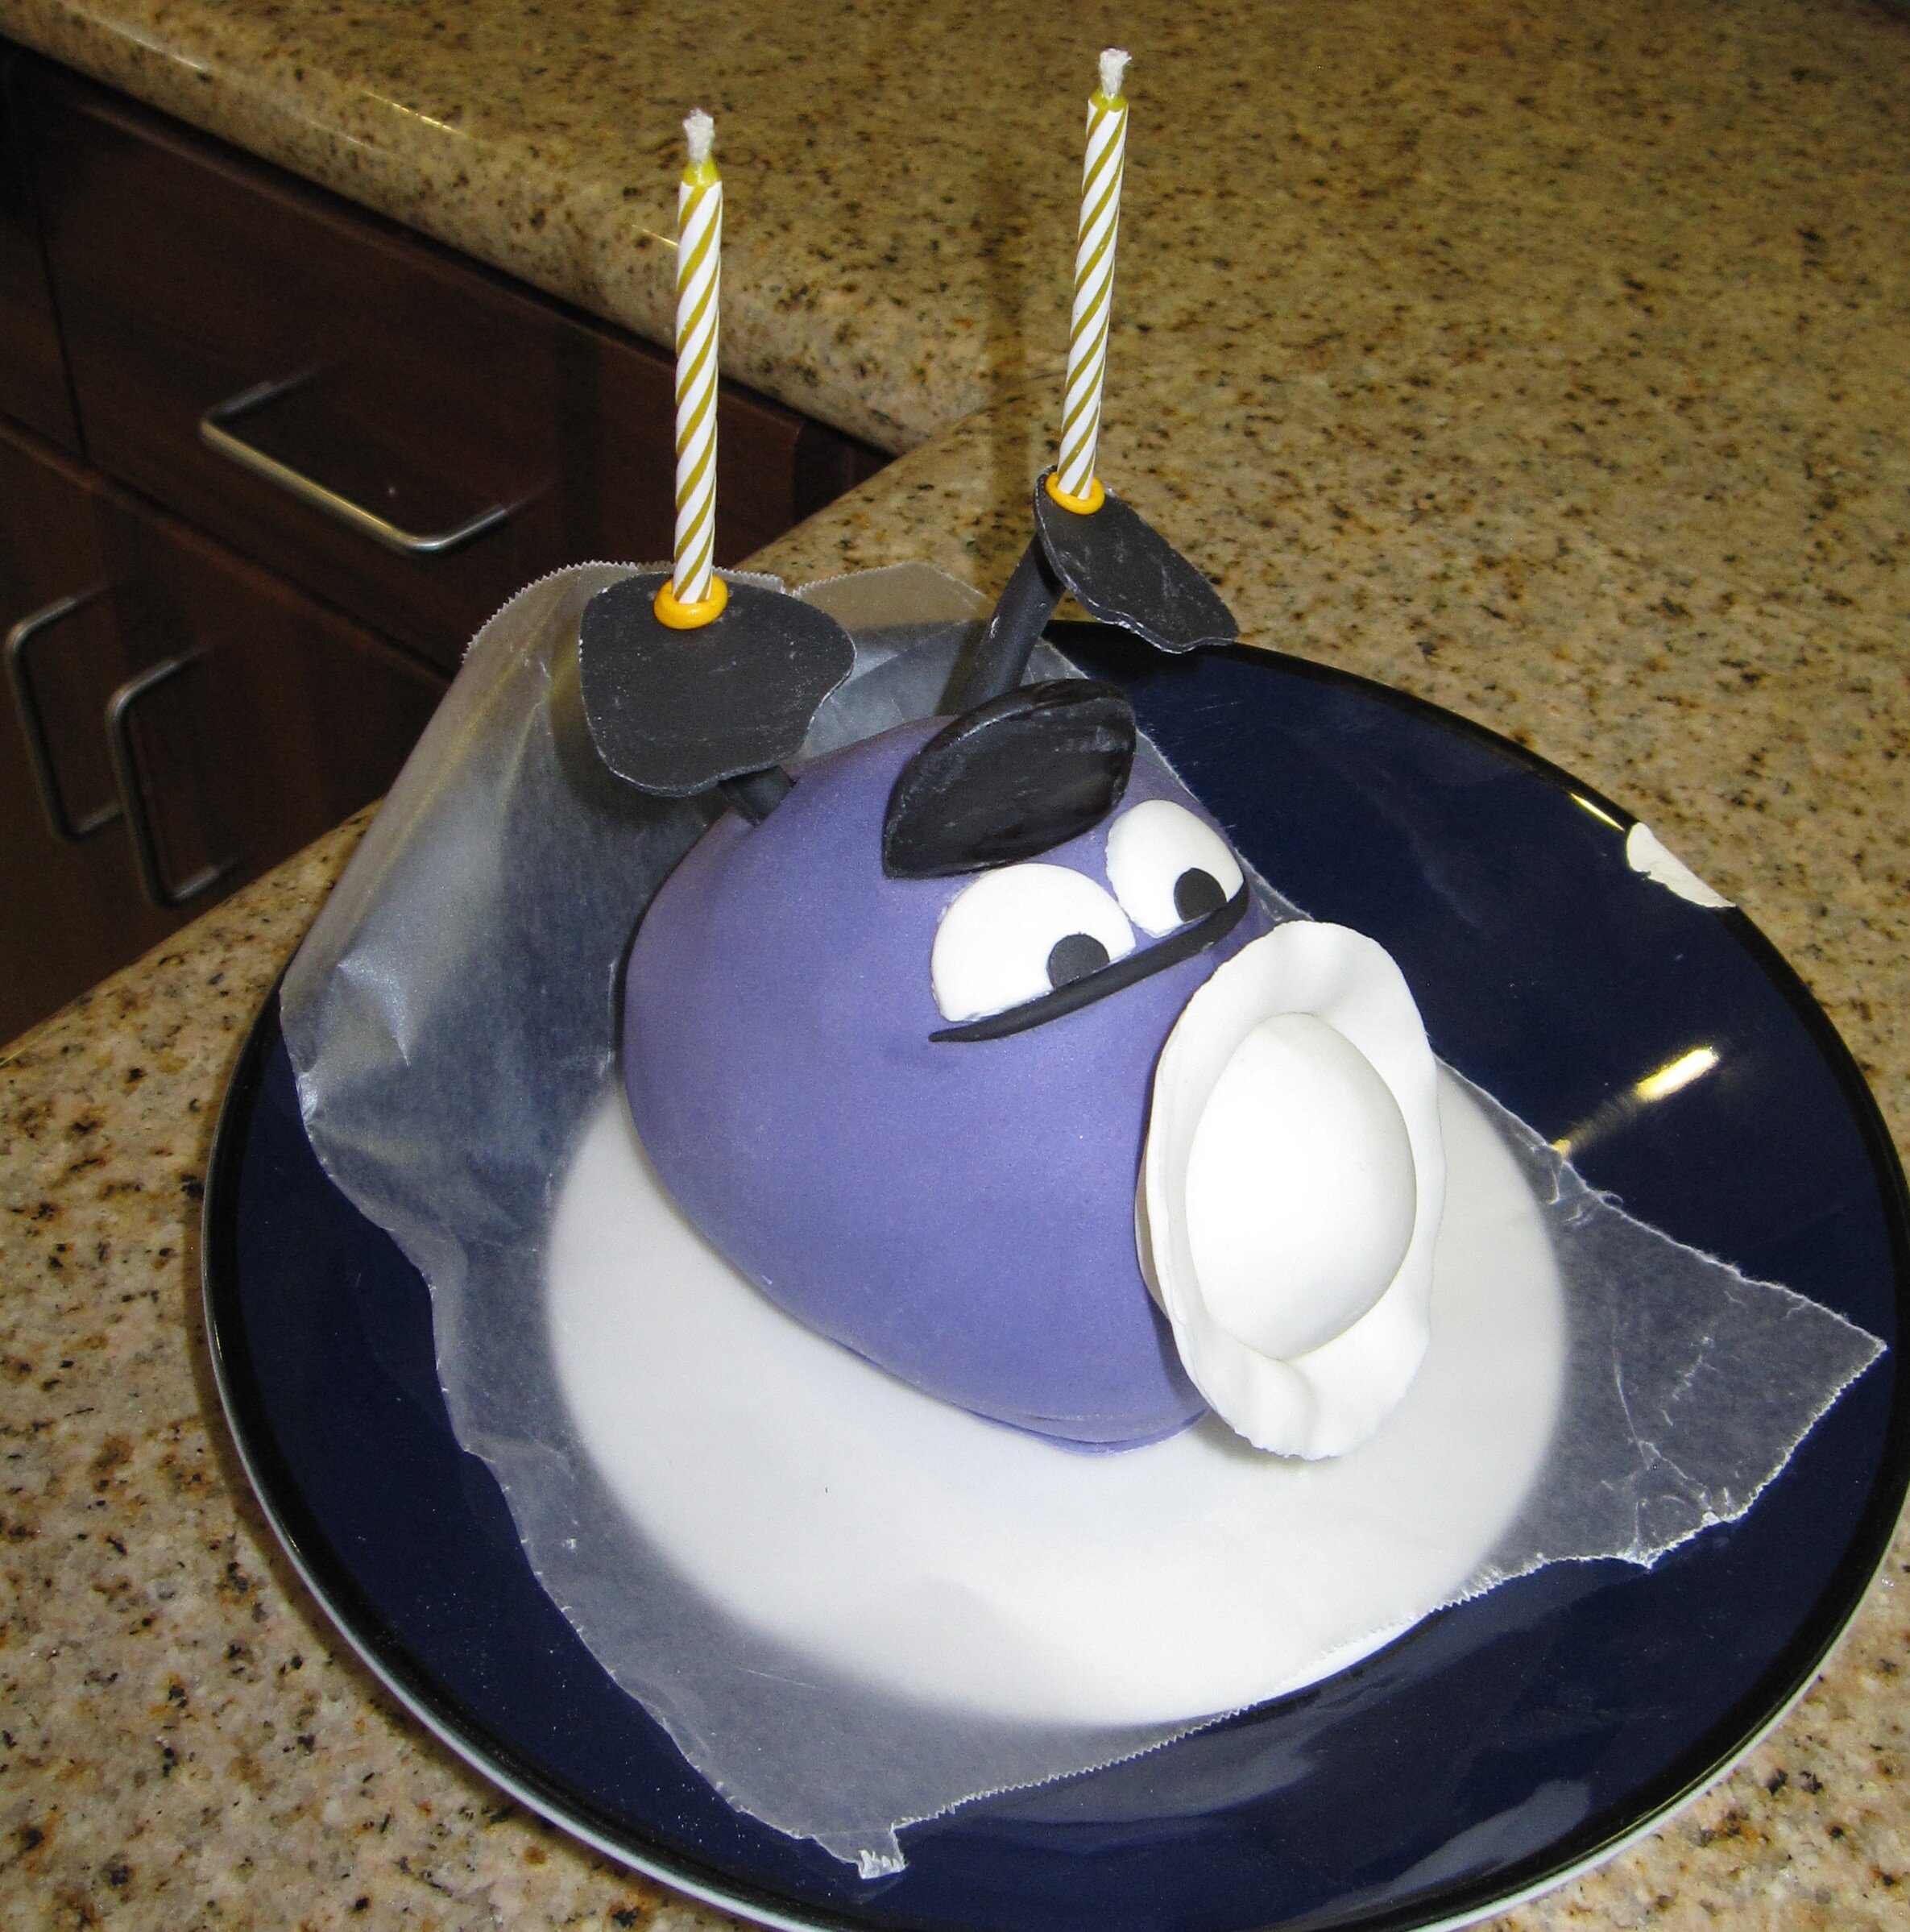
I had hoped to make Chirp and Peep entirely out of cake, but I discovered that it is basically impossible to make a sphere out of nothing but cake. So I cut some Styrofoam balls in half, covered them in tin foil, and used those for the bottom half of Peep and Chirp, with only the top half made of cake. I was quite pleased with how well I did in covering 3” diameter spheres in a smooth layer of fondant. I also think I did a pretty good job of capturing Chirp’s characteristic expression of frustration and exhaustion after she has failed in an attempt to fly.
For Quack, the major problem was, of course, how to make him float. My plan was to make the bottom half of Quack out of buoyant foam and the top half out of cake. The first thing I discovered was that, if you make something egg-shaped (ie. Quack) half out of lightweight foam and half out of heavyweight cake and then place it in water, it will immediately flip over so that the heavy cake part is underwater. No good. I addressed this problem by gluing a lot of heavy steel nuts to the bottom of the foam, so that the bottom of Quack outweighed the top. This worked, up to a point, but it also necessitated a higher proportion of foam to cake to make up for the increased weight. Quack ended up only about one quarter cake and three quarters foam.
I also conducted some experiments on the solubility of fondant in water and I discovered that if I coated the fondant covering Quack in Crisco I could reasonably expect him not to dissolve for at least a quarter of an hour.
Assembling all the cake elements proved more problematic than I had anticipated for two reasons. First, my plan to stick the gum paste flower and the gum paste milkweed plant for the caterpillar directly into the cake utterly failed to account for the fact that moist cake rapidly erodes the structural integrity of gum paste. In the end I did manage to get the flower standing, but the caterpillar’s plant was ultimately a lost cause and he wound up just perched on a clump of grass.

Second, I had planned to assemble the cake while Sam napped and my sister took Alex out to the museum. As Alex proved to be utterly uninterested in the museum that day, though, they came home early. At first, this was delightful, as she immediately ran up to the not-yet-completed cake and yelled, “I love it!!!”
Unfortunately, this was also the moment at which several pieces of the cake started to fall apart. Peep fell off her can. The flower and the milkweed plant began to collapse. I began to freak out. So we spent the next hour or so forbidding Alex from approaching the cake. “It’s very, very fragile!” “Please be careful!” “Oh, stay behind the train table, please!” The poor little kid just wanted to look at it. Alex, I’m sorry. I should have been more concerned with you than I was with the cake.
Sam woke up at about the moment that I finally managed to get the cake assembled and properly accessorized with gum paste rocks and gum paste tufts of grass. Because I was convinced that several components were about to collapse, we rushed to serve the cake, making this an extremely short-lived object, even by cake standards.
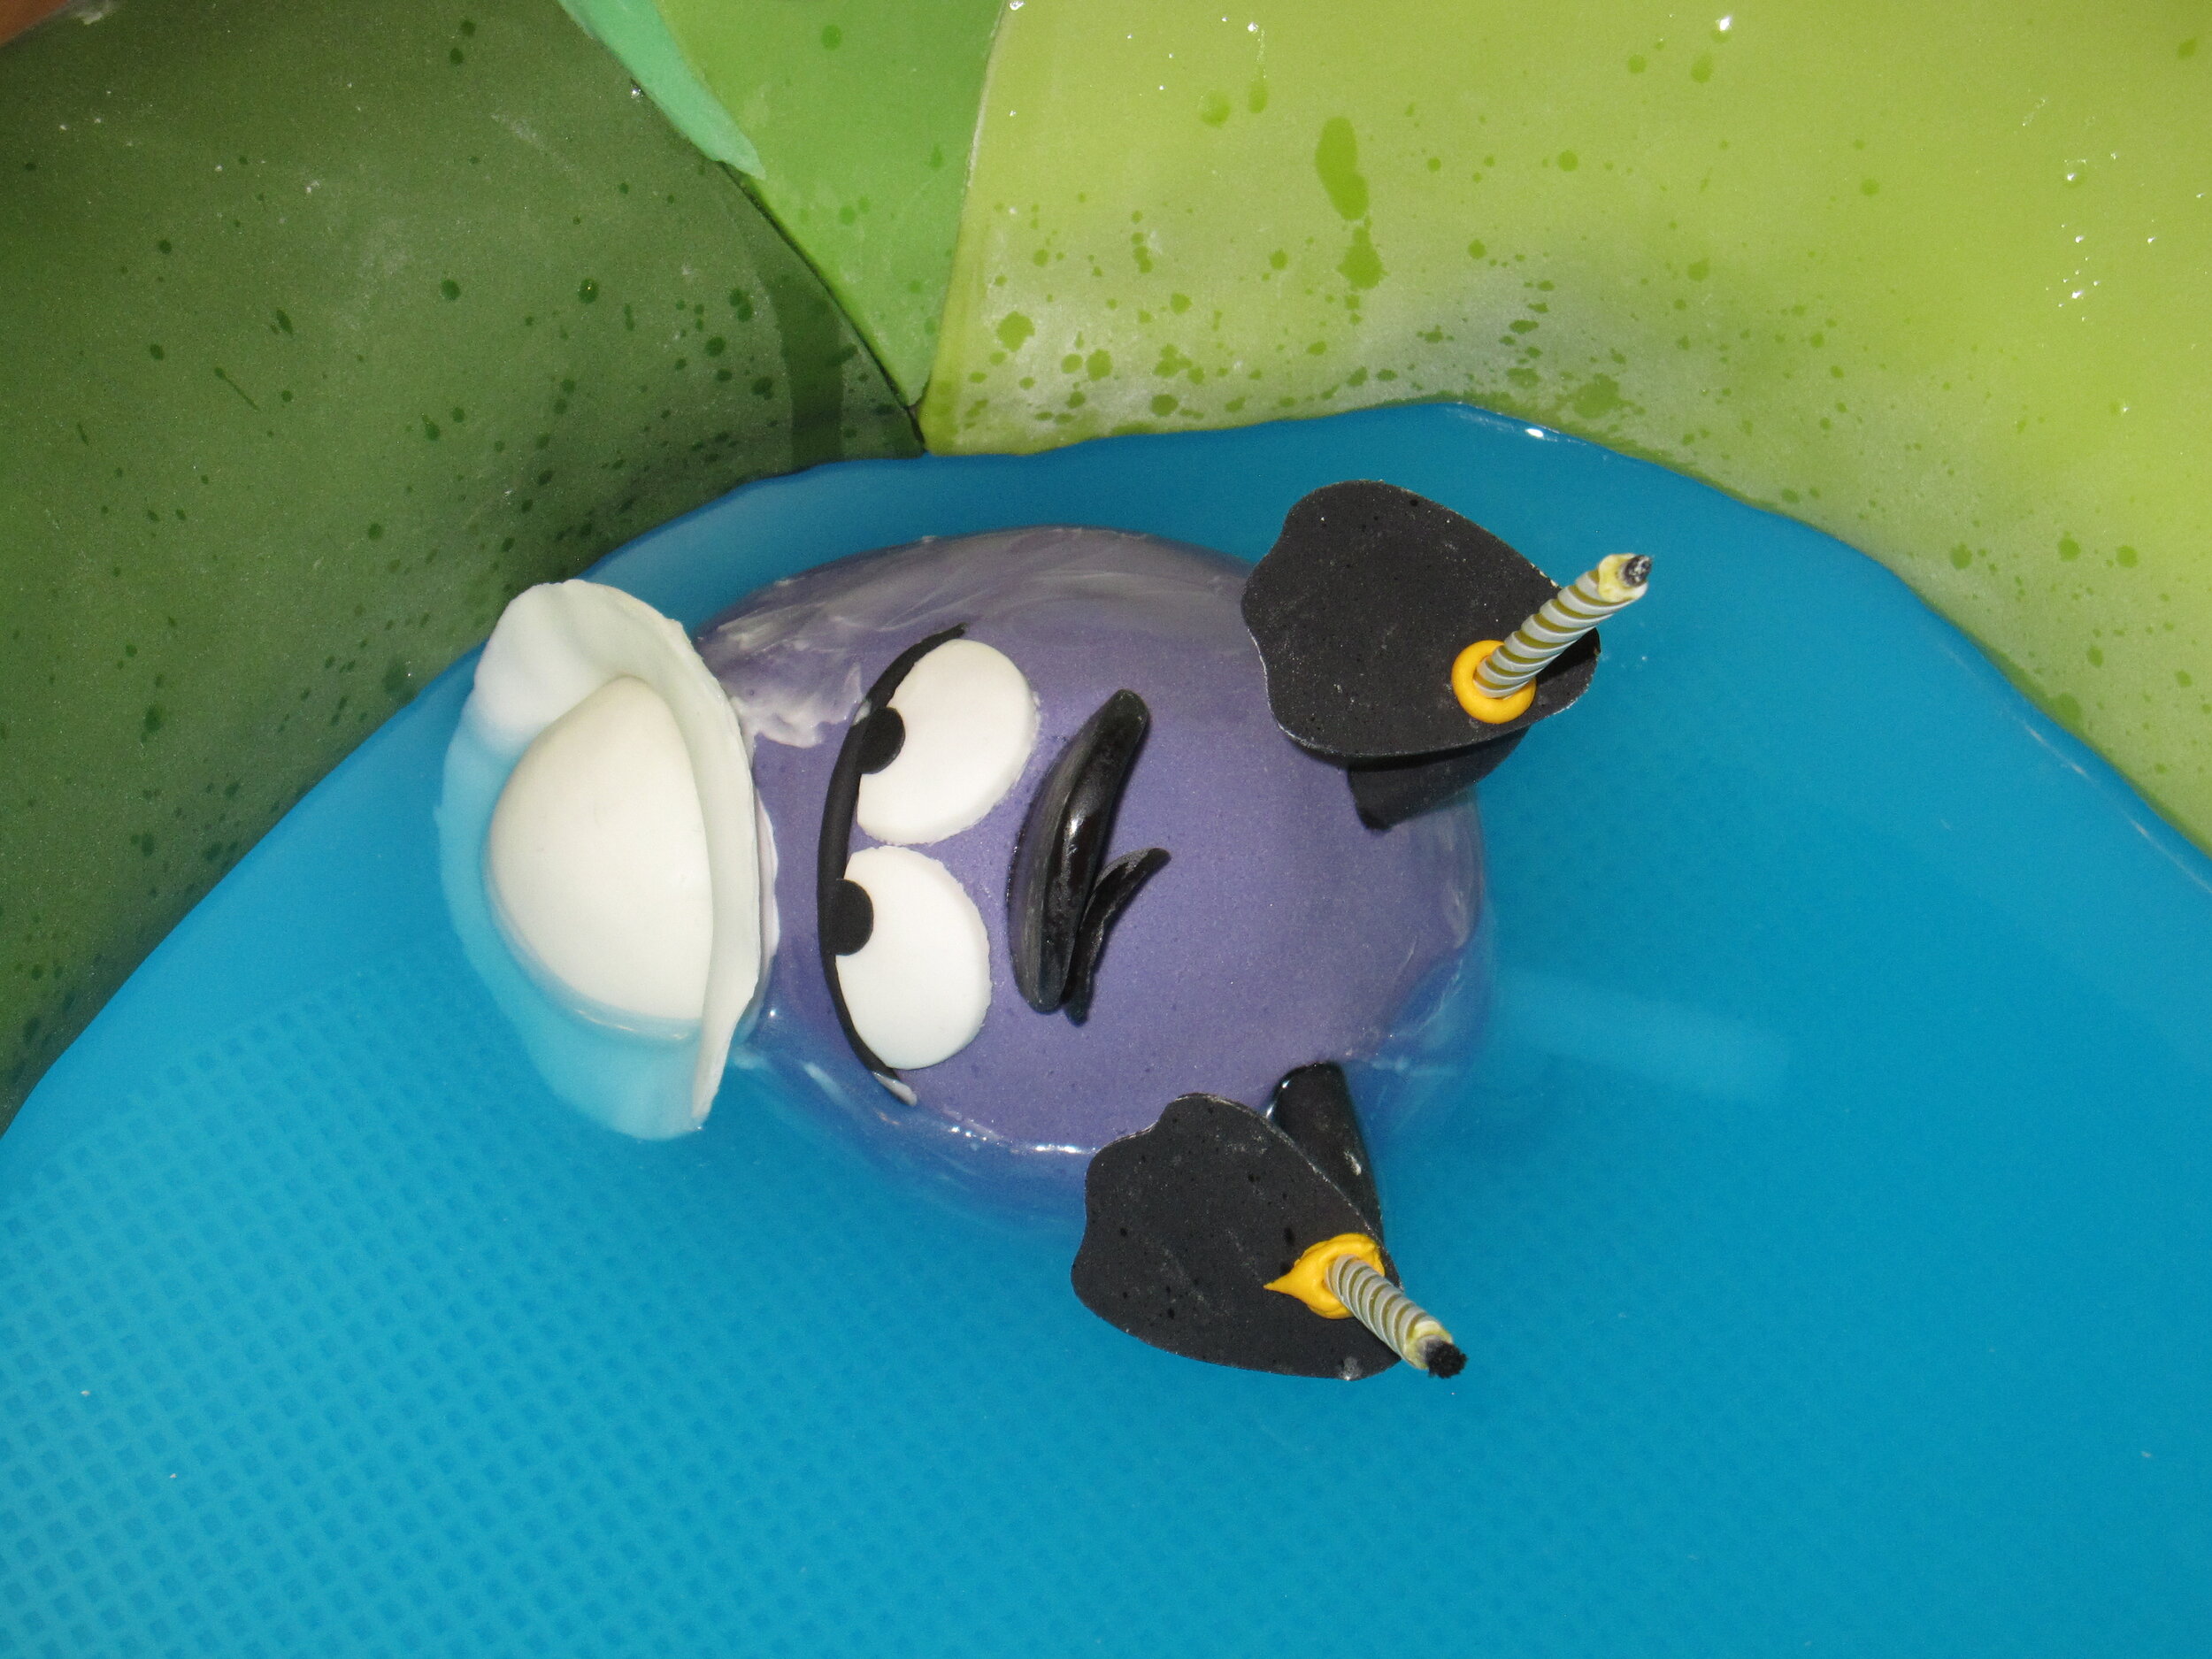
I slightly overfilled Quack’s pond with Gatorade, so that when I actually put Quack in the pond and turned on the pump to agitate the water, it overflowed a bit onto the floor. Other than that, Quack’s floating worked remarkably well. He was a little askew, but he definitely floated, and we were even able to light the two candles that I had adhered to his feet. Remarkably, the bit of cake inside of Quack even remained undamaged and edible.
Poor Sam was probably still recovering from his croup and had just woken up, so he didn’t seem terribly impressed. I’m not sure he understood that it was cake until I dissected Chirp and actually put the cake in front of him. Then he was happy. Sam loves cake. After he finished eating Chirp, he even asked, very sweetly, for “more cake, please?” Happy birthday, Sam!

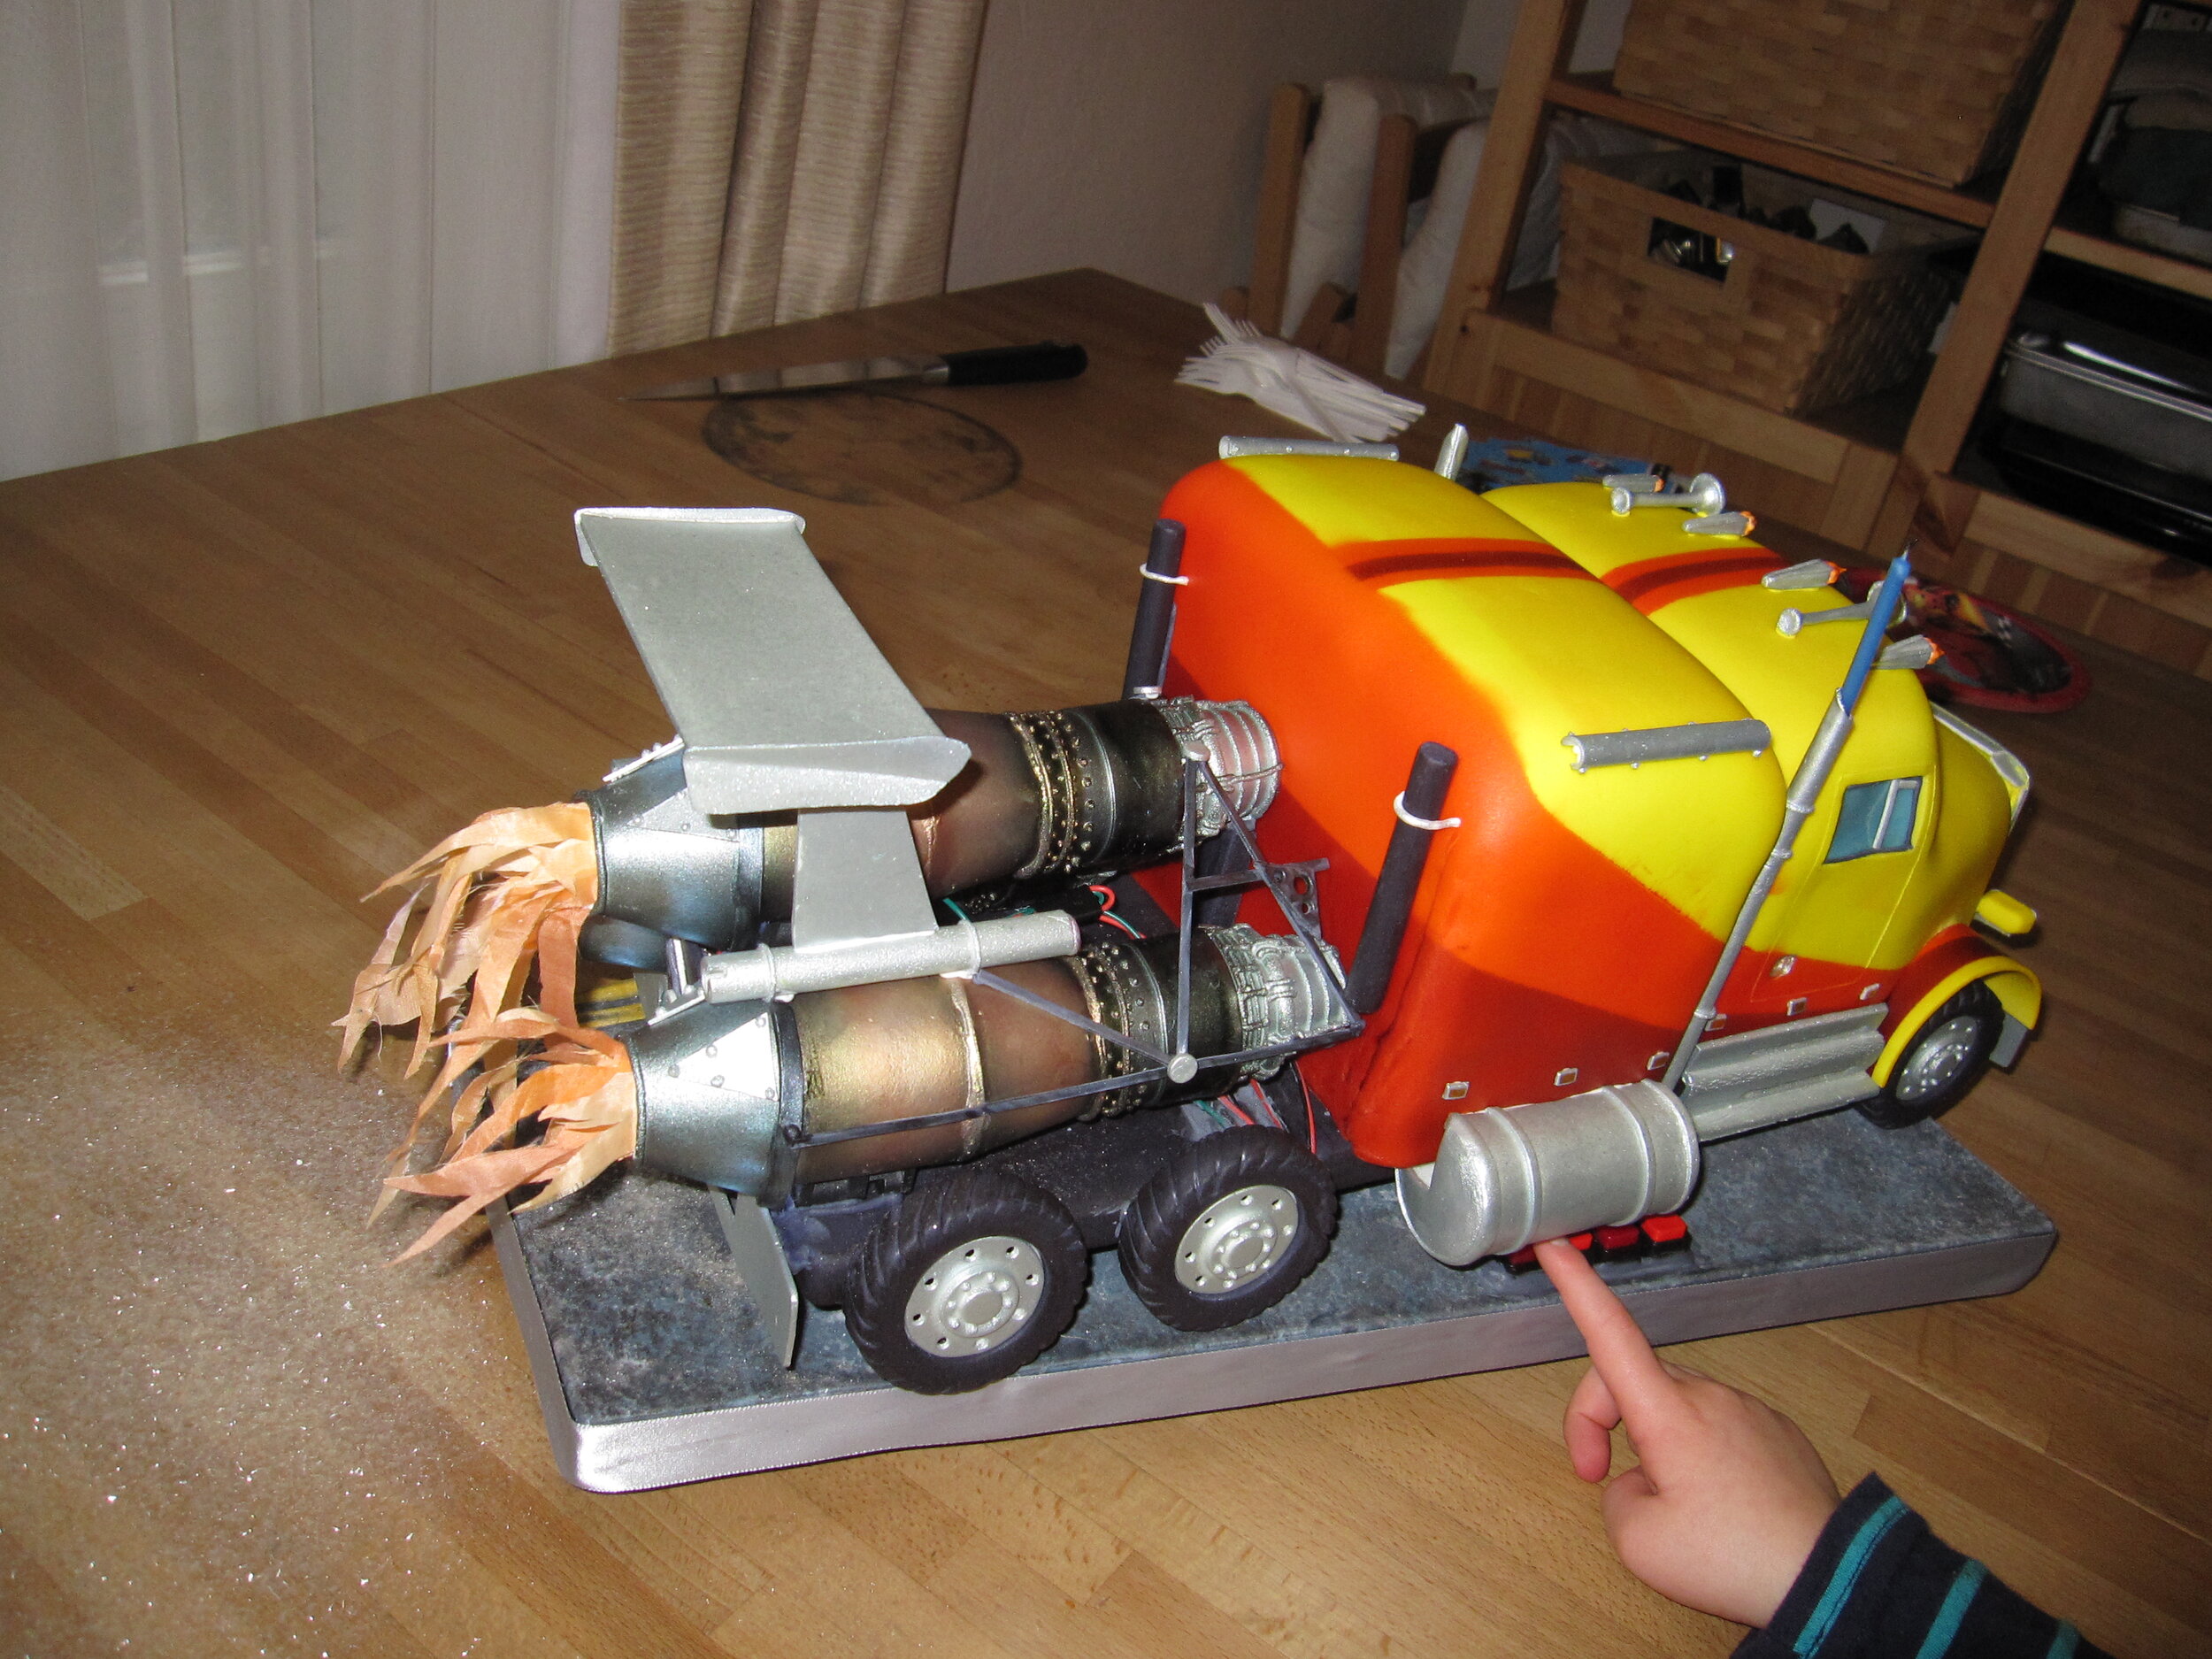
Jet Truck Cake
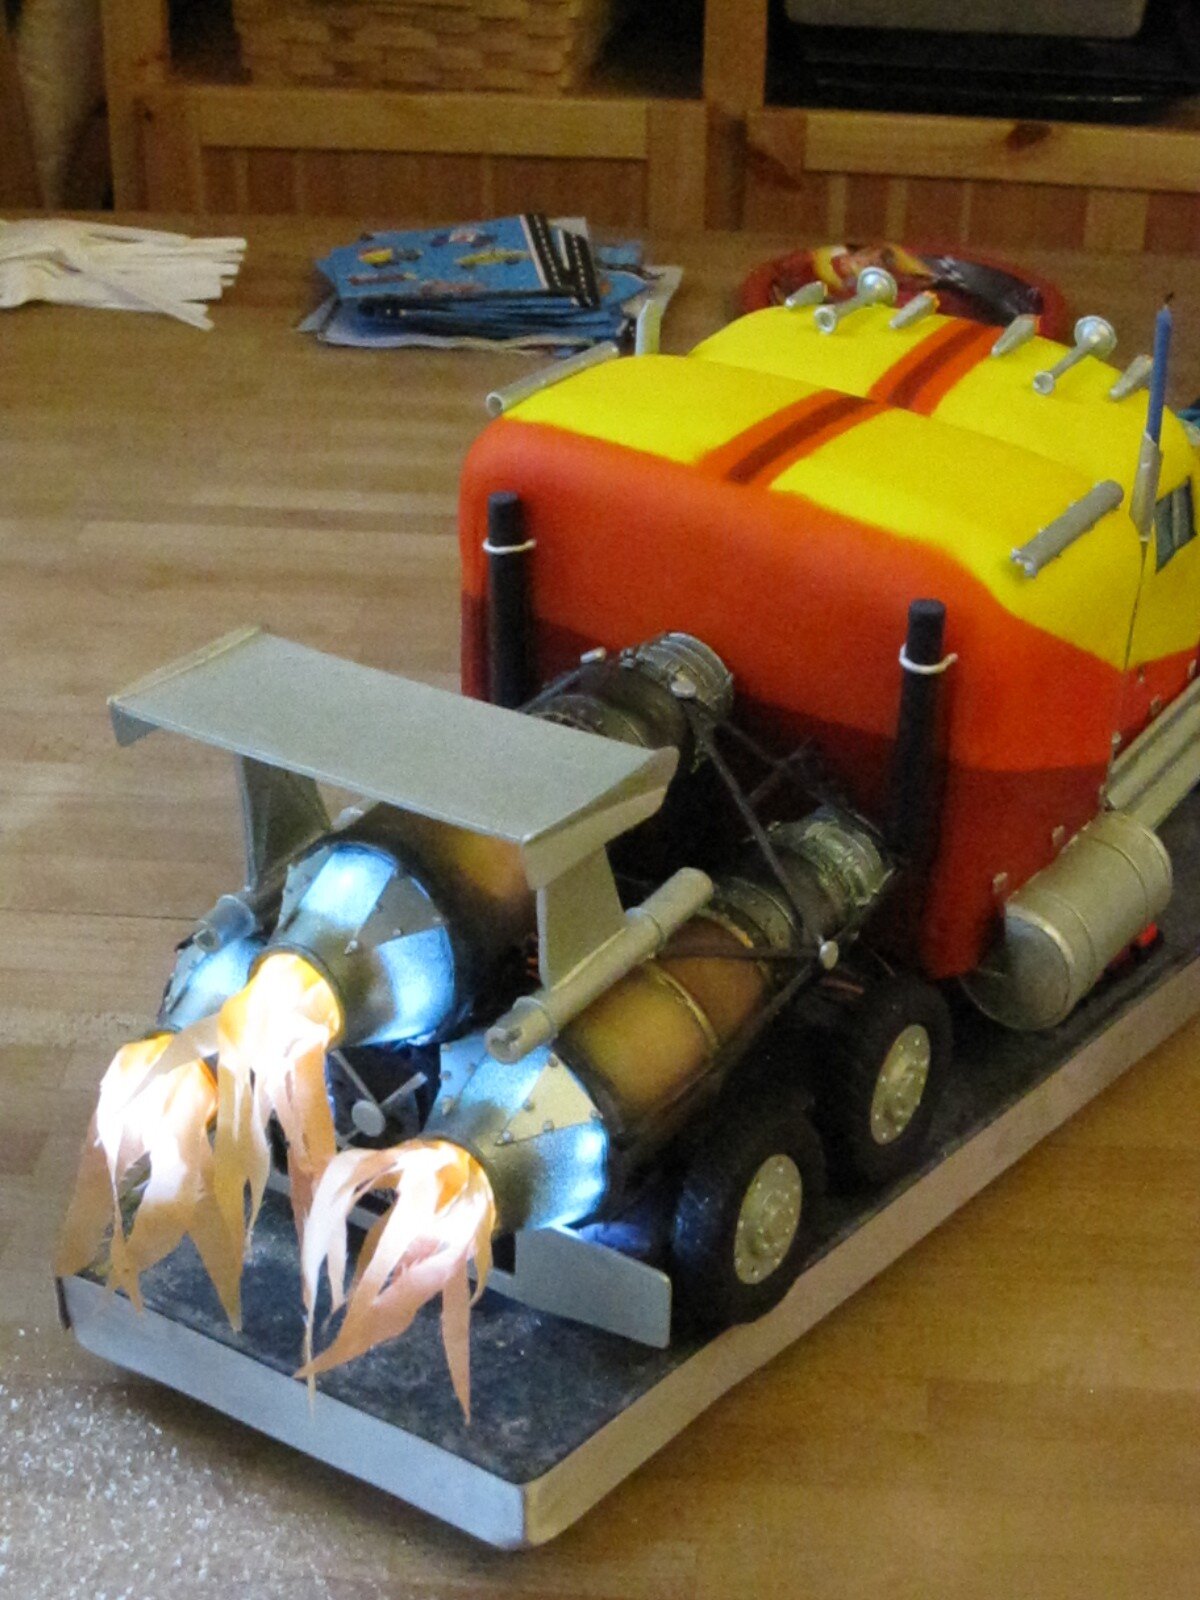
This cake was for my nephew, Sam’s, first birthday. It’s based on a real truck.

This cake was for my nephew, Sam’s, first birthday. It’s based on a real truck. When I asked Sam’s big sister Alex, who was, at the time, almost four years old, what kind of cake she thought that Sam would like for his birthday, she gave me very detailed specs:
Tractor-trailer – w/o trailer
Racing truck
Racing trucks are yellow.
Jet engines on the back
Flame powered engine
Flames come out of exhaust pipe
Flame powered fuel
Button to turn on flames
Alex will show Sam how flames work
Flames come out of jet engine
Flame powered fuel tank on the side
When I showed my notes to my sister, Alex and Sam’s mom, she immediately knew what truck she was thinking of. Evidently she had seen it in a video on youtube. A few google searches later, I had some great reference photos to work from.

Since the planned birthday party would be attended by numerous small children, I decided that having actual flames shoot out the back of the cake would be a bad idea, even if I could accomplish it in a food-safe way. Instead, I planned to make basically a miniature version of the flames on those plastic Halloween cauldrons where a light and a fan inside the cauldron make some waving fabric look like relatively convincing flames.
Ultimately, it didn’t work out nearly as well as I had hoped, for several reasons:
1) Initially I had hoped that I would be able to substitute something edible for the fabric “flames” but I was unable to come up with any food item that was thin, dry, lightweight, and flexible enough to fit the bill. The closest I came was the skin of a bell pepper, but that was too brittle when dried.
2) I bought white fabric, but then dyed it red and orange with food coloring, which stiffened it a bit more than was optimal so it didn’t move as fluidly as I wanted.
3) Fans small enough to fit inside a 2” diameter gum paste rocket aren’t all that powerful. I bought a couple of different ones to try out. I thought the ones I decided on would work, but once I got them all the way hooked up with the fabric I found that they didn’t have enough punch to move strips of fabric more than a couple inches long.
4) When I stuck the fabric to the gum paste rockets, I did it in such a way that the air only passed over one side of the fabric, not both. Unfortunately, I didn’t realize what a big error this was until it was too late to do anything to fix it.
5) When I installed the fans and rockets on the cake, I didn’t leave enough room at the back of the rocket for air to get sucked into the fan. Again, I realized the error too late to correct.
So the flame effect wound up being mediocre at best, but otherwise I think I captured the essence of the jet truck pretty well.
For the base, I started with a trapezoid of plywood. I guess I though that a trapezoid would give it more of a sense of motion than a rectangle, but I’m not sure it really did much. I used grey run-in royal icing, with white and black food coloring sponged on to make it look like asphalt. On top of that I painted yellow lane markers with thinned royal icing and then yellow food coloring.
To raise the body of the truck up off the ground, I mounted a second, thinner piece of plywood, on top of some sections of 1” aluminum channel, positioned so that that channel would later be hidden behind the tires. I covered this piece of plywood with black fondant.

At this point I did all the wiring for the fans and the LEDs to light up the inside of the rockets. I got some nice big red buttons to turn them on and off because I thought that Alex would enjoy that.
Next, I used gum paste, detailed with royal icing, to make the rockets, the grill, the spoiler, the hubcaps, the wheel wells, the fuel tanks, the bumpers, the reflectors, the license plates, and so on and so on. I used fondant for the tires and a few of the other bulkier trim pieces.

Shiny chrome truck bits gave me a chance to try out my new metallic edible airbrush colors. I was a bit skeptical, but they worked great. I was especially pleased with the job I did on the rockets.

For the cake itself I started with three 10” square cakes, carved into the two separate pieces of the cab, then crumb-coated with buttercream. Once covered with fondant, the corners were more rounded than I wanted, giving the truck a more puffy, cartoon-ish look than I would have liked. I’m reaching the conclusion that the only way to get nice, sharp mechanical corners is to pre-make gum paste pieces like I did for the Tardis cake.

My plan was to cover the front cab section first with blue fondant then with yellow fondant so that I could cut the yellow fondant away from the windows revealing the blue fondant beneath. (This is after I decided that my original plan to actually create an interior for the truck that could be seen through the windows was not feasible in the time I had available.) I have never personally tried this technique before, but I have seen them do it many times on Ace of Cakes, so I figured I ought to be able to do it easily. It probably would have worked just fine, except that I decided to wait to cut out the windows until after I airbrushed the orange and red stripes onto the cake.
Masking parts of the cake off and airbrushing is another technique I’ve seen on Ace of Cakes, but this was my first try at it. It worked relatively well, but next time I’ll be more careful with my masking, since I did have a few spots where the color bled under the paper.

By the time I was finished airbrushing, the top yellow layer of fondant had completely fused to bottom blue layer of fondant, so it was utterly impossible to remove one without removing the other. So I cut all the way through both layers for the windshield, the side windows, and the front grille, all the way down to the crumb-coat, and then stuck a new piece of blue fondant into the hole. To give it a window-like gloss, I painted a layer of piping gel onto the windows.
Assembling the rockets around the fans and the lights was a bit of a challenge, both because I kept getting confused about which side of what rocket each wire was supposed to go on and because I had underestimated the required length of a few wires and had to splice in some extra pieces.

Then it was just a matter of attaching tires, fuel tanks, trim, etc. and running a strip of ribbon around the edge of the base to hide the side of the plywood. I stuck the candle into one of the exhaust pipes.

I’m happy to say that Alex was delighted with the cake, even though the flames were a little lame.
I tried putting edible glittering into the rockets so that it was blown out when the fans were turned on, but that wasn’t too dramatic either. Mostly I think Alex just liked pushing the buttons.
Sam was pretty impressed with the cake, too, although he didn’t actually get any of it, because I foolishly used a chocolate cake recipe that involved almond extract and my sister didn’t want to give him nuts yet for fear of allergies, so we made a last minute emergency batch of cupcakes with a nut-free recipe. Sam was very much in favor of the cupcake. I think the only food I’ve ever seen him enjoy more was pumpkin pie. Alex, on the other hand, was most entranced with eating the gum paste pieces. At one point in the party she ran past me, doing a little happy dance, singing, “I have an exhaust pipe!”
